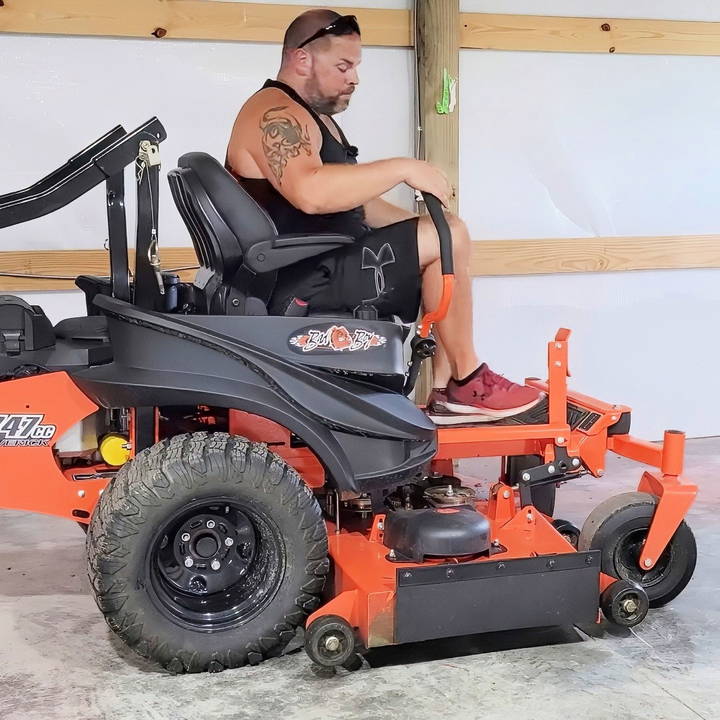
If you've ever found yourself frustrated with grass clippings blowing onto your driveway, patio, or even inside your buildings, you're not alone. The solution? A chute blocker or "grass blocker." These attachments prevent grass from discharging out the side of your mower, giving you a cleaner, more controlled mow. This DIY guide is your roadmap to build your own DIY chute blocker for just a fraction of the cost of commercial options. This guide also covers why having a chute blocker is beneficial, the essential materials needed, and detailed instructions for building and testing.
Why You Need a Chute Blocker
Using a chute blocker on your mower provides several benefits:
- Cleaner Edges: Prevents clippings from being thrown into unwanted areas like patios, flower beds, driveways, and gardens.
- Control Over Direction: Gives you control over where your clippings go, allowing for a more professional, striped lawn look.
- Time and Labor Savings: Reduces the time you spend cleaning clippings off your property, keeping everything looking tidy and well-maintained.
- Eco-Friendly: Mulching grass back into your lawn helps return nutrients to the soil, building a healthier lawn without the need for chemical fertilizers.
Tools and Materials Needed
For this project, you'll need a few basic materials, which can be purchased from a farm supply store or sourced locally. This build requires no welding, making it a great weekend DIY project for anyone comfortable with basic tools.
Materials
- Mat: Often available at Tractor Supply or Rural King for around $25. A single mat can be used to build multiple DIY projects.
- Angle Iron: Angle iron pieces are essential for building the support structure of the chute blocker. A 2x2 inch piece works well, though if you have a 1.5x2 inch piece, it may fit better.
- Bolts, Nuts, and Washers: You'll need five bolts, five nuts, and ten washers, preferably 1.25 inches in length.
- Flat Steel: Used to build the main structure of the blocker. Measurements vary depending on your mower model, but for a 60-inch zero-turn mower, 41 inches of steel will work well.
Tools
- Angle Grinder: For cutting and shaping metal.
- Drill: Essential for drilling holes in the metal pieces for the bolts.
- Measuring Tape: Accuracy is key to ensuring your chute blocker fits snugly on your mower.
- Clamps: Useful for securing pieces while you cut or drill.
- Wrenches: For tightening the bolts and nuts.
Step by Step Instructions
Learn how to make a DIY chute blocker for your mower with step-by-step instructions, from preparation to installation, and enhance your mowing experience.
Step 1: Prepare the Mower and Existing Chute
Before starting, remove any existing chute assembly from your mower. In this guide, we'll be using a bolt-on design, so it's easy to revert to the original chute if desired. Removing the existing chute will give you a clearer view of where the blocker will be attached.
Step 2: Measure and Cut Materials
- Measure the Width of Your Mower Deck: Measure the distance from the bottom of the deck to the top. For a typical zero-turn mower, this may be around 5.25 inches. This will inform the height of your chute blocker.
- Allow for Clearance: Ensure an additional clearance of about 1/8 inch so that the chute doesn't rattle or flap when in use.
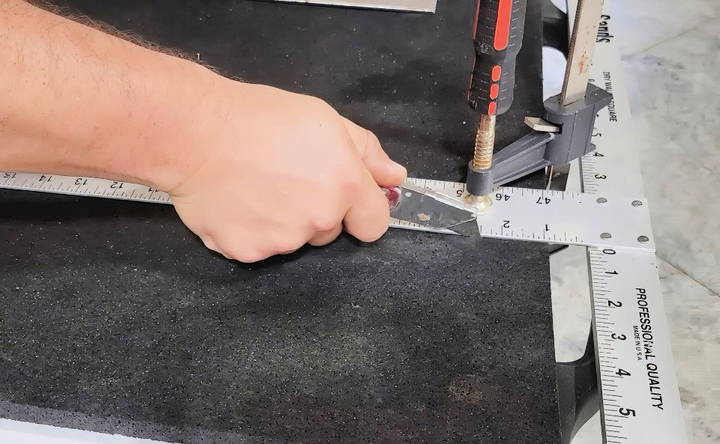
- Cut the Angle Iron: Cut the angle iron pieces to 1.5-inch sections. These pieces will support the mat used for blocking the chute. Positioning is crucial, so cut carefully.
- Cut the Mat: Based on your mower's deck width, cut the mat to cover the chute opening adequately.
Step 3: Assemble the Chute Blocker
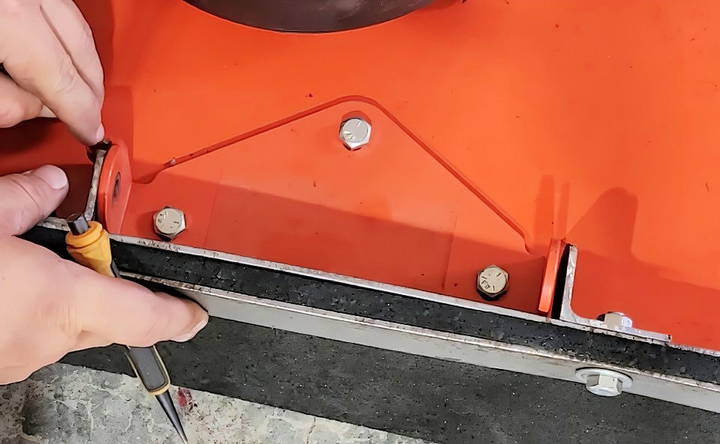
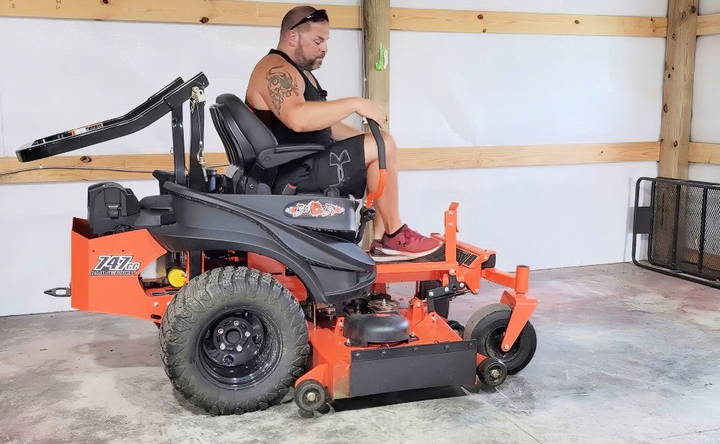
- Attach the Flat Steel and Angle Iron: Position the angle iron along the edge of the deck and secure it using bolts, nuts, and washers.
- Make the Blocker Plate: Attach the mat to the angle iron using bolts, ensuring that it fits snugly over the chute opening. Leave a slight gap at the bottom to prevent rattling.
- Reinforce with Additional Bolts: For larger mowers or for those mowing uneven terrain, consider adding more bolts to stabilize the chute blocker.
Step 4: Install the Blocker on Your Mower
With the assembly complete, it's time to install the blocker:
- Attach the entire assembly to your mower's chute area using existing bolts or the bolts provided.
- Ensure the mat fully covers the chute opening and can move freely when pushed.
Step 5: Test Your Chute Blocker
Now that your chute blocker is installed, it's time for a test run:
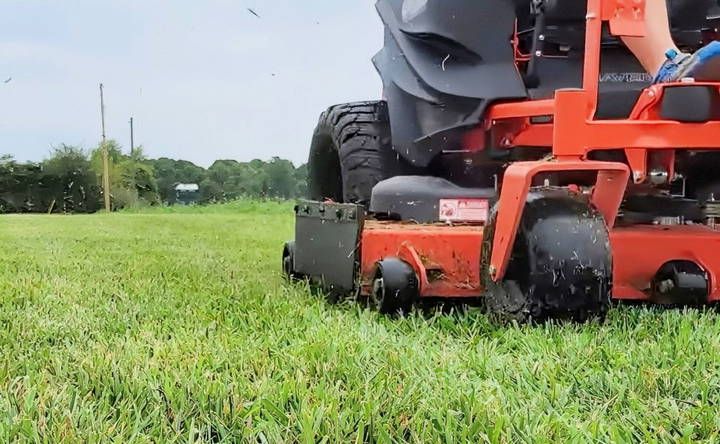
- Mow Along Problematic Areas: Test the chute blocker by mowing along areas where grass clippings typically scatter, such as along a driveway, patio, or garden.
- Check for Effectiveness: Observe if the grass is blocked from exiting the chute. Ideally, it should mulch or fall directly below the mower without blowing out.
- Inspect for Adjustments: If any grass escapes or the blocker vibrates excessively, make minor adjustments by tightening bolts or adding washers for a snugger fit.
Tips for a Successful DIY Chute Blocker
- Plan for Multi-Purpose Use: A single mat or angle iron can serve multiple projects. Consider using leftover materials to build a striping kit for a professional lawn appearance.
- Regular Maintenance: Check your chute blocker for wear and tear, especially if you mow frequently or encounter rocky terrain.
- Experiment with Placement: Slight adjustments in the angle or placement of the blocker can significantly impact performance. Test out a few positions to find the best fit for your mower.
Additional Benefits of Using a Chute Blocker
Using a chute blocker can provide unexpected advantages:
- Improved Mulching Efficiency: Redirecting clippings back under the mower deck helps break down clippings more finely, building a natural mulch that improves soil health.
- Safer Mowing: Chute blockers can reduce the risk of projectiles being launched from the mower, making mowing safer, especially near buildings or vehicles.
- Enhanced Aesthetics: Lawn striping looks more even and professional when clippings are controlled.
Final Thoughts on Building a DIY Chute Blocker
Constructing a chute blocker is a straightforward project that yields significant benefits. Not only does it keep your property cleaner, but it also promotes better lawn health. With an easy bolt-on design, this DIY chute blocker is achievable for anyone with basic tools and materials, giving you control over your mowing experience.
Take some time to follow the steps above, customize your chute blocker as needed, and enjoy a cleaner, better-maintained lawn without the hassle of constant cleanup.
FAQs About DIY Chute Blockers
Explore FAQs about DIY chute blockers to learn installation tips, maintenance, benefits, and troubleshooting for optimal lawn care.
A: This design is adaptable to most zero-turn mowers and even some push mowers. However, be sure to measure your mower deck carefully to ensure the blocker fits properly.
A: Absolutely. Chute blockers, like those from Advanced Chute System or other brands, are available online. However, building your own can save money and allow for custom modifications.
A: Yes, the design is entirely bolt-on, making it ideal for those without welding equipment or experience.
A: Properly installed chute blockers should not affect mower performance. In fact, they may enhance it by improving mulching efficiency and reducing cleanup time.
A DIY chute blocker using a rubber mat may not last as long as metal options, but it’s significantly cheaper. This approach is ideal for those looking for an affordable, functional solution, even if it means replacing parts more frequently.
The blocker stays up mostly due to the tension in the bolts and the balance of the flap. For additional security, some users recommend adding nylon washers or using bolts with locking mechanisms.
Yes, attaching a handle or eye bolt with a rope or bungee cord can make lifting the blocker easier while seated. Some users have even installed powered options with 12V switches, though this requires additional tools and expertise.
Grass clumping or dust clouds can occur if the chute doesn't fully seal. This is more common with DIY models using flexible materials. Regularly clearing buildup and adding a tighter seal where possible can help minimize this.
A half-inch rubber mat works well for most mowers. Some users have found success using thicker materials, like 3/4-inch mats or mud flaps from truck repair shops, for increased durability.
Yes, this DIY approach can work with various mower types. For push mowers, simply adjust the dimensions to fit the smaller chute opening.
High-lift or mulching blades tend to work best with chute blockers, as they keep clippings contained and improve mulching. However, standard blades can still function effectively with the blocker.


