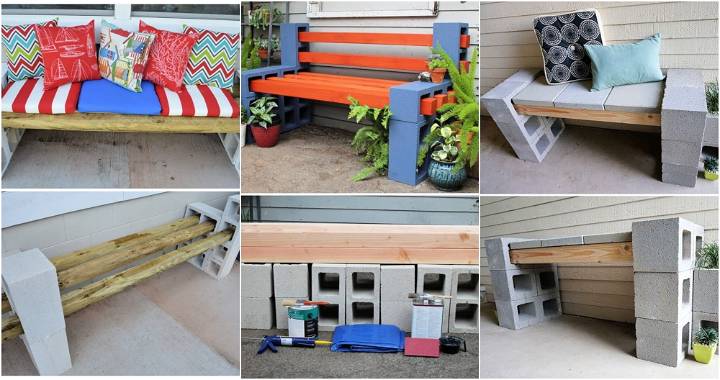
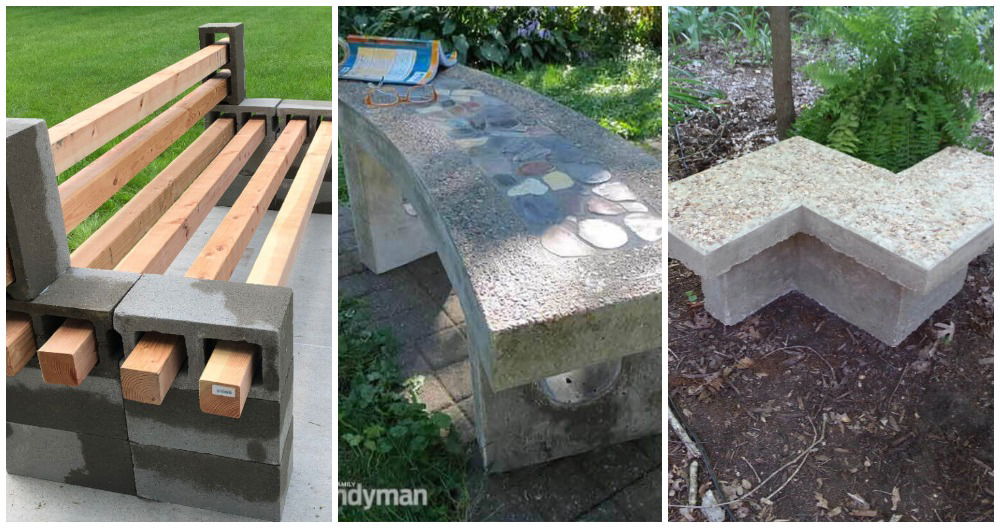
Building a DIY cinder block bench was a fun project that I decided to tackle one weekend. I had some extra cinder blocks and wood lying around and thought, why not put them to good use? It was a simple and budget-friendly project that required basic materials and tools. I found the idea intriguing and couldn't wait to get started.
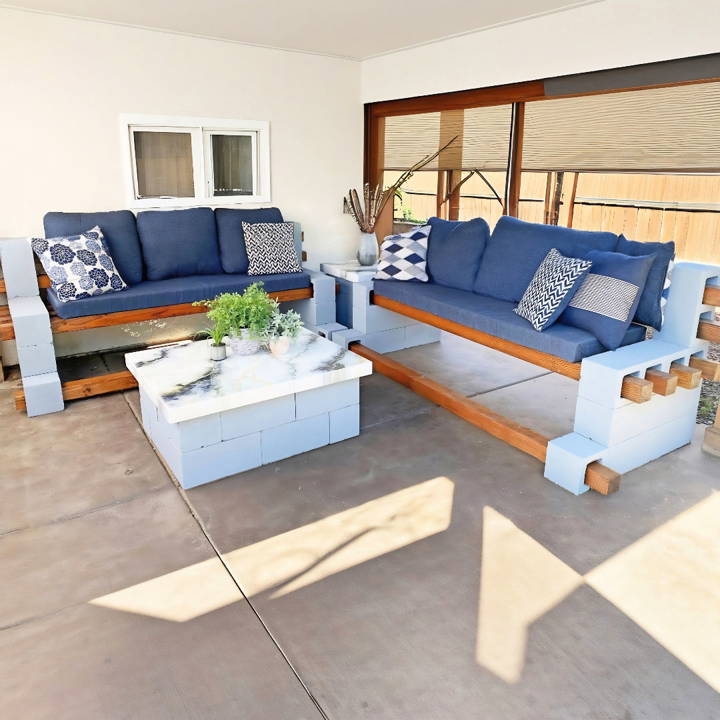
The process of building my cinder block and wood bench was quite enjoyable and satisfying. I carefully planned the dimensions, arranged the cinder blocks, and placed the wooden planks securely on top. The result was a sturdy and stylish bench perfect for my backyard.
If you have some time and a few materials on hand, give this cinder block bench project a try; I am confident it will enhance your outdoor space.
Gathering Your Materials
Before diving into the nuts and bolts, let's walk through the materials required for this project:
- 14 Cinder blocks: The backbone of your bench. Opt for durable blocks that can withstand the weight and elements.
- Six 8-foot 4x4s: These will serve as your seating surface. Choose a wood that's both sturdy and visually appealing.
- Gallon of Paint: Opt for an exterior paint in a color that complements your outdoor space.
- Construction Adhesive: A heavy-duty adhesive to keep the cinders in place.
- Caulking Gun: For precise application of the adhesive.
- Sandpaper Sponge: To smooth out rough edges on the wood and blocks.
- Paint Roller: For an even coat of paint on the cinder blocks.
- Wood Stain: I used a special walnut stain for a rustic look.
- Wood Sealer: To protect your wooden 4x4s from the elements.
Why These Materials?
Each material plays a crucial role in ensuring your bench is both aesthetically pleasing and long-lasting. From the type of wood to the shade of stain, every choice allows you to inject your personal style into the project while maintaining structural integrity.
Step by Step Instructions
Build a stylish, durable cinder block bench with our easy, step-by-step guide. Perfect DIY project for any skill level.
Step 1: Prep and Stain Your Wood
After gathering your materials, you'll want to start by prepping your 4x4s. Use the sandpaper sponge to smooth any rough edges. Apply the wood stain evenly across the boards, let it soak, then wipe off excess stain. Sealing the wood is next, ensuring your bench withstands various weather conditions.
Step 2: Arranging the Cinder blocks
Lay out your cinder blocks where you envision your bench being. Given their hefty weight post-assembly, choosing the right spot is critical. Test fit the 4x4s to ensure everything aligns nicely.
Step 3: Adhesive Time
With your cinder blocks in place, use the caulking gun to apply construction adhesive between each block. Allow this to cure overnight to ensure a solid foundation for your bench.
Step 4: Bring in the Color
Once the adhesive is set, it's time to add some color. I chose a light bluish-gray paint to complement the special walnut stained wood. Using a paint roller (and switching to a smaller brush for tight spaces), coat the cinder blocks evenly. Don't forget to protect your floor or grass with plastic sheets before painting.
Step 5: Assembly and Final Touches
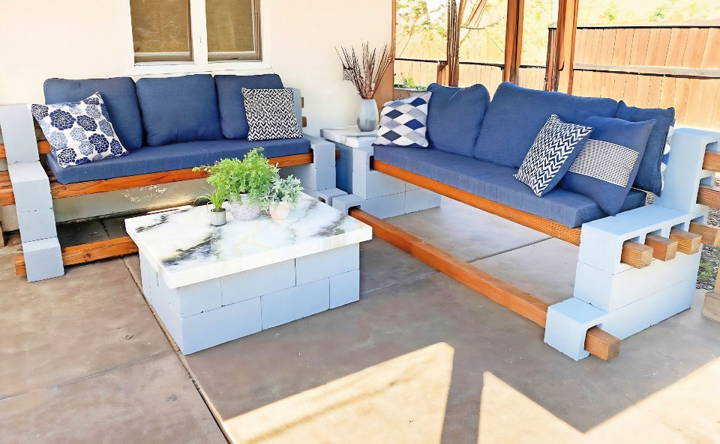
After the paint has dried, slide your 4x4s through the holes in the cinder block, making your seating surface. You might notice gaps between the 4x4s. I improvised by making custom cushions with foam padding, fabric, and a bit of manual stitching—no power tools needed!
Turns Out, You Can DIY Without Power Tools!
Reflecting on this project, it was both a challenge and a delightful surprise. Not using power tools required a bit more elbow grease and creativity, especially when it came to sanding and assembling the bench. The custom cushions added an extra personal touch and comfort to the final product.
Words of Wisdom
- Patience Is Key: Allow time for paint and adhesive to dry entirely.
- Be Flexible: Ready to improvise if things don't go exactly as planned.
- Detail Matters: Taking time on finishes like staining and cushion-making truly elevates the end result.
Design Customization Ideas
Building a DIY cinder block bench combines function with personal style. Customize it to turn a plain bench into a unique piece that enhances your garden or patio.
- Choose Your Theme: Start by deciding on a theme that resonates with your outdoor area. Whether you prefer a rustic charm, a modern edge, or a cozy nook, your theme will guide the rest of your design choices.
- Color Play: Cinder blocks come in a standard gray color, but they don't have to stay that way. You can paint the blocks in any color that suits your theme. For a modern look, consider bold and bright colors. For a more natural feel, opt for earthy tones that blend with the outdoor environment.
- Comfort with Cushions: Add comfort to your bench with cushions. Choose weather-resistant fabrics in colors and patterns that match your theme. You can also add throw pillows for extra comfort and style.
- Plant Integration: Incorporate planters into the design of your bench. Use the holes in the cinder blocks to house small plants or herbs. This not only adds life to your bench but also brings a fresh and natural vibe to your space.
- Light It Up: Consider adding solar-powered lights or LED candles for a warm ambiance in the evenings. You can place them within the cinder block holes or along the bench for a subtle glow.
- Accessorize: Accessorize your bench with outdoor decor items that enhance its appeal. A side table, outdoor rug, or decorative stones can complement the bench and make the space more inviting.
- Mosaic Magic: For those who love a bit of sparkle, build a mosaic on the bench's seating surface. Use broken tiles, glass pieces, or pottery shards to build a colorful and eye-catching design.
- Personal Touch: Finally, add a personal touch. This could be anything from engraved initials to a hand-painted quote that has a special meaning to you.
Make your DIY project unique. Start with these ideas, and mix or build new elements to show your creativity.
Troubleshooting Common Issues
When embarking on a DIY cinder block bench project, you might encounter a few hiccups along the way. Here's a helpful guide to troubleshooting common issues, ensuring your bench-building experience is as smooth as possible.
- Stability Concerns: If your bench wobbles, check that the ground is level where you've placed it. Use a spirit level to confirm. If it's not level, you can adjust the soil or add a sturdy base like a paver under the blocks.
- Cinder Block Cracks: Cinder blocks can crack if they're not handled carefully. If you notice a small crack, you can fill it with a concrete patch. For larger cracks, it's best to replace the block to ensure your bench's integrity.
- Adhesive Issues: If the blocks aren't sticking together well, make sure you're using the right adhesive. A construction adhesive designed for outdoor use and masonry will give you the best results.
- Wood Slipping: To prevent the wooden seat from slipping off the blocks, secure it with adhesive strips or build a small lip with additional adhesive at the block edges.
- Uneven Wood: If the wood seat is uneven, sand it down with sandpaper or a power sander for a smooth, even surface. Always sand in the direction of the wood grain.
- Moss or Algae Growth: In damp environments, moss or algae can grow on your bench. Clean it with a mild bleach solution and a stiff brush. Rinse well and let it dry in the sun.
- Seating Comfort: If the bench is uncomfortable, consider adding a foam pad or cushions. Ensure they're outdoor-friendly to withstand the elements.
- Paint Peeling: Outdoor paint can peel over time. To fix this, scrape off the peeling paint, sand the area, and apply a primer before repainting.
- Wood Rot: Protect your wooden seat from rot by treating it with a wood preservative. If rot has set in, replace the affected planks with new, treated wood.
- Insect Infestation: Keep insects at bay by using cedar or redwood for the seating, as they are naturally resistant. Alternatively, treat the wood with an insect-repellent sealant.
By addressing these common issues proactively, you can enjoy a sturdy and beautiful cinder block bench for years to come.
FAQs About DIY Cinder Block Bench
Discover answers to your faqs about DIY cinder block benches. Learn tips, materials, and step-by-step guidance for your outdoor bench project.
For a standard-sized bench, you will generally need between 12 to 16 cinder blocks. This will create a stable base and backrest. If you plan a larger or more elaborate design, you may need more blocks.
Cinder block benches have a hard surface, so they're not inherently comfortable. However, you can make them cozy by adding cushions or pillows. You can also paint the blocks for a more appealing look.
Cinder blocks are generally more affordable than wood. They are durable and require less maintenance. Wood, while easier to work with, may need more upkeep over time.
Absolutely! Cinder blocks are versatile and allow for various configurations. You can build a longer bench by adding more blocks and wood planks or even build a corner bench for a cozy nook. Feel free to paint the blocks in your favorite colors or add tiles for a unique touch. The design possibilities are endless.
To ensure stability:
Use a level surface to set up your bench.
Apply concrete adhesive between the blocks to bond them securely.
Make sure the wood planks are cut to the right length and fit snugly into the block holes.
For extra security, you can drill holes and insert rebar or metal rods into the cinder blocks before adding the wood planks.
Final Thought
Taking on this DIY cinder block bench project made me feel accomplished and creative. This guide helps you build your cinder block and wood bench step by step, making it easy and fun. Give it a go, and add a new feature to your garden that everyone will love.


