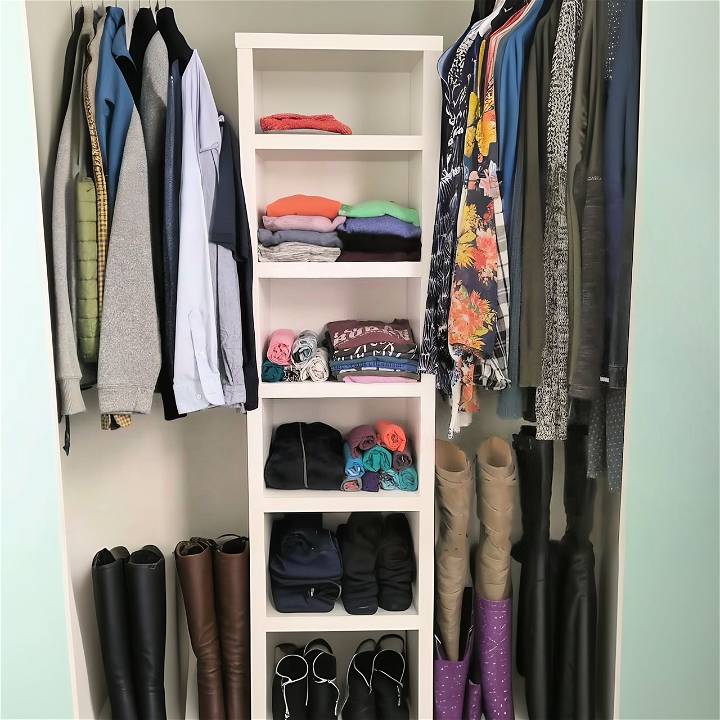
Like many, I found myself drowning in a sea of clothes and shoes within the confines of our tiny master closet. The disorganization was overwhelming, leading to daily frustration and time wasted digging for items hidden in the depths. Inspired by Carrie from Lovely Etc's tutorial on making a simple and cheap DIY closet organizer, I embarked on a journey to reclaim my space and sanity. Here's a step-by-step account of how I transformed my cluttered closet into a haven of organization, and how you can too, for less than $75.
Why Start This Project?
Living with a tiny, disorganized closet can make daily routines more stressful than they need to be. The idea of making a customized closet organizer that fit our specific storage needs and space limitations—without breaking the bank—was too appealing to ignore. Plus, the satisfaction of DIYing a solution added a personal touch to our space.
Gathering Materials: A Closer Look
- 12-Inch Wide MDF Boards: Opting for MDF was a no-brainer due to its sturdiness, cost-effectiveness, and the smooth surface perfect for painting. These boards would form the shelves and dividers of the closet organizer.
- Pocket Screws and a Nail Gun: These tools were essential for assembling the shelves securely. Pocket screws allowed me to connect boards without visible screws, while the nail gun made quick work of attaching supports.
- Paint and Rollers: A fresh coat of white paint to brighten and unify the closet's appearance.
- 1x2 Pine or Poplar Boards: Used for facing on the shelves, these added a polished, custom look without costing a fortune.
Understanding the purpose of each material underscored the project's feasibility and boosted my confidence in the outcome.
Steps to My DIY Closet Organizer
Learn how to build your own DIY closet organizer with easy-to-follow steps, from prepping the space to adding finishing touches and hanging bars for a stylish and functional storage solution.
Prepping the Space
The first step involved removing all items from the closet and tearing out the old shelving and closet rod. Giving the closet walls a fresh coat of paint laid a clean foundation for the new organizer.
Planning and Measuring
Taking cues from Carrie, I browsed Pinterest for inspiration and sketched a rough plan, which included top shelving, side hanging bars, and middle shelves for varied storage. Using painter's tape to outline the design on the closet floor was crucial for visualizing the space and refining measurements.
Cutting and Assembling the MDF
After cutting the MDF boards to size, I began constructing the middle shelving unit. Adding pocket holes to the bottom of each shelf ensured a strong hold when connected to the vertical side boards. This central piece would anchor the design.
Shelving and Shoe Storage
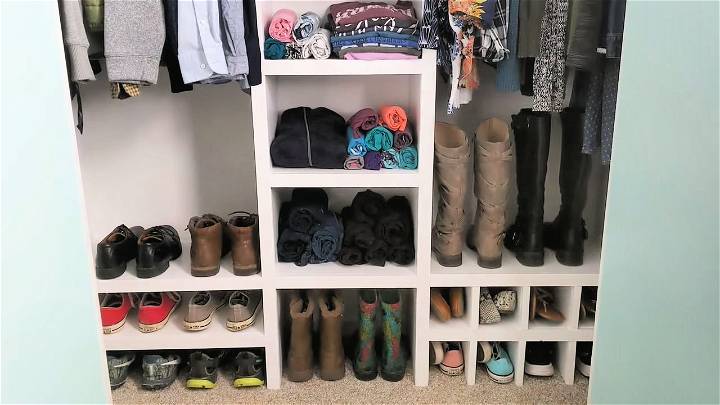
For shoe storage, I constructed additional shelves at the bottom of the closet. Making use of every inch, I tailored some areas specifically for shoes, using dividers to keep pairs organized and accessible.
Finishing Touches: Trimming and Painting
Applying 1x2 boards as facing on the shelves truly transformed the look, giving it a more substantial and custom feel. Following this, a diligent round of caulking, wood filling, and painting provided a sleek, seamless finish.
Hanging Bars and the Reveal
The final step was adding two closet bars for hanging clothes. Seeing the transformed closet, organized and efficient, was incredibly rewarding. Not only was the clutter gone, but finding what I needed became effortless.
Customization Ideas for Different Spaces
Building a DIY closet system that fits your space and meets your needs can be a rewarding project. Whether you have a large walk-in closet or a small reach-in, there are plenty of ways to customize your storage to make the most of the area you have. Here's how to tailor your DIY closet system for different spaces:
For Small Closets:
- Maximize Vertical Space: Use the full height of your closet with tall shelving units. Install hooks or over-the-door organizers to hang accessories.
- Add Multiple Rods: Place two or three rods at different heights to hang shirts, pants, and longer items like dresses or coats.
- Use Sliding Baskets: These are great for storing smaller items and can be easily accessed.
For Walk-In Closets:
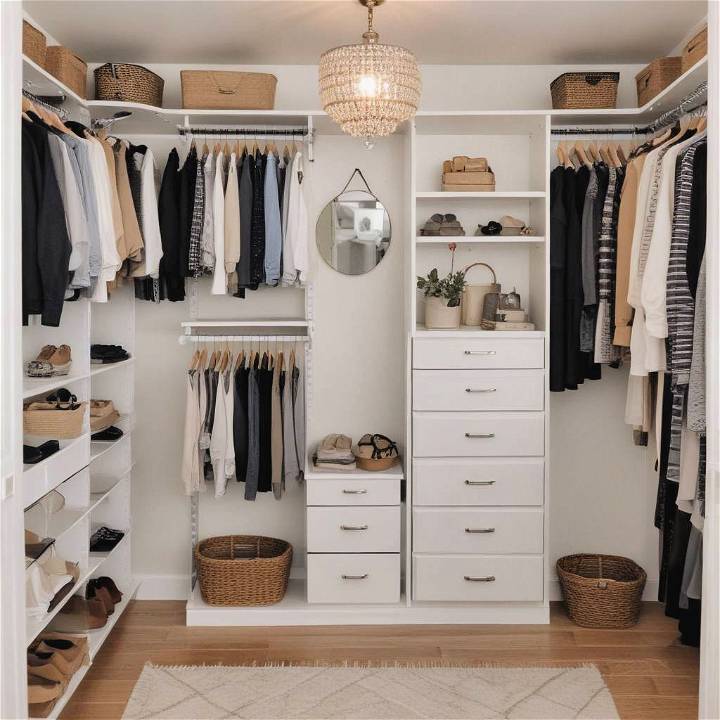
- Island Storage: If space allows, add an island in the center with drawers for additional storage and a flat surface for folding clothes or packing.
- Seating Area: Include a small bench or ottoman. It's not only functional but also makes the space feel luxurious.
- Display Shelves: Show off your favorite shoes or bags on open shelves.
For Shared Closets:
- Divide the Space: Use a shelving unit or a set of drawers as a partition to give each person their own section.
- Color Coding: Assign different colors to hangers or bins for each person to easily identify their items.
- Shared Accessory Storage: Have a communal area for items that both people use.
For Kids' Closets:
- Adjustable Systems: Choose shelving and rods that can be adjusted as your child grows.
- Fun Elements: Incorporate colorful bins or labels to make it easier for kids to put away their clothes.
- Low Hooks: Place hooks at a child-friendly height for backpacks and hats.
For Unusual Spaces:
- Custom Shelving: Build shelves to fit odd angles or corners to utilize every inch.
- Hanging Organizers: They can be adapted to fit under sloped ceilings or in narrow spaces.
- Retractable Features: Use pull-out rods or fold-down desks to save space.
Remember, planning is key to a successful DIY closet system. Measure your space, think about storage needs, and consider daily closet use. Get creative and follow these tips for a functional and stylish design. Adjust as needed for a space that works.
Maintenance and Upkeep Tips
Maintaining your DIY closet system is crucial for ensuring it stays functional and beautiful over time. Here are some straightforward tips to help you keep your closet in top condition:
Regular Cleaning
- Keep it Dust-Free: Wipe down shelves and rods every month with a microfiber cloth to prevent dust buildup.
- Spot Clean Stains: Immediately treat any spills or stains on closet components to avoid permanent damage.
Organizing Hacks
- Declutter Seasonally: Go through your items every season and donate or discard things you no longer need.
- Use Clear Storage: Opt for transparent boxes or bins to easily see what's inside, reducing the need to rummage.
Hardware Checks
- Tighten Loose Screws: Inspect and tighten any loose screws or hardware quarterly to ensure stability.
- Lubricate Moving Parts: Apply a silicone-based lubricant to drawer slides and hinges once a year for smooth operation.
Protecting Materials
- Use Liners: Place liners on shelves to protect the surface from scratches and spills.
- Control Humidity: If you live in a humid area, consider using a dehumidifier to protect your closet from moisture damage.
By following these easy tips, you can extend the life of your closet system and keep it looking new. Remember, a little care goes a long way in preserving your home projects. Keep these practices regular for a long-lasting closet system.
FAQs About DIY Closet Systems
Discover everything you need to know about DIY closet systems with our comprehensive FAQ guide. Get expert answers to all your questions today!
What materials should I use for my DIY closet system?
The best materials for your closet system depend on your budget, style, and the weight of items you plan to store. Common choices include:
- Wood: Sturdy and classic, but can be heavy and expensive.
- Melamine: Affordable and easy to clean, though not as durable as wood.
- Wire Shelving: Cost-effective and ventilated, ideal for damp areas.
How do I measure my closet for a DIY system?
Accurate measurements are crucial. Here's a simple process:
- Height: Measure from floor to ceiling at each corner and the middle.
- Width: Measure wall-to-wall at the top, middle, and bottom.
- Depth: Measure from the back wall to the front edge where the door closes.
Can I adjust my closet system after it's built?
Yes, many systems are designed to be adjustable. Look for components like:
- Modular Units: These can be rearranged as needed.
- Adjustable Shelves: These allow you to change the height to accommodate different items.
- Telescoping Rods: These can expand or contract to fit your space.
What tools do I need to install a DIY closet system?
You'll need basic tools, such as:
- Measuring Tape: For precise measurements.
- Level: To ensure shelves and rods are straight.
- Drill: For securing components to the walls.
- Saw: If you need to cut shelves or rods to size.
How can I make my closet system look built-in?
To give your closet a custom, built-in look, consider:
- Trim and Molding: Add these for a finished appearance.
- Paint or Stain: Match the closet's color to your room's trim.
- Door and Drawer Fronts: Use matching materials for a cohesive design.
Final Thoughts and Advice
This project was about more than just building a closet organizer; it was about reclaiming a part of my daily life from chaos. For those considering this DIY, my advice is clear: plan meticulously, don't shy away from customization, and remember, the beauty of DIY lies in crafting solutions that perfectly fit your needs.
Remember, a serene and organized closet isn't reserved for those with grand spaces or budgets. With some creativity, a few basic tools, and a willingness to invest some elbow grease, transforming your cluttered closet into a model of organization is wholly achievable.


