When I had to make more space in my small apartment, I decided it was time to build my own DIY clothes rack. It was surprising how making something so simple could solve my storage problems and also add a unique touch to my room. I learned that you don't need fancy tools or a lot of money to build something functional and stylish.
The process made me realize the importance of being resourceful with what you have around. I used some wooden poles, a drill, screws, and a bit of paint. Following online guides helped, but adding my personal touch made it special. Now, I'm excited to share tips on how anyone can start their DIY project to make their own clothes rack. It's amazing how a little effort can lead to such a useful outcome.
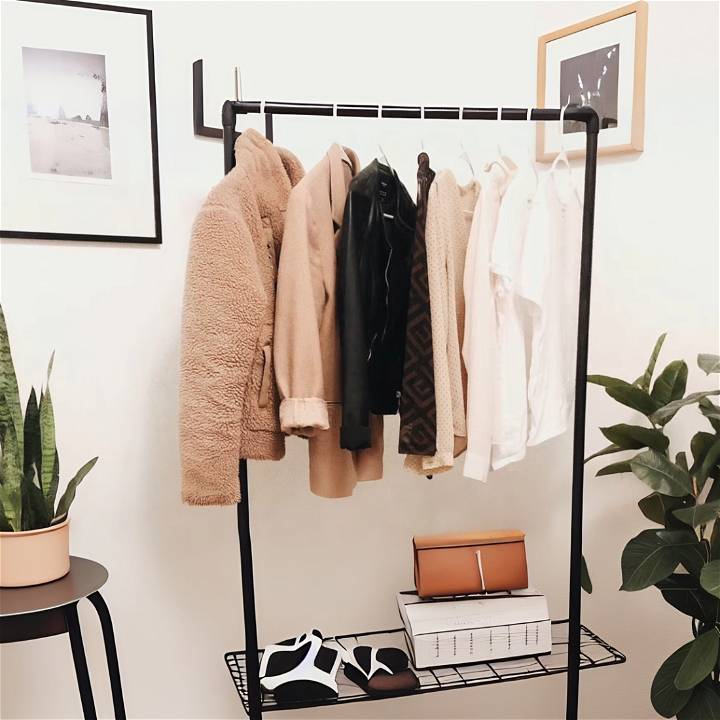
In this light, I want to lend a hand: my experience can guide you to build a DIY clothes rack that not only saves space but also showcases your style. Just start with simple materials and let your creativity flow.
How to Make a Clothes Rack - Step by Step Instructions
Learn how to make a clothes rack with our step-by-step instructions. Build a stylish and functional DIY clothes rack for your home with ease.
Materials Needed
- Two 10-feet long, 3/4 inch PVC pipes
- Four 8-inch long PVC pipes (for the base)
- Four 6-inch long PVC pipes (for vertical support)
- Four T-joints
- Four elbow joints
- Four end caps
- PVC cement (optional for a permanent structure)
- Spray paint (optional for customization)
Tools Required
- PVC cutter or saw
- Tape measure
- Sandpaper or a sanding block (for smoothing edges)
- Gloves (optional for painting)
Step By Step Instructions
Learn how to build an industrial-style clothing rack with PVC pipe for under $12 below:
Step 1: Preparing the PVC Pipes
Start by cutting the 10-feet long PVC pipes into required lengths if they haven't been pre-cut. You'll need to build two longer sections for the top bar of the rack and several smaller sections for the base and supports. Smooth out any rough edges with sandpaper.
Step 2: Assembling the Base
- Take one T-joint and insert an 8-inch PVC pipe on two opposite sides.
- Repeat this step with another T-joint so you have two identical pieces.
- Connect these pieces with a 6-inch PVC pipe, making a square base. Repeat this process to make another square.
- Position the remaining T-joints on top of the 6-inch sides of the squares, ensuring the third opening faces inward.
Step 3: Building the Vertical Supports
- Insert the 6-inch PVC pipes into the T-joints that are facing upwards on the base squares.
- Add an elbow joint to the top of each 6-inch pipe, making sure the opening faces inward toward the center of the rack.
Step 4: Constructing the Top Bar
- Connect the two top bars (long PVC pipes) with a T-joint in the center.
- Insert each end of the top bar into the elbow joints on the vertical supports.
Step 5: Final Touches
- Place end caps on the exposed ends of the base for a polished look.
- For added stability, you can glue each connection with PVC cement. This is optional, as it will make the rack permanent and non-adjustable.
- Optionally spray paint the entire rack for a custom finish. Black paint can give an elegant, industrial look. Be sure to paint in a well-ventilated area or outdoors.
Tools and Tips
- Measure twice, cut once to ensure accuracy.
- PVC cement dries quickly, so be decisive when assembling.
- Sanding the pipes lightly before painting helps the paint adhere better.
Video Tutorial
For a step-by-step video tutorial, watch May Nunez's DIY Industrial Clothing Rack on YouTube.
t pairs well with this written guide, providing a visual view of the techniques discussed in an easy-to-understand manner. This video is perfect for those who appreciate both a visual demonstration and the convenience of written instructions.
Making your own clothing rack is not only cost-effective but also allows you to customize your space to your liking. Whether you're aiming for practicality, style, or both, this DIY project is a great way to add an industrial flair to your home.
Customization Ideas
One of the best parts about DIY projects is the ability to customize them to your liking. Here are some ideas on how you can personalize your DIY clothes rack:
Choose Your Material
The type of material you use can greatly influence the look and feel of your clothes rack. For a rustic look, consider using reclaimed wood. For a modern, sleek design, metal pipes might be a good choice.
Paint or Stain
Adding a coat of paint or stain can dramatically change the appearance of your clothes rack. You could choose a color that matches your room decor, or go for a bold, contrasting color to make it stand out.
Add Shelves or Hooks
Adding shelves to your clothes rack can provide extra storage space for folded clothes or accessories. Hooks can be useful for hanging hats, scarves, or bags.
Decorate
Consider adding decorative elements to your clothes rack. This could be anything from stencil designs to hanging a small plant at one end.
Make it Mobile
Adding wheels to your clothes rack can make it easy to move around. This can be particularly useful if you often rearrange your room.
The goal is to build a clothes rack that not only serves its purpose, but also reflects your personal style. So, don't be afraid to get creative and make it your own!

Troubleshooting Guide
When working on a DIY project like a clothes rack, you might encounter some challenges. Here's a guide to help you troubleshoot some common issues:
Problem: The Rack is Wobbly
Solution: Check all your connections and make sure they are tight. If the problem persists, check if your rack is level. If it's not, you may need to adjust the length of your rack's legs.
Problem: The Wood is Splitting
Solution: This usually happens when screws are driven into the wood without pre-drilling holes. To prevent this, always drill pilot holes before inserting screws.
Problem: The Paint or Stain is Uneven
Solution: This could be due to using too much paint or stain, or not allowing enough drying time between coats. Always follow the manufacturer's instructions on the paint or stain can.
Problem: The Rack Doesn't Hold Enough Weight
Solution: This could be due to the type of wood used or the design of the rack. Consider using a stronger type of wood, or adding additional supports to the rack.
Every problem has a solution. Don't get discouraged if you run into issues. Part of the fun of DIY projects is overcoming these challenges and learning from them.
Maintenance and Care
Taking care of your DIY clothes rack will ensure its longevity and keep it looking its best. Here are some tips on how to maintain and care for your clothes rack:
Regular Cleaning
Dust and dirt can accumulate on your clothes rack over time. Use a soft, dry cloth to wipe down the rack regularly. Avoid using harsh chemicals that could damage the finish.
Check for Wear and Tear
Regularly inspect your clothes rack for any signs of wear and tear. This could include loose screws or a wobbly frame. Address these issues promptly to prevent further damage.
Protect from Extreme Conditions
If your clothes rack is made of wood, it's important to protect it from extreme conditions. Avoid placing it in direct sunlight or in damp areas to prevent warping or fading.
Refresh the Finish
Over time, the finish on your clothes rack may start to look worn or faded. Consider refreshing the finish with a new coat of paint or stain. Remember to sand the surface lightly before applying the new finish.
A well-maintained clothes rack not only looks better, but it also functions better and lasts longer.
FAQs About DIY Clothes Rack
Discover everything you need to know about DIY clothes racks in this comprehensive FAQ guide. Find tips, tutorials, and answers to all your questions here!
What type of wood should I use for my clothes rack?
The type of wood you choose depends on your personal preference and the look you're going for. Pine, oak, and cedar are all good choices for a clothes rack.
Can I use metal pipes instead of wood for the frame?
Yes, you can use metal pipes for a more industrial look. Just make sure to choose pipes that are sturdy enough to hold the weight of your clothes.
How can I prevent the wood from splitting when I screw it together?
To prevent splitting, it's a good idea to drill pilot holes before you insert the screws. This gives the screw a path to follow and reduces the pressure on the wood.
What kind of paint or stain should I use?
You can use any kind of paint or stain that is suitable for wood. If your clothes rack will be used in a damp area like a bathroom, consider using a waterproof finish.
How can I make my clothes rack more stable?
If your clothes rack is wobbly, check to make sure all the connections are tight. You can also add extra supports or a heavier base to increase stability.
Can I add shelves to my clothes rack?
Absolutely! Adding shelves can provide extra storage space. Just make sure to account for the extra weight when designing your rack.
How do I care for my clothes rack?
Regular cleaning with a soft, dry cloth can keep your clothes rack looking its best. If you've painted or stained your rack, avoid using harsh chemicals that could damage the finish.
What should I do if my clothes rack starts to wobble over time?
Check all the connections and make sure they're tight. If the rack is still wobbly, it might be a sign that the wood has warped. In this case, you may need to replace the affected parts.
Can I make my clothes rack mobile?
Yes, adding casters to the bottom of your clothes rack can make it easy to move around. Just make sure to choose casters that are suitable for the weight of the rack and the type of flooring in your home.
What if I don't have all the tools needed for this project?
If you don't have all the necessary tools, you might be able to rent them from a local home improvement store. Alternatively, consider asking a friend or neighbor if you could borrow theirs.
DIY projects are a learning experience. Don't hesitate to ask for help or seek advice if you're unsure about something.
Conclusion:
Wrapping up, making a DIY clothes rack can be a fun and practical project for any home. With simple materials and a little bit of creativity, you can customize your own stylish storage solution.


