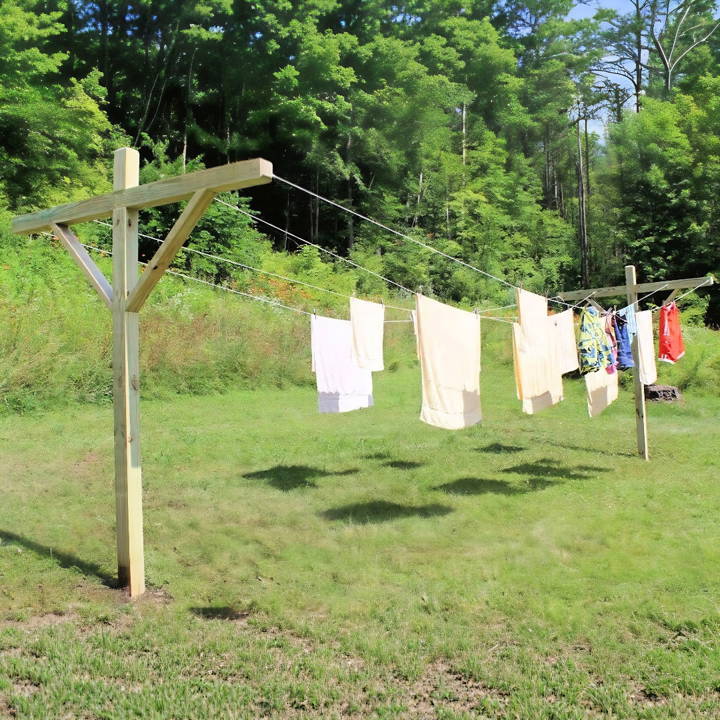
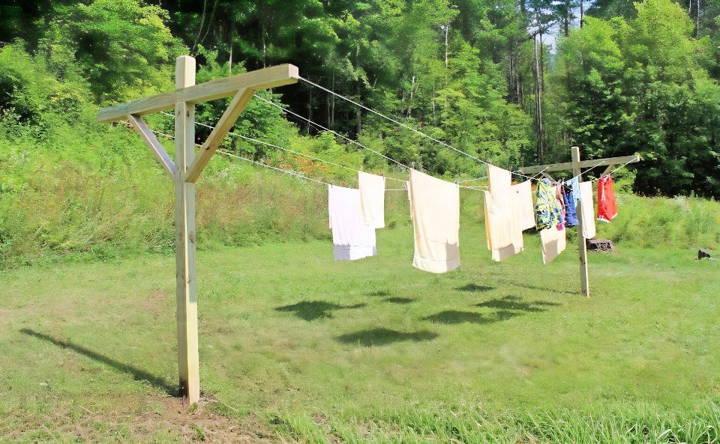
Building a DIY clothesline is an efficient and eco-friendly way to dry your clothes while saving on energy costs. With some simple materials and basic tools, you can easily build a sturdy and reliable clothesline in your backyard. This guide will walk you through the necessary steps, providing clear instructions on how to select the right materials and assemble the clothesline, ensuring it stands the test of time.

Continue on to learn detailed tips and tricks for maintaining your DIY clothesline and ensuring it lasts for years.
Materials Needed and Their Purpose
- Treated four by 4-inch Post (10-foot): This serves as the main support of the clothesline, ensuring durability and resistance to weather elements.
- 6-Foot Crosspiece: I bought a 12-foot piece and cut it in half. This part holds the actual lines where you'll hang your clothes.
- 2 by 4-Inch Wood (10-foot): Used for making braces that will reinforce the structure, making it sturdy.
- Exterior Deck Screws (3-inch): These are used to assemble all parts securely, ensuring the longevity of your clothesline.
- Eye Hooks: They are essential for holding the clothesline (the actual line you will hang your clothes on).
- Circular Saw, Router, and Chop Saw: These tools are crucial for cutting wood accurately according to the measurements.
- Screwdriver: Needed for precise fastening, especially when installing eye hooks.
- Drill: A drill makes pre-drilling holes for screws and eye hooks easier, reducing the risk of splitting the wood.
Step by Step Instructions
Learn how to build a DIY clothesline with our step-by-step guide. From making the lap joint to installing eye hooks, we cover all 6 essential steps.
Step 1: Making the Lap Joint
Firstly, measure down nine inches on your 10-foot 4 by 4 post; this is where the crosspiece will attach. Use a circular saw, set to a depth of one and three-quarters inches, to cut along the marked line. This depth matches half of the 4 by 4's thickness, ensuring a perfect fit. Remove the marked section by making multiple passes with the saw, effectively making a lap joint.
Step 2: Softening the Edges
After cutting the lap joint, soften the edges of the post at the top with a 45-degree angle cut, almost like a chamfer. This step is vital for both aesthetic appeal and to prevent splinters.
Step 3: Preparing the Crosspiece
For the crosspiece preparation, find its center at 36 inches (since it's a 6-foot piece) and mark out an inch and three-quarters on either side. Cut out this portion in the same manner as the main post to fit them together snugly.
Step 4: Attaching the Crosspiece
With both the post and crosspiece prepared, it's time to join them. This is where the two lap joints will come together, supported later by braces for additional security.
Step 5: Making and Attaching the Braces
Cut your 2 by 4-inch wood into 28-inch-long pieces, then at each end, cut a 45-degree angle - these will serve as your braces. Attach these braces using 3-inch exterior deck screws, ensuring the structure gains more strength and stability.
Step 6: Installing Eye Hooks
Measure and mark evenly spaced points on the crosspiece for your eye hooks, which will hold the clothesline. Pre-drill holes to make the installation of eye hooks easier, ensuring they are secure. Use a screwdriver for tightening, leveraging it for a firm fix.
Additional Tips
- Safety Measures: Always wear protective gear when working with power tools. Eyes, ears, and fingers are precious - keep them safe.
- Weatherproofing: Consider applying a wood preservative or paint to further protect your clothesline post from the elements, extending its lifespan.
- Height Considerations: Before you start your project, think about who will be using the clothesline. Adjust the height accordingly to ensure it is user-friendly.
Customization Ideas for Your DIY Clothesline
Making a DIY clothesline that fits your space and style can be both fun and rewarding. Here are some ideas to help you customize your clothesline:
- Choose the Right Location: Find a spot in your yard that gets plenty of sunlight and breeze. It should be easy to access but out of the way of regular activities.
- Select Durable Materials: Go for materials that can withstand the weather. Galvanized steel or aluminum are great for poles, while vinyl-coated wire or natural fiber ropes make for strong lines.
- Adjustable Height: Consider a design that allows you to raise or lower the lines. This makes it easier to hang and remove clothes, especially for those with back issues.
- Space-Saving Design: If you have limited space, think about a retractable line or a fold-down rack that you can store when not in use.
- Personal Touch: Paint the poles in your favorite color or pattern. This adds a personal touch and can make your clothesline a decorative feature in your garden.
- Add Convenience Features: Attach a small basket for clothespins or a shelf for laundry supplies. This keeps everything you need within reach.
- Safety First: Ensure all components are securely installed. Regularly check for wear and tear, especially on lines and connections.
By customizing your clothesline, you not only get a functional tool for drying clothes but also an addition that enhances your outdoor space.

Troubleshooting Common Issues with DIY Clotheslines
Even the best DIY projects can hit a snag now and then. Here are some common clothesline issues and how to fix them:
- Sagging Lines: Over time, clotheslines may stretch and sag. To fix this, tighten the line if it's adjustable. If not, you may need to replace it with a new one that has a tighter weave or is made of more durable material.
- Rust Stains on Clothes: Metal parts can rust and stain your clothes. Use stainless steel or coated materials to prevent rust. If rust appears, clean the metal parts with a rust remover and repaint them if necessary.
- Weak Anchors: If your clothesline poles are wobbly, the anchors might be weak. Make sure the poles are set in concrete for stability. If they're already in concrete, check for cracks or damage and repair as needed.
- Mold or Mildew on Lines: Wet weather can lead to mold or mildew. Clean the lines with a mixture of water and vinegar and let them dry in the sun. To prevent this, don't leave clothes out longer than necessary, especially overnight.
- Clothespins Breaking or Leaving Marks: Cheap clothespins can break easily or leave marks. Invest in high-quality clothespins that won't rust or stain. For marks, try using clothespins with soft grips or padding.
- Lines Snapping: Heavy loads can cause lines to snap. Distribute weight evenly, and don't overload the clothesline. Consider using a thicker line or a cable if you frequently dry heavy items.
By keeping an eye on these common issues and knowing how to fix them, you'll ensure your DIY clothesline remains a reliable part of your sustainable living practices.
Maintenance Tips for Your DIY Clothesline
Keeping your DIY clothesline in top shape is key to ensuring it serves you well for years to come. Here are some straightforward maintenance tips:
- Regular Inspections: Every few months, take a close look at your clothesline. Check for any wear and tear, especially on the lines and where they attach to the poles.
- Tighten Up: If you notice any slack in the lines, tighten them to prevent sagging. This helps keep your clothes off the ground and makes hanging laundry easier.
- Clean the Lines: Dirt and grime can build up on your clothesline. Wipe it down with a damp cloth and a mild detergent. Rinse well to avoid leaving any residue that could stain your clothes.
- Protect from Weather: If you live in an area with harsh weather, consider taking down your clothesline during extreme conditions, like heavy snow or strong winds, to prevent damage.
- Lubricate Moving Parts: If your clothesline has pulleys or other moving parts, a bit of lubricant can keep everything moving smoothly and prevent rust.
- Replace When Needed: Materials can degrade over time. If you notice significant fraying or rusting, it might be time to replace parts of your clothesline.
- Mind the Load: Don't overload your clothesline. Heavy items should be spaced out and, if possible, dried on multiple lines to distribute the weight evenly.
By following these simple maintenance steps, you'll ensure your clothesline remains a reliable, eco-friendly part of your home.
FAQs About DIY Clothesline
Learn everything about DIY clotheslines with our comprehensive faqs, covering installation, materials, and maintenance for efficient drying solutions.
Yes, you can set up a clothesline indoors. Use a heavy-duty screw hook to secure the ends of your rope to opposite door frames or walls. Make sure it’s high enough (around 75 inches from the floor) to allow air circulation and prevent clothes from touching the ground.
For a sturdy clothesline, ensure your anchoring points are solid, and the rope is taut. If you’re using posts, dig deep enough holes and secure them with concrete. Choose a durable rope and tighten it to prevent sagging. Regularly check the tension and adjust as needed.
Using a clothesline saves energy and money compared to electric dryers. It also gives your clothes a fresh, outdoor scent. Line-drying is gentle on fabrics and can help extend the life of your clothing. Plus, it's environmentally friendly.
To maintain your clothesline, clean the line regularly to prevent dirt from transferring to the clothes. Inspect the line and anchoring points for wear and tear. Replace the rope if it shows signs of fraying or weakness. During winter or rainy seasons, take down the line to protect it from the elements.
To prevent your clothes from fading, avoid direct sunlight when line-drying colored garments. Look for a shaded area or dry them during times when the sun is not at its peak. Additionally, turning clothes inside out before hanging them can also help protect the colors from fading.
Final Thoughts
Wrapping up, making a DIY clothesline is a cost-effective and environmentally friendly project. With simple materials and easy steps, anyone can enjoy fresh, sun-dried laundry. Start this project today and experience the benefits of a DIY clothesline for yourself!


