For anyone interested in building their own DIY CNC router, particularly those inspired by the meticulous guide I strolled upon on YouTube by DIY Builds, I've decided to share my step-by-step experience. By combining my personal journey with technical steps, I aim to provide a comprehensive breakdown that's easy to follow.
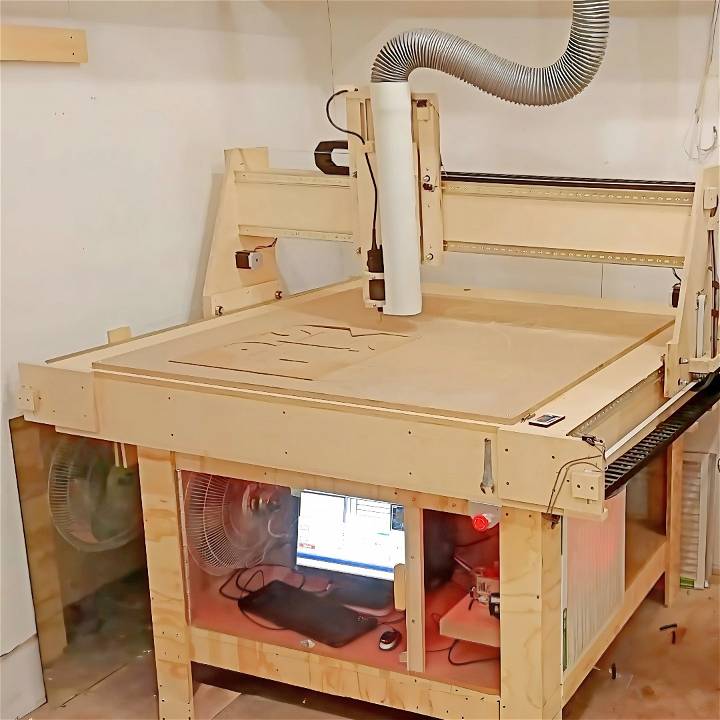
Step by Step Instructions
Learn how to build a DIY CNC router step by step, from preparing the workspace to final assembly and testing. Get valuable tips along the way.
Step 1: Preparing the Workspace and Gathering Materials
Before starting, I ensured my workspace was spacious enough to accommodate a 5-foot by 5-foot CNC router. The heart of my project was to build a torsion box top, allowing a maximum material thickness of 6 inches, all under $900. I sourced the materials listed on DIY Builds' website, which included 5/8-inch MDF, 3/4-inch plywood, and 3/4-inch Baltic birch for the torsion box, alongside other hardware components.
Why each material is needed:
- 5/8-inch MDF and 3/4-inch plywood: These provide a sturdy base and surface for the CNC router table.
- 3/4-inch Baltic birch: Chosen for the torsion box for its strength, ensuring a flat, stable cutting surface.
- Hardware components: Screws, nails, glue, and electronics were needed for assembling the table, torsion box, legs, and wiring the electronics underneath.
Step 2: Building the CNC Table
The first tangible step was constructing the table. I started by cutting the plywood and MDF to size, using the dimensions available on the DIY Builds website. The legs were assembled using glue, screws, and nails, forming a robust foundation. The torsion box assembly was an intricate process, requiring precise cuts and notching for the interlocking pieces. I meticulously glued and secured each component, ensuring a perfectly flat surface atop the table structure.
Step 3: Assembling the Torsion Box
Building the torsion box was perhaps the most challenging yet rewarding part of the project. The concept of a torsion box is to make a structure that prevents warping and maintains rigidity. I used 3/4-inch Baltic birch plywood, cutting it into strips to form the internal grid, and then secured these between two larger sheets of the same material. Attention to detail was crucial here, to maintain the precision required for accurate CNC routing.
Step 4: Mounting the Electronics
Electronics installation was a new territory for me. Adhering to the blueprint from DIY Builds, I mounted the stepper motors, configured the control board, and wired the power supply beneath the table. While it took some time to understand the wiring diagram fully, the project's digital plans were invaluable in guiding me through this process.
Step 5: Final Assembly and Testing
Once the table, torsion box, and electronics were in place, I mounted the din rails and gantry. Assembling the gantry required precision, ensuring it moved smoothly along the rails. Finally, testing was crucial. Beginning with slow movements to check the gantry's alignment and progressing to full test cuts on scrap material helped me adjust and fine-tune the machine's settings.
Lessons Learned and Useful Tips
- Precision is key: From cutting materials to assembling the torsion box, attention to detail ensures the CNC router's accuracy.
- Patience with electronics: Wiring the electronics and configuring the control software requires patience. It's helpful to study the diagrams and instructions carefully.
- Safety First: Always prioritize safety, especially when working with power tools and electrical components.
Calibrating the Machine's Axes for Accuracy
When embarking on your DIY CNC router journey, achieving precise and accurate cuts is paramount. Properly calibrating the machine's axes ensures that your creations match your design intent. Let's delve into the nitty-gritty of calibration:
Understanding the Axes
Before we dive in, let's get acquainted with the three primary axes of a CNC router:
- X-Axis: Represents the horizontal movement from left to right.
- Y-Axis: Handles the front-to-back motion.
- Z-Axis: Governs vertical movement, controlling the depth of cuts.
Why Calibration Matters
Imagine you're carving intricate patterns into a wooden panel. If your CNC router isn't precisely calibrated, those delicate swirls could turn into jagged edges. Calibration ensures that your machine interprets your design commands accurately, resulting in clean, crisp cuts.
Step-by-Step Calibration Process
Learn the step-by-step calibration process for your machine, from homing to fine-tuning, including checking axis movement and adjusting steps per millimeter (steps/mm).
a. Homing the Machine
- Power On: Start by turning on your CNC router.
- Homing Sequence: Initiate the homing process. The machine will move each axis to its reference point (usually the corner of the work area).
- Verify Position: Check that the machine's position aligns with the reference point. Adjust if necessary.
b. Checking Axis Movement
- Manual Jogging: Use your CNC control software to manually move each axis.
- Measure Distances: With a ruler or calipers, measure the actual movement against the commanded movement. Note any discrepancies.
c. Steps per Millimeter (Steps/mm)
- Calculate Steps/mm: Determine the correct steps/mm value for each axis. This value defines how many motor steps correspond to a millimeter of movement.
- Adjust Settings: Access your CNC controller settings and input the calculated steps/mm values for X, Y, and Z axes.
d. Fine-Tuning and Testing
- Test Cuts: Build a simple test design (a square or circle) and execute it.
- Measure Accuracy: Measure the dimensions of the cut. If it deviates from the intended size, fine-tune the steps/mm settings accordingly.
- Iterate: Repeat the test cuts and adjustments until you achieve spot-on accuracy.
Tips and Troubleshooting
- Backlash: Minimize backlash (play or slack) by tightening belts and ensuring smooth movement.
- Lubrication: Regularly lubricate rails, lead screws, and bearings.
- Belt Tension: Maintain proper tension in belts to prevent slippage.
- Software Updates: Keep your CNC control software up-to-date for improved calibration features.
Remember, calibration isn't a one-time affair. As you work with different materials or after prolonged use, recheck and recalibrate periodically. Your DIY CNC router will thank you with precise, flawless creations!
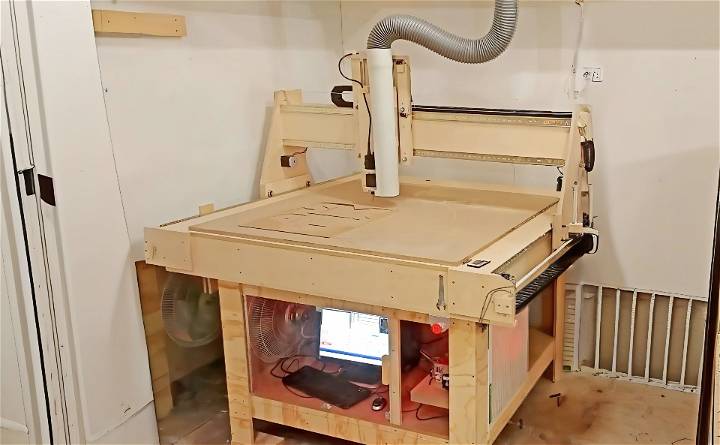
FAQs About DIY CNC Routers
Learn all you need to know about DIY CNC routers in this comprehensive FAQ guide. Find answers to common questions and get started on your own project today.
1. What Is a DIY CNC Router?
A DIY CNC router (Computer Numerical Control) is a versatile tool that allows hobbyists, makers, and small businesses to build precise cuts, engravings, and 3D carvings. Unlike traditional handheld routers, CNC routers are automated and follow digital designs. They're commonly used for woodworking, plastic fabrication, and even light metalwork.
2. How Does a DIY CNC Router Work?
- Design Input: Start by making or downloading a digital design using software like Fusion 360, Inkscape, or Easel.
- Toolpath Generation: The CNC software generates a toolpath based on your design, specifying the router's movements.
- Material Setup: Secure your material (wood, acrylic, or aluminum) onto the router bed.
- Execution: The CNC router follows the toolpath, cutting or carving the material with precision.
3. How Do I Choose the Right DIY CNC Router?
Consider these factors:
- Workspace Size: Choose a machine that accommodates your project size.
- Spindle Power: Higher power allows for faster cutting and tougher materials.
- Rigidity: Sturdy frames minimize vibrations and ensure accuracy.
- Controller: Look for user-friendly control software and compatibility.
4. What Safety Precautions Should I Take?
- Eye Protection: Always wear safety glasses or goggles.
- Dust Collection: Use a dust extractor to keep your workspace clean.
- Secure Workpiece: Properly clamp or secure your material to prevent movement during cutting.
- Emergency Stop: Familiarize yourself with the emergency stop button.
5. Can I Build My Own DIY CNC Router?
Absolutely! Many enthusiasts build their CNC routers from scratch. Resources like OpenBuilds and CNC Cookbook offer detailed guides and community support. Remember to start with a simple design and gradually upgrade as you gain experience.
Conclusion
Building my CNC router was a challenging but ultimately rewarding project. It pushed my DIY skills to new levels and introduced me to the world of CNC routing. For others embarking on this journey, I recommend meticulously planning, studying the available resources, and approaching each step with patience and precision. Remember, the goal is not just to build a machine but to unlock a world of creative possibilities.


