Maintaining a planted aquarium has been one of the most rewarding hobbies I've taken up. The sight of lush, green plants thriving in a well-maintained tank is something truly special. One of the key ingredients to achieving this is providing enough CO2 for the plants. While there are several commercial options available, I discovered that making a DIY CO2 system is incredibly simple, budget-friendly, and effective.
Why a DIY CO2 System?
I've tried several different methods for injecting CO2 into my aquarium over the years. When I first started, I went for the commercially available options, which can be quite expensive. Over time, I realized that for a smaller aquarium or if you're just getting started, a DIY CO2 system can be just as effective at a fraction of the cost. Plus, there's a certain satisfaction in making something yourself that works perfectly.
Materials Needed: What You'll Use and Why
Let's talk about what you'll need to get started with a DIY CO2 system. The materials are simple and affordable, and most of them are things you might already have at home.
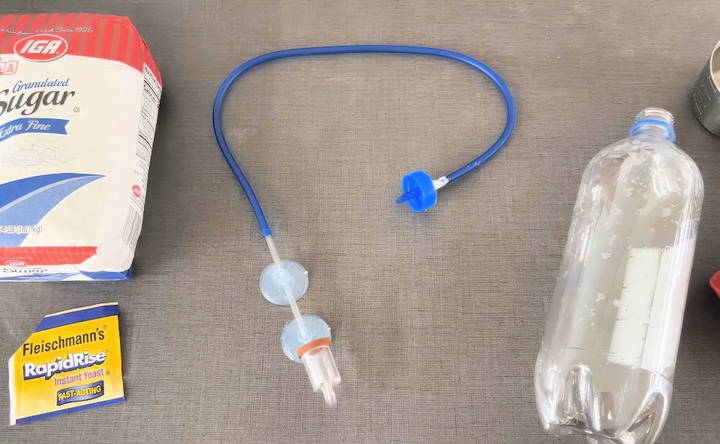
- Granulated Sugar: Granulated sugar is the primary fuel for our CO2 generator. The sugar feeds the yeast in our system, which then ferments and produces CO2. I use the cheapest sugar I can find; there's no need for anything fancy here. In fact, the more basic, the better, as all you need is a pure sugar source.
- Baker's Yeast: Yeast is the magic ingredient here. When sugar meets yeast, fermentation happens, and that produces CO2 as a by-product. You don't need special wine or champagne yeast; the simple baker's yeast I use for making bread works perfectly fine. I usually buy it in bulk because it's cheaper and I use it for baking too.
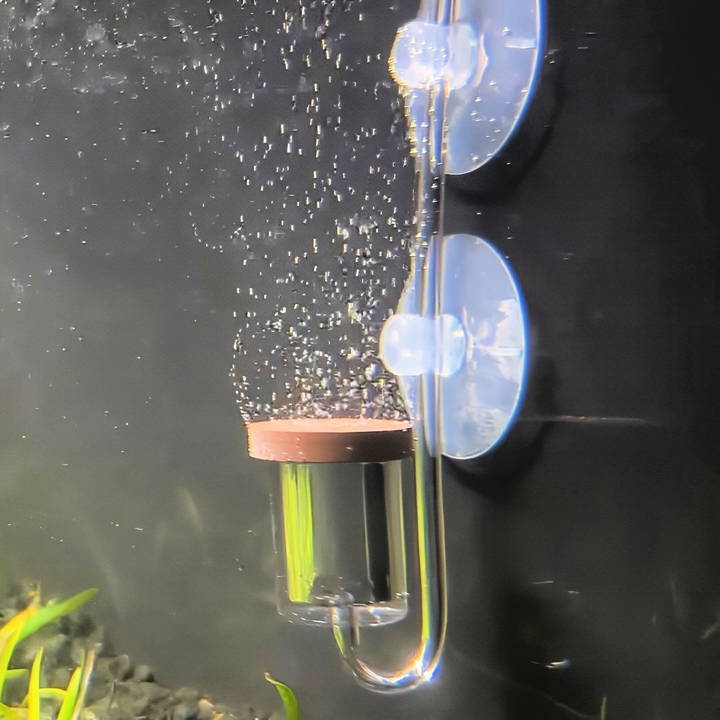
- CO2 Diffuser: I initially tried making my own CO2 diffuser using various DIY methods, but honestly, it wasn't worth the hassle. A good quality diffuser is inexpensive and crucial for efficiently dissolving CO2 into the water. Trust me on this one—just buy a decent diffuser to save yourself the headache.
- Airline Tubing: Airline tubing is how we get the CO2 from our generator (the bottle) into the tank. It's essential to use tubing that fits snugly to prevent any gas from escaping.
- Silicone Sealant (100% Silicone): To make an airtight seal around the tubing where it meets the bottle cap, you'll need silicone sealant. I used some leftover silicone from a home renovation project. Any 100% silicone sealant will do; just make sure it's aquarium-safe.
- A One-Liter Soda Bottle with Cap: The bottle will serve as your CO2 generator. I prefer using a one-liter soda bottle because it's the perfect size for most small to medium tanks and easy to handle. Make sure to keep the cap as you'll be modifying it for the tubing.
- A Funnel, Measuring Cup, and Drill: A funnel makes it easier to get the sugar into the bottle, and a measuring cup helps ensure you're using the correct amounts. A drill and the right-sized drill bit make making a hole in the bottle cap easy and clean. If you don't have a drill, you can use a knife, but it's more challenging and can be unsafe.
Step by Step Instructions
Learn step-by-step instructions on making your own DIY co2 aquarium setup. Easy-to-follow guide for a healthier fish and plant environment.
Step 1: Prepare Your Bottle Cap
Using a drill bit slightly smaller than your airline tubing, carefully drill a hole in the center of your bottle cap. You want this hole to be snug to make an airtight seal. If you don't have a drill, you could use a sharp knife to carve out the hole, but be very careful as it can be tricky to get a precise fit.
Step 2: Attach the Airline Tubing
Cut the end of your airline tubing at an angle and thread it through the hole in the bottle cap. It might take a bit of effort, but that's a good thing—you want it to be tight. You can use pliers to help pull it through if needed. Once the tubing is in place, apply silicone sealant around the hole to seal any gaps. Let this dry completely for a few hours to ensure a perfect airtight seal.
Step 3: Mix Your CO2 Solution
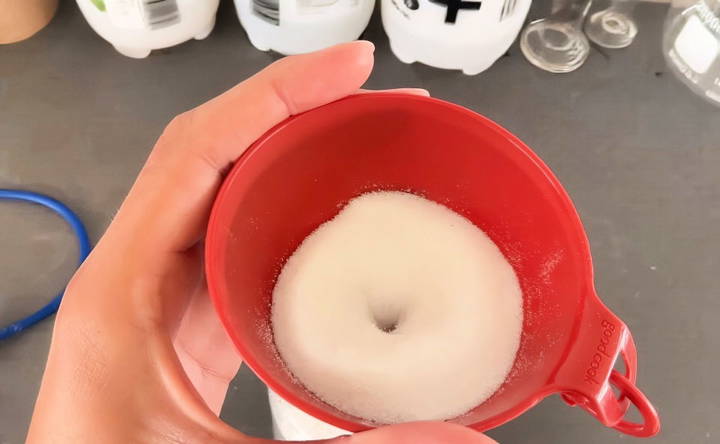
Now it's time to mix up the solution that will generate CO2. Using a funnel, pour one cup of granulated sugar into your one-liter soda bottle. Next, add about a third to half of a packet of yeast. There's no need to use the whole packet; a little goes a long way because yeast grows exponentially once it's in the bottle.
Step 4: Activate the Yeast
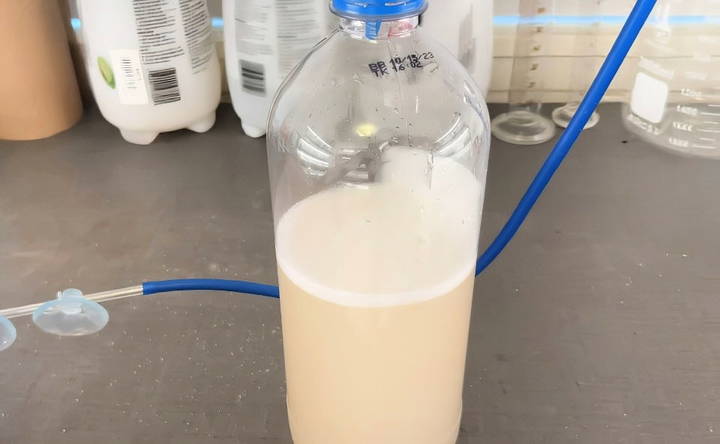
To activate the yeast, fill the bottle about two-thirds full with lukewarm water. Be careful not to use hot water as it can kill the yeast. Once you've added the water, put your thumb over the top of the bottle and shake it vigorously for about 30 seconds to a minute. This helps dissolve the sugar and distribute the yeast evenly throughout the water. You'll know you've done it right when you see foam starting to form on top of the water.
Step 5: Seal the System and Install in Your Aquarium
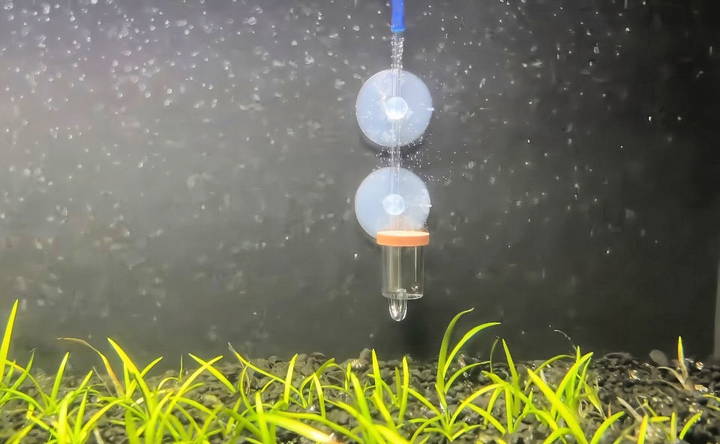
Once the solution is well mixed, screw the cap back onto the bottle. Make sure it's tightly sealed to prevent any CO2 from escaping. Then, place the bottle next to your aquarium and insert the airline tubing into the tank, connecting it to the diffuser.
Make sure the diffuser is positioned in an area with good water flow, like near a circulation pump. This ensures that the CO2 is spread evenly throughout the tank, promoting better diffusion.
Monitoring and Maintaining Your DIY CO2 System
After setting up the system, you'll want to keep an eye on it, especially for the first few days. Depending on the temperature of your room and tank, the CO2 may start producing within a couple of hours.
Tips on Managing Water Backflow
Occasionally, water from the aquarium might backflow into the airline tubing while pressure builds up. You can install a check valve to prevent this or manually remove the diffuser and allow the water to drain out.
Watching Your Fish and Plants
One thing to be mindful of with a DIY CO2 system is that it doesn't have a way to turn off at night when the lights are off. Plants don't photosynthesize without light and can produce CO2 instead of oxygen. If you notice your fish gasping at the surface in the morning, that's a sign of low oxygen levels. In that case, consider running an air pump or air stone at night to maintain oxygen levels.
How Long Will It Last? Adjustments and Tweaks
In my experience, this DIY CO2 recipe will generally last about two weeks. This can vary depending on the room temperature—warmer temperatures will cause the yeast to consume the sugar faster, while cooler temperatures will slow down the process.
If you find that the CO2 production is slowing down sooner than expected, you might need to adjust the sugar or yeast amounts slightly. Every aquarium is different, so a bit of experimentation will help you find the right balance for your setup.
Using a DIY CO2 system has been a game-changer for my planted aquarium. Not only is it cost-effective, but it also provides a sense of control over my tank's environment that I wouldn't get with pre-made systems. The plants in my aquarium have thrived since implementing this setup, and the growth rates have noticeably improved.
If you're looking to enhance your planted aquarium without spending a lot of money, I highly recommend giving this a try. It's a simple project that can be completed in under an hour and requires minimal materials and effort.
Advanced Tips and Tricks
Discover advanced tips for DIY co2 reactors, assembly instructions, and automation. Ensure optimal co2 diffusion and troubleshoot common issues with ease.
Automating CO2 Injection
Automating your CO2 injection can save time and ensure consistent CO2 levels in your aquarium. Here's how you can do it:
- Use a Timer: Connect your CO2 system to a timer. Set it to turn on and off at specific times. This helps maintain a regular CO2 schedule, which is crucial for plant health.
- Install a Solenoid Valve: A solenoid valve can be connected to your timer. It controls the flow of CO2, turning it on and off automatically. This prevents CO2 from being released when the lights are off, saving CO2 and preventing excess buildup.
- Monitor CO2 Levels: Use a drop checker or CO2 indicator solution. These tools help you monitor CO2 levels and make adjustments as needed. Aim for a green color in the drop checker, indicating optimal CO2 levels.
DIY CO2 Reactors
A CO2 reactor can improve the efficiency of CO2 diffusion in your aquarium. Here's a simple way to build one:
Materials Needed:
- A plastic bottle (1-2 liters)
- Airline tubing
- A powerhead or water pump
- Bio balls or ceramic rings
Assembly Instructions:
- Step 1: Drill two holes in the bottle cap. Insert airline tubing through one hole. This will be the CO2 inlet.
- Step 2: Attach the other end of the tubing to your CO2 system.
- Step 3: Fill the bottle with bio balls or ceramic rings. These materials help break up CO2 bubbles, increasing contact time with water.
- Step 4: Connect the powerhead or water pump to the second hole in the bottle cap. This will circulate water through the reactor.
- Step 5: Place the reactor in your aquarium. Ensure the powerhead is submerged and running.
Tips for Optimal CO2 Diffusion
- Positioning: Place the CO2 diffuser or reactor near the water flow. This helps distribute CO2 evenly throughout the tank.
- Regular Maintenance: Clean the diffuser or reactor regularly to prevent clogging and ensure efficient CO2 diffusion.
- Adjusting CO2 Levels: Start with a low CO2 flow rate and gradually increase it. Monitor your plants and fish for signs of stress. Adjust as needed to find the optimal balance.
Troubleshooting Common Issues
- Inconsistent CO2 Production: Check for leaks in your CO2 system. Ensure all connections are secure and airtight.
- Algae Growth: Excess CO2 can lead to algae growth. Balance CO2 levels with proper lighting and nutrient dosing.
- Fish Stress: High CO2 levels can stress fish. Monitor their behavior and adjust CO2 levels if you notice any signs of distress.
By following these advanced tips and tricks, you can optimize your DIY CO2 system for better plant growth and a healthier aquarium.
Maintaining Your CO2 System
Proper maintenance of your CO2 system is crucial for the health of your aquarium plants and fish. Here's a comprehensive guide to help you keep your system running smoothly.
Monitoring CO2 Levels
- Use a Drop Checker: A drop checker is a simple tool that changes color based on CO2 levels. Place it in your aquarium and check it regularly. Aim for a green color, which indicates optimal CO2 levels.
- Observe Plant and Fish Behavior: Healthy plants will show vibrant growth and color. Fish should be active and not gasping at the surface. Any signs of distress may indicate CO2 levels are too high or too low.
Regular Equipment Checks
- Inspect for Leaks: Regularly check all connections, tubing, and seals for leaks. A simple way to do this is to apply soapy water to the connections and look for bubbles.
- Clean the Diffuser: Over time, the diffuser can get clogged with debris and algae. Soak it in a bleach solution (1 part bleach to 10 parts water) for a few hours, then rinse thoroughly before placing it back in the tank.
Replacing CO2 Sources
- Yeast-Based Systems: If you're using a yeast-based CO2 system, replace the mixture every 2-4 weeks. Signs that it's time to replace include a decrease in bubble rate or no bubbles at all.
- Citric Acid and Baking Soda Systems: For citric acid and baking soda systems, replace the mixture every 3-4 weeks. Monitor the pressure gauge to ensure consistent CO2 production.
Adjusting CO2 Levels
- Start Low and Increase Gradually: Begin with a low CO2 flow rate and gradually increase it. This helps prevent sudden changes that can stress your fish and plants.
- Use a Bubble Counter: A bubble counter helps you measure the CO2 flow rate. Aim for 1 bubble per second for a 20-gallon tank, adjusting as needed based on plant and fish response.
Troubleshooting Common Issues
- Inconsistent CO2 Production: If your CO2 production is inconsistent, check for leaks and ensure the mixture is fresh. For yeast-based systems, ensure the temperature is stable, as fluctuations can affect yeast activity.
- Algae Growth: Excess CO2 can lead to algae growth. Balance CO2 levels with proper lighting and nutrient dosing. Consider adding algae-eating fish or snails to help control algae.
- Fish Stress: High CO2 levels can stress fish. Signs include gasping at the surface and lethargy. Reduce CO2 flow and increase aeration if you notice these signs.
Safety Precautions
- Handle Chemicals Carefully: When mixing CO2 solutions, handle chemicals like citric acid and baking soda with care. Wear gloves and eye protection to avoid contact.
- Ventilate the Area: Ensure your workspace is well-ventilated when preparing CO2 mixtures to avoid inhaling fumes.
By following these maintenance tips, you can ensure your CO2 system operates efficiently, promoting a healthy and vibrant aquarium.
FAQs About DIY CO2 Aquarium Systems
Explore our faqs about DIY co2 aquarium systems to enhance plant growth, improve tank health, and make a thriving aquarium environment.
A DIY CO2 aquarium system is a homemade setup that adds carbon dioxide (CO2) to your aquarium. CO2 is essential for the growth and health of aquatic plants. In an aquarium, plants use CO2 for photosynthesis, which helps them grow and produce oxygen. Without enough CO2, plants can become weak and may not thrive.
Maintaining CO2 levels is crucial for the health of your plants and fish. You can monitor CO2 levels using a drop checker, which changes color based on the CO2 concentration. Adjust the mixture or the amount of CO2 being released if needed. Regularly check and replace the yeast mixture to ensure a consistent CO2 supply.
Using a DIY CO2 system has several benefits:
Cost-effective: It is cheaper than commercial CO2 systems.
Improved plant growth: Plants grow faster and healthier with adequate CO2.
Better oxygen levels: Healthy plants produce more oxygen, benefiting fish and other aquatic life.
While DIY CO2 systems are generally safe, there are a few risks to be aware of:
Overdosing CO2: Too much CO2 can harm fish. Always monitor CO2 levels.
Leaks: Ensure all connections are secure to prevent leaks.
Maintenance: Regularly check and maintain the system to avoid any issues.
Troubleshooting a DIY CO2 system involves identifying and resolving common problems to ensure it functions effectively. Here are some tips:
No CO2 production: If no bubbles are forming, check the yeast mixture. Ensure the water is warm (not hot) and the yeast is active. Sometimes, adding a pinch of baking soda can help.
Leaks: Inspect all connections and seals. Use silicone sealant if necessary to prevent leaks.
Fluctuating CO2 levels: Consistent CO2 output is crucial. If levels fluctuate, try using a more stable mixture or adding a second bottle to balance the output.
Algae growth: Excess CO2 can promote algae growth. Adjust the CO2 levels and ensure proper lighting and nutrient balance to control algae.
Final Thoughts
Always keep an eye on your tank's health—observe both the plants and the fish to make sure everything is balanced. DIY solutions require a bit more monitoring, but the rewards are well worth it. Your tank will not only look more vibrant, but you'll also get the satisfaction of knowing you built something that enhances your aquarium's ecosystem.


