Making your own wooden coasters is a satisfying and practical DIY project that blends craftsmanship with creativity. Whether you're looking to upcycle scrap wood or make custom gifts for friends and family, coasters offer an excellent entry point into woodworking. They're simple to make, require minimal materials, and can be tailored to suit any style or occasion. In this guide, we'll cover every aspect of making DIY wooden coasters, from selecting wood to finishing touches, providing detailed instructions, helpful tips, and advice on batching them for gifts or sales.
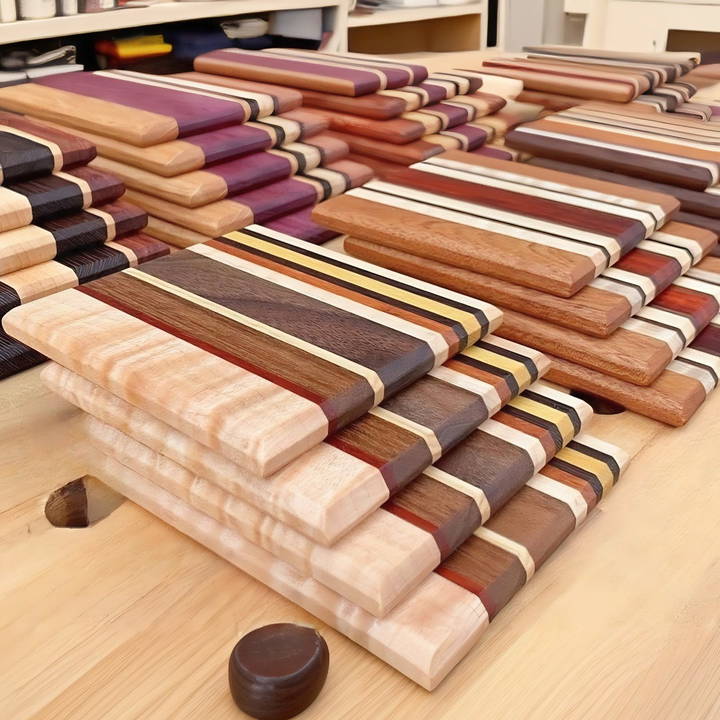
Why DIY Coasters?
Before diving into the process, it's important to understand why wooden coasters are such a great project. Coasters are:
- Inexpensive to Make: They require only small pieces of wood, making them a great way to use up scraps from other projects.
- Customizable: You can experiment with different shapes, wood types, and finishes to match your personal style or décor.
- Perfect for Gifting or Selling: Handcrafted coasters make thoughtful gifts, and with a few tweaks, they can also be sold as premium items at craft fairs or online.
Now, let's explore the step-by-step process to make your own coasters.
Materials You'll Need
- Scrap wood: Ideal for coasters, scrap wood pieces from cutting boards, shelves, or other woodworking projects work wonderfully. Consider using hardwoods like walnut, oak, maple, or even exotic woods like purpleheart or wenge for a rich and vibrant finish.
- Wood glue: A strong adhesive like Titebond III is water-resistant, making it perfect for coasters.
- Clamps: Parallel clamps or pipe clamps to hold the wood together during glue-up.
- Table saw or miter saw for cutting wood to size.
- Sander or planer: To smooth out rough surfaces.
- Router: For adding edge profiles, such as chamfers or round-overs.
- Finishing oil: Osmo Polyx, mineral oil, or a polyurethane finish will protect the wood and enhance its natural beauty.
- Optional: Anti-skid pads for the bottom of the coasters.
Step by Step Instructions
Learn how to make DIY coasters with our step-by-step guide, from wood selection to finishing touches. Perfect your craft with expert tips and design variations!
Step 1 - Wood Selection
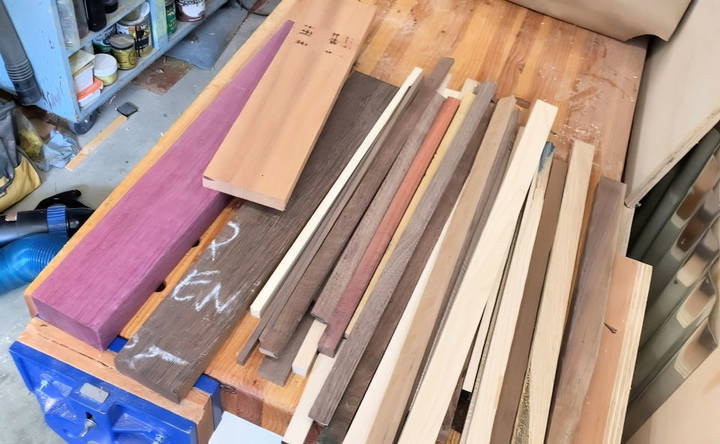
Wood selection is key when crafting coasters. Not only will the type of wood impact the final look, but it also affects durability. Hardwood species, such as walnut, cherry, oak, and maple, are popular choices due to their beauty and longevity.
For those looking to make their coasters more colorful or unique, consider incorporating exotic woods like Purpleheart, wenge, or Sapelli. These woods add vibrant contrasts when combined with lighter varieties.
Symmetry vs. Asymmetry
Before you start cutting, decide on the overall design aesthetic you want. Do you prefer symmetrical patterns where the wood pieces are mirrored, or do you lean toward a more random, asymmetrical look? Symmetrical patterns tend to offer a cleaner, more structured appearance, while asymmetry can make an artistic, freeform style.
Step 2 - Cutting and Preparing the Wood
Once you've chosen your wood, it's time to cut it down to size. Most coasters are around 4 to 5 inches square, but you can adjust the size to suit your preference.
Cutting Strips
Start by ripping your wood into strips, typically ½ inch to ⅝ inch thick. It's a good idea to cut extra material so you have some leeway during the glue-up and sanding process.
Using a table saw, rip the wood into pieces of varying widths. Having strips of different sizes will allow you to make interesting patterns when you glue them up later.
Surface Preparation
Before glue-up, it's essential to smooth the edges of your wood. Any rough or uneven surfaces can cause issues when gluing. If you have a planer or a drum sander, run the pieces through it to ensure each edge is perfectly flat. Alternatively, you can use a sanding block to smooth the edges by hand.
Step 3 - Glue-Up
Now comes the exciting part—assembling your coaster blanks. Here's how to do it:
- Arrange the Wood Strips: Lay out your pieces in the desired pattern. Remember to mix thick and thin pieces for contrast, and think about how the colors and grain patterns will complement each other.
- Glue: Apply a generous amount of wood glue to the edges of each strip and press them together. Be sure to use enough glue for a strong bond but not so much that it squeezes out excessively.
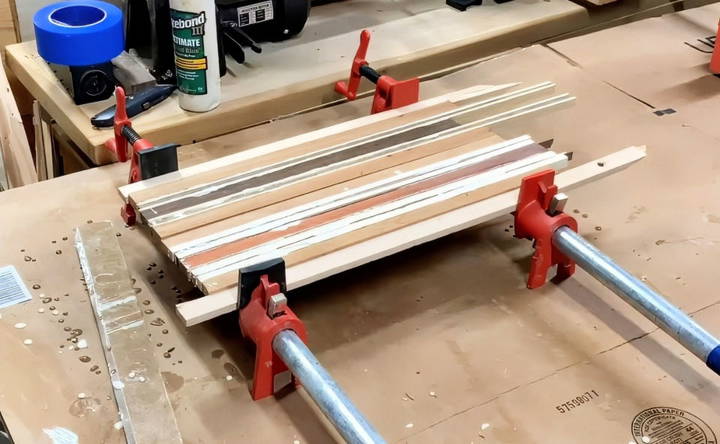
- Clamp: Place the glued-up pieces in clamps, making sure the strips stay aligned. Use scrap wood (called cauls) on the top and bottom of the stack to keep the pieces flat during the clamping process. Tighten the clamps until glue squeeze-out appears along the seams.
- Dry Time: Let the glue dry according to the manufacturer's instructions, typically 24 hours for the best bond.
Step 4 - Planing and Sanding
Once the glue has dried, your coaster blanks will likely be uneven or rough on the surface. At this stage, it's time to smooth everything out.
Planing for a Smooth Surface
Using a planer will give you the smoothest, most uniform finish. Run each glued-up blank through the planer, removing only a little material at a time until both sides are flat and smooth.
If you don't have a planer, a drum sander or belt sander can achieve similar results. In the absence of these tools, you can use a hand plane or even sand the surface by hand—though it will take considerably longer.
Sanding for Perfection
After planing, use a power sander or sanding block to refine the surface of the wood. Start with coarse-grit sandpaper (around 80 or 120 grit) and gradually work your way up to finer grits (220 grit or higher). Be sure to sand all surfaces, including the edges.
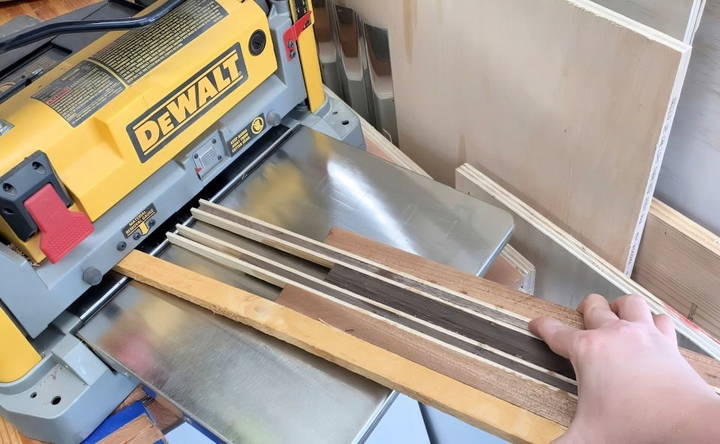
Sanding Jig for Efficiency
To speed up the sanding process, especially when making multiple coasters, you can make a simple sanding jig. This can be done by attaching scrap plywood to a workbench, making a snug pocket where the coaster fits. The jig holds the coaster in place while you sand, preventing it from slipping around.
Step 5 - Cutting Coasters to Size
With your blanks smooth and ready, it's time to cut them down to individual coasters.
Squaring Off the Ends
Using a table saw or crosscut sled, square off the ends of your coaster blank. Measure carefully to ensure that each coaster will be the same size. Most coasters are between 4 and 5 inches in width, but you can make them any size you prefer.
Cut each blank into equal squares. Be sure to make precise cuts to avoid variations in size.
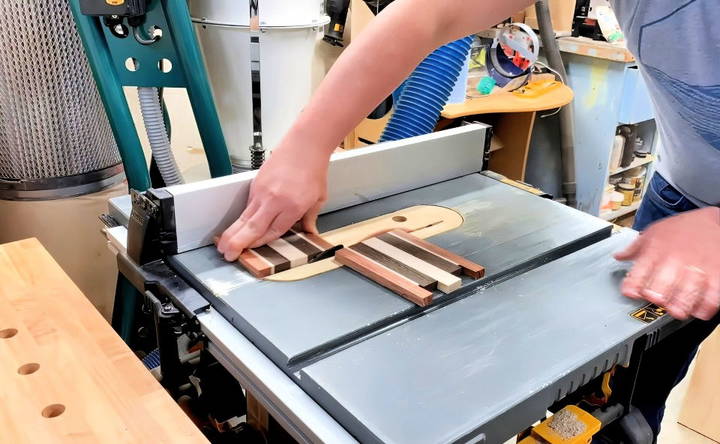
Adding Edge Profiles
For a more polished look, consider adding an edge profile to your coasters. A simple chamfer or round-over can add a professional touch and also make the coasters more comfortable to handle.
Use a router table with a chamfer or round-over bit to achieve the desired edge. If you don't have a router, you can round the edges slightly by hand using sandpaper.
Step 6 - Finishing Touches
Now that your coasters are cut and sanded, the final step is to apply a finish. The finish not only enhances the wood's natural beauty but also protects it from moisture and wear.
Finishing Options
- Oil Finishes: Danish oil, tung oil, or boiled linseed oil will penetrate the wood, enhancing the grain and providing a natural look. These finishes are easy to apply but may require regular maintenance as the oil wears off.
- Polyurethane: For a more durable, water-resistant finish, consider using a wipe-on or brush-on polyurethane. Polyurethane makes a protective film on the surface of the wood, making it more resistant to spills and moisture. This is a good option if your coasters will see heavy use.
- Hard Wax Oils: Products like Osmo Polyx combine oil and wax for a finish that's both protective and natural-looking. These finishes are easy to apply and don't require as many coats as polyurethane.
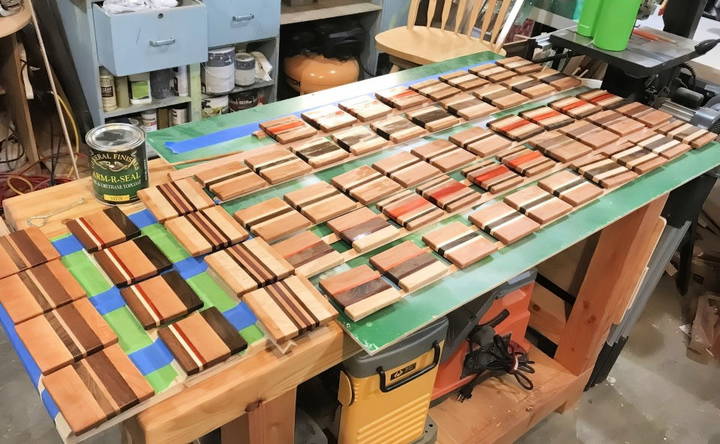
Apply the finish according to the manufacturer's instructions. For most finishes, you'll want to apply at least two coats, sanding lightly between coats for the smoothest result.
Anti-Skid Pads
To prevent the coasters from sliding around, consider attaching small anti-skid pads to the bottom. These can be found at most hardware stores and are easy to apply.
Step 7 - Optional: Selling Your Coasters
If you're thinking about selling your coasters, there are a few additional considerations to keep in mind.
Pricing Your Coasters
One of the first things to consider if you want to sell your coasters is pricing. Coasters might seem like a small and simple product, but the time, effort, and materials involved in making them can add up quickly. As a general rule, the price of handcrafted items should reflect not only the cost of materials but also the time spent on labor and any overhead costs you may have (like tool maintenance and shop costs).
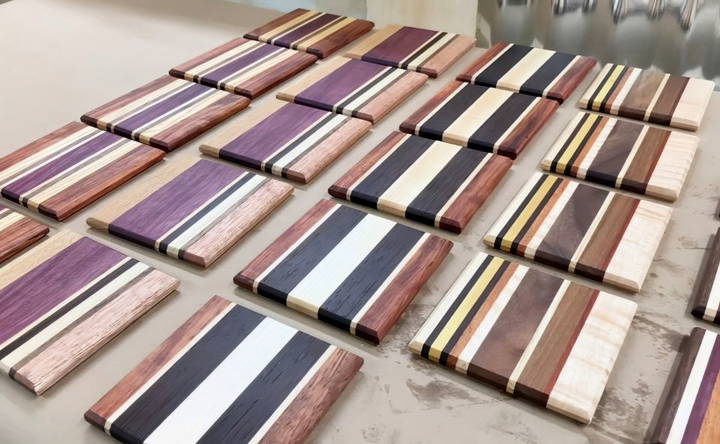
Here's a basic breakdown of factors to consider when pricing your coasters:
- Material Costs: Exotic hardwoods like wenge or purpleheart are more expensive than standard domestic woods like oak or maple. Factor in the cost of these materials when pricing your coasters.
- Labor: Consider how long it takes you to complete a set of coasters from start to finish. This includes cutting, glue-up, sanding, and finishing. Break down your hourly rate to ensure you're compensating yourself for your time.
- Finishing Supplies: Finishes like polyurethane, hard wax oils, and even sandpaper add to the total cost. Include the cost of finishing supplies, especially if you're using higher-end products.
- Packaging: If you plan to sell your coasters online or at a craft fair, packaging is another cost to factor in. Attractive packaging can help justify a higher price point and improve your product's overall appeal.
Market Research
Once you've calculated your costs, it's helpful to do some research on the market. Search for similar handmade coasters online or at local craft shows to see how they are priced. A set of four handcrafted coasters can range anywhere from $20 to $50 or more, depending on the materials used and the craftsmanship involved.
Keep in mind that coasters are often viewed as a low-cost gift item, so while you may be able to charge a premium for the uniqueness and quality of your product, most customers won't expect to pay more than $50 for a set of four coasters. Pricing too high might alienate potential buyers, but underpricing can also undervalue your work.
Making a Niche
One way to stand out in the market is to find a niche or unique selling point for your coasters. This could be:
- Custom designs: Offering personalized engraving or customization can attract buyers looking for unique, one-of-a-kind gifts.
- Eco-friendly options: Use sustainably sourced wood or upcycle materials, which appeals to eco-conscious consumers.
- Unique wood combinations: Using rare or exotic woods can make a high-end product that appeals to luxury buyers.
- Bundled products: Consider offering coasters as part of a bundle, paired with items like handmade drink trays or bottle openers to increase perceived value.
Selling Online or In-Person
If you're serious about selling your coasters, there are a variety of platforms to consider:
- Etsy: One of the most popular online marketplaces for handcrafted goods, Etsy is a great platform to showcase your coasters. The platform allows for easy setup and provides a built-in customer base.
- Local Craft Fairs: Attending local craft fairs or markets is a great way to sell directly to customers. It also allows you to get feedback on your products in person and build connections with potential buyers.
- Online Store: If you plan to sell a high volume of products, setting up your own online store via Shopify or another platform can give you more control over pricing and branding.
- Social Media: Platforms like Instagram and Facebook are great tools for marketing your handmade products. You can showcase the creation process, highlight the materials used, and engage with potential customers.
Coaster Design Variations
Once you've mastered the basic square or circular coasters, there are many design variations you can experiment with to make your coasters stand out. These variations can be used to add a personal touch or make them more visually appealing.
Shape Variations
While most coasters are typically square or circular, you can get creative with different shapes:
- Hexagonal Coasters: These are trendy and visually interesting. They can be cut using a table saw or a miter saw set to 30 degrees to make precise angles.
- Geometric Patterns: Instead of simple straight lines, consider cutting your coasters into irregular or geometric shapes like triangles or parallelograms. These can be arranged to form interesting patterns.
- Custom Shapes: If you're looking to get really creative, try using a jigsaw to cut your coasters into unique shapes like animals, states, or any design your imagination can conjure.
Wood Inlays
Incorporating wood inlays into your coasters adds a level of complexity and beauty to your designs. To make inlays:
- Cut a thin strip of contrasting wood and fit it into a groove that you've routed or chiseled out of the main body of the coaster.
- Glue the strip into place, sand it smooth, and finish the coaster as usual.
Inlays provide a stunning visual contrast and can be used to make intricate patterns or even spell out initials for personalized gifts.
Resin Coasters
For those looking to branch out into new materials, resin coasters offer a fantastic way to add color and creativity. You can pour clear or colored resin into wood voids or cracks, making beautiful effects as the resin hardens. This technique is particularly useful for pieces of wood with natural imperfections, as it turns flaws into unique design elements.
Here's how you can make resin and wood coasters:
- Prepare the Wood: Select wood with interesting cracks or voids. Sand and clean the surface.
- Build a Mold: Use a silicone mold or make one with tape to contain the resin while it cures.
- Pour the Resin: Mix the resin and pour it into the gaps or voids in the wood. You can add pigments, glitter, or even small objects like dried flowers to the resin for a personalized touch.
- Sand and Finish: Once the resin has cured, sand the coaster to smooth out the surface and apply your preferred finish.
Caring for Your Wooden Coasters
Wooden coasters, like all wood products, require some care to ensure they last a long time and maintain their beauty. Here are some tips for keeping your coasters in tip-top shape:
- Avoid Prolonged Exposure to Water: While your coasters are designed to protect surfaces from moisture, they should not be left in standing water for extended periods. Be sure to wipe up any water that accumulates on the surface.
- Re-oil Regularly: If you've used an oil finish, such as mineral oil, you'll need to reapply the finish periodically. Simply wipe on a new coat of oil and buff off the excess.
- Handle with Care: Though wooden coasters are durable, they can still be scratched or dented if dropped or mishandled. Treat them gently to avoid damage.
- Clean with a Damp Cloth: If your coasters become dirty, a damp cloth is all you need to wipe them clean. Avoid using harsh chemicals or abrasive cleaners, as they can damage the finish.
Final Thoughts
DIY wooden coasters are not only a fun project for woodworkers of all skill levels but also a practical and aesthetically pleasing addition to any home. From selecting the right wood to choosing a finish, every step of the process can be tailored to your preferences and creativity. Whether you're making them as gifts, for personal use, or even to sell, these coasters are a great way to use up scrap wood and show off your woodworking skills.
By experimenting with different designs, materials, and finishes, you can make coasters that are truly one-of-a-kind. Plus, with the techniques discussed in this guide—such as batching for efficiency and incorporating design variations like inlays and resin—you'll be able to turn a simple project into a standout piece of craftsmanship.
So grab some scrap wood, fire up your tools, and start crafting your own unique set of DIY wooden coasters today!
FAQs About DIY Coasters
Learn answers to frequently asked questions about DIY coasters, including materials, techniques, and tips for making your own coasters at home.
To protect wood coasters from water marks, apply a waterproof finish like polyurethane, lacquer, or tung oil. These sealants form a barrier, preventing moisture from penetrating the wood. Additionally, using a mineral oil or beeswax blend can help maintain the coasters' natural look while providing some water resistance.
If your coasters are uneven, you can use a drum sander to flatten them. For coasters with minimal thickness, wetting the wood slightly and clamping them together while drying might help, though this approach may not always work.
Both face grain and edge grain work well for coasters. Edge grain offers more durability, while face grain highlights the wood’s natural patterns. The choice depends on your preference for aesthetics versus longevity.
Osmo Polyx is a popular choice for durability and water resistance. For a more natural look, you can use a mineral oil and beeswax blend. Both finishes have trade-offs, so select based on the desired appearance and how the coasters will be used.
Using a drum sander instead of hand-sanding can save significant time. Additionally, sanding the full wood blank before cutting into individual coasters reduces the need for sanding edges afterward.


