Building a DIY coat rack can be a fun and practical project for your home. This guide will show you how to make a coat rack using simple materials and basic tools. You'll be able to customize your DIY coat rack to match your decor. Plus, it's an affordable way to add some organization to your space.
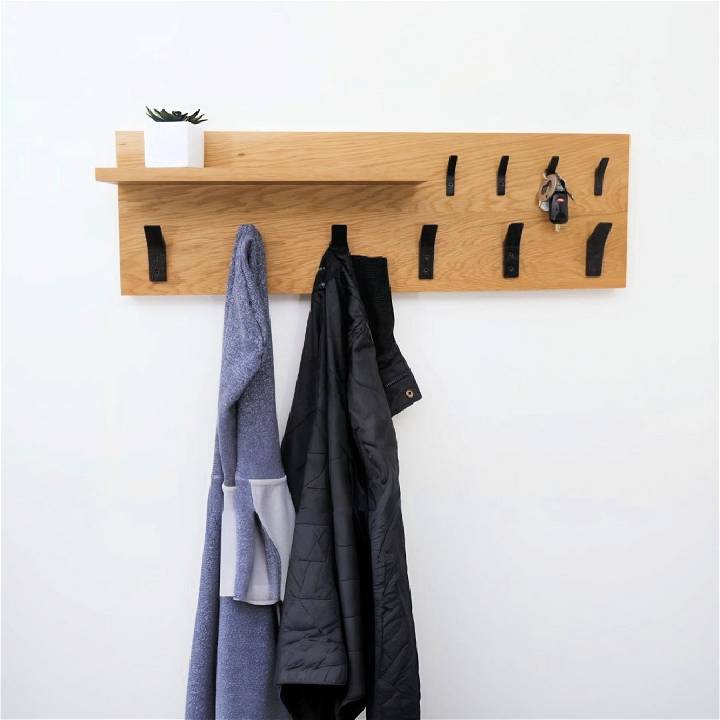
We'll cover everything from gathering your materials to the final assembly. The step-by-step instructions are easy to follow, making it a great project for anyone. By the end, you'll have a durable and stylish coat rack that you made yourself. Keep reading to explore the detailed steps and tips for making your own coat rack.
Make your own DIY coat rack effortlessly with our step-by-step guide. Perfect for beginners, this project adds functionality and style to any space.
Gathering Materials and Tools
Before diving into any project, the first step is always to gather your materials and tools. For this modern coat rack, I primarily used white oak for the main structure due to its durability and aesthetic grain. Additionally, ash was utilized for parts that would remain unseen, serving as a sturdy and cost-effective choice.
Why these materials?
White oak offers a beautiful finish and is robust enough to support coats and accessories, while ash, though not as visually striking, provides the necessary strength without breaking the bank.
Tools Needed:
- Table saw and planer: Essential for cutting and surfacing wood.
- Palm router: Ideal for removing glue residue and ensuring a smooth surface.
- Clamps: Critical for holding pieces together securely during the gluing process.
- Miter saw or a hand saw: Necessary for making precise miter cuts.
Step by Step Instructions
Learn how to make a DIY coat rack with step-by-step instructions: surfacing boards, using a french cleat system, and crafting custom hooks.
1. Surfacing and Joining the Boards
The initial challenge was to surface the white oak boards and join them to form a larger panel, which would serve as the back of the rack. This required careful planning and execution, as any misalignment could affect the final product's appearance and functionality.
2. Implementing the French Cleat System
A French cleat system was chosen for mounting the coat rack to the wall. This method not only simplifies the installation process but also allows for easy adjustments and provides robust support. Cutting a 45-degree angle into a piece of wood and securing one half to the rack and the other to the wall ensures stability and ease of hanging.
3. Crafting Custom Hooks
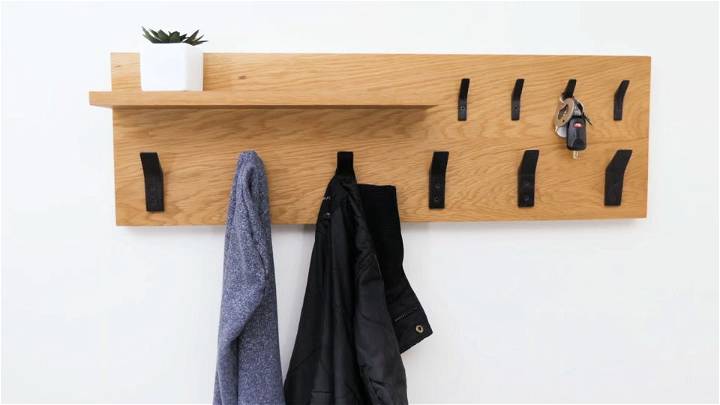
The hooks were possibly the most creatively fulfilling part of the project. Made from the same white oak, they were cut into L-shapes with carefully measured angles to ensure they were both functional and aesthetically pleasing. The most exciting aspect was ebonizing these hooks using a mixture of steel wool and white vinegar, a process that added a gorgeous dark finish to the wood.
4. The Finish
For a project like this, finishing is not just a final step—it's an opportunity to bring out the natural beauty of the wood. After sanding the surfaces up to 400 grit by hand, Odi’s oil was applied. This finish not only enhanced the grain of the wood but also provided a natural, tactile feel to the coat rack that commercial products seldom offer.
Lessons Learned
Discover the importance of precision, experimenting with finishes, and the joy of learning in our comprehensive lessons-learned guide.
The Importance of Precision
One takeaway from this project was the critical importance of precision. Whether surfacing the wood, making miter cuts for the continuous grain at the ends, or cutting the hooks, every measurement and every cut needed to be exact. This project reinforced the value of patience and attention to detail in woodworking.
Experimenting with Finishes
Ebonizing the hooks was a leap into the relatively unknown territory of DIY wood finishes. This experiment not only broadened my knowledge of woodworking techniques but also resulted in a stunning visual contrast that elevated the entire project.
The Joy of Learning
Perhaps the most significant lesson learned was the joy found in acquiring new skills and knowledge. From the initial planning stages to the final touches, this project was a journey of discovery. And while not everything went perfectly according to plan, the challenges encountered along the way only made the process more rewarding.
Design Customization Ideas
When making your own coat rack, the design possibilities are endless. Here are some ideas to inspire a unique and functional piece that reflects your personal style:
- Choose Your Style: Think about the overall aesthetic of the space where the coat rack will go. Whether it’s modern, rustic, minimalist, or eclectic, your coat rack can be a statement piece that complements your home’s decor.
- Selecting Materials: Wood is a classic choice, offering warmth and versatility. For a more industrial look, consider using metal pipes or reclaimed materials. If you’re aiming for a lighter Scandinavian vibe, opt for pale woods and simple, clean lines.
- Color Schemes: Paint or stain your coat rack to match or contrast with your room’s color palette. Bright colors can add a playful touch, while darker hues build a more sophisticated look.
- Functional Add-Ons: Incorporate shelves, drawers, or baskets for additional storage. This is especially useful for keeping accessories like hats, gloves, and scarves organized.
- Personal Touches: Add hooks of various sizes to accommodate different items. You can also personalize your coat rack with stencils, carvings or by attaching decorative knobs.
- Space-Saving Designs: If you’re short on space, consider a wall-mounted coat rack or a corner design. Foldable or extendable racks are also great for small areas.
- Kid-Friendly Features: For households with children, build a lower section on the coat rack that’s easily accessible to them. Use fun shapes and colors to encourage kids to hang up their coats.
- Eco-Friendly Options: Use sustainable materials or repurpose old furniture pieces to make your coat rack. This not only reduces waste but also gives your coat rack a unique story.
The key to a successful DIY project is to make it your own. Use these ideas as a starting point, and let your creativity lead the way.
Troubleshooting Common Issues
Building a DIY coat rack can be a rewarding project, but sometimes, you might encounter a few hiccups along the way. Here’s a guide to help you solve some common issues:
Wood Splitting
- Cause: Drilling too close to the edge or using screws that are too large.
- Solution: Pre-drill holes to prevent splitting, and choose screws appropriate for the wood’s thickness.
Rack Wobbling
- Cause: Uneven floor or uneven cut on the coat rack’s legs.
- Solution: Adjust the length of the legs until the rack stands firm, or add felt pads under the legs to balance out minor unevenness.
Hooks Coming Loose
- Cause: Insufficient anchoring or heavy load.
- Solution: Use wall anchors if mounting on drywall, and ensure hooks are screwed in tightly. Distribute weight evenly across all hooks.
Stain Not Adhering
- Cause: The surface is not properly prepared or is an incompatible stain type.
- Solution: Sand the wood thoroughly before staining, and use a pre-stain wood conditioner if needed. Make sure the stain is suitable for your wood type.
Paint Chipping
- Cause: Poor quality paint or lack of primer.
- Solution: Use high-quality paint and apply a primer first to ensure better adhesion and durability.
Difficulty Hanging
- Cause: Lack of proper tools or unclear mounting instructions.
- Solution: Use a level to ensure your coat rack is hung straight. If necessary, seek assistance or use a stud finder to locate the best spot for mounting.
Patience and planning are essential to overcome challenges. Avoid rushing, and prioritize safety with tools. These tips will help you build a sturdy, stylish coat rack.
FAQs About DIY Coat Rack
Discover essential faqs about DIY coat rack projects. Learn tips, materials, and techniques to build your own unique coat rack.
Consider the following when selecting a design:
Space: Measure the area where you’ll place the rack.
Style: Match the rack with your home’s decor.
Functionality: Decide if you need extra features like shelves or storage.
Skill Level: Choose a design that matches your crafting abilities.
Absolutely! There are many designs suitable for beginners. Look for plans labeled as “easy” or “for beginners.” These usually require minimal tools and have straightforward instructions. Start with a basic design and as you gain confidence, you can try more complex projects.
Personalizing your coat rack can be fun and creative. Here are some ideas:
Paint: Choose a color that complements your room.
Decorative Hooks: Find unique hooks that express your personality.
Add-ons: Consider adding a shelf or a chalkboard for notes.
Themes: Build a theme-based rack, like nautical or rustic.
Safety is paramount. Here are some tips:
Wear Safety Gear: Use gloves, goggles, and a mask when cutting or sanding wood.
Read Instructions: Understand the steps before starting.
Secure Materials: Clamp down wood when sawing or drilling.
Tool Safety: Use tools according to their instructions and maintain them properly.
To ensure your coat rack stands the test of time, follow these tips:
Choose Quality Materials: Opt for hardwoods like oak or maple for strength.
Secure Joinery: Use screws and wood glue for a firm hold.
Proper Anchoring: When mounting, anchor the rack to wall studs, not just drywall.
Even Distribution: Space hooks evenly to distribute weight and avoid strain on any one point.
Maintenance: Tighten any loose screws periodically and check for wear.
Final Thoughts
Wrapping up, making a DIY coat rack is a fun and rewarding project that adds a personal touch to your home. By following the steps in our guide on how to make a DIY coat rack, you’ll have a functional and stylish piece in no time. Remember, this guide about how to make a coat rack doesn’t have to be complicated; with a few materials and some creativity, you can craft a beautiful and useful addition to your space.


