Starting a DIY cold frame project was one of my most satisfying gardening experiences. I decided to build it to extend my growing season and protect my plants. Understanding the basics was simple, and gathering materials like wood and old windows felt empowering. With some effort and patience, I saw the benefits almost immediately as my plants thrived.
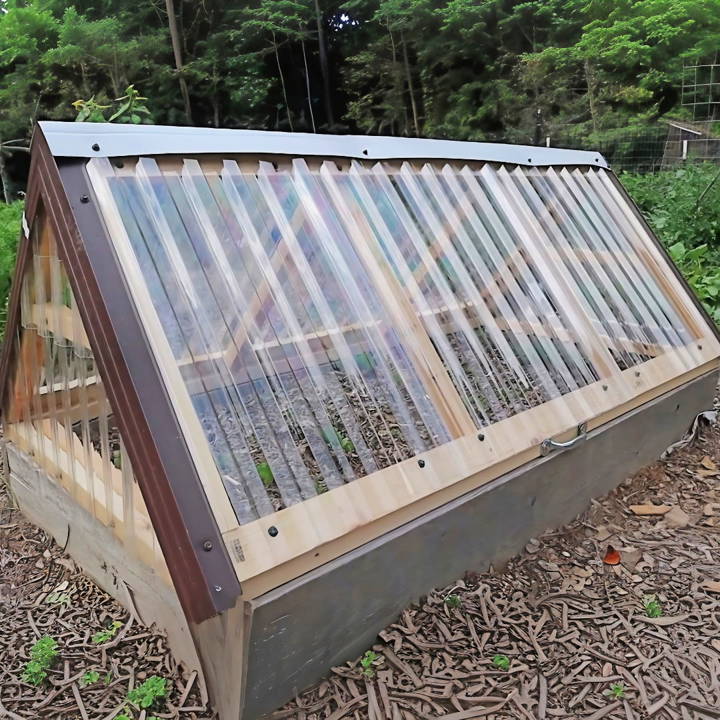
My DIY cold frame helped me grow vegetables even when the weather turned cold. I followed easy steps, making sure to measure everything correctly and secure each part tightly. Seeing those first green sprouts during chilly days made me feel proud. You can experience this, too; this guide will help you build your own cold frame easily.
Gathering Materials and Tools
Learn essential tips for gathering materials and tools, including polycarbonate panels, cedar two-by-twos for frames, and additional materials.
Why Polycarbonate Panels?
Polycarbonate panels were my top choice for their durability and clearness, allowing maximum sunlight while providing excellent insulation. Unlike regular plastic that might need frequent replacing, polycarbonate offers longevity with minimal maintenance.
Cedar Two-By-Twos for the Frame
Cedar was selected for its natural resistance to rot and pests, essential qualities for any outdoor garden structure. The base and frame of the cold frame were crafted from cedar two-by-twos, providing a sturdy foundation that's designed to last.
Additional Materials
- Hinges and a handle for the lid, ensuring easy access to the plants inside.
- Scrap metal trim and an old fascia for the ridge cap, utilized for their availability and cost-effectiveness. These materials were repurposed to protect the cold frame's top edge.
- A selection of tools including a saw, drill, screws, and metal shears, vital for cutting and assembling the frame accurately.
Step by Step Instructions
Learn how to build your own DIY cold frame with easy step-by-step instructions. Perfect for gardening enthusiasts!
Constructing the Base
I measured my raised bed (33 x 66 inches) to determine the size of the cold frame. After cutting the cedar to match those measurements, I secured the pieces together, forming a sturdy box-like base. This step required precision and patience, especially when drilling to prevent the wood from splitting.
Assembling the Frame
Thinking through the design, I opted for a 35-degree angle for the roof slope to maximize sunlight exposure and water runoff. This angle also contributed to an aesthetically pleasing structure that blended well with the garden's natural surroundings.
Attaching the Polycarbonate Panels
The next step involved cutting the polycarbonate panels to size (27 inches wide) and attaching them to the frame. This process demanded careful measurement and cutting to ensure a snug fit that would keep the cold air out and the warm air in.
Securing the Edges and Adding a Lid
To finish the frame, I affixed one-by-threes along the edges, creating a tight seal for the polycarbonate panels. For the lid, a combination of hinges, a handle, and a custom-designed ridge cap using repurposed metal ensured a functional and weather-resistant top that could easily open and close.
Lessons Learned and Advice
Discover key lessons for your DIY projects: stay flexible, be precise, and never skip pre-drilling for perfect results every time.
DIY Requires Flexibility
One lesson I learned was the importance of being flexible with materials and designs. Using what was available, such as the scrap metal trim for the ridge cap, saved money and added a unique touch to the project.
Precision Pays Off
Accurate measurements and careful cutting cannot be overstated. They are crucial for ensuring that all parts fit together seamlessly, avoiding gaps that could let in cold air or pests.
Don't Skip the Pre-drilling
Pre-drilling holes, especially when working with cedar, made the assembly process smoother and prevented the wood from splitting. This extra step might seem time-consuming but it's worth the effort for the longevity it adds to your cold frame.
The Final Product
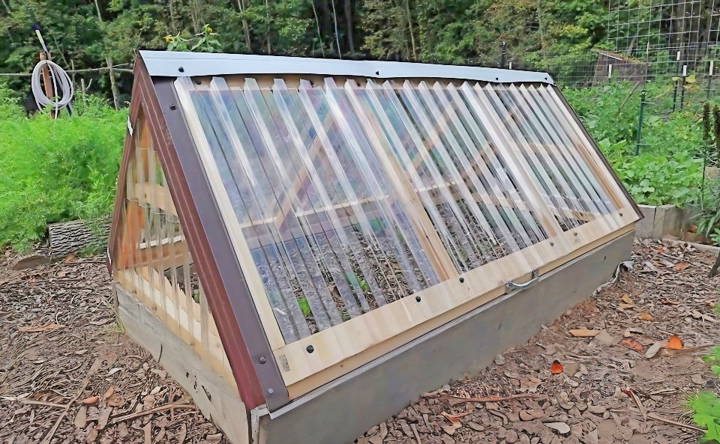
After completing the construction and securing the cold frame over my raised bed, I stood back to admire my work. The clear polycarbonate panels bathed my plants in sunlight, and the sturdy cedar frame blended beautifully with the garden's aesthetic. It was a project that required effort, patience, and a bit of creativity, but seeing my plants thriving within the protected environment of the cold frame confirmed it was all worthwhile.
Seasonal Planting Guide for Cold Frames
Creating a thriving garden with a cold frame means understanding what to plant and when. Here’s a simple guide to help you plan your planting throughout the year.
Spring
As winter thaws, start with cool-season crops that can handle a light frost. Lettuce, spinach, and radishes are perfect early starters. They’ll germinate in cooler soil and grow quickly in the protected environment of your cold frame.
Summer
Transition to heat-loving plants as temperatures rise. Herbs like basil and cilantro, or vegetables like peppers, can start in the cold frame before moving to your garden. Remember to remove the cold frame cover on hot days to prevent overheating.
Autumn
Autumn is the time for a second round of cool-season crops. Plant leafy greens and root vegetables like carrots and beets. They’ll mature quickly and can be harvested before the deep freeze sets in.
Winter
In many climates, a cold frame can turn your garden into a year-round venture. Hardy greens like kale and collards can survive the cold with the extra protection a cold frame provides. You might even try winter lettuce varieties for fresh salads despite the snow.
The key to successful cold frame gardening is to monitor the temperature and ventilate on warmer days to avoid cooking your plants.
Troubleshooting Common Issues with Cold Frames
When you’re nurturing your garden through a cold frame, it’s like caring for a mini ecosystem. Here are some common issues you might face and straightforward solutions to keep your garden thriving.
Overheating
Your plants can get too hot, especially on sunny days. To prevent this:
- Ventilate: Prop opens the lid on warm days.
- Monitor: Keep a thermometer inside to watch the temperature.
Watering Woes
Both overwatering and underwatering can harm your plants.
- Check the soil: It should be moist, not soggy or dry.
- Water in the morning: This helps prevent mildew and gives plants time to absorb moisture.
Location Matters
The right spot for your cold frame can make all the difference.
- Choose a sunny spot: Aim for southern exposure.
- Protect from wind: A sheltered location prevents damage and heat loss.
Pest Control
Pests love the warmth of a cold frame as much as your plants do.
- Inspect regularly: Look for signs of insects or disease.
- Natural remedies: Use non-toxic methods like neem oil or insecticidal soap.
By keeping an eye on these aspects, you’ll ensure your cold frame is a haven for your plants, not a source of stress.
Maintenance and Care for Your DIY Cold Frame
Keeping your DIY cold frame in top condition ensures your plants stay healthy and your gardening continues smoothly. Here’s a straightforward guide to maintaining your cold frame:
Regular Checks
Inspect your cold frame often. Look for cracks in the covering or signs of wear in the frame. Early detection means easier fixes.
Cleaning
Keep the glass or plastic cover clean to allow maximum light. A simple wipe with soapy water can remove dirt or algae that may block sunlight.
Ventilation
Proper airflow prevents overheating and disease. On warmer days, open the lid slightly to let air circulate.
Weatherproofing
Before harsh weather hits, check that your cold frame is secure. In snowy regions, brush snow off the lid but leave it around the sides for insulation.
Pest Management
Regularly check for pests. If you spot any, use gentle methods like hand-picking or spraying with water to remove them.
Temperature Control
Monitor the temperature inside your cold frame. Use a thermometer to ensure it doesn’t get too hot or too cold for your plants.
Watering
Water your plants as needed. The soil should be moist, not waterlogged or dry. Morning is the best time to water to avoid dampness at night.
By following these simple steps, you’ll extend the life of your cold frame and the vitality of your plants, making your garden a year-round joy.
FAQs About DIY Cold Frame
Discover answers to common questions about DIY cold frames. Learn benefits, materials, and construction tips to enhance your gardening efforts.
A DIY cold frame is a simple, low-cost structure that acts like a mini-greenhouse for your plants. It’s usually made of a wooden box with a clear lid and is placed over plants to protect them from cold weather while letting in sunlight.
Cold frames extend your growing season by shielding plants from frost and cold winds. They’re great for starting seeds early in the spring, growing winter crops, or hardening off indoor seedlings before transplanting them outside.
Absolutely! You can use scrap wood, old windows, or even bricks to construct your cold frame. Just make sure any wood hasn’t been treated with harmful chemicals if you’re placing the frame directly on the soil.
Keep an eye on the temperature inside your cold frame, as it can get quite warm on sunny days. Ventilate as needed to prevent overheating. Also, check for any damage to the structure and repair it to ensure your plants stay protected.
Selecting the right spot for your cold frame is crucial. Look for a south-facing location that gets plenty of sunlight, especially during the winter months. It should also be sheltered from strong winds. If possible, place it against a building or fence to provide additional warmth and protection.
Moving Forward
Putting effort into building a DIY cold frame has its rewards. I hope this guide inspires you to start your project and enjoy the benefits of extended growing seasons.


