Building a DIY cold smoker can be a fun and rewarding project. A cold smoker allows you to smoke foods at home, adding unique flavors to meats, cheeses, and more. You'll need some materials like a metal drum, wood chips, and a smoking tube. By following clear instructions, you can build a homemade smoking device that works just as well as store-bought models.
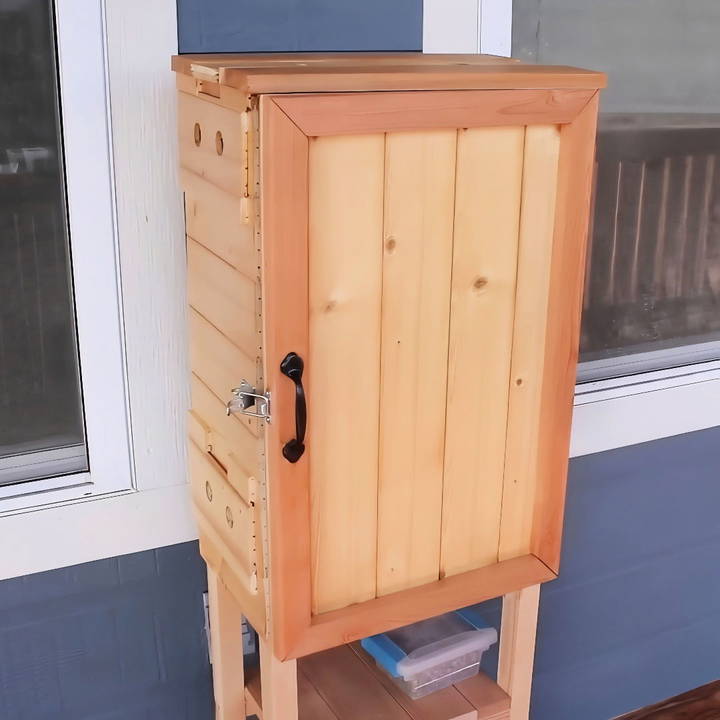
Making a homemade cold smoker is a way to take control of the smoking process. With a few tools and basic DIY skills, you can build a smoker that fits your needs. Building your own cold smoker not only saves money but also gives you the satisfaction of making something with your hands.
Ready to start? In the next section, we'll dive into the materials and step-by-step instructions.
Materials Needed and Why
To get started with building a cold smoker, you'll need a few basic materials:
- Scrap Wood or New Lumber (untreated and unfinished): Essential for constructing the frame and body.
- Wood Glue and Brad Nails (18 gauge): Secures various parts together.
- Tongue and Groove Pine Paneling: Ensures a seamless, gap-free exterior.
- Cedar Boards: Used for the bottom and additional framing elements.
- Hinges and a Handle: Required for the door.
- Foam Gasket Tape: Helps to seal the door.
- Screws and Screwdriver: For securing major parts.
- Forstner Bit: For drilling vent holes.
- Wood Finish and Foam Brush: To apply the finish.
I chose these materials because they are safe to use around food and durable enough for the project. Now, let me guide you through constructing your DIY cold smoker in one day.
Step by Step Instructions
Learn how to build a DIY cold smoker with our step-by-step instructions. Follow the guide from preparing the legs to testing your smoker.
1. Preparing the Legs
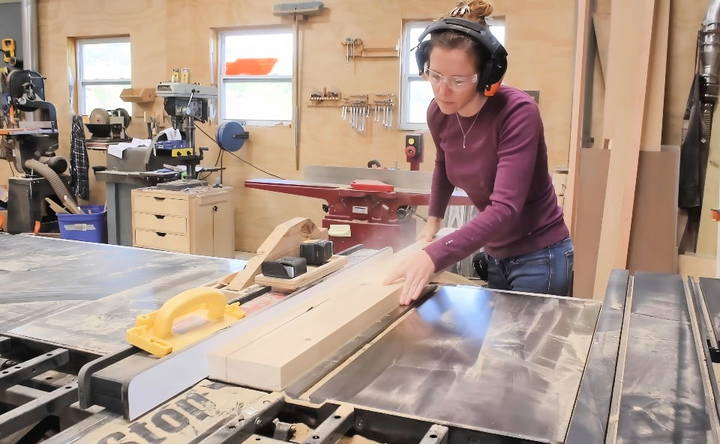
Firstly, I headed to my table saw to rip down wood to make legs for the smoker. It's important to use untreated, unfinished wood to avoid any harmful chemicals leaching into the food. If you're using scrap wood, ensure it's clean and safe.
2. Joining the Legs
Next, I joined two legs together with a crosspiece. For all joints, I pre-drilled holes to prevent splitting. This step ensures your smoker's frame is sturdy and reliable.
3. Marking and Attaching Shelves
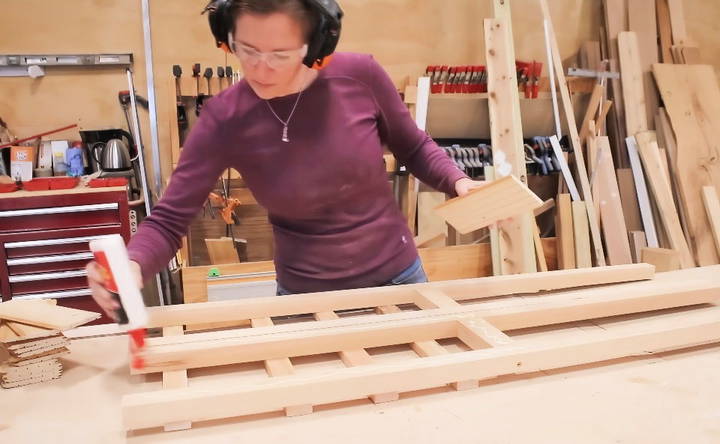
Once the legs were ready, I marked where the shelves would go inside the legs. These will hold the racks. Using wood glue and my 18 gauge brad nailer, I attached the shelf supports.
4. Aligning the Rack Supports
To keep the structure aligned, I placed both leg assemblies next to each other. Ensuring that the rack supports were at the same height was crucial for this step.
5. Adding Sheathing
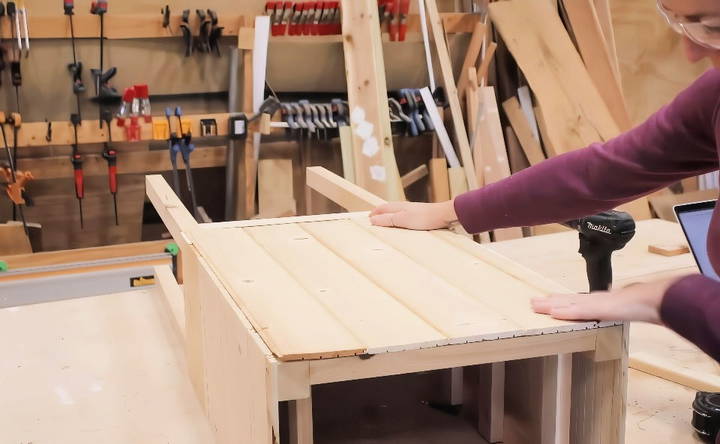
I decided to use tongue and groove pine paneling that I had left over. It's excellent for making a gap-free surface. I set up a stop block at my miter saw, cut the needed pieces, and attached them using wood glue and brad nails.
6. Securing the Frame
After covering the two sides, I joined them at the top with crossmembers, again pre-drilling to avoid splitting.
7. Building the Bottom
I opted for cedar scraps for the bottom panel because of their durability. I didn't nail these in place, anticipating future replacement.
8. Constructing the Back
For the back, I also used tongue and groove pine paneling. I laid the boards out, attached horizontal braces using glue and brad nails, and finally secured the entire back to the smoker with screws.
9. Building the Door
The door needed to be lightweight yet sturdy. I framed the tongue and groove paneling with thicker cedar boards, securing them with wood glue and nails. I attached the door to the frame using two hinges, pre-drilling the holes to prevent splitting.
10. Building the Roof
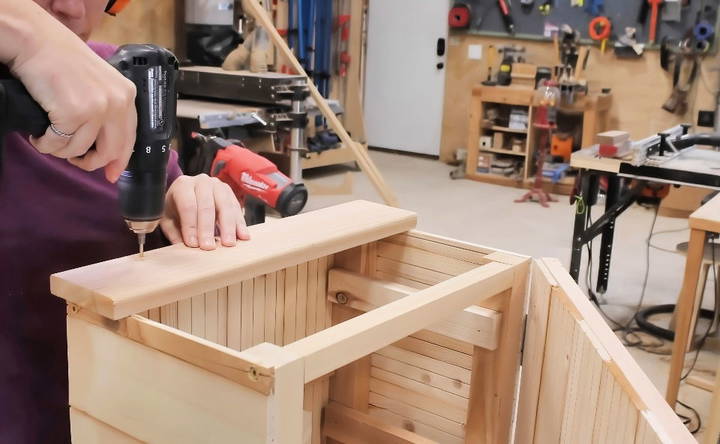
The roof required vent holes for airflow. I used cedar boards and thin paneling to make it adjustable. After cutting the pieces, I drilled holes through both layers with a Forstner bit, ensuring perfect alignment.
11. Adding Side Vents
Like the roof, the sides also needed vents. I used a similar sliding mechanism with paneling and drilled vent holes that could be opened or closed by sliding the boards.
12. Finishing Touches
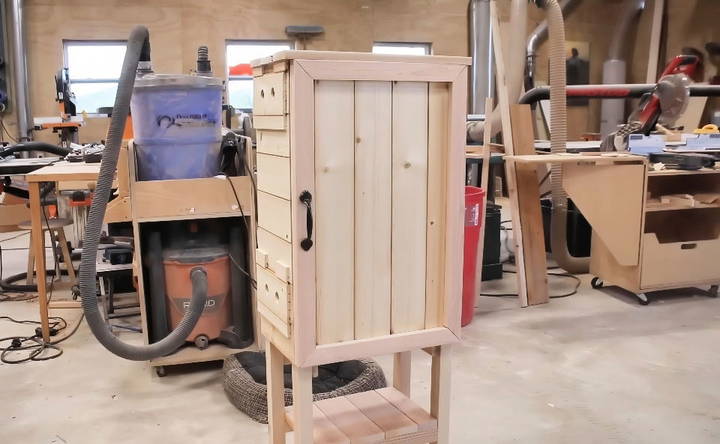
To seal the door, I applied foam gasket tape and added a handle and latch. The latch ensures the door compresses the gasket slightly when closed, improving the seal.
13. Applying Finish
For the finish, I used TotalBoat Wood Honey, which is food-safe and easy to apply. For exterior protection, I applied TotalBoat Halcyon, a UV-stable finish.
14. Testing Your Cold Smoker
For the test run, I placed a smoke tube with smoke pellets inside and lit it until it smoldered. I then monitored the temperature using a thermometer inside the smoker, keeping it around 80-85 degrees for cheese.
Troubleshooting Common Issues
When you embark on the journey of DIY cold smoking, you might encounter a few roadblocks. Here's a guide to help you troubleshoot some of the common issues you may face:
- Inconsistent Smoke Production Sometimes, your cold smoker might not produce a steady stream of smoke. This could be due to inadequate airflow or damp wood chips. Ensure that your smoker has proper ventilation and that you're using dry, well-seasoned wood.
- Temperature Fluctuations Maintaining the right temperature is crucial in cold smoking. If the temperature gets too high, it can cook the food instead of smoking it. Use a reliable thermometer to monitor the temperature and make adjustments as needed.
- Difficulty with Smoke Generator If you're using a smoke generator and it's not working correctly, check for blockages or malfunctions. Follow the manufacturer's instructions for troubleshooting and maintenance.
- Food Safety Concerns Cold smoked food is in the temperature “danger zone” for bacterial growth. Always cure or brine your meats properly before smoking, and consider using a curing salt to inhibit bacterial growth.
- Acrid Smoke Flavor If your food has a bitter taste, it might be due to stale smoke. Ensure there's enough airflow to allow the smoke to circulate and escape, preventing it from becoming stale and impacting the flavor.
- Material Safety Be cautious about the materials you use to build your smoker. Avoid using galvanized metal or certain types of treated wood, which can release harmful chemicals when heated.
- Environmental Impact Consider the environmental impact of your smoking. Use sustainable materials and avoid practices that could be harmful to the environment.
Maintain your cold smoker and keep these tips in mind to enjoy safe and flavorful cold-smoked foods. Patience and attention to detail help resolve common issues.
Safety Tips for Cold Smoking
Cold smoking is a fantastic way to infuse your food with that rich, smoky flavor. However, it's essential to prioritize safety to ensure your smoked delights are not only delicious but also safe to consume. Here are some straightforward tips to keep you and your food safe during the cold smoking process:
- Choose Quality Ingredients Start with the best quality meats and fish. Freshness is key, so source your ingredients from reputable suppliers.
- Curing is Crucial Before smoking, cure your meats and fish properly. Curing helps to prevent the growth of harmful bacteria. Use a mix of salt and sugar, and for extra safety, consider adding curing salts.
- Keep It Cool Cold smoking should be done at temperatures below 85°F. This helps to prevent the food from entering the temperature range where harmful bacteria can thrive.
- Smoke Smart Use the right kind of wood for smoking. Hardwoods like hickory, maple, and apple are excellent choices. Avoid using softwoods or any wood that has been treated with chemicals.
- Clean and Sterile Ensure all your equipment and surfaces are clean and sterile before you start. This will help to prevent any cross-contamination.
- Monitor the Smoke Keep an eye on the smoke density. Too much smoke can lead to an acrid taste, while too little may not impart enough flavor. Aim for a light, consistent smoke.
- Ventilation is Vital Good airflow is essential in the smoking process. It helps to keep the smoke fresh and prevents it from becoming stale and bitter.
- Be Patient Cold smoking takes time — often many hours. Don't rush the process. The longer your food smokes, the more flavor it will absorb.
- Safety First Always follow expert advice and recipes. If you're ever in doubt, it's better to err on the side of caution and seek guidance from a professional.
By following these tips, you'll be able to enjoy the unique flavors of cold-smoked foods while ensuring that every bite is safe to eat.
FAQs About DIY Cold Smokers
Discover answers to common questions about DIY cold smokers, including tips, materials, and techniques for the perfect cold smoking experience.
A DIY cold smoker is a homemade device used to smoke food at low temperatures, typically between 65°F and 85°F. It’s a way to impart a smoky flavor to foods like cheese, fish, and meats without cooking them.
Cold smoking is best suited for foods that can absorb smoke flavor without needing to be cooked. This includes cheeses, nuts, certain fish like salmon, and meats that have been cured. It’s important to note that cold smoking does not cook food, so proper food safety practices must be followed.
DIY cold smoking can be safe if done correctly. It's crucial to maintain the right temperature range and to use food-grade materials. Always cure meats properly before cold smoking to prevent bacterial growth. If you're new to cold smoking, it's a good idea to research and follow food safety guidelines carefully.
The best wood chips for cold smoking are those that burn slowly and impart a mild, pleasant flavor. Popular choices include apple, cherry, hickory, and maple. Avoid using resinous woods like pine, as they can produce a bitter taste and harmful smoke.
The duration of cold smoking depends on the type of food and the flavor intensity you desire. It can range from 1 hour for cheese to several days for meats. Always monitor the food and smoke environment to ensure safety and quality during the extended smoking process.
Enjoying the Results
The result was incredible! Smoked cheese took about two hours, and smoked olives and okra took just 20 minutes. The flavor was fantastic.
Building your DIY cold smoker is a quick, enjoyable project that provides delicious results. If you're interested in making your own, feel free to adapt these steps to suit your available materials and needs. Enjoy your cold-smoking journey!


