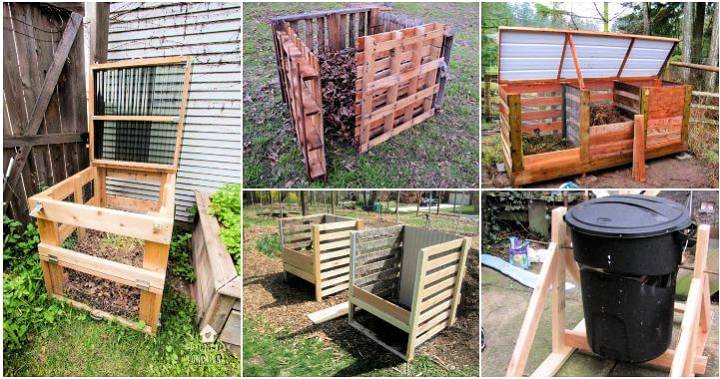
I remember standing in the middle of my garden, staring at the pile of leaves, kitchen scraps, and garden waste, wondering how I could transform this 'waste' into gold for my plants. Compost was the answer, but the thought of manually turning a compost pile every so often seemed daunting. That's when I embarked on my journey to construct a DIY compost tumbler.
The Science Behind Composting
Composting is a natural process that transforms organic waste into valuable fertilizer for plants. It's like a recipe that nature follows to recycle nutrients back into the soil. Let's break down this recipe into simple steps to understand how it works.
What Happens in a Compost Pile?
- Mixing Ingredients: Your compost pile is like a kitchen for microorganisms. You add ‘greens' like vegetable scraps, which are rich in nitrogen, and ‘browns' like dry leaves, which are rich in carbon. This mix is the food for tiny creatures that compost.
- Microbial Feast: Microorganisms such as bacteria and fungi start to eat the organic matter. They break it down into smaller pieces. This process generates heat, which is why the center of a compost pile feels warm.
- Decomposition: As the microorganisms break down the materials, they release enzymes. These enzymes further decompose the organic matter into even smaller molecules.
- Transformation: Over time, the organic matter turns into humus. Humus is a dark, rich material that's great for improving soil health. It helps the soil retain moisture and makes nutrients available to plants.
Why Use a Compost Tumbler?
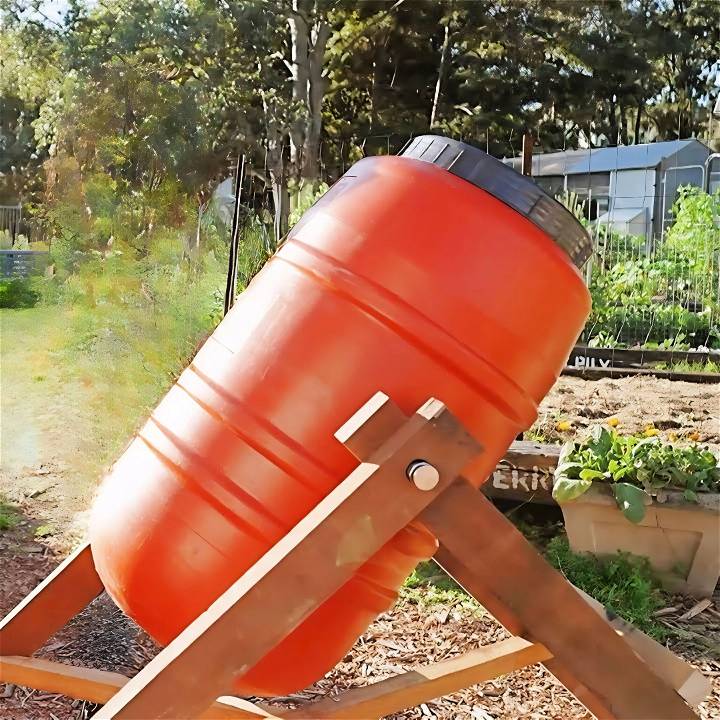
A compost tumbler is a container that you can turn easily. Turning the compost adds oxygen, which is essential for composting. Oxygen helps the microorganisms thrive and speeds up the process. Plus, a tumbler keeps the compost contained and neat.
The Benefits of Composting
- Reduces Waste: Composting turns kitchen scraps and yard waste into something useful instead of sending it to a landfill.
- Improves Soil: The humus from compost helps soil hold onto nutrients and water, making your garden healthier.
- Saves Money: You can reduce the need for chemical fertilizers by using compost in your garden.
Composting is a way to give back to the Earth. By understanding and participating in this cycle, we contribute to a healthier planet.
Materials You'll Need and Why
- Sturdy Timber: To build a frame that can withstand the weight of the compost tumbler filled with scraps.
- Galvanized or Stainless Steel Screws: These prevent rusting, ensuring your compost tumbler frame remains strong over time.
- Length of Galvanized Pipe: This will serve as the axle for the tumbler, chosen for its resistance to rust.
- A Large Plastic Barrel: It's crucial to use a food-safe barrel, which means it previously contained items safe for consumption, thus ensuring no harmful chemicals leach into your compost.
The choice of materials was crucial for making a durable, safe, and environmentally friendly compost tumbler. My aim was to repurpose materials where I could, marrying sustainability with practicality.
Step by Step Instructions
Discover detailed step-by-step instructions for making a DIY compost tumbler. Perfect for DIY enthusiasts looking to compost with ease.
Building The Frame
Realize how to build a sturdy frame in just two steps: preparing the timber and assembling the frame.
Step 1: Preparing the Timber
First, I cut the timber to the desired length to build two pairs of legs that would hold the axle about a meter up. This height is essential for giving the barrel ample spinning room.
Step 2: Assemble the Frame
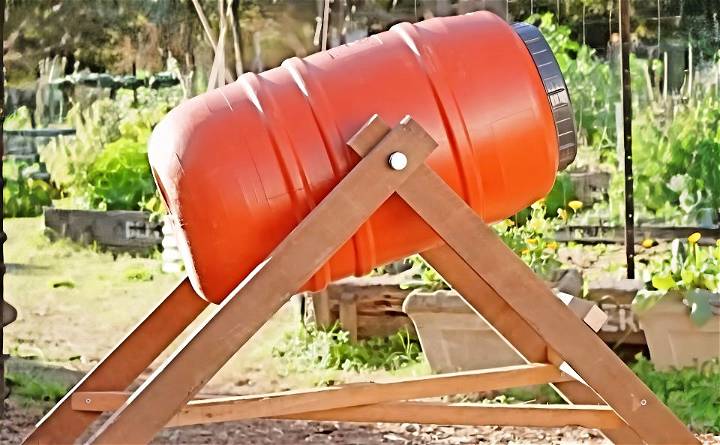
Using the galvanized screws, I connected the legs at the top, drilling holes through them to fit the axle. At this point, the importance of using sturdy materials became crystal clear as the frame needed to support the full weight of the composting materials without buckling.
Setting Up The Barrel
Learn how to set up the barrel: find the center and install the axle with our easy-to-follow guide. Perfect for beginners and experts alike!
Step 3: Finding the Barrel's Center
Determining the central axis was next — a crucial step to ensure smooth spinning. I measured and marked the points for the axle to pass through, ensuring precision to avoid any imbalance.
Step 4: Installing the Axle
After drilling holes on the marks, I pushed the galvanized pipe through. The fit had to be snug; too loose, and the barrel would wobble, too tight, and it wouldn't spin. This step required some muscle but achieving a perfect fit was immensely satisfying.
Final Touches
Discover the final steps in your DIY project: adding spacers, assembling everything, and bracing the frame for a sturdy finish. Complete your build now!
Step 5: Adding Spacers
Spacers were added to the axle to prevent the barrel from sliding side-to-side. This step was pivotal to ensure the compost tumbler would rotate without shifting its position.
Step 6: Assembling Everything
With the barrel on the axle and the frame built around it, it was a matter of securing everything into place. The simplicity of the design made assembly straightforward yet rewarding as everything came together.
Step 7: Bracing The Frame
To eliminate any wobble, I added cross-bracing to the frame. Not only did this make the entire structure "safe as houses," but it also gave me peace of mind, knowing my DIY project wouldn't collapse under the weight of the compost.
Composting Tips for Different Climates
Composting is a versatile process that can be adapted to various climates around the world. Whether you live in a tropical, temperate, arid, or cold region, you can successfully compost with a few adjustments. Here's how you can tailor your composting practices to suit your local climate:
For Hot and Dry Climates:
- Maintain Moisture: In hot, dry areas, your compost can dry out quickly. To prevent this, regularly add water to maintain a damp, sponge-like consistency.
- Shade Your Bin: Place your compost tumbler in a shaded area to protect it from direct sunlight, which can overheat and dry out the compost.
- Balance Greens and Browns: Ensure a good balance of green (nitrogen-rich) and brown (carbon-rich) materials to retain moisture and facilitate the breakdown process.
For Cold and Wet Climates:
- Insulate Your Compost: Keep your compost warm by insulating your tumbler or bin. You can use materials like straw or foam to help retain heat.
- Turn Regularly: Turning your compost more frequently will help generate heat and speed up the decomposition process.
- Drainage is Key: Make sure your compost tumbler has proper drainage to prevent excess water from making the compost too soggy.
For Temperate Climates:
- Seasonal Adjustments: In regions with four distinct seasons, adjust your composting habits according to the weather. Add more browns in the fall and greens in the spring and summer.
- Aerate Well: Regular aeration is crucial. Turn your compost tumbler every few days to introduce fresh oxygen and promote healthy microbial activity.
For Tropical Climates:
- Fast Decomposition: The warm, humid conditions in tropical climates can lead to faster decomposition. Monitor your compost more frequently to manage the process.
- Prevent Overheating: While heat is good for composting, too much can kill beneficial microbes. Ensure your compost tumbler is not in a location that gets too hot.
- Manage Moisture: Tropical climates can be very wet. Cover your compost tumbler during heavy rains to prevent waterlogging.
By following these climate-specific tips, you can build a thriving compost system that works with your local environment.
Troubleshooting Common Issues
When you're turning kitchen scraps and yard waste into compost with a DIY tumbler, you might run into a few hiccups. Here's a straightforward guide to solving some common problems so you can keep your compost healthy and productive.
- It Smells Bad: If your compost tumbler starts to smell, it's often because there's too much wet, green material, like food scraps. To balance this out, add more browns, like dry leaves or shredded paper.
- It's Not Heating Up: Compost should feel warm as it breaks down. If it doesn't, try adding more green materials rich in nitrogen, such as grass clippings or coffee grounds, to kickstart the process.
- It's Too Wet or Soggy: If your compost is too damp, it can get smelly and slow down the decomposition. Mix in more browns to absorb the excess moisture and turn the tumbler to aerate it.
- It's Attracting Pests: A well-sealed compost tumbler shouldn't attract pests. If you notice critters, make sure the lid is secure and avoid adding meat or dairy products, which can draw them in.
- It's Too Dry: Compost needs some moisture to decompose properly. If it's too dry, add some water and green materials, and turn the tumbler to distribute the moisture evenly.
- The Compost is Clumpy: Sometimes, compost can clump together, which slows down the process. Break up large clumps with a fork and turn the tumbler to improve air circulation.
- There's Not Enough Compost: If you're not getting as much compost as you expected, check that you're adding a good mix of greens and browns. Also, make sure you're turning the tumbler regularly to aerate the pile.
Monitor these issues and know fixes to keep your compost tumbler efficient. Composting balances materials, moisture, and air. A bit of care rewards you with rich garden compost.
Maintenance and Care for Your DIY Compost Tumbler
Keeping your compost tumbler in good shape is key to producing high-quality compost. Here's a simple guide to maintaining your tumbler that will help you get the best results from your composting efforts.
- Regular Checks: Every few weeks, give your compost tumbler a once-over. Make sure all parts are secure, especially the lid and any moving parts. Tighten any loose screws or bolts to keep everything stable.
- Cleaning: After each batch of compost is finished, give your tumbler a quick clean. Rinse it out with water to remove any leftover debris. This helps prevent unwanted smells and keeps your tumbler ready for the next batch.
- Lubrication: If your tumbler has any metal parts or axles, apply a bit of lubricant to keep them turning smoothly. This makes it easier to rotate the tumbler and ensures even composting.
- Drainage: Check the bottom of your tumbler for any excess moisture. If you find it's too wet, drill a few small holes for drainage. This helps maintain the right moisture level for optimal composting.
- Balancing Act: Keep an eye on the balance of green (nitrogen-rich) and brown (carbon-rich) materials in your compost. A good mix is crucial for effective decomposition. If you notice your compost is too wet or dry, adjust the materials accordingly.
- Protection: If you live in an area with harsh weather, consider where you place your tumbler. Keep it out of extreme conditions like intense heat or cold, which can affect the composting process.
By following these simple maintenance steps, you'll ensure your DIY compost tumbler stays in great condition, helping you turn kitchen scraps and yard waste into nutrient-rich compost for your garden.
FAQs About DIY Compost Tumbler
Discover essential faqs about DIY compost tumblers, including tips, benefits, and troubleshooting for efficient composting at home.
A DIY compost tumbler is a container that you can rotate to mix your compost materials easily. It’s usually made from a barrel and can be turned with a handle. This helps to aerate the compost and speed up the decomposition process.
It's best to turn your compost tumbler every few days to provide oxygen to the microorganisms that break down the waste. Regular turning also helps to mix the materials and break them down more evenly.
Your compost is ready when it looks like dark, crumbly soil and has a pleasant, earthy smell. It should not have any large, recognizable pieces of the original waste. This process can take anywhere from a few weeks to a few months, depending on the conditions and materials.
Yes, you can add paper products to your compost tumbler. Items like uncoated paper plates, napkins, and cardboard can be composted. However, make sure to shred them into smaller pieces to speed up the composting process. Avoid glossy or coated paper, as it may contain chemicals that are not suitable for compost.
The ideal ratio of green to brown materials in your compost tumbler is about 1:1 by volume. “Greens” are nitrogen-rich materials like vegetable scraps and grass clippings, while “browns” are carbon-rich materials like dry leaves and branches. Maintaining this balance helps to build the right environment for efficient composting.
Final Thoughts
Constructing a DIY compost tumbler from scratch was not only about sustainability or practicality; it was a journey of learning and empowerment. As I placed the barrel in a shaded area of my garden and gave it a gentle spin, I couldn't help but feel a sense of accomplishment. My advice? Don't be intimidated by the thought of DIY projects like this. With some basic materials, a bit of elbow grease, and a willingness to learn, you, too, can transform your gardening practices for the better.


