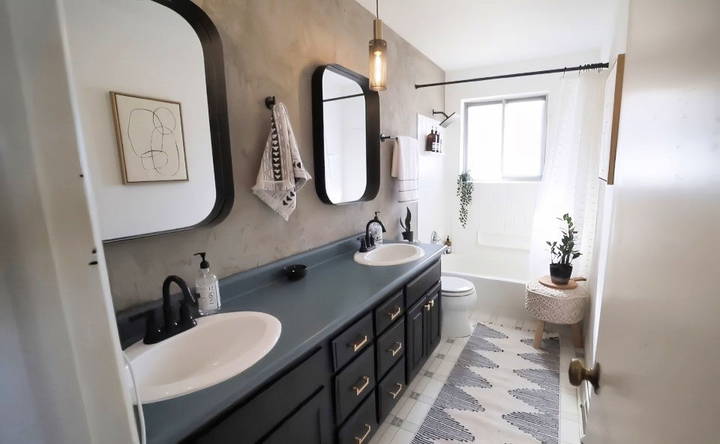
Making a DIY concrete accent wall can transform your space, offering a modern, industrial, or rustic touch depending on the texture and finish. This guide breaks down every step to show you how to make a stunning concrete accent wall at home, based on a hands-on project. Whether for a bathroom or a living area, this process ensures a stunning and unique outcome.
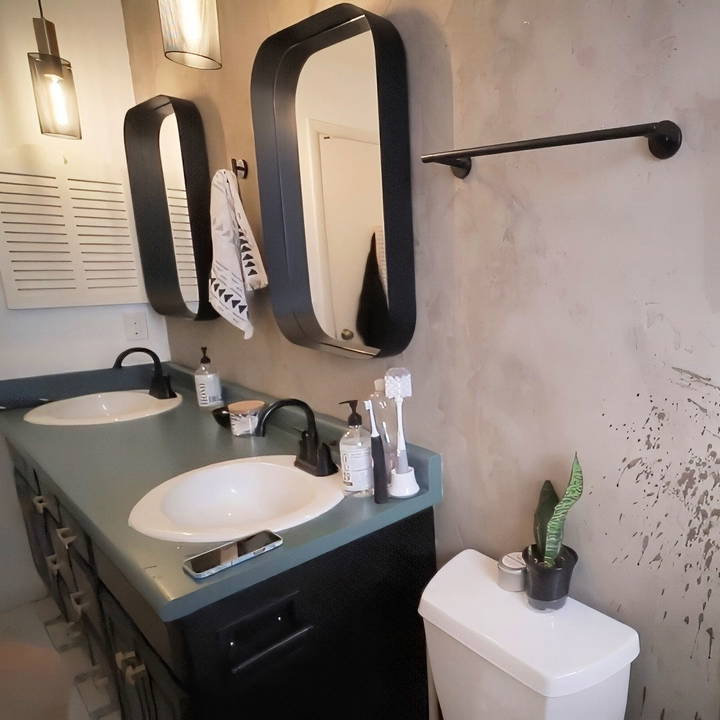
Why Choose a Concrete Accent Wall?
A concrete accent wall is not only stylish but also durable and versatile. Here's why it stands out:
- Aesthetic Appeal: Concrete walls add texture and depth, fitting various design themes.
- Durability: When properly applied, it lasts for years.
- Customizable Texture: You can decide how rough or smooth you want the finish to be.
- Budget-Friendly: It's a cost-effective way to achieve a high-end look.
Materials and Tools You'll Need
Before starting, gather these materials and tools:
Materials:
- Feather Finish Cement Mix: A patching system designed for smooth applications.
- Water: For mixing the cement.
- Painter's Tape: To mask off the edges and protect adjoining surfaces.
- Protective Plastic Sheets: To cover floors and fixtures.
- Optional Sealer: To protect the wall and enhance its finish.
Tools:
- Trowel: For applying the cement.
- Mixing Bucket: To prepare the cement.
- Float: For smoothing the surface.
- Measuring Cup: To get the correct water-to-cement ratio.
- Sponge or Cloth: For cleaning edges and small corrections.
Step by Step Instructions
Build a stunning DIY concrete accent wall with our step-by-step instructions, from workspace prep to maintenance tips for lasting beauty.
1. Prepare the Workspace
Preparation is key for a smooth and efficient project.
- Clean the Surface: Ensure the wall is free from dust and grease.
- Mask the Edges: Use painter's tape to protect adjoining walls, ceilings, and fixtures.
- Lay Protective Sheets: Cover the floor and other nearby areas to catch spills.
2. Mix the Cement
The right consistency is crucial for a successful application.
- Start by adding 14 ounces of water into the mixing bucket.
- Slowly add about one-fourth of the cement bag and stir thoroughly.
- Adjust the mixture if it's too liquidy by adding more cement. The consistency should be thick enough to stick to a trowel but not runny.
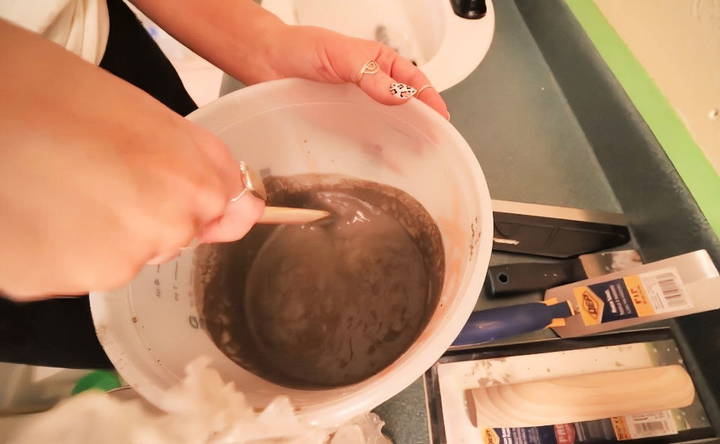
Tip: You only have a 15-minute work window after mixing, so prepare small batches.
3. Apply the Cement
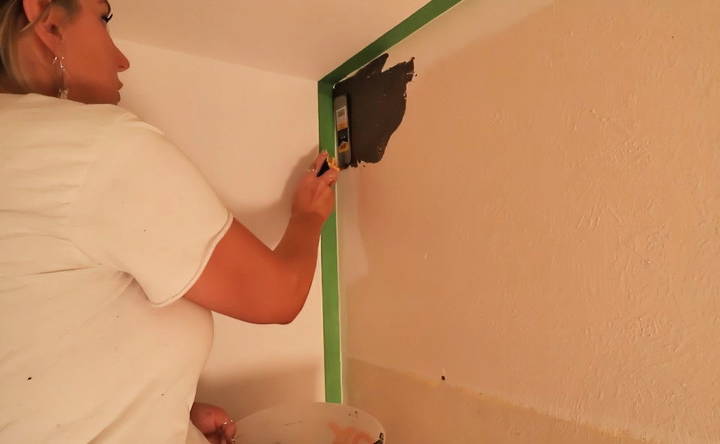
- Start in the Corners: Use a smaller float for tighter areas and corners. This ensures a uniform application even in tricky spots.
- Work in Sections: Apply the cement in manageable sections, smoothing it out with a trowel or float.
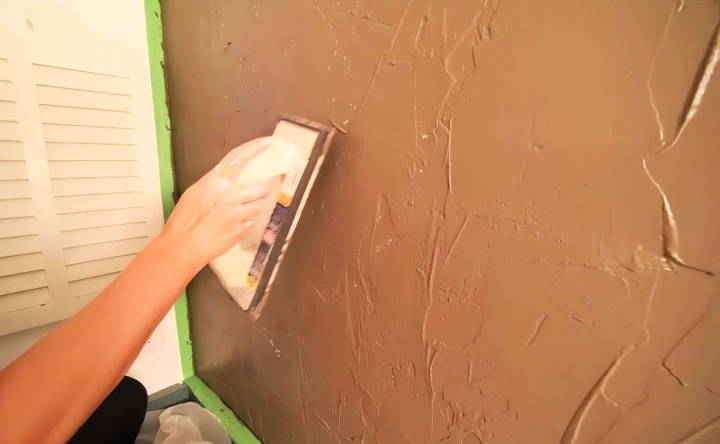
- Check Texture: If you prefer a rougher look, leave it as applied. For a smoother finish, lightly go over the surface with a float after 10 minutes.
Note: Imperfections add character. Don't aim for perfection—embrace the raw, organic look.
4. Layer and Smooth
- Allow each section to partially dry before revisiting it to smooth out bumps or fill gaps.
- If areas look patchy with the wall showing through, you can patch them later once the first layer dries.
5. Let It Dry
- Allow the wall to dry overnight. Initially, it might appear patchy, but the color will even out as it fully sets.
- If some areas remain darker or lighter, it's normal and adds to the visual texture.
Post-Application Tips
Discover essential post-application tips for evaluating and refining your project, effective tape removal, and protective measures for lasting results.
Evaluate and Refine
- Inspect the wall the next morning for any areas needing touch-ups.
- Apply additional cement sparingly to any gaps or overly thin spots.
Tape Removal
- Carefully peel off the painter's tape to reveal clean edges. Pull it away at an angle to avoid pulling off cement.
Protective Measures
- Water Resistance: While minor splashes from handwashing or baths won't damage the wall, prolonged exposure to water may. Consider sealing the wall with a water-resistant topcoat if it's in a high-moisture area.
Challenges and Solutions
- Uneven Texture: If the texture is inconsistent, smooth it out after the initial 10-minute drying period.
- Patchy Drying: Some areas may appear darker. If it bothers you, apply a thin additional layer to even it out.
- Limited Working Time: Mix smaller batches to ensure you can apply and smooth the cement within 15 minutes.
Maintaining Your Concrete Accent Wall
- Cleaning: Use a damp cloth to wipe off dust and minor stains.
- Handling Water Spots: Any discoloration from water splashes usually dries clear. If sealed, this won't be an issue.
- Refreshing the Look: Over time, if the texture wears, you can reapply a thin layer of cement.
Conclusion
Building a DIY concrete accent wall is a rewarding project that can transform your space. With careful preparation, the right materials, and a bit of patience, you can achieve a stunning, durable, and unique feature wall. Embrace the imperfections—they're what make this style so special!
Take pride in your work and enjoy the character and sophistication your new wall brings to your home!
FAQs About DIY Concrete Accent Walls
Discover answers to top FAQs about DIY concrete accent walls. Learn tips and techniques for stunning home interiors with ease.
Cement adheres best to drywall or cement backer boards. If the wall has a textured surface, like a popcorn finish, lightly sand it to build a smooth base.
Priming isn’t required but can improve adhesion and protect against moisture. Lightly scuffing the surface is also helpful for better grip.
Small white patches can be painted with a matching gray color or covered with a thin layer of cement. This approach is easier than reapplying large amounts of cement.
Sealing is recommended, especially in high-moisture areas like bathrooms. Use a matte or satin finish concrete sealer to maintain the aesthetic and protect against mold or discoloration.
Yes, use a masonry drill bit to predrill holes and add drywall anchors. This prevents cracking or flaking.
Properly applied cement walls are durable and resistant to wear. They may absorb minor splashes, but sealing can enhance resilience to moisture and stains.
Yes, powder colorants or concrete dyes can be added to achieve various shades, including lighter grays or even marble effects.
Removing cement from the wall involves chipping off the material and sanding the surface. This process is labor-intensive but manageable with proper tools.
Yes, but ensure the base material is suitable. For tiled surfaces, prime them first to improve adhesion, and always seal high-use areas like fireplaces or kitchen cabinets.
Cement generally doesn't emit strong odors, making it suitable for indoor projects. Ensure proper ventilation for comfort while working.


