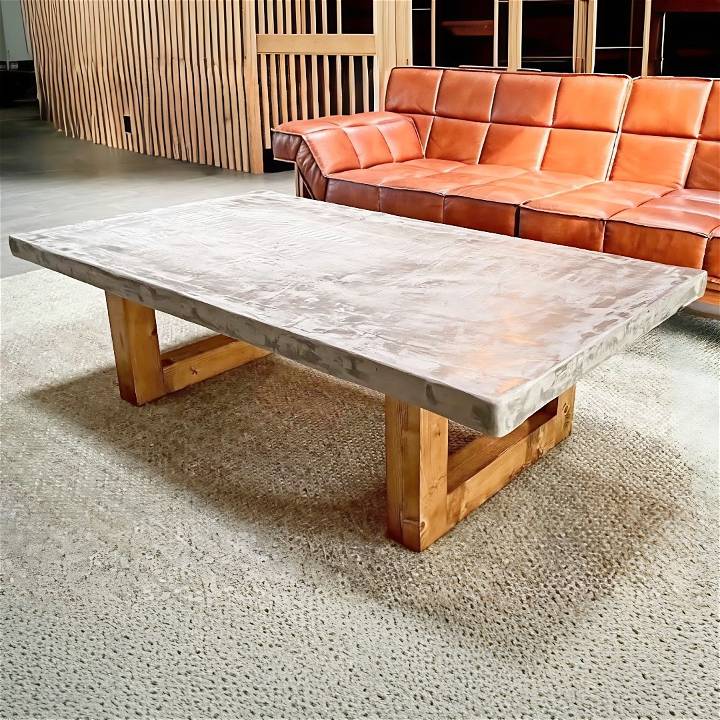
Ever since I moved into my new apartment, I've been obsessed with the idea of having a unique coffee table. One that stands out, but doesn't break the bank. That's when I stumbled upon a method to build a stylish concrete coffee table for under $75. It was an exciting, somewhat challenging project, but incredibly rewarding. Let me walk you through the process, step by step.
Materials Needed
1. Two-by-fours: For the legs, you'll need to cut 12 pieces at 20 inches each. These give the sturdy base for your table.
2. OSB or Plywood: I used OSB because it was flatter, but plywood is also a good option if it's not warped.
3. Durock (Cement Board): This will cover the top and give the concrete something to adhere to.
4. Henry Feather Finish: A deliciously affordable and versatile concrete patch perfect for this project.
Why These Materials?
Each material is chosen for its durability and cost-effectiveness. For instance, two-by-fours are sturdy yet inexpensive, making them perfect for the table's legs. OSB or plywood forms a solid base, while Durock ensures a good surface for the concrete application. Lastly, the Henry Feather Finish provides a concrete look and feel without the need for heavy slabbing.
Step by Step Instructions
Learn how to make a gorgeous DIY concrete coffee table with our step by step instructions. From preparing the legs to adding the finishing touches, we've got you covered.
Step 1: Preparing the Legs
First, cut your two-by-fours into 12 pieces at 20 inches each and trim off the rounded edges. Glue them together in pairs to form what will look like 4x4s. This part might seem tedious, but it's crucial for getting those robust, chic-looking legs.
Step 2: Cutting the Top
Use OSB or plywood for the top; mine was cut to the desired size based on the space where I wanted the table to sit. The choice between OSB and plywood depends on the quality available to you; just ensure it's straight and flat.
Step 3: Assembling the Frame
Once the legs are prepared and the top is cut, assemble the frame by attaching the legs to the top using screws and making sure everything is perfectly aligned. This structural integrity is vital for the finished product.
Step 4: Adding the Durock
Cut the Durock to cover the top, securing it in place with screws. It doesn't have to look pretty as it will be covered with concrete, but ensure it is securely attached.
Step 5: Concrete Time
Mixing the Henry Feather Finish with water to a peanut butter consistency, I started applying it to the underside of the table first. This helped me get comfortable with the material. I aimed for at least an eighth of an inch coverage, going over the edges carefully to avoid later cracks.
Step 6: Refining the Surface
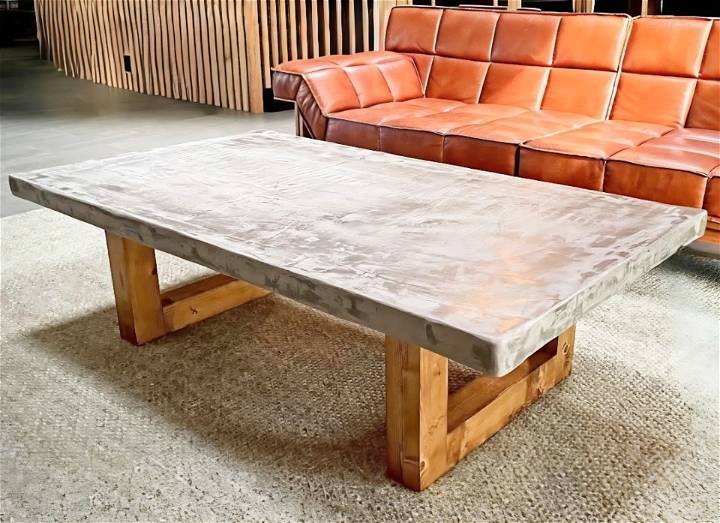
After letting the underside dry, I flipped the table and started on the top, which is the more visible part. I decided on a more organic, free-flowing pattern, making sure to cover all surfaces with the same, even coverage, particularly focusing on building up the edges slightly for a smooth, rounded finish.
Step 7: Sanding and Sealing
Once dry, I sanded the surface with 150-grit paper for a smooth finish and applied concrete sealer to protect the surface. This stage was crucial for achieving that sleek, polished look and ensuring the table's durability.
Finishing Touches
Finally, I flipped the table to its right side and treated the legs with wood conditioner followed by an Early American stain, which gave a warm, natural look that contrasted beautifully with the cool, industrial vibe of the concrete. A coat of satin polyurethane on the legs added the finishing touch, sealing the deal.
Customization Ideas for Your DIY Concrete Coffee Table
Building a DIY concrete coffee table is not just about functionality; it's also an opportunity to express your personal style and add a unique touch to your living space. Here are some customization ideas that can help you transform a simple concrete table into a centerpiece that reflects your taste and creativity.
Personal Touches
Incorporate Items with Sentimental Value: Embed items that hold special meaning to you directly into the tabletop. This could be anything from:
- Coins from your travels
- Shells collected from your favorite beach
- Glass pieces or tiles in various colors
Choose a Theme: Reflect your interests or the ambiance of your room by selecting a theme for your table. For example:
- Nature-inspired: Use leaves or flowers to build imprints on the surface.
- Modern chic: Opt for geometric shapes or minimalist designs.
Functional Add-Ons
Integrated Technology: Consider adding functional elements such as:
- USB ports for charging devices
- Wireless chargers embedded into the surface
Adjustable Features: Make your table more versatile by incorporating:
- Adjustable legs to change the height
- Wheels for easy mobility
Artistic Flair
Colorful Creations: Don't limit yourself to the gray color of concrete. Experiment with:
- Concrete dyes to achieve different hues
- Staining techniques for a rustic look
Mosaic Magic: Make a mosaic design using:
- Broken tiles
- Colored glass
- Stones
By adding these personalized touches, not only will you have a piece of furniture that's functional, but you'll also have a story to tell and a work of art to show off.
FAQs About DIY Concrete Coffee Tables
Find answers to all your questions about DIY concrete coffee tables. Get expert tips, step-by-step guides, and troubleshooting advice in one place.
What materials do I need to make a concrete coffee table?
To build your own concrete coffee table, you'll need a concrete mix, reinforcement materials like wire mesh or rebar, a mold which can be made from melamine or wood, and tools such as a trowel, drill, and sandpaper. You may also want to have sealant and paint or stain if you wish to customize the finish.
How do I ensure my concrete table is durable?
For a durable concrete coffee table, make sure to:
- Use a high-quality concrete mix and follow the mixing instructions carefully.
- Incorporate reinforcement like wire mesh within your concrete pour to add strength.
- Cure the concrete properly, which involves keeping it moist and covered for at least a week.
- Apply a sealer to protect the surface from stains and water damage.
Can I add color to my concrete coffee table?
Yes, you can add color to your concrete coffee table by using concrete dyes or stains. Mix the dye into your concrete before pouring, or apply the stain after the concrete has cured for a customized look.
What are some creative ways to customize my concrete coffee table?
Get creative with your table by:
- Building a mosaic on the surface with tiles, glass, or stones.
- Embedding personal items like coins or pebbles into the tabletop.
- Using stencils to apply designs with acid stains or paints.
- Incorporating functional elements such as built-in coasters or charging ports.
How do I maintain my concrete coffee table?
Maintain your concrete coffee table by:
- Regularly wiping it down with a damp cloth to remove dust and spills.
- Reapplying sealant every few years to maintain its protective layer.
- Avoiding the use of harsh chemicals or abrasive cleaners that can damage the surface.
- Using felt pads or coasters to prevent scratches and heat marks.
By following these tips and frequently asked questions, you can build a beautiful and long-lasting DIY concrete coffee table that suits your style and needs.
Conclusion
Building this concrete coffee table was not just about saving costs; it was a rewarding journey of learning and making something with my own hands. It's now a centerpiece in my living room, sparking conversations and providing functional value. For anyone looking to embark on this DIY project, I say, go for it! The experience is as fulfilling as the final product. Don't hesitate to innovate and adjust based on your preferences and space requirements.


