Concrete overlays offer an affordable, durable, and aesthetically pleasing solution to revamping your old, worn-out floors. Whether you're looking to replace tile, cover uneven surfaces, or simply upgrade your space with a modern, rustic look, a concrete overlay can be an ideal choice. This guide leads you through the full process of applying a concrete overlay, including every necessary step, tool, and material for a successful result.
What Is a Concrete Overlay?
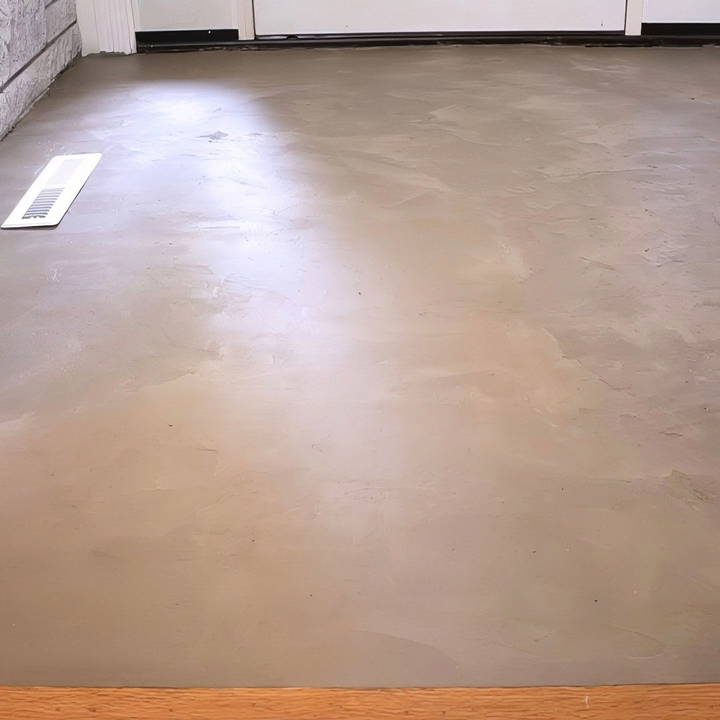
A concrete overlay is a thin layer of decorative concrete applied to an existing surface. It serves both functional and aesthetic purposes, providing a smooth, level surface while enhancing the appearance of floors, walls, or even countertops. It's an ideal solution when you want to refresh old surfaces without the hassle of removing the existing substrate entirely. In this guide, we'll focus on a feather finish technique that results in a modern, smooth concrete floor.
Why Choose a Concrete Overlay?
There are several reasons to opt for a concrete overlay:
- Durability: Concrete is known for its strength and durability, making it perfect for high-traffic areas.
- Cost-Effective: You can give your floor a completely new look without the high costs of demolition and installation.
- Customization: Concrete overlays allow for various finishes, including rustic, modern, and smooth designs, making them a versatile choice for interior design.
- Ease of Application: With the right tools and materials, a concrete overlay can be a simple DIY project that delivers professional-level results.
Tools and Materials You'll Need
To get started, gather the following tools and materials:
Material List:
- Ardex Feather Finish: A high-quality micro-topping that builds a smooth, even layer over your surface.
- Concrete Leveler: For making a level surface before applying the feather finish.
- Concrete Leveler Primer: Helps the leveler adhere properly to the surface.
- Behr Concrete Sealer: Seals the overlay, giving it a durable and attractive finish.
Tool List:
- Bosch Demolition Hammer: For tile removal and tough grout lines.
- Chisel and Hammer: Essential for manual tile and grout removal in tight spots.
- Paint Brush: For applying primer and sealer.
- Shop Vac: Keeps the work area clean by vacuuming up dust and debris.
- Sanding Pads: For smoothing the surface after applying the concrete overlay.
- Drill with Mixing Paddle: To ensure even mixing of materials.
- Finishing Trowel: For applying the concrete feather finish smoothly.
Step by Step Instructions
Learn how to apply a DIY concrete overlay with our step-by-step guide, from preparation to sealing, for a flawless and durable finish.
Step 1: Removing the Existing Flooring
Before you can apply the concrete overlay, you'll need to remove the old flooring. If you have tile, this can be labor-intensive but necessary for a clean, even surface.
- Taping Off Surrounding Areas: Since this is a messy process, tape off nearby surfaces like walls, stairs, and railings to prevent damage from flying debris.
- Tile Removal: Use a sledgehammer and chisel to break up the tiles. Older tiles, like those from the 1950s, are often set in a thick mortar bed, making them difficult to remove by hand. A demolition hammer can make this task easier.
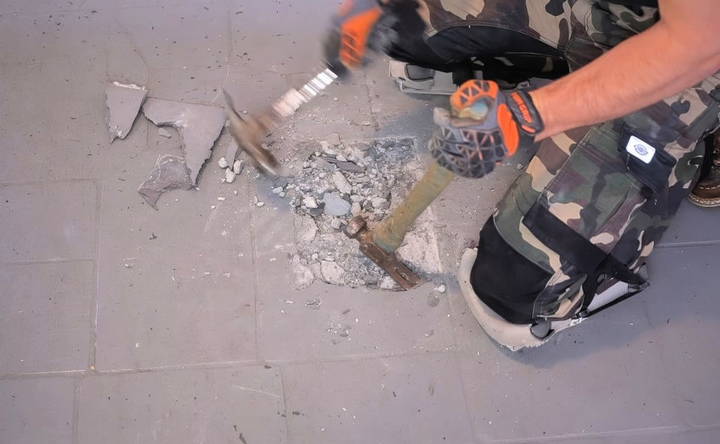
Pro Tip: If the grout lines are especially tough, a demolition hammer can save you hours of effort compared to manual chiseling.
Step 2: Preparing the Surface
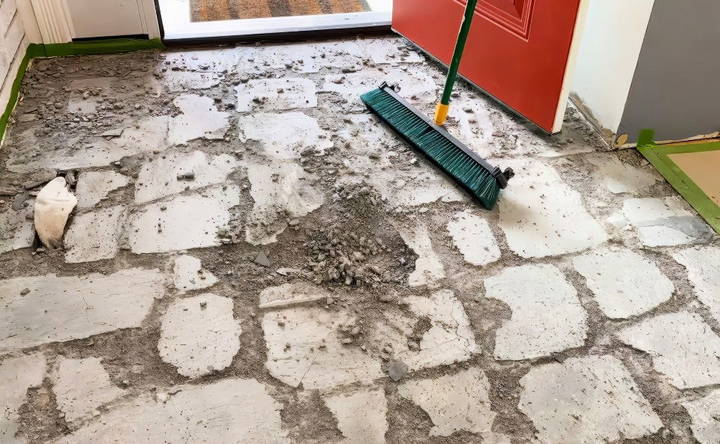
After removing the old tile and grout, clean the area thoroughly to remove all dust and debris. A smooth and clean surface is crucial for the next steps.
- Vacuum and Sweep: After using a broom to clear larger debris, follow up with a shop vac to get rid of finer dust particles.
- Inspect the Surface: Make sure the mortar bed is intact, as you'll want to salvage as much of it as possible for structural stability. If there are any uneven areas, don't worry—this is where the concrete leveler comes into play.
Step 3: Applying the Concrete Leveler
Now that the surface is clean, it's time to apply the concrete leveler to build a smooth foundation for the feather finish.
- Prime the Surface: Before using the leveler, apply a concrete primer to ensure proper adhesion between the mortar bed and the new layer.
- Mix the Concrete Leveler: When mixing the leveler, always add water to your bucket first and then the dry mix. This prevents dry clumps at the bottom of the bucket and ensures a consistent mixture.
- Pour and Spread: Pour the leveler into the center of the area and use a squeegee to spread it evenly, filling in any low spots and making a smooth surface.
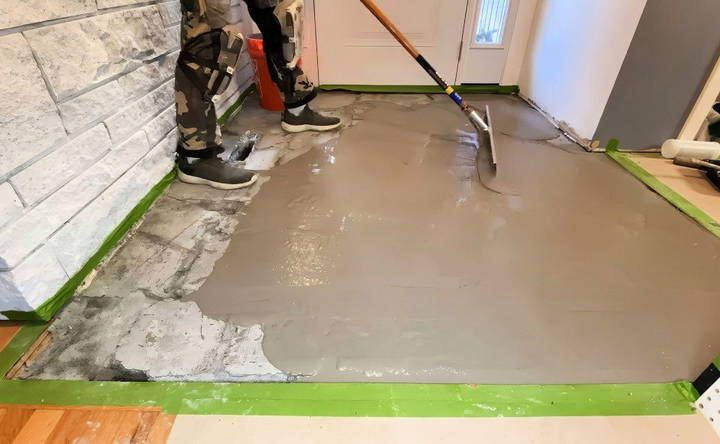
Pro Tip: For best results, let the concrete leveler dry completely before proceeding. This may take a few hours or overnight, depending on the product.
Step 4: Applying the Concrete Feather Finish
With the base layer in place, you're ready to apply the Ardex Feather Finish. This step builds the final, visible surface of your concrete overlay.
- Mix the Feather Finish: Mix the feather finish to a smooth consistency—similar to thick peanut butter. It's essential to achieve the right texture so it spreads evenly without leaving streaks.
- Spread the Feather Finish: Using a finishing trowel, apply the feather finish in even strokes. The goal is to spread it as smoothly as possible across the entire surface.
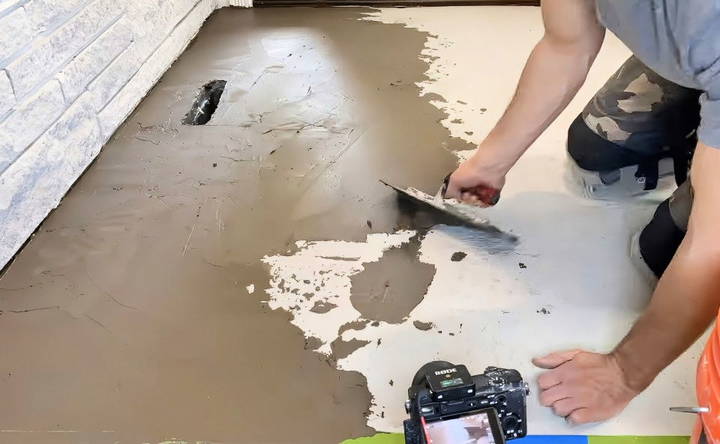
Pro Tip: Feather finish dries quickly, so work in small sections. If you're looking for a modern, rustic appearance, don't worry about achieving a perfectly smooth surface—a few natural imperfections can add character.
Step 5: Sanding the Surface
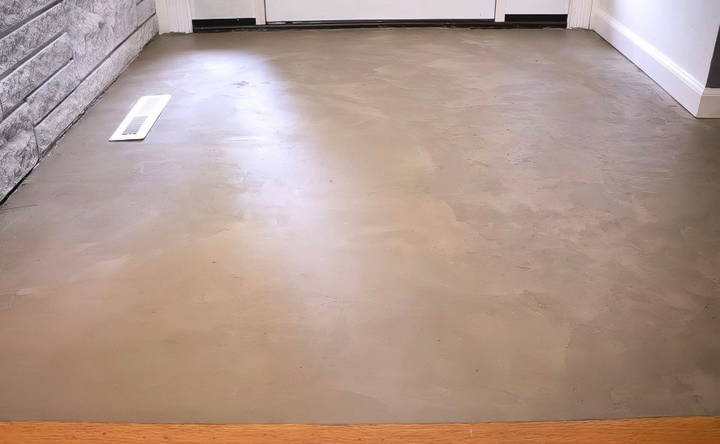
Once the feather finish is fully dry (typically after 24 hours), it's time to sand the surface for a smooth, polished look.
- Use 320 Grit Sandpaper: A fine-grit sandpaper like 320 works best to smooth out any rough spots without damaging the surface. A sanding block allows for better control, especially near the edges where the concrete meets other surfaces like wood flooring.
- Vacuum Again: After sanding, vacuum the surface to remove all dust particles before sealing.
Step 6: Sealing the Concrete Overlay
To protect your new concrete overlay and enhance its appearance, you'll need to apply a sealer. This step is essential for making the surface waterproof and durable.
- Apply the Sealer: Using a paintbrush, apply the Behr concrete sealer in long, even strokes. For best results, follow up with a foam roller to smooth out the application and ensure even coverage.
- Let It Dry: Allow the sealer to dry thoroughly before walking on the surface or reinstalling any vents or fixtures.
Pro Tip: For outdoor surfaces, you may need to apply multiple coats of sealer. Indoors, a single coat is usually sufficient.
Final Thoughts: Is a Concrete Overlay Right for You?
This project might seem like a lot of work, but with the right tools and materials, a DIY concrete overlay can transform your space with minimal cost and effort. It's perfect for making a sleek, modern look that's also durable and easy to maintain. Plus, concrete overlays are customizable, allowing you to experiment with different finishes and designs.
By following these steps, you'll be able to achieve a professional-looking finish that not only looks great but also stands up to daily wear and tear. So, if you're looking for a cost-effective, stylish, and practical solution for your floors, a DIY concrete overlay might be just what you need!
FAQs About DIY Concrete Overlays
Discover answers to common questions about concrete overlays, benefits, applications, and maintenance tips to enhance your surfaces.
With proper maintenance and sealing, a concrete overlay can last for many years, often 10–20 years or more, depending on the conditions and usage.
While it’s possible, it’s generally better to remove the old tile to ensure a smoother, more durable finish.
The cost of materials for a typical 100 sq. ft. space can range from $150 to $300, depending on the products used. Renting tools like demolition hammers can add to the cost, but they are often necessary for larger projects.
To prevent cracks, ensure your surface is properly prepared and level before applying the overlay. Apply primer to help the overlay adhere, and make sure to use a concrete leveler for an even base. If cracks still appear, they can often be filled with more overlay or patching material.
Technically, yes, but it's not recommended. It's better to remove old tiles, especially if they’re higher than adjacent flooring. This ensures a smooth, even finish and avoids issues like height differences between floor sections.
If your concrete leveler dries unevenly, lightly sand the high spots and reapply a thin layer to low areas. Make sure to smooth out the new layer with a trowel. You can also use a squeegee during the initial application to help distribute the leveler evenly.
The drying time depends on the products used, but typically, the concrete leveler dries within 24 hours, and the feather finish dries in a few hours. Always wait 24 hours before walking on it to ensure the surface is fully hardened.
Yes, you can add pigments or dyes to the feather finish or concrete leveler. Mix the colorant into the water before adding it to the dry mix. This allows for creative customization, such as subtle shades or bold colors.
Yes, sealing is important to protect the surface from moisture, stains, and wear. Use a concrete sealer like Behr Low Luster Sealer to achieve a durable, semi-gloss finish. For high-traffic or exterior areas, you may need multiple coats.
Lightly sand the surface with fine-grit sandpaper (such as 320) and vacuum up the dust. Reapply the feather finish in thin layers if necessary, and use circular motions when sanding to avoid streaks.
Concrete overlays can be applied to wooden subfloors, but you must ensure the wood is stable and won't shift. It's important to use a bonding agent between the wood and the concrete to prevent future cracking or separation.
Concrete overlay floors are easy to maintain. Sweep and vacuum regularly to remove dirt and debris. Clean with a mild soap and water solution, avoiding harsh chemicals that could degrade the sealer. Reseal the floor periodically, depending on foot traffic.
A properly installed and sealed concrete overlay can last 10 to 20 years, depending on usage and maintenance. Ensure you reseal the floor periodically to extend its lifespan.


