Embarking on a DIY concrete patio project can be both rewarding and challenging. After diving headfirst into this adventure myself, I learned a plethora of valuable lessons — from handling underground utilities to achieving the perfect concrete finish. In this step-by-step guide, I'll share my firsthand experience, intending to make your DIY journey smoother and more enjoyable.
Assessing the Need for Underground Utilities
The first step in my project was understanding the scope and requirements for underground utilities. I needed electrical lines for outdoor lighting, water lines for a garden, and a drain system to avoid water pooling. Planning these utilities required careful consideration of their locations and depths to ensure they wouldn't interfere with the future patio structure.
Materials Required and Their Purpose
- Concrete Mix: The primary material for the patio. Its durability makes it perfect for outdoor spaces.
- Crushed Concrete Base: Used for the foundation to ensure a stable and level patio.
- PVC Piping and Conduits: For electrical lines and water pipes, ensuring they are safely buried beneath the patio.
- Rebar or Fiberglass Rods: Provides strength and support to the concrete, preventing cracks and structural failure.
- Broom and Float: These tools help achieve a smooth surface and the necessary texture for the patio.
Executing the Project
Learn how to make a DIY concrete patio with our step-by-step guide. From mapping out the area to finishing touches, we've got you covered!
Step 1: Mapping Out the Area
I began by clearing the backyard space and marking the area for the patio. A crucial part of this step involved mapping out where the underground utilities would run, ensuring they didn't clash with the patio's footing and had the correct depth clearance.
Step 2: Laying Out the Underground Utilities
Next, I trenched the paths for my electrical, water, and sewer lines, following the mapped-out routes. It was vital to maintain a depth that prevented any risk of the utilities being damaged by the patio construction or future landscaping activities.
Step 3: Preparing the Ground and Forms
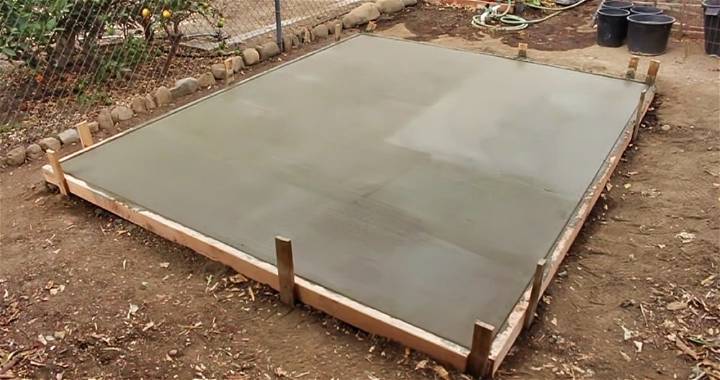
After installing the utility lines, I focused on ground preparation. I removed any debris, leveled the ground, and laid down a crushed concrete base. This base was then compacted and leveled to ensure a solid foundation for the patio. Wooden forms were constructed around the project's perimeter to hold the concrete in place during pouring.
Step 4: Installing Rebar for Additional Support
To prevent cracking and ensure the longevity of the patio, I laid down rebar grids, tying them securely in place. This step was vital for structural integrity, especially in areas prone to ground movement or heavy use.
Step 5: Pouring the Concrete
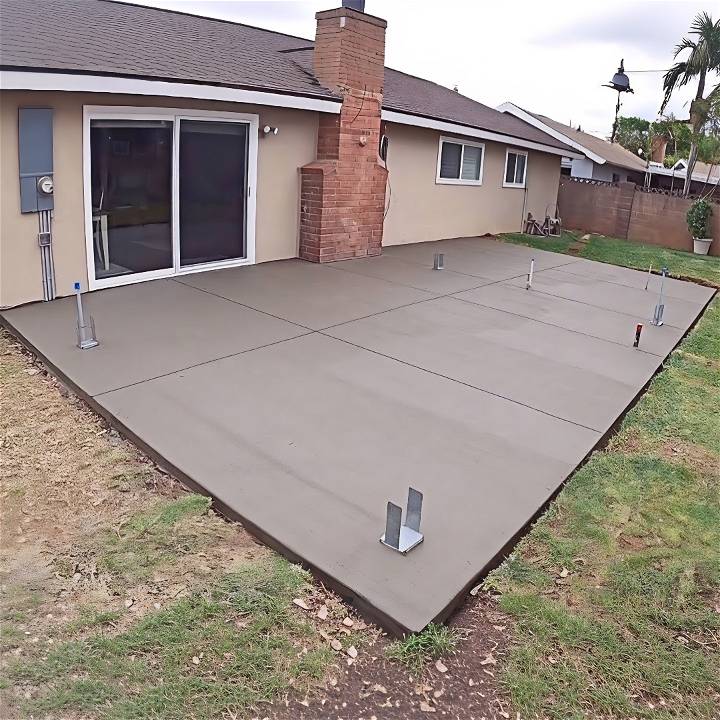
The concrete pour was the most exhilarating part of the project. After mixing the concrete to the right consistency, it was poured into the forms, being careful to fill every corner and ensure there were no air pockets. A float was used to level the freshly poured concrete, followed by a broom finish for a non-slip surface.
Step 6: Curing and Sealing the Concrete
Allowing the concrete to cure slowly was crucial, so I kept it moist under burlap for several days. Once cured, I applied a sealant to protect the surface from moisture and wear, extending the patio's life.
Step 7: Finishing Touches
With the concrete set and sealed, it was time to remove the forms. I then backfilled the edges and applied landscaping around the patio to integrate it seamlessly with the backyard.
Troubleshooting Tips for DIY Concrete Patio
Building a concrete patio can be a rewarding DIY project, but sometimes things don't go as planned. Here are some troubleshooting tips to help you overcome common challenges:
- Uneven Surface: If your patio surface is uneven, it could be due to an improperly leveled formwork or uneven ground before pouring the concrete. To fix this, you can use a screed board to level the concrete before it sets. For significant unevenness in a cured patio, applying a concrete resurfacer might be necessary.
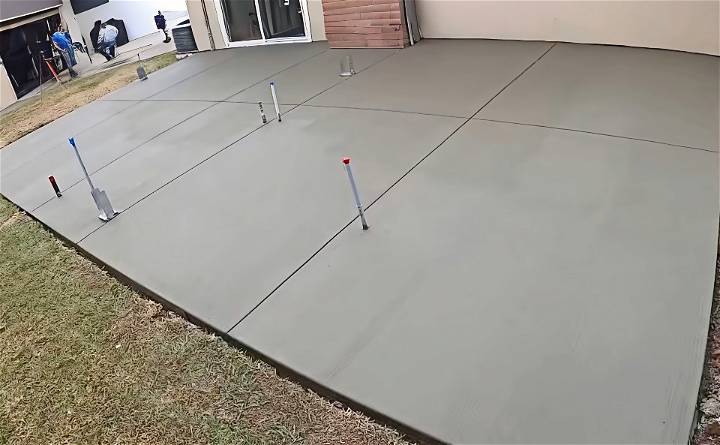
- Cracking: Cracks can appear if the concrete dries too quickly or if there's a lack of control joints. To prevent this, ensure you're adding control joints every 4-6 feet in large slabs and keeping the surface moist during the curing process. For existing cracks, clean the area and fill it with a concrete repair caulk or a vinyl patching compound.
- Discoloration: Discoloration can occur due to uneven curing, the use of different batches of concrete, or the reaction of certain materials with the concrete. To avoid this, mix enough concrete to complete the job and cure it uniformly. If discoloration happens, a concrete stain or dye can help even out the color.
- Surface Pitting: Surface pitting, or bug holes, are small cavities on the concrete surface. They are often caused by air bubbles trapped during the pouring process. To minimize this, tap the sides of the forms to release trapped air and use a concrete vibrator. A concrete patching compound can fill these holes in a finished patio.
- Moss and Algae Growth: Moss and algae can grow on patios in shady, damp areas. To prevent growth, ensure proper drainage and consider using a sealant with anti-fungal properties. If growth occurs, a solution of bleach and water can help remove it, but be sure to protect your plants and grass from the solution.
- Sealant Peeling: Peeling sealant can be due to moisture trapped under the sealant or the application of a sealant on a dirty surface. Before sealing, make sure the patio is dry and clean. If peeling happens, remove the old sealant, clean the surface thoroughly, and reapply the sealant.
By being prepared to address these issues, you can ensure a smooth and successful DIY concrete patio project.
FAQs for DIY Concrete Patio
When embarking on a DIY concrete patio project, you might have several questions. Here's a comprehensive FAQ section to guide you through the process:
Q: How long does it take for the concrete to cure?
A: Concrete typically takes about 24 to 48 hours to set enough for you to walk on it. However, it can take up to 28 days to fully cure and reach its maximum strength. During this time, keep the surface moist to prevent cracking.
Q: What's the best concrete mix for a patio?
A: For patios, a general-purpose mix, such as a 5-bag mix with a high-strength cement, is recommended. This ensures durability and a smooth finish.
Q: Can I pour concrete directly on dirt?
A: Yes, but it's crucial to prepare the ground properly. Remove any grass, plants, or debris. Compact the soil and add a layer of gravel to improve drainage.
Q: How thick should the concrete be for a patio?
A: A thickness of 4 inches is standard for residential patios. If you plan to place heavy objects like a hot tub on the patio, consider increasing the thickness to 6 inches for extra support.
Q: Do I need to reinforce my concrete patio?
A: Yes, reinforcement with wire mesh or rebar can prevent cracks and provide structural integrity. It's especially important for larger patios or areas with heavy usage.
Q: How do I prevent my patio from cracking?
A: Apart from proper reinforcement, control joints should be placed to allow for expansion and contraction. Also, ensure the base is well-compacted and that the concrete is not too wet when poured.
Q: What maintenance is required for a concrete patio?
A: Regular cleaning and periodic sealing are recommended. Sealing helps protect the surface from stains, weather, and wear. It's typically done every 2-3 years, depending on the sealer type and patio usage.
Q: Can I add color to my concrete patio?
A: Absolutely! You can add pigment to the concrete mix before pouring or apply a stain after the concrete has cured for a customized look.
Q: When is the best time to build a concrete patio?
A: The ideal time is during mild weather conditions—not too hot or cold—to ensure the concrete sets properly. Avoid pouring concrete in extreme temperatures.
By tackling these issues, you'll be ready to make a great concrete patio. Plan well and follow best practices for success.
Conclusion: Enjoying the Fruits of Labor
Completing this DIY concrete patio was a journey filled with learning, hard work, and, ultimately, immense satisfaction. Seeing the project come together, knowing the sweat and effort that went into every step, was incredibly rewarding.
This project wasn't just about laying concrete; it was about transforming a part of my home. If you're considering embarking on a similar DIY adventure, I hope my experience inspires and guides you through your project. Remember, thorough planning, understanding the materials and their purpose, and taking each step with care will lead you to a successful and fulfilling outcome.


