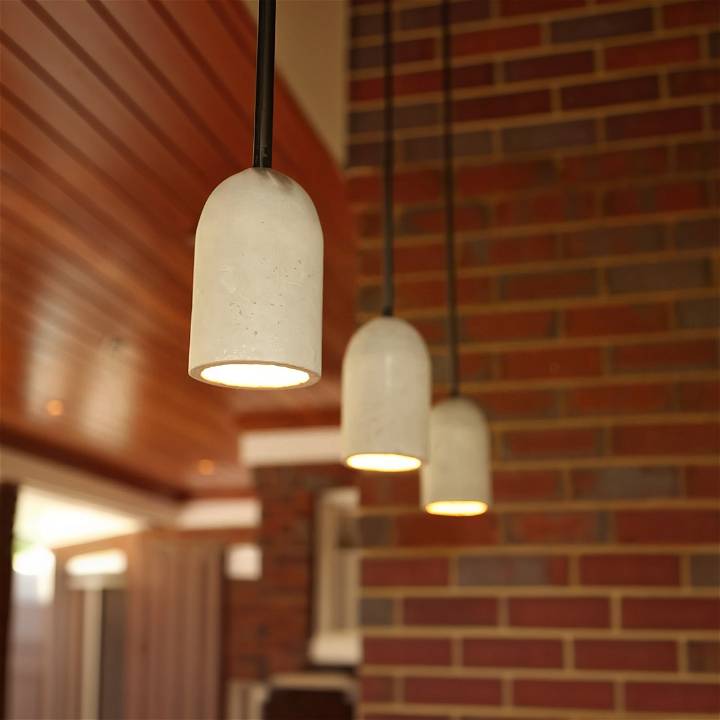
Making your own DIY concrete pendant lights can transform your living space with a unique touch of modern design. This guide offers step-by-step instructions, ensuring you have all the necessary materials and knowledge to embark on this creative project. From selecting the right concrete mix to mastering the mold-making process, we lay a solid foundation for your crafting journey, making the complexity of working with concrete both manageable and enjoyable.
As you move forward, you'll find practical advice on customizing your pendant lights, dealing with common challenges like air bubbles and cracks, and exploring advanced techniques for truly one-of-a-kind creations. Safety tips and a comprehensive FAQ section are also included to address any queries you might have, ensuring a smooth and enjoyable crafting experience. With clear instructions and a focus on creativity, you're well-equipped to make a statement piece that adds warmth and style to any room. Ready to start crafting? Let's explore the world of DIY concrete pendant lights together, step by step.
Materials You Will Need
- Quickrete sand topping mix
- Mixing bucket
- Pendant cord kit
- Mixing spoon (disposable)
- Large can for support
- Drill driver with a pilot bit and a Phillips bit
- Razor knife and scissors
- Cooking spray
- 2.5-inch screws
- Permanent marker
- Power sander or mallet
- Coarse-grit sandpaper
- Eye protection and waterproof gloves
- Light bulb
- Two soda bottles (one 2-liter and one 1.25-liter)
Step-By-Step Instructions
Learn how to make DIY concrete pendant lights with our easy step-by-step instructions below:
Preparing the Bottles
- Empty and Clean: Start by emptying and cleaning the two soda bottles. Remove all labels and rinse well.
- Cut to Size: Depending on the desired length of your pendant light, cut the larger bottle to size, leaving a bit extra for adjustments. The smaller bottle doesn't need to be cut.
- Prep for Concrete: Spray the outside of the smaller bottle with cooking spray. This will help you remove the mold once the concrete has set.
Making the Mold
- Attach the Bottles: Screw the caps of the two bottles together, using a 2.5-inch screw. Drill three pilot holes evenly spaced around the larger bottle's cut edge, and secure the smaller bottle inside with screws. Ensure the space between each bottle is even.
- Mix the Concrete: Follow the Quickrete instructions to mix the sand topping mix. Aim for a thick, pancake batter-like consistency.
- Fill the Mold: Pour the concrete into the space between the two bottles, tapping the mold occasionally to release air bubbles.
Finalizing the Pendant
- Let It Dry: Allow the concrete to cure according to the mix instructions, typically overnight.
- Remove the Mold: Carefully cut away the plastic bottles with a razor knife.
- Smooth the Edges: Use coarse-grit sandpaper to smooth any rough edges.
- Install the Pendant: Attach the pendant cord kit according to the manufacturer's instructions. If you're not comfortable with electrical work, consider hiring a professional.
Safety Tips
- Always wear protective eyewear and gloves when working with concrete and cutting tools.
- Work in a well-ventilated area to avoid inhaling concrete dust.
Customization Ideas
- Consider adding color to the concrete mix for a unique look.
- Use various bottles for different pendant shapes and sizes.
Video Tutorial
For a step-by-step video tutorial on crafting DIY Concrete Pendant Lights, watch this helpful video: DIY Concrete Pendant Lights.
It pairs well with this written guide, providing an additional perspective on the methods outlined, to ensure clarity and ease of understanding.
Make your own concrete pendant lights to add a custom touch to your home decor. A fun and creative project that will impress. Enjoy crafting!
In-Depth Explanations and Variations for DIY Concrete Pendant Lights
Making your own concrete pendant lights is not only a fulfilling project but also a fantastic way to add a modern, industrial touch to your home. The success of your project largely depends on understanding the curing process and exploring various customization options. Let's dive into the details.
Understanding the Curing Process
The Science Behind Curing:
Curing is a critical phase in a concrete setting, involving a series of chemical reactions between water and cement. These reactions help to harden and strengthen the material. The process is influenced by temperature, humidity, and time.
Ideal Conditions for Curing:
- Temperature: The optimal temperature range for curing is between 50°F and 75°F (10°C to 24°C). Temperatures too low can slow down the curing process, while too high temperatures can cause the water to evaporate too quickly, weakening the concrete.
- Humidity: A relative humidity of 90% is ideal for the curing process. Maintaining high humidity ensures that there is enough moisture for the chemical reactions to continue.
- Timeframes: Concrete typically needs at least 24 to 48 hours to set initially. However, for it to reach its maximum strength, it should cure for at least 3 to 7 days. Longer curing times result in stronger concrete.
Tips for Optimal Curing:
- Maintain Moisture: Cover your concrete pendant with a plastic sheet or a damp cloth to retain moisture.
- Monitor Temperature: Keep your curing concrete in a stable environment where you can control the temperature, avoiding direct sunlight or cold drafts.
- Be Patient: Resist the urge to de-mold your pendant too early. Giving it time ensures a better result.
Variations and Customization Options
Different Designs and Shapes:
You can experiment with various molds to make unique shapes for your pendant lights. Common household items like balloons for spherical shapes, bowls for dome shapes, and buckets for larger, circular pendants can be used. The only limit is your imagination.
Customizing Surface Texture and Color:
- Surface Texture: For a smooth finish, use fine-grit sandpaper after demolding. For a rough, industrial look, consider adding small pebbles or coarse sand to your concrete mix.
- Color: Concrete pigment can be added to the mix before pouring it into the mold. Experiment with different colors to match your decor.
Adding Decorative Elements:
Embedding items into your concrete pendant can add a personal touch. This could be anything from small stones, glass pieces, or even metal objects. Place them in the mold before pouring the concrete for a unique look.
DIY pendant lights offer endless customization options. Experiment with the curing process for unique designs. Patience and creativity are key to success.
Troubleshooting Common Challenges
Air Bubbles
Identification: Small holes or voids on the surface of your pendant light.
Fix: To minimize air bubbles, tap the sides of your mold gently but firmly after pouring the concrete. This encourages air bubbles to rise to the surface. If bubbles persist, using a finer concrete mix or a concrete vibrator can help. For finished pieces, fill small holes with a slurry of cement and water, then sand smooth.
Uneven Concrete
Identification: The concrete surface is not level or has high and low spots.
Fix: Ensure your mold is on a perfectly level surface before pouring. If you've already poured and the surface is uneven, you can sand it down with coarse-grit sandpaper, moving to finer grits for a smooth finish. For future projects, using a self-leveling concrete mix can help.
Cracks
Identification: Visible fractures or hairline cracks in the concrete.
Fix: Small cracks can often be repaired with a concrete patching compound. Apply according to the manufacturer's instructions and allow it to dry completely. To prevent cracks, avoid moving your project until it has fully cured, and ensure your mix has the right amount of water (too dry or too wet can lead to cracking).
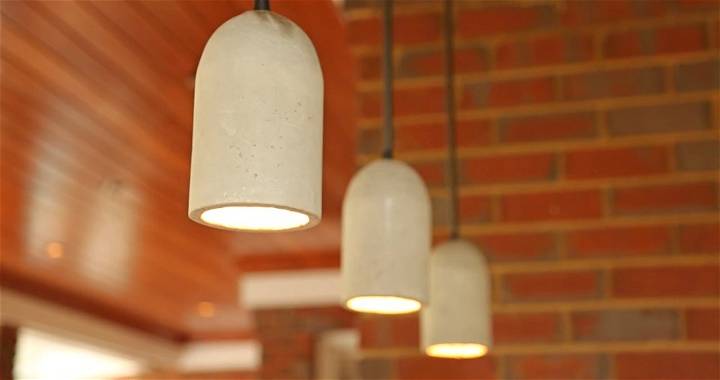
Advanced Techniques for DIY Concrete Pendant Lights
Learn advanced techniques for making DIY concrete pendant lights. Elevate your home decor with these stylish and unique lighting fixtures.
Embedding Objects in Concrete
For those looking to take their concrete pendant lights to the next level, embedding objects into your concrete can add an eye-catching element. Small stones, colored glass fragments, or even metal pieces can be set into the wet concrete mix. The key is to carefully place these items in the mold after pouring the initial layer of concrete. Use a tool to gently press the objects into the surface, ensuring they are well embedded but still visible after the concrete sets.
Making Multiple-Piece Molds
Making a pendant light that involves multiple pieces or complex shapes may require a more advanced approach to molding. For this, consider using silicone to make your molds, as it allows for greater flexibility in design. You can construct your original model from clay or a similar material, and then make a silicone mold around it. This method is particularly useful for designs that aren't simply spherical or cylindrical.
Using Colored Concrete Mixes
Adding color to your concrete mix can dramatically change the look of your pendant lights. There are two main methods for achieving colored concrete: adding pigment directly to your concrete mix before pouring or applying a concrete stain after the object has cured. When mixing the color directly into the concrete, ensure a consistent mix to avoid color patches. With staining, you have the flexibility to add patterns or gradients, though it requires a steady hand and a good eye for detail.
Safety Precautions and Safe Handling of Materials
Safety should always be a priority when working with concrete and the associated tools and chemicals. Here are key precautions to ensure a safe working environment:
- Wear Protective Gear: Always wear gloves and eye protection when mixing and pouring concrete. If you're sanding or cutting cured concrete, a dust mask or respirator is also essential to prevent inhalation of concrete dust.
- Proper Ventilation: Work in a well-ventilated area, especially if you're working with any chemicals for coloring or sealing your concrete. Outdoor spaces are ideal, but if you're working indoors, ensure windows are open and fans are running.
- Skin Protection: Concrete can cause burns and irritation due to its caustic nature. If you get concrete on your skin, wash it off immediately with water. Long sleeves and pants can offer additional protection.
- Careful Handling: Be mindful of the weight of concrete and the hard edges of your finished pieces. Lift with your legs, not your back, and consider wearing protective footwear.
Experienced DIYers can make unique concrete lights while staying safe by using advanced techniques and safety precautions.
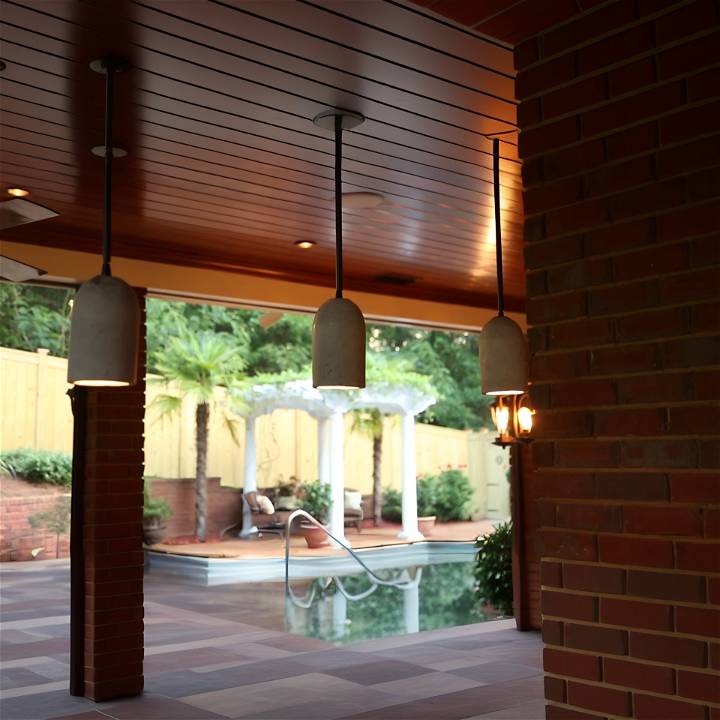
FAQs About DIY Concrete Pendant Lights
Discover the answers to all your DIY concrete pendant light questions in this comprehensive FAQ guide. Learn how to make stunning lighting solutions.
Q: What type of concrete mix should I use for pendant lights?
A high-strength, fine-textured concrete mix is ideal for detailed work like pendant lights. Look for mixes designed for artistic or decorative projects.
Q: Are there any safety considerations I should be aware of?
Yes, always wear protective gear, including gloves, eye protection, and a dust mask when mixing and pouring concrete. Work in a well-ventilated area to avoid inhaling dust.
Q: Can I customize the color or texture of my concrete pendant lights?
Absolutely. Add liquid or powder concrete pigment to your mix for color. For texture, consider embedding objects into the wet concrete or using a textured mold.
Q: My pendant light is heavier than expected. How can I ensure it's safely installed?
Make sure to use a ceiling anchor suitable for the weight of your pendant light. When in doubt, consult with a professional to ensure safe installation.
Q: How long should I let my concrete pendant light cure before installation?
Concrete typically needs to be cured for at least 24-48 hours before demolding. However, for maximum strength, allow your pendant light to cure for an additional 7 days before hanging.
By understanding common challenges and questions, you can navigate making DIY concrete pendant lights for a smoother project and beautiful results.
Conclusion:
In conclusion, mastering the art of DIY concrete pendant lights can transform your home with unique and custom lighting options. From preparing the bottles, and crafting the perfect mold, to the finalization of your pendant, each step brings you closer to adding a chic touch to your décor. This guide has covered everything from safety tips to customization ideas, ensuring your project is both successful and tailored to your style.
Troubleshooting common challenges and exploring advanced techniques enhances your skills further, allowing for even more creativity. If you've followed these step-by-step instructions, you're now equipped to illuminate your space with a bespoke ambiance. Remember, patience and precision are key, and the results are well worth the effort for any budding designer. Happy crafting!


