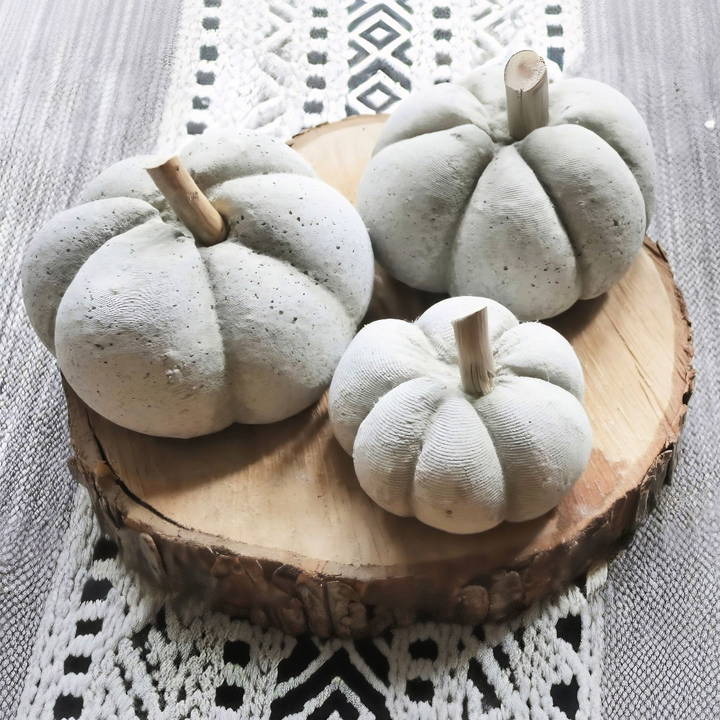
Decorating your home for the fall season doesn't have to be expensive or complicated. In fact, with a bit of creativity, you can make beautiful DIY concrete pumpkins at home for just a dollar. These pumpkins are perfect for adding charm to your space, whether you want to place them on your table, mantel, or front porch. Here's how I made mine using a few simple materials, and how you can do the same.
Why I Chose to Make My Own Pumpkins
I'm not someone who usually goes all-in on seasonal decorations, but when I saw how cute and affordable these concrete pumpkins could be, I couldn't resist. Store-bought versions of similar pumpkins can range anywhere from $5 to $40, but I managed to make a set of three for just a couple of bucks. It's fun, inexpensive, and gives you complete control over the size and style of your pumpkins.
Materials You'll Need
The great thing about this project is that you don't need a long list of materials. Here's what I used:
- Nylons (pantyhose): Any kind will work, but I found that thicker nylons make for easier removal once the concrete dries.
- String: You'll need it to shape the pumpkin and give it those characteristic ridges.
- Quikrete: This is a premixed concrete you can find at any hardware store. It's easy to work with and affordable.
- Water: To mix with the concrete.
- Sticks: Use them as stems for your pumpkins.
- 120 Grit Sandpaper (optional): To smooth out the surface if needed.
Step by Step Instructions
Make stunning DIY concrete pumpkins for fall decor with our easy, step-by-step guide. Learn how to prep, mold, and finish like a pro!
Step 1: Prepare Your Nylons
The first step is to get your nylons ready. I cut off the top section, then sliced the remaining nylon in half. This gave me enough material to make four pumpkins from one pair of nylons. It's an easy way to upcycle something you might already have lying around.
Step 2: Mix the Concrete
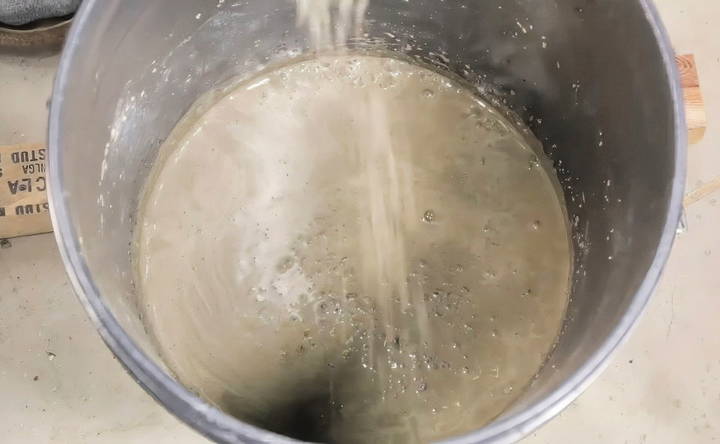
Next, I prepared the Quikrete. A little tip: don't try to mix all the concrete at once. Start with a small batch, adding water to make a thick consistency, then gradually add more mix and water as needed. I used an empty yogurt container to hold the nylon open as I filled it with concrete. It made the process a lot less messy and gave me a good-sized mold for the pumpkin shape.
Step 3: Shape the Pumpkin
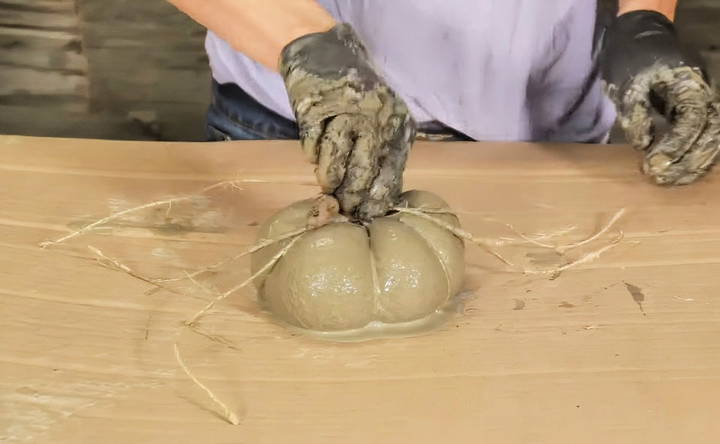
Once the concrete was inside the nylon, I tied a knot at the top to seal it. Then, I laid out three pieces of string on a flat surface and set the nylon pumpkin right in the middle. Carefully, I tied the strings at the top to make those lovely pumpkin ridges. One thing to keep in mind: avoid tying the strings directly on top of the nylon knot, as they can get buried in the concrete and be difficult to remove later.
Step 4: Let It Dry
Now, the hardest part—waiting! I set the pumpkins aside to dry for 24 hours. While waiting, I experimented with some other nylon-based ideas, but the pumpkins remained my favorite.
Step 5: Remove the Nylon and String
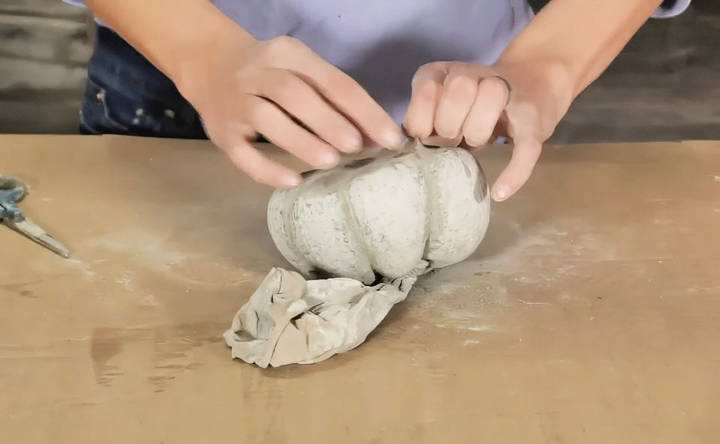
Once the pumpkins had fully dried, it was time to remove the nylons and string. I started by cutting the string from the bottom, and then I carefully made a small hole in the bottom of the nylon to peel it off. If your nylons are too thin, they can get stuck in the concrete and make a fuzzy texture. That's why I recommend using thicker nylons. They come off in one smooth piece and give a cleaner finish.
Step 6: Optional Smoothing
If you plan to display the pumpkins indoors, you might want to give them a quick sanding with 120-grit sandpaper. This will remove any rough edges or concrete residue. Once you've sanded them down, make sure to wipe off any remaining dust.
Step 7: Add the Stems
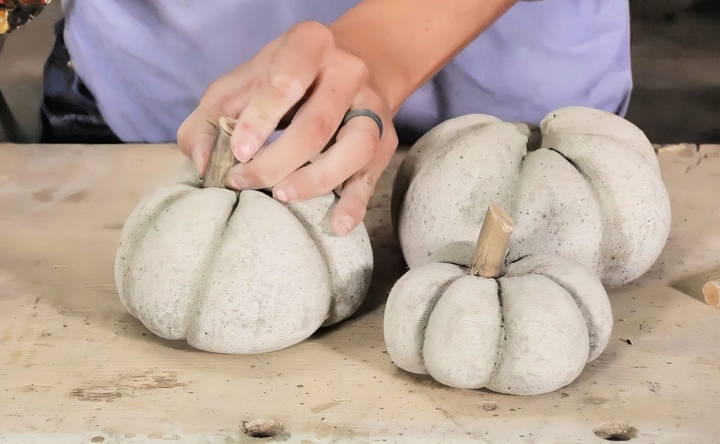
The final touch is adding stems. I used small sticks from my backyard and attached them with hot glue to the top of the pumpkin. You can experiment with different types of stems—maybe use cinnamon sticks for a scented option or paint your sticks to match your decor.
Tips and Tricks I Learned Along the Way
While making these pumpkins, I discovered a few helpful tips that made the process smoother:
- Thicker nylons work best: Thin nylons can stick to the concrete and make it difficult to remove cleanly. Thicker nylons peel off in one piece, saving you time and frustration.
- Knot placement is important: When tying the strings to form the pumpkin ridges, avoid tying them directly on the nylon knot. It's much easier to remove the string later if it's tied separately.
- Work in small batches when mixing concrete: If you try to mix all the concrete at once, it becomes hard to get a smooth consistency. Working in smaller batches ensures everything is well-mixed and easier to pour into the nylon mold.
Decorating Ideas for Your Concrete Pumpkins
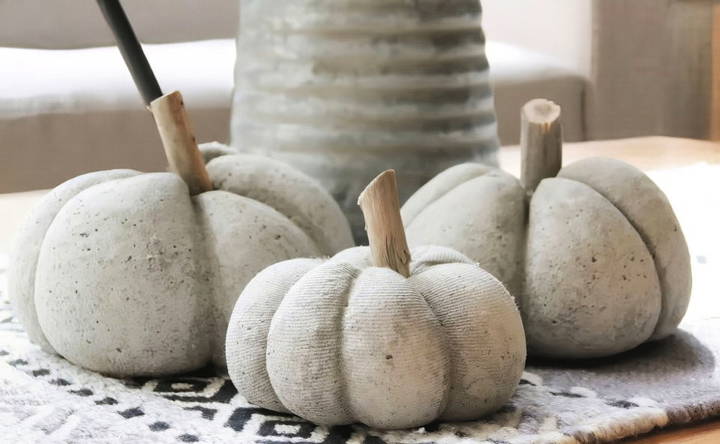
Once your pumpkins are ready, the fun begins! I used mine as table centerpieces, but here are a few more ideas:
- Mantel Decor: Make smaller pumpkins to arrange on your mantel for a subtle touch of fall.
- Front Porch Display: Make larger pumpkins to place on your front steps or porch.
- Paint Them: You can even paint your concrete pumpkins to match your home's color scheme. Try classic orange or white for a minimalist look, or even metallic for something a bit more modern.
Creative Variations
Making DIY concrete pumpkins is a fun and versatile project. Here are some creative variations to make your pumpkins unique and personalized.
Different Shapes and Sizes
- Variety of Molds: Use different molds to make pumpkins of various shapes and sizes. You can find molds in craft stores or online. Try using molds for traditional round pumpkins, tall and skinny pumpkins, or even whimsical shapes.
- Custom Molds: Make your own molds using items like balloons, plastic containers, or even old socks. Fill them with concrete to make custom shapes.
Decorative Ideas
- Painting: Once your concrete pumpkins are dry, paint them with acrylic or spray paint. Use vibrant colors for a festive look or muted tones for a more rustic feel.
- Staining: Concrete stains can give your pumpkins a natural, stone-like appearance. Apply the stain with a brush or sponge for different effects.
- Embellishments: Add embellishments like glitter, sequins, or beads. You can also glue on leaves, twine, or fabric to give your pumpkins a unique texture.
Seasonal Variations
- Halloween: For Halloween, paint your pumpkins in spooky colors like black, orange, and purple. Add faces or designs using stencils and paint.
- Thanksgiving: Make a harvest theme by painting your pumpkins in warm, earthy tones. Add elements like corn husks, dried flowers, or mini scarecrows.
- Winter Holidays: Transform your pumpkins into winter decorations by painting them white and adding snowflake designs. You can also use metallic paints for a festive touch.
Functional Variations
- Planters: Turn your concrete pumpkins into planters by hollowing out the top and adding soil and plants. Succulents and small flowers work well.
- Candle Holders: Make candle holders by making a small indentation in the top of the pumpkin. Place a tea light or small candle inside for a cozy glow.
- Doorstops: Use your concrete pumpkins as decorative doorstops. Their weight makes them perfect for holding doors open.
Personalization
- Monograms: Personalize your pumpkins with monograms or initials. Use stencils and paint to add letters to the surface.
- Messages: Write messages or quotes on your pumpkins. This can be done with paint, markers, or even carved into the concrete before it sets.
- Family Projects: Get the whole family involved by letting each member decorate their own pumpkin. This makes a collection of unique and meaningful decorations.
By exploring these creative variations, you can make your DIY concrete pumpkins truly one-of-a-kind. Have fun experimenting, and let your creativity shine!
Common Mistakes and Troubleshooting
Making DIY concrete pumpkins can be a rewarding project, but it's not without its challenges. Here are some common mistakes and troubleshooting tips to help you achieve the best results.
Avoiding Air Bubbles
Mistake: Air bubbles in the concrete can weaken the structure and make an uneven surface.
Solution:
- Mixing: Mix the concrete thoroughly to ensure a smooth consistency. Use a paddle mixer if possible.
- Tapping: After pouring the concrete into the mold, tap the sides gently to release trapped air bubbles.
- Vibrating: Place the mold on a vibrating surface or use a vibrating tool to help air bubbles rise to the surface.
Fixing Cracks
Mistake: Cracks can appear in the concrete as it dries, compromising the pumpkin's durability.
Solution:
- Proper Mixing: Ensure the concrete mix has the right water-to-cement ratio. Too much water can weaken the concrete.
- Curing: Allow the concrete to cure slowly. Keep it covered with plastic wrap or a damp cloth to retain moisture.
- Repairing: If cracks do appear, fill them with a concrete patching compound and smooth them out with a trowel.
Uneven Surfaces
Mistake: The surface of the pumpkin may be uneven or have rough spots.
Solution:
- Smoothing: Use a trowel or a putty knife to smooth the surface of the concrete before it sets.
- Sanding: Once the concrete is dry, sand the surface with fine-grit sandpaper to achieve a smooth finish.
Mold Issues
Mistake: The concrete may stick to the mold, making it difficult to remove.
Solution:
- Lubrication: Apply a thin layer of mold-release spray or vegetable oil to the inside of the mold before pouring the concrete.
- Patience: Allow the concrete to fully cure before attempting to remove it from the mold. This can take up to 24 hours.
Incorrect Consistency
Mistake: The concrete mix may be too thick or too runny, affecting the final product.
Solution:
- Follow Instructions: Carefully follow the mixing instructions on the concrete package.
- Adjusting: If the mix is too thick, add small amounts of water until it reaches a pourable consistency. If it's too runny, add more concrete mix.
Color Issues
Mistake: The color of the concrete may not turn out as expected.
Solution:
- Testing: Test the color on a small batch of concrete before applying it to the entire project.
- Consistent Mixing: Ensure the colorant is evenly mixed into the concrete to avoid streaks or uneven coloring.
Handling and Storage
Mistake: Improper handling and storage can damage the pumpkins.
Solution:
- Careful Handling: Handle the pumpkins gently, especially when they are still curing.
- Proper Storage: Store the pumpkins in a cool, dry place to prevent damage from moisture or extreme temperatures.
By being aware of these common mistakes and knowing how to troubleshoot them, you can make beautiful and durable concrete pumpkins.
FAQs About DIY Concrete Pumpkins
Discover answers to frequently asked questions about DIY concrete pumpkins. Learn how to make and customize your own stylish decor!
Concrete usually takes about 24 to 48 hours to set completely. It's best to leave it undisturbed during this time to ensure it hardens properly.
Yes, you can paint your concrete pumpkins. Use acrylic paint for the best results. You can also add a sealant to protect the paint and give your pumpkins a glossy finish.
Concrete pumpkins are durable and can withstand outdoor conditions. However, if you live in an area with harsh weather, consider applying a sealant to protect them from moisture and extreme temperatures.
Yes, concrete pumpkins can be used as planters. Make sure to drill drainage holes at the bottom to prevent water from accumulating inside.
Store your concrete pumpkins in a dry place to prevent moisture damage. If you plan to keep them outside, consider applying a sealant to protect them from the elements.
Final Thoughts
Making DIY concrete pumpkins is an affordable and simple way to add a touch of fall to your home. With just a few materials and a bit of time, you can make a unique decor that will last for years. Plus, it's a fun and creative project that anyone can do. Whether you make them big or small, painted or plain, these pumpkins are a charming addition to any home.
So, if you're looking for a budget-friendly DIY project this season, give these concrete pumpkins a try!


