Making your own DIY cookie cutter can be both enjoyable and practical. This step-by-step guide will help you craft unique shapes right at home. Making homemade cookie cutters allows you to personalize your baking tools, whether for special occasions or everyday baking. Plus, it's easier than you might think! Follow these steps to get started on making your own custom cookie cutters.

You'll only need a few materials and a bit of time. This guide breaks down the process into simple steps, making it easy to follow and complete. From selecting materials to shaping and finishing, we've got you covered.
Ready to start making your own DIY cookie cutters? Let's dive into the detailed instructions below.
Choosing Your Materials
- Aluminum Flashing: This is the star of the show. It's incredibly cheap—I found mine at a local hardware store for just $1. You'll need it because it's flexible yet sturdy enough to hold the shape of your cookie cutter.
- Needle-nose Pliers (Jewelry Size): Essential for bending the flashing, especially at precise angles. If your toolkit doesn't have one, it's worth grabbing a pair.
- Craft Scissors: You'll use these to cut the aluminum flashing. Make sure they're strong enough to cut through the metal without dulling.
- Template: Pick a simple outline to start. This could be a cartoon character, an animal, or any shape you love. Keep complexity in mind; simpler is easier.
- Fine-tip Sharpie & Ruler: This is for marking precise measurements and lines on your aluminum strip.
- Twine: This helps in measuring the perimeter of your design, ensuring you cut just the right amount of flashing.
- Scotch Tape: Surprisingly, this is all you need to secure the ends of your cookie cutter together. Its durability and ease of use make it perfect for this project.
Step by Step Instructions
Learn how to make custom cookie cutters at home with our step-by-step guide, covering materials, shaping techniques, and expert tips for perfect results.
Preparing Your Materials
Start by flattening out the aluminum flashing with your hands. It's pliable but can be a bit obstinate at first. Once flattened, use the ruler and sharpie to mark a straight line down the length of the flashing. This is where your craft scissors come in—cut carefully along the line. Remember, the edges can be sharp, so handle with care.
Shaping Your Masterpiece
- Measure Up: Use twine to outline your template, then compare this length against your strip of flashing, adding a little extra for the overlap.
- Mold Away: Begin molding your aluminum strip around the template. For straight lines, use your hands. For angles and curves, this is where your needle-nose pliers shine. Bend slowly and check your progress against the template frequently.
- Mark and Bend: When you reach an angle, mark it with the sharpie before bending with your pliers. It's crucial to be decisive with your bends to avoid weakening the metal.
- Finishing Touches: Once your shape is complete, overlap the ends slightly. This is where the humble piece of scotch tape becomes the hero, securing your shape firmly.
My first bird-shaped cookie cutter taught me patience in bending aluminum precisely. My initial bends were off, but practice made me better at judging angles and applying pressure with pliers.
Customization Ideas for DIY Cookie Cutters
Making your own cookie cutters is not just about cutting the dough into shapes; it's an opportunity to express your creativity and add a personal touch to your baking. Here are some ideas to inspire your DIY cookie-cutter projects:
- Celebrate with Personalized Shapes: Whether it's a birthday, wedding, or holiday, make it memorable by crafting cutters in shapes that resonate with the occasion. Think of numbers for anniversaries, hearts for Valentine's Day, or stars for Christmas.
- Educational Fun with Kids: Turn baking into a learning experience. Make alphabet or animal-shaped cutters to teach children about letters and wildlife. It's a fun way to combine education with a tasty treat!
- Custom Messages: Impress your friends and family by making cookie cutters that spell out names or special messages. Perfect for personalized gifts or party favors.
- Seasonal Themes: Embrace the changing seasons with themed cutters. Make leaf shapes for fall, flowers for spring, suns for summer, and snowflakes for winter.
- Your Favorite Things: Show off your hobbies or interests through your baking. Make cutters shaped like musical instruments, cars, or any other objects that tell a story about you.
- Mix and Match: Combine different shapes to make new ones. Use circles and rectangles to build a robot or hearts and ovals to design a new animal. The possibilities are endless!
- Stamps and Imprints: Go beyond the outline. Design cutters that also imprint patterns or textures onto your cookies, adding another layer of detail to your creations.
The key to customization is to let your interests and imagination lead the way. With a little bit of creativity, you can transform simple cookies into works of art that are as unique as you are.
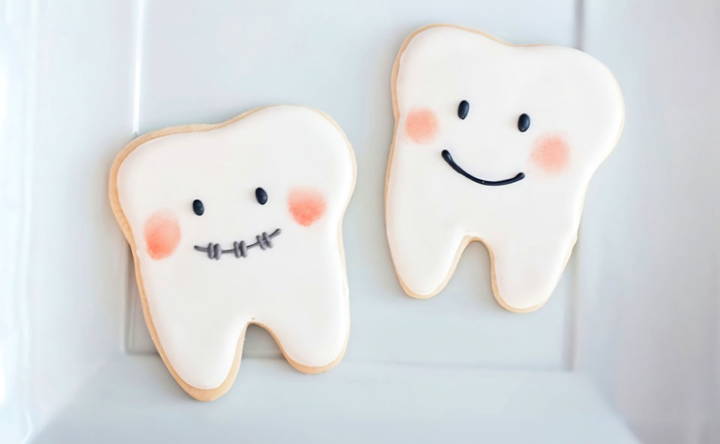
Advanced Techniques for DIY Cookie Cutters
When you're ready to take your DIY cookie-cutter skills to the next level, these advanced techniques will help you make intricate and professional-looking shapes. Here's how to refine your craft:
- Precision Bending: For complex designs, precision is key. Use needle-nose pliers to bend metal strips with accuracy. Follow a printed template of your design, and use a non-permanent marker to outline where bends should occur on the metal strip.
- Joining Edges: To make a seamless join, use food-safe superglue. Apply a small amount to the ends of your cutter and hold firmly until the glue sets. This will ensure your cookie cutter maintains its shape during use.
- Adding Handles: For ease of use, especially with deeper cutters, attach a handle. You can make a handle by folding over a wider strip of metal and securing it to the top edge of your cutter.
- Making Imprints: To add texture to your cookies, design cutters that imprint patterns. You can etch designs into flat strips of metal using a pointed tool before bending them into shape. This technique adds a decorative touch to your cookies without the need for additional icing or decorations.
- Layering Designs: For a multi-dimensional effect, layer different shapes on top of each other. Start with a base shape, then add smaller cutters on top to make a layered design. This is perfect for making detailed characters or scenery.
- Using Alternative Materials: Explore materials beyond metal, such as wood or plastic. If you have access to a 3D printer, you can design and print your own cookie cutters in any shape you can imagine.
- Themed Collections: Make a series of related shapes that tell a story or represent a theme. This is great for holiday baking, educational sets, or as a gift for someone with a specific interest.
Use advanced techniques to make unique cookie cutters that showcase your DIY skills. Always prioritize safety with sharp materials and enjoy crafting something special for your baking.
Troubleshooting Common Issues in DIY Cookie Cutter Making
When crafting your own cookie cutters, you might encounter a few hiccups along the way. Here's a helpful guide to troubleshooting common issues so you can keep your baking projects on track:
- Sharp Edges: If you're using materials like tin strips or soda cans, the edges can be quite sharp. Always wear protective gloves to avoid cuts, and use a file to smooth out any sharp points after shaping your cutter.
- Bending Metal: Getting the right shape can be tricky. If the metal isn't bending as you'd like, use needle-nose pliers for precision. For intricate designs, consider using a template to guide your bends.
- Cutter Sticking to Dough: To prevent sticking, dip your cutter in flour before each use. This will help release the cutter from the dough without distorting the shape.
- Overworking the Dough: If your cookies are coming out tough, you might be over-mixing the dough. Mix just until the ingredients are combined to keep your cookies tender.
- Cutter Durability: For a sturdier cutter, consider using an aluminum oven liner. Remember to fold the sharp edges inwards and flatten them to avoid any injuries.
- Leavening Issues: If your cookies aren't holding their shape, check your leavening agents. Expired baking soda or baking powder can cause cookies to spread too much.
- Dough Consistency: Too much butter or not enough flour can also lead to cookies that don't hold their shape. Adjust your recipe accordingly if you notice spreading.
- Environmental Factors: Believe it or not, the weather can affect your baking. High humidity or elevation changes can impact how your cookies bake, so consider these factors if you're having issues.
By keeping these tips in mind, you'll be better prepared to handle any challenges that arise during your DIY cookie-cutter making. Patience and practice make perfect, so don't be discouraged by a few setbacks.
FAQs About DIY Cookie Cutter
Discover everything you need to know about DIY cookie cutter faqs with tips, materials, and techniques to make unique cookie shapes at home.
Yes, you can use a clean, empty soda can to make a simple cookie cutter. After enjoying your drink, clean the can, cut off the top and bottom, and cut down the side to create a flat sheet. Mark and cut a strip from the can, then shape it into your desired cookie cutter design. Remember, this method is best for smaller cookies.
It is safe to make cookie cutters at home as long as you use food-safe materials and take the necessary precautions, such as wearing protective gloves when handling sharp edges. Always ensure that any adhesives used are also food-safe.
To ensure your DIY cookie cutter maintains its shape, use a sturdy material like a tin strip or an oven liner. When using aluminum foil, fold it into a thick strip before shaping. For added stability, you can double the strips or use heavy-duty foil.
Decorating cookies is a fun way to add personality to your treats. After baking, let the cookies cool completely. Then, use royal icing, colored sugars, or edible paints to decorate. For intricate designs, use a piping bag with a fine tip. If you’re working with children, simpler decorations like sprinkles or chocolate chips can be applied directly to the icing.
Absolutely! The beauty of DIY cookie cutters is the ability to make any shape you can imagine. From simple circles and hearts to complex silhouettes of your favorite characters or pets, the only limit is your creativity. Just ensure your design isn't too intricate for the material you're using, as some materials may not hold fine details well.
Final Thoughts
Wrapping up, mastering how to make a DIY cookie cutter can be a fun and fulfilling project. By crafting your own DIY cookie cutter, you personalize your baking adventure and unleash your creativity in the kitchen. Follow this step-by-step guide, and you'll quickly see how easy and enjoyable it is to make unique shapes for your delicious treats.


