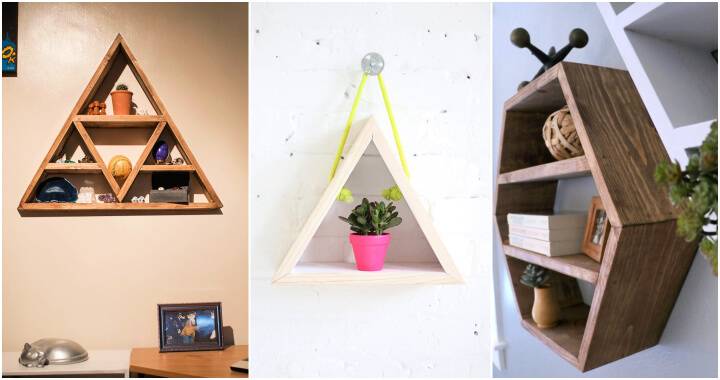
Building a corner shelf can be both fun and useful. One day, I noticed an empty corner in my living room. I wanted to make it more functional and stylish. I decided to make a DIY corner shelf. With some basic tools and materials, I started my project excited about making something by myself.
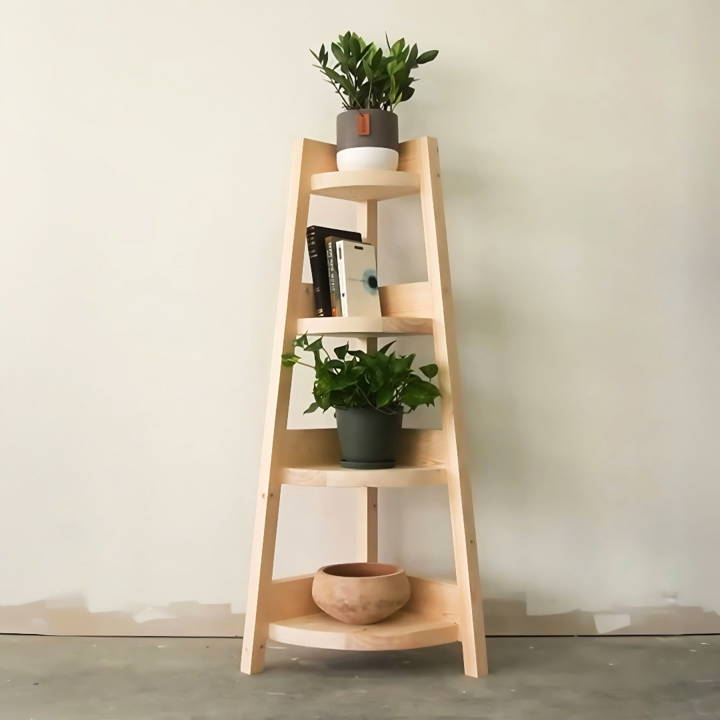
To make a DIY corner shelf, you need wood, screws, a saw, a drill, and measuring tape. First, measure the corner space to ensure your shelf fits well. Cut the wood according to your measurements. Assemble the pieces using screws and secure them in place. Sand the edges for a smooth finish. Now, you have a functional and beautiful corner shelf.
I'm helping with this guide so you can build your own unique DIY corner shelf. These steps will help you start your project right away.
Materials Needed
Get a comprehensive list of materials needed for your project, including lumber, tools, and supplies. Start your DIY project with ease!
Lumber:
- 2x6 by 8 boards (2): These serve as the main structure of your shelves. I chose them for their width and sturdiness.
- 2x2 by 6 boards (3): These are used for the frame of the shelf. Opting to cut my own 2x2s from one of the 2x6 boards was a cost-effective method I found useful.
Tools and Supplies:
- Table saw, and Miter saw: For cutting wood to precise lengths and angles.
- Wood glue and Clamps: Essential for bonding the boards securely.
- Sander and Sandpaper: This is used to smooth down rough edges and ensure a clean finish.
- Screws (2.5-inch) and Pocket hole screws (1.5-inch): To assemble the pieces tightly.
- Drill and Jigsaw: For assembling and shaping the shelves.
- Measuring tape and Pencil: To measure and mark cuts accurately.
Step by Step Instructions
Get easy, step-by-step instructions on a DIY corner shelf. Build your own stylish, space-saving shelf with simple materials and tools.
1. Preparing the Wood
First up, cut your 2x6 boards into three pieces for the shelves. If your boards have rounded edges like mine, you may want to trim them slightly to square off the edges. This is optional but helps in achieving cleaner glue-ups.
2. Glue-ups for Shelf Panels
Glue the cut pieces together to form a solid wood panel. This will be the base from which you'll cut out individual shelves. Remember to clamp them tight and leave them to dry.
3. Building the Shelf Frame
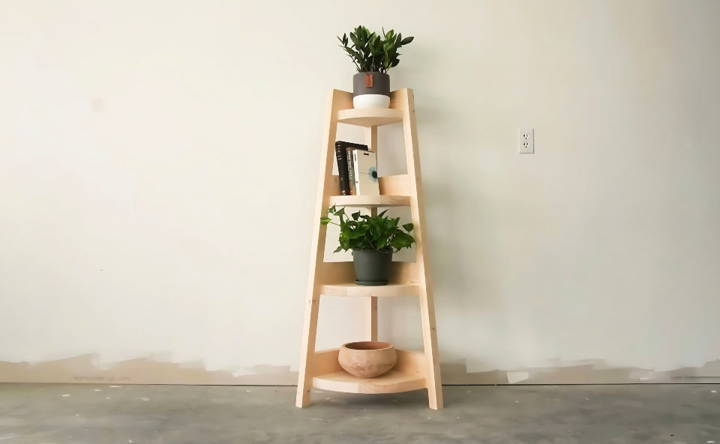
Cut your 2x2s at a 7-degree angle for the sides of the frame to slant inwards, making a unique shelf design. Remember to cut one set with square ends for the back straight post and two with mitered ends for the slanted sides.
4. Assembling the Shelf Frame
Drill pocket holes where needed for discreet screw placement. I found pocket holes to be efficient and effective, especially for the back part of the shelf where visibility is minimal.
5. Cutting and Adding the Shelves
After the frame, it's time to cut the shelves from the glued-up panel. Measure and trace out the sizes needed, including any desired curves at the edges for a more aesthetic look. A jigsaw is perfect for this part, with a miter saw to ensure straight edges.
6. Sanding and Final Touches
Thoroughly sand down all parts for a smooth finish. This part is time-consuming but crucial for a professional look. Then, attach the shelves to the frame using your screws.
7. Painting or Staining (Optional)
You can leave your shelf in its natural wood state or paint/stain it to match your decor. Since this was for my mom, she chose to paint it later to match her foyer.
Tips for Success
- Measure Twice, Cut Once: This old adage is incredibly important in DIY woodworking projects.
- Dry Fit Before Final Assembly: Always piece together your project without glue or screws to ensure all parts fit correctly.
- Personalize: Don't hesitate to modify the design based on your needs. Whether it's the number of shelves or the overall dimensions, make it yours.
- Safety First: Always use protective gear and be mindful of safety when operating power tools.
Customization Ideas for Your DIY Corner Shelf
Building a corner shelf that reflects your personal style and complements your home decor can be a fulfilling DIY project. Here are some customization ideas to inspire you:
- Choose Your Style: Think about the overall look you want to achieve. For a modern feel, consider clean lines and glossy finishes. If you prefer a rustic vibe, use reclaimed wood and a natural stain.
- Paint It Up: A fresh coat of paint can transform your shelf. Go bold with a bright color, or keep it classic with white or black. For a playful touch, use painter's tape to build geometric patterns or stripes.
- Add Some Texture: Incorporate materials like rope or fabric for a unique texture. Wrapping the edges or underside of shelves with sisal rope can add a nautical twist, while a fabric backing can introduce a pop of pattern.
- Get Creative with Brackets: Brackets aren't just functional; they can be decorative too. Choose brackets that match your style, whether they're ornate iron for a vintage look or sleek metal for a contemporary edge.
- Light It Up: LED strip lights or small lamps can add ambiance and highlight items on your shelf. Consider installing lights underneath each shelf for a warm glow.
- Mix and Match: Don't be afraid to mix materials and textures. A wooden shelf with metal accents or glass elements can build an interesting contrast.
- Personalize with Accessories: Display items that mean something to you, like souvenirs from travels, handmade pottery, or framed photos. Arrange them in groups of odd numbers for a pleasing composition.
- Think About Function: If your shelf will hold books, consider adding a creative bookend or painting the inside of the shelf in a contrasting color. For a kitchen shelf, hooks underneath can hold mugs or utensils.
- Safety First: Ensure your customized shelf is safely installed. Use appropriate anchors for your wall type, and don't overload the shelf.
Incorporate these ideas to make a functional corner shelf that reflects your personality and style. The best DIY projects are joyful to build and use daily.
Advanced Projects for Your DIY Corner Shelf
For those who have mastered the basics of DIY and are looking for a challenge, advanced projects can take your corner shelf to the next level. Here's how you can push the boundaries of creativity and craftsmanship:
Rotating Corner Shelves:
- Design: Plan a rotating mechanism at the base of your shelf. This can be as simple as a lazy Susan bearing or as complex as a motorized turntable.
- Construction: Build individual shelf tiers, ensuring they are perfectly balanced. Attach them to the rotating mechanism with a sturdy central axis.
- Functionality: Consider the weight distribution and ensure that your rotating shelf can hold your items securely while in motion.
Multi-Tiered Corner Shelves:
- Design: Sketch out a multi-tiered structure that extends vertically, making use of the height in a room.
- Construction: Use high-quality materials to ensure stability. Each tier should be securely fastened to the wall or to the tiers below it.
- Customization: Add unique features to each tier, such as a built-in plant holder on one level or a hidden drawer in another.
Foldable or Expandable Shelves:
- Design: Build a blueprint for shelves that can fold out for use or collapse to save space.
- Mechanism: Incorporate hinges and supports that allow for easy movement. Ensure that when extended, the shelves lock in place for safety.
- Materials: Choose materials that are lightweight yet durable to facilitate movement without compromising on strength.
Integrated Technology Shelves:
- Design: Plan shelves with built-in charging stations or smart home device compartments.
- Wiring: Safely integrate electrical components, following local codes and regulations.
- Functionality: Ensure that the technology is easily accessible and that cords are neatly managed.
Themed Shelves:
- Inspiration: Draw inspiration from your favorite book, movie, or art piece to build a themed shelf.
- Design Elements: Incorporate iconic colors, shapes, or symbols into the shelf design.
- Attention to Detail: Add small touches that true fans will appreciate, like quotes or imagery related to the theme.
Advanced DIY projects require planning, tool/material knowledge, and safety. Wear gear, work in ventilated areas, and get professional advice.
Upcycling and Repurposing for DIY Corner Shelves
Upcycling and repurposing materials for your DIY corner shelves is not only eco-friendly but also adds a unique character to your home. Here's how you can turn old items into stylish and functional corner shelves:
Finding Materials:
- Look for items at home that are no longer in use, like old ladders, wooden crates, or drawers.
- Visit thrift stores, garage sales, or salvage yards for unique finds that can be transformed into shelves.
Preparation:
- Clean your found items thoroughly before starting the project.
- If you're using wood, sand it down to remove any rough spots and prepare it for painting or staining.
Design:
- Imagine new uses for your items. An old ladder can become a vertical shelf, and a wooden crate can be mounted sideways for a rustic look.
- Maintain the item's original charm. If it has an interesting history or patina, consider preserving it as part of the design.
Assembly:
- Secure your materials properly when assembling them into shelves. Use brackets or screws that are appropriate for the weight they will hold.
- Ensure that the shelves are level when you mount them to the wall.
Finishing Touches:
- Add a coat of paint or stain if you want to update the look, but choose colors that enhance the original material.
- Consider adding wallpaper or fabric to the back of crates or drawers for an extra pop of color and pattern.
Safety:
- Make sure that your repurposed shelves are safely anchored to the wall, especially if they will hold heavy items.
- Check for any sharp edges or splinters and smooth them out to prevent injuries.
Upcycling and repurposing build unique pieces, give materials new life, and reflect your creativity and sustainability. Transform hidden treasures into functional home art.
FAQs About DIY Corner Shelf
Discover answers to your questions about DIY corner shelves! Find tips, materials, and step-by-step guides for making your own unique corner shelf.
Measure the corner where you plan to install the shelf. Consider the items you want to place on it and ensure there is enough clearance above and below the shelf. A good rule of thumb is to leave at least 12-18 inches of space between shelves for books and decorative items.
Yes, you can build a floating corner shelf that has no visible supports. This is achieved by using internal brackets that are mounted to the wall and the shelf slides onto these brackets, making a clean, floating appearance.
The best way to mount a corner shelf depends on the shelf’s weight and the wall type. For lighter shelves, you can use drywall anchors and screws. For heavier shelves or if you’re mounting to a stud, use heavy-duty brackets and ensure they are securely screwed into the stud.
Absolutely! You can transform an old door into a corner shelf, build rotating shelves for easy access, or build a multi-tiered shelf for plants. There are many plans available that can help you build a shelf that fits your style and needs.
Decorating your DIY corner shelf can be a fun and creative process. Consider painting it to match your room's color scheme or using wood stain for a rustic look. Add decorative brackets for a vintage feel, or keep it minimalist with clean lines. You can also use wallpaper or contact paper on the shelf's surface for a unique touch. For a personal display, arrange books, plants, framed photos, or collectibles in a way that reflects your style and interests.
Reflection
Wrapping up, building a DIY corner shelf can be a rewarding project. It not only maximizes space but also adds a personal touch to your home. By following this easy guide on how to build a DIY corner shelf, you'll have a functional and stylish addition to any room. Happy crafting!


