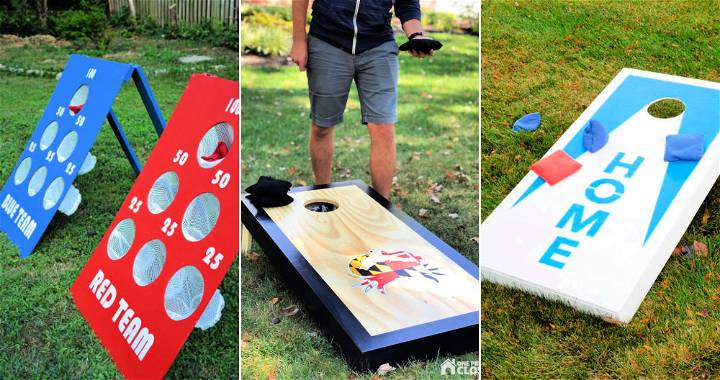
I've always loved outdoor parties, and one year, I decided to make my own DIY cornhole boards. The process was simple and fun! My goal was to add a new element of entertainment to our gatherings. With just a few materials and a bit of time, I buildd something my friends and family would enjoy.
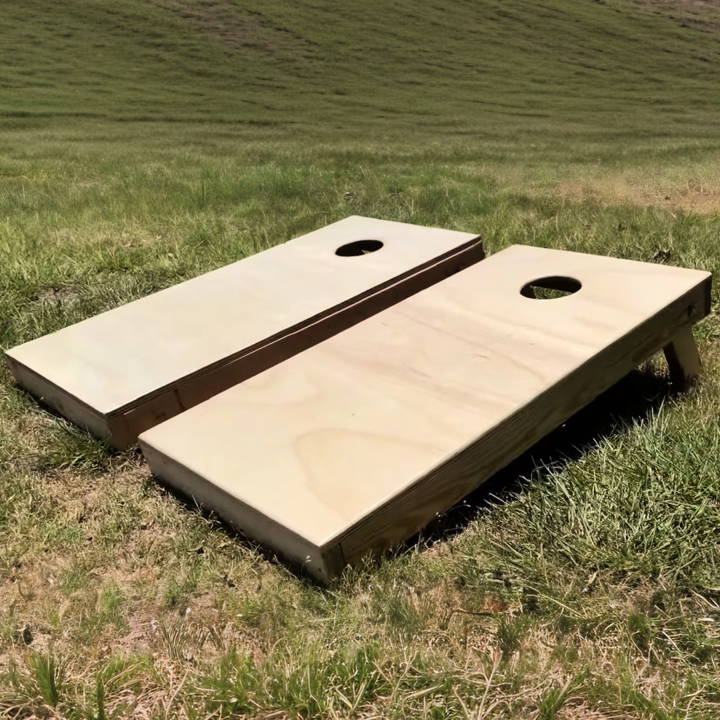
Making cornhole boards wasn't as hard as I thought. I found some great cornhole board plans online and followed the steps carefully. Sanding, cutting, and painting the wood was all part of the fun. I ended up with a set of boards that were both functional and eye-catching. Try it out; you'll be surprised how easily you can make your outdoor events more enjoyable.
I'm helping with this: building your own cornhole boards can be easier and more fun than you think. It can make your gatherings more enjoyable. So grab your tools and start building today.
Materials Needed and Their Purpose
- Four 2x4s: These serve as the frame for each board, providing structure and support.
- Two sheets of 2-foot by 4-foot 3/4-inch plywood: This will be the surface of your cornhole boards.
- Pocket screws: Used to securely join the pieces without them being visible from the top.
- Circular saw and jigsaw: These are essential for cutting the wood to the correct sizes and shapes.
- Drill: A crucial tool for making pocket holes and assembling the pieces.
- Carriage bolts, washers, and wing nuts: These are used to attach the legs in a way that allows them to fold for easy storage.
- Sandpaper (240 grit, 320 grit, and 400 grit): Necessary for smoothing out all surfaces and edges, ensuring a nice finish.
- Semi-gloss polyurethane: Protects the wood and gives the boards a slick surface for playing.
Each material and tool plays a pivotal role in crafting a sturdy and functional cornhole board. Let's dive into the step-by-step process.
Step by Step Instructions
Build your own DIY cornhole boards with our easy guide! Build the frame, craft legs, and add finishing touches for the perfect game set.
Building the Frame and Surface
- Cut the 2x4s: Using a circular saw, cut the 2x4s to build the frame for the boards. You'll need two pieces at 4 feet and two pieces at 21 inches for each board frame.
- Prepare the plywood: Ensure your plywood pieces are cut accurately to 2 feet by 4 feet. They should fit perfectly on top of the frame we'll build.
- Assemble the frame: Drill pocket holes in the ends of the 21-inch 2x4s, and attach them between the 4-foot pieces using pocket screws, forming a rectangular frame.
- Attach the plywood: Lay the plywood on top of the frame and secure it by drilling pocket screws through the frame into the plywood. Be careful to avoid drilling too deep to prevent the screws from poking through the top.
Crafting and Attaching the Legs
- Cut and sand the legs: Cut the legs from the remaining 2x4 pieces, ensuring they're slightly angled (about 30 degrees) to let the board stand at the correct angle. Sand the edges to prevent splinters.
- Build the pivot point: Mark and drill a hole in each leg and the side of the frame for the carriage bolt. This will allow the legs to fold under the board.
- Attach the legs: Use the carriage bolts, adding a washer on each side of the leg and inside the frame, then secure with a wing nut. This setup allows easy movement and storage.
Finishing Touches
- Sand the entire board: Start with 240 grit sandpaper and finish with 320 grit to ensure a smooth surface. Pay extra attention to the edges and the hole.
- Apply polyurethane: Apply the first coat of semi-gloss polyurethane with a foam brush for a smooth finish. After it dries, light-sand with 400 grit sandpaper, and apply another coat. Repeat this process 5-10 times for the perfect playing surface.
Advanced Customization
Personalizing cornhole boards offers endless possibilities, adding unique flair and enhancing the game experience. Here's how to elevate your DIY boards:
- Electronic Scoreboards: Forget about manual scorekeeping; an electronic scoreboard can keep track of points with ease. You can build a simple one using LED numbers and a basic microcontroller like an Arduino. This addition is not only practical but also adds a professional touch to your setup.
- Lighting for Night Play: Don't let the sunset end your game. Install LED strips along the sides and the hole of your cornhole boards. Use battery-powered lights for portability. Choose lights with a waterproof rating if you plan to play outdoors.
- Innovative Board Designs: Move beyond the classic rectangle. Experiment with shapes or themes that reflect your personality or interests. Just ensure that the hole remains 6 inches in diameter and centered 9 inches from the top.
- Sound Systems: Integrate a small speaker system to play music or sound effects when a bag goes through the hole. This can be a fun addition to parties or gatherings.
- Connectivity: Add Bluetooth capability to connect your scoreboard or sound system to your smartphone. This way, you can control everything right from your phone.
- Quality Materials: Use high-quality wood and finishes to ensure your boards last longer and withstand the elements. Consider materials like birch plywood for the surface for a smoother slide.
- Custom Bags: Build or purchase bags that match your board design. Use durable materials like duck cloth, and consider all-weather fillings like plastic pellets.
Combine creativity with functionality for advanced customization. Maintain the game's integrity by adding your style.
Troubleshooting Your DIY Corn Hole Boards
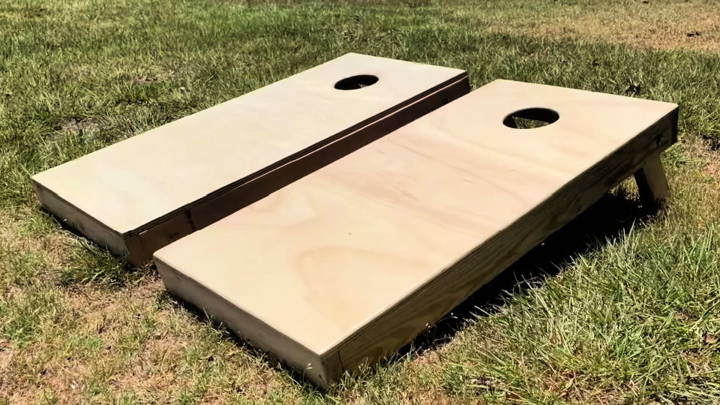
Building your own cornhole boards can be a rewarding project. However, you might encounter some common issues along the way. Here's a troubleshooting guide to help you solve these problems quickly and keep the game going:
Warped Wood
- Cause: Exposure to moisture or improper storage.
- Solution: Store your boards in a dry, flat area. If warping occurs, place heavy, flat objects on top of the boards when not in use to help flatten them out.
Rough Surface
- Cause: Inadequate sanding or use of low-grade plywood.
- Solution: Sand the board thoroughly, starting with coarse-grit sandpaper and progressing to fine-grit. Always use high-quality, sanded plywood for the smoothest finish.
Bags Not Sliding
- Cause: The surface is not slick enough, or the bags are overfilled.
- Solution: Apply a smooth finish to the board, such as polyurethane. Ensure bags are filled to the correct weight (approximately 15-16 ounces) for optimal sliding.
Loose Joints
- Cause: Insufficient glue or screws during assembly.
- Solution: Disassemble the frame and re-glue it using wood glue. Add wood screws for additional strength.
Paint Chipping
- Cause: Low-quality paint or lack of primer.
- Solution: Use high-quality exterior paint and apply a primer before painting. For added protection, apply a clear coat after the paint has dried.
Hole Fraying
- Cause: Frequent use causes wear around the edges of the hole.
- Solution: Install a metal or plastic ring around the hole to protect the edges. Alternatively, apply a sealant to the edge to prevent fraying.
Inaccurate Dimensions
- Cause: Measurement errors during cutting.
- Solution: Always double-check measurements before cutting. Use a template for the hole to ensure accuracy.
Board Bounces
- Cause: Insufficient support or too thin plywood.
- Solution: Ensure the frame is sturdy and add additional support braces if needed. Use at least ½-inch thick plywood for the surface.
Fix these issues to make your DIY cornhole boards durable and fun. Pay attention to details and don't rush.
FAQs About DIY Cornhole Boards
Discover answers to frequently asked questions about DIY corn hole, including tips, materials, and step-by-step instructions for making your own game.
A regulation corn hole board is 48 inches long, 24 inches wide, and the top should be 4 inches off the ground at the back end. The front end should be approximately 2.5 to 4 inches from the ground. The hole is 6 inches in diameter and centered 9 inches from the top and 12 inches from each side.
Absolutely! Feel free to paint your board in any color or design. Many people add their favorite team logos, family names, or other personal touches. Just make sure to seal your board properly to protect it from the elements.
Yes, if you prefer, you can use plastic pellets as an alternative to corn. They are weather-resistant and won’t degrade over time. Some people also use crushed walnut shells, sand, or small pebbles. Each material has a different feel and may affect the game play slightly.
To ensure your corn hole board has the correct angle, the back end of the board should be 12 inches off the ground. You can achieve this by cutting the legs at an angle. The angle is typically 27 degrees off square for the back end. This will give you the proper pitch for the board, making the gameplay consistent with regulation standards.
For a long-lasting finish, start by sanding the wood to a smooth surface. Then, apply a primer if you're going to paint it. After the primer, apply exterior paint or a weather-resistant sealant. For added protection, especially if you'll be using the boards outside, consider using a polyurethane topcoat to shield against moisture and sun damage. Reapply the sealant or topcoat every year or as needed to maintain the board's quality.
Conclusion:
Building your own DIY cornhole boards is not just a crafting project; it's an experience you'll cherish. Give it a try, and let the fun begin!


