If you have an aging crawl space cover or a damaged screen door, tackling these projects yourself is easier than you might think. I've recently taken on both tasks at my home, and I'm here to share how I managed to get them done, step by step. By following the methods I used, you can build a solid, durable DIY crawl space cover and restore a screen door without breaking the bank. Let's dive in!
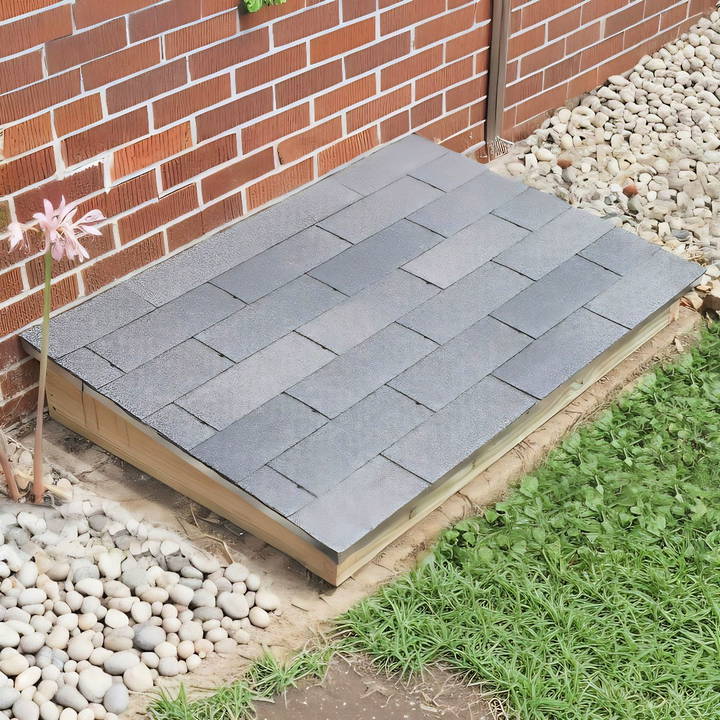
Building a Durable Crawl Space Cover
After noticing that my old crawl space cover was falling apart, with shingles coming loose and plywood wearing down, I knew it was time for a replacement. Here's exactly what I did to get the job done using simple materials and tools.
Materials You'll Need
- Pressure-treated lumber: (2) 2x4s and (1) 2x8
- Plywood for the top cover
- J-channel trim for drip protection
- Shingles
- Roofing nails (1 inch)
I used pressure-treated lumber to prevent future rot and decay, which is crucial for outdoor projects like this. Treated wood is durable and can handle the moisture that crawl spaces often endure.
Step by Step Instructions
Learn to build a DIY crawl space cover with step-by-step instructions. From measuring and cutting to final assembly, get all your materials and tips now!
Step 1: Measure and Cut the Lumber
To build the frame, I started by measuring and cutting the two-by-fours and two-by-eight pieces. For the slope of the cover (so water would run off), I marked 3.5 inches at the front and tapered it to a point at the back. This slight incline will help prevent water from pooling on top, which helps with longevity.
Step 2: Assembling the Frame
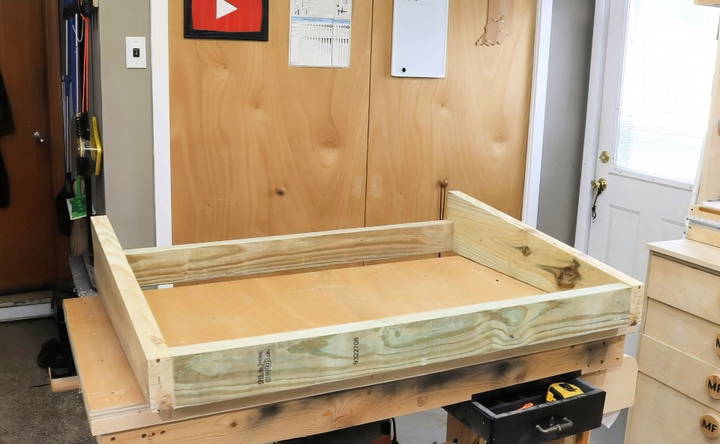
Once the pieces were cut, I assembled the frame using treated lumber. If you're familiar with basic woodworking, this is a straightforward process. I used screws and a drill to secure the frame together. Making sure the frame is sturdy ensures the cover will last for years to come.
Step 3: Adding the Top Plywood
Next, I cut a piece of plywood to fit over the frame, ensuring it covered the entire top. Once I laid it in place, I used 1-inch roofing nails to secure it. I chose plywood for this project because it's easy to work with, and adding shingles on top will protect it from the elements.
Step 4: Shingling the Top
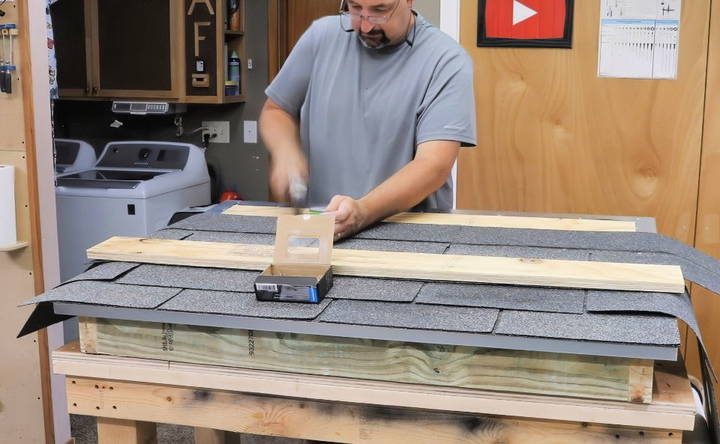
With the plywood in place, I applied shingles over the top, starting from the bottom and overlapping each row upwards to ensure water runs off properly. The shingles will protect the plywood from weathering over time, which can extend the life of your crawl space cover.
Step 5: Installing J-channel
To finish the cover, I added a J-channel trim around the edges to protect the plywood from water damage. The J-channel also gives the cover a clean, finished look and acts as a drip edge to divert water away from the wood. This small addition makes a big difference in durability.
When the wood dries out, I'll add a coat of paint to further protect it from moisture. Overall, the new cover looks much better and should hold up for many years.
Bonus Project: Repairing a Screen Door for $15
On top of the crawl space cover, I also needed to replace the screen in a door that had blown off its frame. If your screen door has seen better days, this quick fix will save you money and make your door look as good as new.
Materials You'll Need
- New screen (fiberglass or aluminum)
- Screen spline
- Screen spline tool
- Utility knife
I picked up a used screen door for $40 at a local Habitat for Humanity store. The door was in good shape, but the screen was rusted and torn, so I decided to replace it.
Step 1: Remove the Old Screen
The first step was to remove the old screen and spline (the rubber cord that holds the screen in place). To do this, I popped the screen frame out of the door and pulled the old spline from the channel that runs around the edges.
Step 2: Measuring for the New Spline
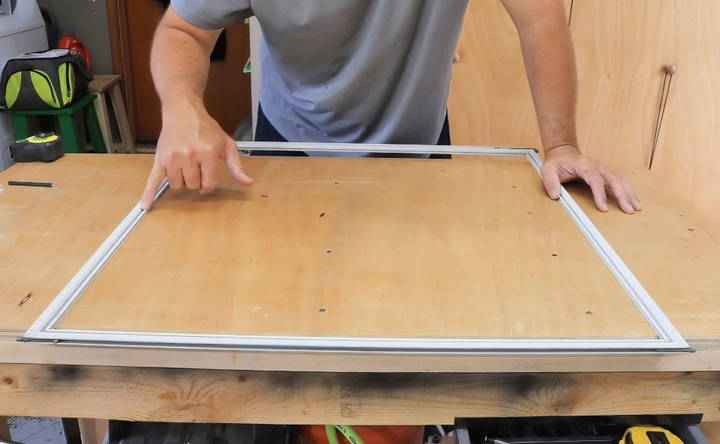
Before heading to the hardware store, it's important to measure the size of the groove where the spline fits. I didn't measure beforehand, but luckily, I found a product that included three different sizes of spline, so I could choose the one that fit.
Step 3: Installing the New Screen
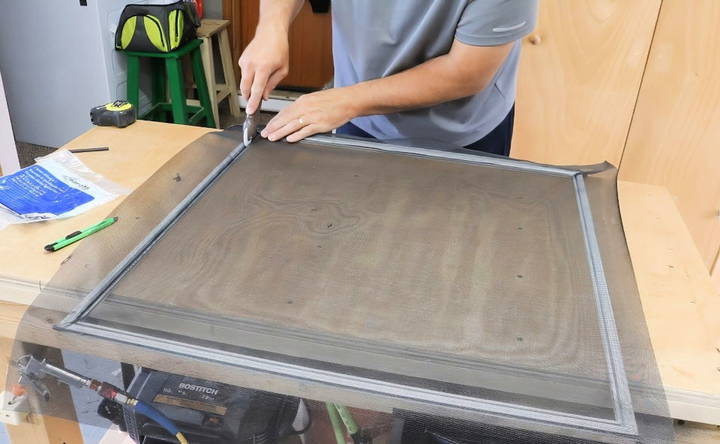
Once you have the right spline, cut the new screen slightly larger than the frame so you can trim the excess later. Start by laying the screen over the frame and use the spline tool to press the screen and spline into the channel. The tool has two ends: one side pushes the screen in, while the other side helps guide the spline into the groove.
Step 4: Trimming the Excess Screen
After you've secured all sides of the screen with the spline, use a utility knife to trim away the extra screen material for a neat finish.
For about $15 in materials and a little bit of elbow grease, I had the screen door looking brand new. This repair process is quick and easy, and it can make a world of difference to your door's appearance and functionality.
Tips and Tricks I Learned Along the Way
- Choosing the Right Lumber and Materials: When building outdoor structures, always go with pressure-treated wood. It lasts much longer than untreated wood, especially when exposed to moisture.
- Pay Attention to the Slope: The slight slope I added to the crawl space cover may seem minor, but it plays a crucial role in keeping water from pooling on top. Without that slope, your cover could rot much faster.
- Double-Check Your Measurements: Whether you're working on a crawl space cover or screen door, measuring twice before cutting ensures that everything fits together smoothly, saving time and materials.
- Invest in Proper Tools: Having the right tools, like a screen spline tool, makes the job so much easier. These tools are inexpensive but make a big difference in the final result.
Common Issues and Solutions
When dealing with crawl space covers, several common issues can arise. Here are some of the most frequent problems and practical solutions to address them.
Moisture Problems
Issue: Moisture buildup in the crawl space can lead to mold, mildew, and wood rot.
Solution:
- Install a Vapor Barrier: Place a heavy-duty plastic sheet over the ground in the crawl space to prevent moisture from seeping up from the soil.
- Ensure Proper Ventilation: Make sure there are enough vents to allow air to circulate and reduce humidity.
- Use a Dehumidifier: In areas with high humidity, a dehumidifier can help keep moisture levels in check.
Pest Control
Issue: Crawl spaces can attract pests like rodents, insects, and spiders.
Solution:
- Seal Entry Points: Inspect the crawl space for any gaps or holes and seal them with caulk or foam.
- Use Pest-Resistant Materials: Consider using materials that are less attractive to pests, such as metal or treated wood.
- Regular Inspections: Check the crawl space regularly for signs of pests and take action immediately if you find any.
Structural Concerns
Issue: The structure of the crawl space cover may weaken over time, leading to sagging or collapse.
Solution:
- Use Durable Materials: Choose materials that are strong and resistant to wear and tear, such as treated lumber or metal.
- Reinforce the Cover: Add extra support beams or braces to strengthen the cover.
- Regular Maintenance: Inspect the cover periodically and make any necessary repairs to keep it in good condition.
Insulation Issues
Issue: Poor insulation can lead to energy loss and higher utility bills.
Solution:
- Insulate the Cover: Use foam board or spray foam insulation to insulate the crawl space cover.
- Seal Gaps: Ensure that all gaps and cracks are sealed to prevent air leaks.
- Check for Drafts: Regularly check for drafts and address them promptly to maintain energy efficiency.
Accessibility Problems
Issue: The crawl space cover may be difficult to access for inspections or repairs.
Solution:
- Install an Access Door: Ensure there is a properly sized and easily accessible door to the crawl space.
- Use Hinges and Latches: Equip the cover with hinges and latches for easy opening and closing.
- Keep the Area Clear: Make sure the area around the crawl space cover is free of debris and obstacles.
Maintain and inspect your crawl space cover regularly to keep it effective and long-lasting. Address common issues with practical solutions to prevent problems.
Safety Precautions
When working on a DIY crawl space cover, safety should be your top priority. Here are some essential safety precautions to ensure a safe and successful project.
Personal Safety
- Wear Protective Gear: Always wear safety glasses, gloves, and a dust mask to protect yourself from debris and dust.
- Use Proper Tools: Ensure you are using the right tools for the job and that they are in good working condition. Follow the manufacturer's instructions for safe use.
- Work in a Well-Ventilated Area: If you are using adhesives, paints, or other chemicals, make sure the area is well-ventilated to avoid inhaling harmful fumes.
- Take Breaks: Avoid fatigue by taking regular breaks. Working while tired can lead to mistakes and accidents.
Environmental Safety
- Dispose of Materials Properly: Dispose of any waste materials, such as old insulation or debris, according to local regulations. Do not burn or dump them in unauthorized areas.
- Use Eco-Friendly Products: Whenever possible, choose environmentally friendly materials and products to minimize your impact on the environment.
- Avoid Disturbing Wildlife: Be mindful of any wildlife that may be living in or around your crawl space. Take steps to safely relocate any animals before starting your project.
Electrical Safety
- Turn Off Power: If your crawl space has electrical wiring, make sure to turn off the power at the breaker box before starting work.
- Use Insulated Tools: When working near electrical components, use tools with insulated handles to reduce the risk of electric shock.
- Check for Wiring: Before drilling or cutting, check for any hidden wiring to avoid accidental damage.
Structural Safety
- Ensure Stability: Make sure the crawl space cover is stable and secure before working on it. Use proper supports and braces if necessary.
- Avoid Overloading: Do not place heavy objects on the crawl space cover that could cause it to collapse or become damaged.
- Check for Hazards: Inspect the area for any potential hazards, such as sharp objects or unstable ground, and address them before starting work.
Fire Safety
- Keep a Fire Extinguisher Nearby: Have a fire extinguisher on hand in case of emergencies, especially if you are using flammable materials.
- Avoid Open Flames: Do not use open flames, such as candles or torches, in the crawl space. Use battery-operated lights instead.
- Store Flammable Materials Safely: Keep flammable materials, such as solvents and adhesives, in a safe, cool place away from heat sources.
Prioritize safety for yourself, others, and the environment to ensure a secure DIY crawl space cover project.
FAQs About DIY Crawl Space Covers
Get answers to FAQs about DIY crawl space covers. Learn about materials, installation tips, and benefits to ensure your home stays protected.
A crawl space cover is a barrier that seals the entrance to your crawl space. It helps keep out moisture, pests, and debris, protecting your home’s foundation and improving energy efficiency.
Covering your crawl space prevents moisture buildup, which can lead to mold and structural damage. It also keeps pests out and can improve your home’s energy efficiency by reducing drafts.
Measure the width and height of the crawl space opening. Add a few extra inches to each measurement to ensure the cover fits snugly and can be securely attached.
It's best to use a heavy-duty plastic sheet, such as polyethylene, which is durable and resistant to moisture. Clear or opaque plastic can be used based on your preference.
Inspect your crawl space cover at least twice a year. Look for any signs of damage, wear, or gaps that could allow moisture or pests to enter. Repair or replace the cover as needed.
Final Thoughts: Save Money and Get the Job Done Right
Both the DIY crawl space cover and screen door repair projects were relatively simple and inexpensive to complete. By using quality materials and taking the time to do things right, you can save money while improving your home's durability and appearance.
It took me about five hours to complete both projects, but they were worth the effort. Now, I have a solid new cover for my crawl space and a fully functioning screen door—all for a fraction of what it would cost to hire someone else to do the work.
The sense of accomplishment from tackling these jobs on my own made it all the more rewarding. If you've got similar projects on your to-do list, don't hesitate to dive in!


