Lowered vehicles look amazing, but if you own one, you know the daily struggle of getting in and out of steep driveway curbs. Not only can it cause frustrating bumps and scrapes, but over time, it could lead to real damage to your vehicle. The solution? A custom DIY curb ramp that smooths out the transition from street to driveway, saving you time, money, and hassle.
In this guide, you'll find everything you need to build a removable curb ramp for your driveway, making it easier for vehicles with low ground clearance. We'll cover the tools, materials, and step-by-step instructions for making a durable ramp that you can easily remove when necessary. Whether you're using a product like Curb Ramp™ or building your own from scratch, this guide has you covered.

Why Build a DIY Curb Ramp?
There are several reasons why you might need a custom curb ramp:
- Lowered Vehicles: Cars that have been lowered or have low ground clearance, such as sports cars, are vulnerable to damage when entering or exiting driveways with steep curbs.
- Reduced Wear and Tear: A curb ramp can prevent your car's front bumper, undercarriage, or suspension from scraping against the pavement, which can lead to costly repairs over time.
- Improved Access: If you have a driveway that's difficult to access, a custom ramp will make the transition smoother for any vehicle.
- Temporary Use: A removable curb ramp is ideal for renters or those who prefer a non-permanent solution that can be removed as needed.
Let's get started on building your very own DIY curb ramp!
Tools and Materials You Will Need
Building a custom curb ramp doesn't require many specialized tools, but it's important to have the right materials for a sturdy and reliable result. Here's what you'll need:
Tools:
- Trowel: For spreading and smoothing out the material.
- Paint Brush: Used to prime the surface before applying the main material.
- Drill Mixer (optional): To mix materials thoroughly if you're using a product like Curb Ramp™.
- Measuring Tape: To measure the dimensions of your driveway and curb.
- Utility Knife or Saw: In case any adjustments need to be made to your substrate.
Materials:
- Substrate (optional): A substrate can be added to give additional support under the ramp, depending on your driveway's surface.
- Curb Ramp™ Kit or Similar Material: Curb Ramp™ is a popular option because it's designed specifically for this purpose. It's a durable and weather-resistant material that can be customized to your driveway's shape.
- Adhesive: If using a kit like Curb Ramp™, adhesive will be included. If you are making your own, make sure you have a strong, weather-resistant adhesive for bonding the ramp to the curb.
Optional Accessories:
- Primer: Some materials work better when the surface is primed first. A small amount of adhesive can act as a primer, which ensures a stronger bond between the curb and the ramp.
- Level: To make sure the ramp is smooth and even.
- Gloves: For safety and cleanliness while working with the adhesive or material.
- Plastic Sheeting: To protect nearby surfaces from spills or adhesive.
Step by Step Instructions
Learn how to make a DIY curb ramp with step-by-step instructions. From measuring to testing, build your curb ramp efficiently and easily.
Step 1: Measure Your Driveway Curb
Before you begin, take accurate measurements of the curb. This will help you determine how much material you'll need and how wide and high the ramp should be. Measure the width of the curb where the ramp will sit and the height from the street to the top of the curb.
You'll also want to consider how steep the incline of the ramp should be. A gradual incline will provide a smoother transition, especially for cars with extremely low ground clearance.
Step 2: Prepare the Driveway and Curb
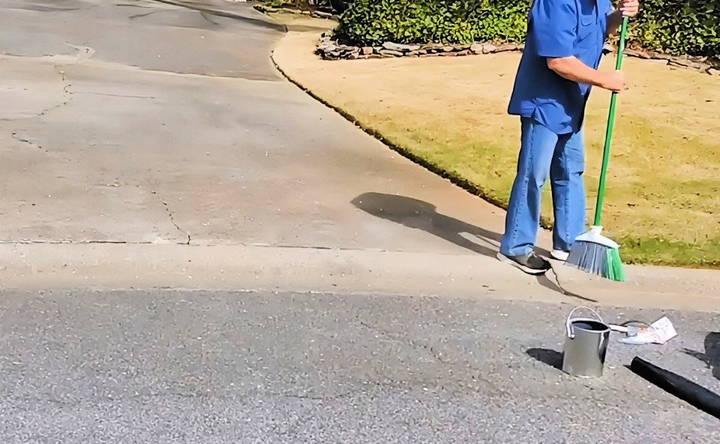
Once you've measured your curb, clean the area where the ramp will be placed. Sweep away any dirt, debris, or loose gravel to ensure the adhesive and material stick properly. If your curb has any cracks or holes, you may want to repair them beforehand to build a smooth surface for your ramp.
Step 3: Apply a Substrate (Optional)
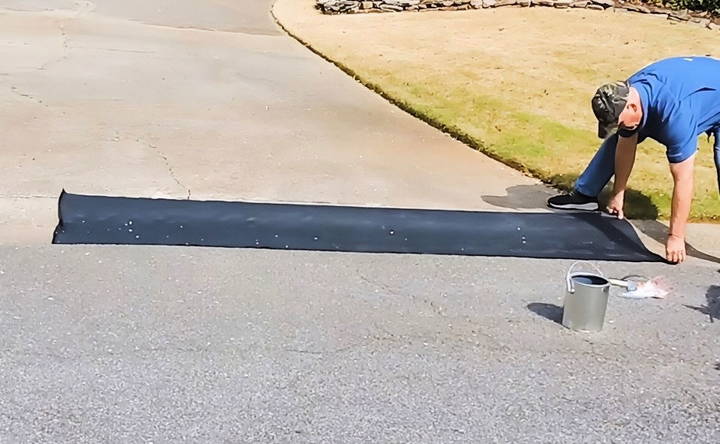
Depending on the condition of your driveway apron, you might want to add a substrate layer for extra support. A substrate can help reinforce the ramp and ensure that it holds up over time, especially if your driveway has a rough or uneven surface. If you choose to use a substrate, follow the product's instructions for applying it to your driveway.
Step 4: Mix the Ramp Material
If you're using a pre-made ramp kit like Curb Ramp™, mix the material according to the manufacturer's instructions. This typically involves combining the ramp material with adhesive to build a pliable mixture that can be spread over the curb.
Use a drill mixer if you have one available, as this will ensure that the materials are mixed evenly and thoroughly. If you're building your own ramp, mix the cement or other material you've chosen in a bucket or wheelbarrow until it reaches a workable consistency.
Step 5: Prime the Curb and Driveway
Before applying the ramp material, prime the curb with a small amount of the leftover adhesive or primer. This will help the ramp material stick better to the curb and ensure a more durable bond. Use a paintbrush to apply the adhesive or primer evenly across the curb and the area where the ramp will sit.
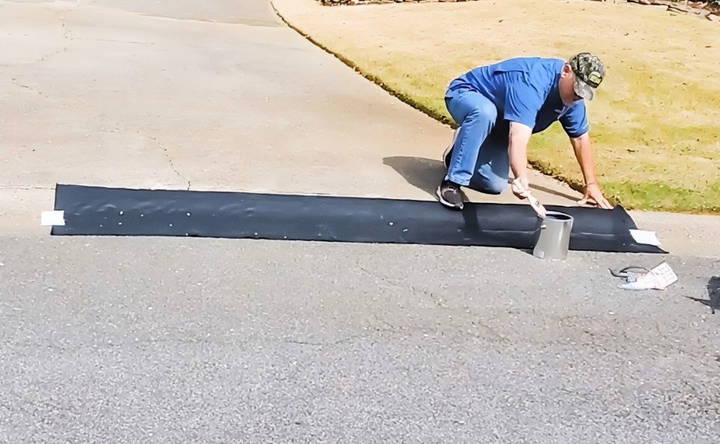
Allow the primer to dry according to the manufacturer's instructions before moving on to the next step.
Step 6: Apply the Ramp Material
With the curb primed and ready, start applying the ramp material. Use a trowel to spread the mixture over the curb and driveway, shaping it into a smooth, even ramp. You'll want to fill the gap between the curb and the street completely, ensuring a gradual incline that makes it easy for vehicles to transition between the two.
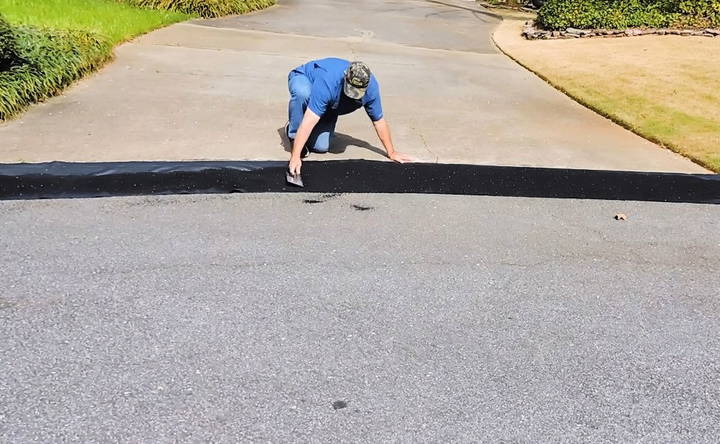
Work slowly and carefully to ensure the ramp is even and smooth. If necessary, use a level to check your work and adjust the material as needed.
Step 7: Let the Ramp Dry
After you've applied the ramp material, it's crucial to let it dry completely before using it. This drying period can take up to 48 hours, depending on the material you used and the weather conditions. Be patient—trying to use the ramp before it's fully set could damage the ramp and force you to start over.
During the drying period, consider covering the ramp with plastic sheeting to protect it from rain, dirt, or other debris.
Step 8: Test the Ramp
Once the ramp has fully dried, test it by slowly driving over it with your vehicle. Pay attention to how the car transitions from the street to the driveway and whether the ramp provides a smooth ride. If the ramp feels uneven or too steep, you may need to make minor adjustments or apply another layer of material.
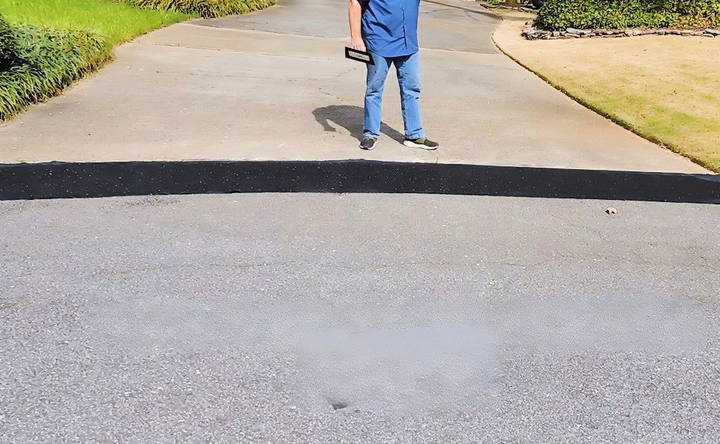
If you're satisfied with the results, congratulations—you've successfully built a custom curb ramp!
Maintaining Your DIY Curb Ramp
To keep your curb ramp in good condition, follow these maintenance tips:
- Inspect Regularly: Check your ramp for any signs of wear and tear, such as cracks or erosion, and make repairs as needed.
- Keep It Clean: Sweep away dirt and debris that could accumulate on the ramp over time.
- Reapply Material: Depending on the material used, you may need to reapply a layer every couple of years to ensure the ramp remains effective.
- Remove During Harsh Weather: If your ramp is removable, consider taking it up during harsh winter conditions to prevent it from being damaged by snowplows or extreme temperatures.
Final Thoughts
Building a DIY curb ramp is a practical and cost-effective solution for protecting your lowered vehicle from damage. By following the steps outlined in this guide, you'll have a custom ramp that fits your driveway perfectly and makes daily driving smoother and safer.
With the right materials and a little effort, you can build a ramp that's durable, removable, and tailored to your needs. Whether you're using a specialized product like Curb Ramp™ or building from scratch, this project is a fantastic way to protect your vehicle and make your driveway more accessible. Enjoy the smooth transition!
FAQs About DIY Curb Ramp
Get quick answers to common questions about DIY curb ramp installation, materials, cost, and safety. Enhance accessibility affordably today!
The number of kits depends on the width and depth of your curb. Measure the total width of the curb where you plan to place the ramp and refer to the kit's coverage guidelines to determine how many are needed for complete coverage.
Yes, if you've built a removable curb ramp, you can take it off when necessary. This is useful for renters or temporary needs. However, some materials may leave residue or require more effort to remove.
Most kits and materials will bond well to both asphalt and concrete. Be sure to clean the surface thoroughly before applying for the best results.
Curing times vary depending on the material, but it typically takes 24 to 48 hours for a ramp to fully cure and be ready for use. Make sure to allow the ramp enough time to set before driving over it.
No, the surface must be dry before applying the ramp material. Wet conditions can affect adhesion, so check the weather forecast before installation to ensure proper drying.
Yes, to ensure durability, the ramp edges should have a minimum thickness, usually recommended by the manufacturer. This prevents cracking or wearing down over time.
Yes, additional layers of material can be added after the ramp has cured. Simply prime the surface again and apply a new layer to adjust the height or coverage.
Yes, most ramp materials are designed to withstand different weather conditions, including rain and snow. However, extreme weather, such as snowplows, may damage the ramp over time.
For most ramp kits, tools can be cleaned with soap and water immediately after use. If the material has dried, use a solvent recommended by the product manufacturer.
When properly installed and maintained, a DIY curb ramp can last for several years. Regular maintenance, like cleaning and inspecting for cracks, will help prolong its lifespan.


