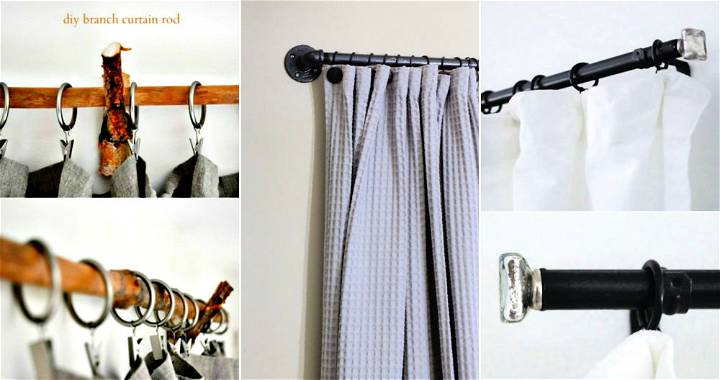
Making DIY curtain rods can greatly enhance your home décor. This guide covers everything you need to know about making DIY curtain rods at home. Making your own rods allows you to personalize your space to match your style. With just a few tools and materials, you’ll be able to create DIY curtain rod sets that look just as good as store-bought options.
You'll learn about selecting materials, measuring correctly, and installing your simple curtain rods. The process is straightforward and budget-friendly, making it a practical choice for any home improvement enthusiast.
Upgrade your home decor with our DIY curtain rods guide. Easy, budget-friendly, and stylish solutions for window treatments.
Choosing the Right Materials
Learn how to choose the right materials for your project. Discover why each material matters and make informed decisions.
Why Each Material Matters:
- 3/4 inch Conduit: Budget-friendly and sturdy, conduit pipes are usually tucked away in walls for electrical purposes but are perfect for custom curtain rods due to their strength and flexibility.
- Wooden Dowels: These are essential for smoothly joining sections of conduit, especially for contoured walls.
- Curtain Rod Brackets and Finials: Obviously, for hanging the rod and adding a polished look.
- Tools: Including a tubing and conduit cutter for precise cuts, a conduit bender for those perfect curves, and a drill for installation.
Step by Step Instructions
Learn how to make DIY curtain rods step by step, from creating a template to installation, customizing the look, and reflecting on cost and experience.
Creating a Template
I started by grabbing old cardboard boxes to map out the wall's shape. Positioning one of the brackets as a guide, I traced out where the curtain rod would ideally go. This template was crucial for marking where to bend and cut the conduit.
Bending and Cutting the Conduit
Then came the fun part—bending the conduit. Aligning my marks with the arrow on the conduit bender, I applied pressure gradually. I won't lie; it took a bit of muscle and several tries to get it right. After achieving the desired bends, I used the cutter to segment the conduit, ensuring it fits my space perfectly. A quick file down of any rough edges and the conduit was ready.
Joining With Dowels
To assemble the rod into one cohesive piece, wooden dowels came into play. They had to fit snugly inside the conduit pieces. A bit of sanding ensured a perfect fit. These dowels are the unsung heroes of this project, providing stability and strength to the assembled curtain rod.
Customizing the Look
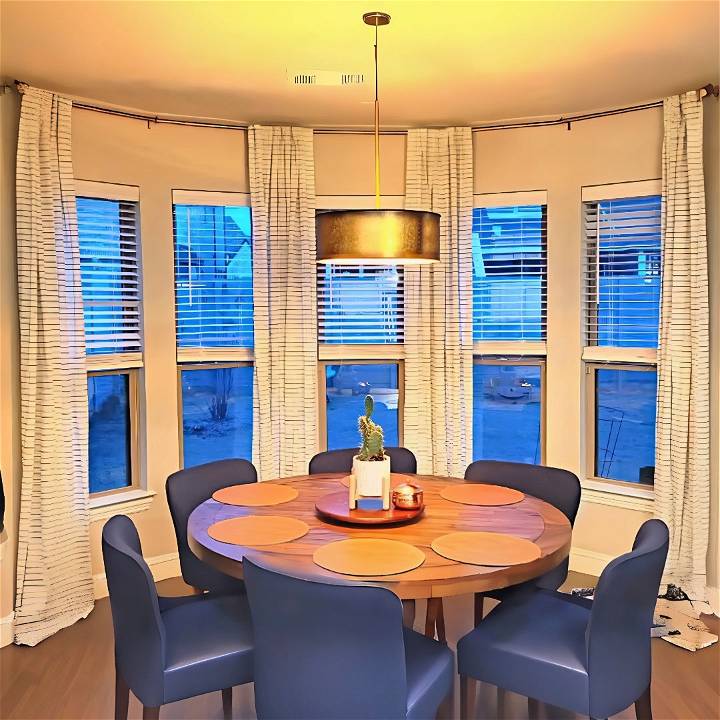
The brackets and finials were not originally in my desired color, hence a bit of spray painting was called for. Gold was my choice, elegantly complementing the room's aesthetic. The same went for the rods. This step required patience, as multiple coats were necessary for a uniform finish.
Installation
With everything painted and dried, the installation was straightforward. I drilled holes for the brackets, assembled the rod with careful attention to the dowels, and capped it with the finials. The curtain installation was the final step, transforming the nook dramatically.
Reflections on Cost and Experience
The total cost was impressively low, around a hundred dollars, excluding curtains. For a custom piece, that's unbeatable. The conduit cutter and bender, while initially a tad intimidating, proved to be manageable and are now integral parts of my DIY toolkit.
The Final Reveal
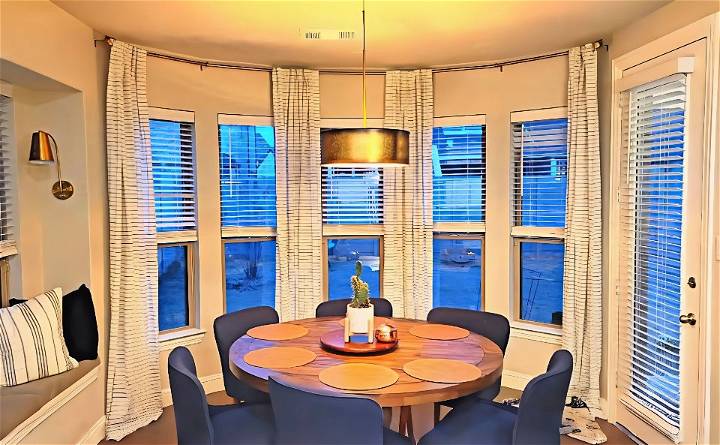
The result was breathtaking. The curtains added warmth and depth to the dining nook, transforming it into one of my favorite spots at home. This project, from conception to completion, was not just about sprucing up a space. It was a testament to the power of DIY and creativity.
To Sum Up
- Preparation is Key: From gathering materials to creating templates, the success of this project depended on meticulous planning.
- The Right Tools Make a Difference: Investing in a conduit cutter and bender was crucial.
- Flexibility and Creativity: Adapting the design to fit the space and choosing spray paint to customize the hardware.
Design Tips for Choosing the Right Curtain Rod
When selecting a curtain rod for your home, it’s important to consider both functionality and style. Here are some tips to help you make the best choice:
Consider the Room’s Decor
- Match the Metal: If you have metal accents in your room, such as door handles or light fixtures, choose a curtain rod with a similar finish to create a cohesive look.
- Wooden Warmth: For a more traditional or rustic style, wooden curtain rods can add warmth and character to your space.
Think About the Curtains
- Weight Matters: Heavier curtains require sturdier rods, so ensure the rod you select can support the weight of your drapes.
- Style Synergy: The style of your curtains should influence the rod design. Simple curtains might pair well with a more decorative rod, while ornate curtains could benefit from a simpler rod.
Functionality is Key
- Adjustable Length: Opt for an adjustable rod if you plan to change your window treatments occasionally. This offers flexibility and ensures a perfect fit for any window size.
- Ease of Use: Consider rods with a smooth glide system if you open and close your curtains frequently.
Installation Ease
- Check the Hardware: Ensure the rod comes with all necessary mounting hardware and clear instructions. This will make the installation process much smoother.
Personal Touch
- DIY Finials: Customize your curtain rods with DIY finials. Use items like vintage doorknobs or crafted wood pieces for a unique touch.
Safety First
- Secure Mounting: Always use proper anchors and brackets to secure your curtain rod safely, especially in homes with children and pets.
Follow these tips to choose a curtain rod that looks great and works perfectly. The right rod enhances your room's look and completes your window treatments.
Installation Troubleshooting for Curtain Rods
Installing curtain rods can sometimes present challenges. Here’s a troubleshooting guide to help you overcome common issues:
The Rod is Sagging
- Solution: Check if the brackets are too far apart. They should be no more than 4 feet apart for standard rods. For heavier curtains, reduce the distance.
Difficulty in Sliding Curtains
- Solution: Ensure the rod is smooth and free of any burrs. If it’s a telescoping rod, the transition point can cause snags. Apply a silicone lubricant for a smoother glide.
Brackets Coming Loose
- Solution: Use wall anchors suited for your wall type (drywall, plaster, or masonry). If the screws are stripping, replace them with a slightly larger size for a tighter fit.
Rod Doesn’t Fit the Window
- Solution: Measure the window width before purchasing the rod. If it’s an adjustable rod that’s too short, you may need an extension piece or a new rod.
Curtains Too Heavy for the Rod
- Solution: Upgrade to a rod with a thicker diameter or one that’s specifically designed for heavy drapes. Ensure the brackets are also heavy-duty.
Uneven Rod
- Solution: Use a level during installation to ensure the brackets are even. Adjust as necessary before fully tightening the screws.
Damaged Wall from Installation
- Solution: Patch small holes with spackling paste and repaint if necessary. For larger damage, you may need to use a wall repair kit.
The Rod is Too Decorative for the Curtain Style
- Solution: Choose a rod that complements the curtain style. Simple curtains often pair well with more ornate rods and vice versa.
Can’t Find Studs for Mounting
- Solution: Use a stud finder to locate studs. If there are no studs where you need to mount, use toggle bolts or heavy-duty anchors.
Rod is Bending Under the Weight
- Solution: Distribute the weight more evenly by adding a center bracket. If the problem persists, consider a rod with more support.
Anticipate common issues and know solutions for a smoother, more efficient curtain rod installation. Key: careful planning, accurate measuring, and patience.
Maintenance and Care for Curtain Rods
Keeping your curtain rods in good condition is essential for ensuring they last long and remain functional. Here’s a guide to maintaining and caring for your curtain rods:
Regular Cleaning
- Dust Regularly: Use a soft cloth or duster to wipe down your rods every few weeks to prevent dust build-up.
- Gentle Washing: For deeper cleaning, use a mild detergent and warm water. Avoid harsh chemicals that can damage the finish.
Check for Wear and Tear
- Inspect Brackets: Make sure the brackets are secure and not loose. Tighten any screws if necessary.
- Look for Rust: If you have metal rods, check for signs of rust, especially in humid environments. Treat any rust spots early to prevent spreading.
Protect the Finish
- Avoid Scratches: Be careful not to scratch the rod when opening and closing curtains. Use rings or hooks that glide smoothly.
- Polish if Needed: If your rod has a metal finish, you can use a suitable polish to keep it looking shiny and new.
Handle with Care
- Be Gentle: When removing curtains for washing, be gentle with the rods. Rough handling can bend or damage them.
- Proper Support: Ensure your rods are properly supported, especially if they extend over a long span. Additional brackets can help distribute the weight.
Seasonal Adjustments
- Check Alignment: With changes in temperature and humidity, your rods may shift slightly. Realign them if you notice any sagging or bending.
- Lubricate Moving Parts: If your rod has a telescoping function or movable parts, lubricate them occasionally to keep them operating smoothly.
Curtain Care
- Weight Distribution: Make sure your curtains are hung evenly to avoid putting extra stress on one side of the rod.
- Fabric Maintenance: Keep your curtains clean to prevent any dirt from transferring to the rod.
Extend the life and look of your curtain rods with simple maintenance. Routine care keeps them functional and enhances your home's aesthetic. A bit of care goes a long way!
FAQs About How to Make a Curtain Rod
Learn everything about how to make a curtain rod with these faqs. Find essential tips, tools, and step-by-step guides for a perfect DIY project.
Measuring and cutting: Measure the width of your window and add at least 8 inches to allow the curtains to hang on either side. Use a saw to cut your material to the desired length. If you’re using a metal pipe, you might need a pipe cutter.
Installation: First, mark the spots on the wall where the brackets will go, ensuring they are level and aligned with each other. Drill pilot holes, insert the wall anchors, and then screw the brackets into place. Place the rod onto the brackets and secure it if necessary.
Painting: Yes, you can paint your curtain rod. First, lightly sand the surface if it’s smooth to help the paint adhere. Then, apply a primer if needed, and once it’s dry, paint the rod with your chosen color. Allow it to dry completely before installation.
Sturdiness: To ensure your curtain rod is sturdy, use high-quality, solid brackets and secure them into the wall studs or use appropriate wall anchors for your wall type. If the rod is very long, consider adding a center bracket for extra support.
Design and Finish: The design of your curtain rod should complement the style of your room. For a modern look, consider sleek metals like brushed nickel or chrome. For a rustic vibe, a wooden dowel with a natural finish or a distressed look might be perfect. To choose the finish, think about the color scheme of your room and whether you want the rod to stand out or blend in. You can achieve various finishes by painting, staining, or using spray paint for a metallic effect. Remember, the design and finish of your curtain rod can significantly impact the overall aesthetic of your space.
Conclusion:
Wrapping up, making DIY curtain rods to elevate your home décor is a fun and fulfilling project. By making diy curtain rods, you can save money and customize them to your style. Crafting a diy curtain rod is straightforward and offers immense satisfaction upon completion. Remember, it's the small touches, like simple curtain rods, that make your home truly yours.


