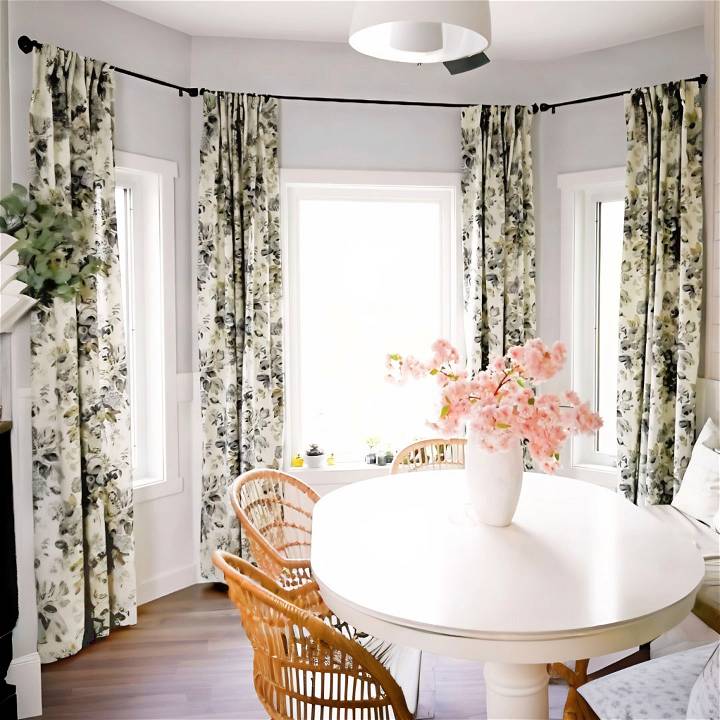
Making curtains at home was a project I initially approached with trepidation. As someone who admired the cozy and personalized touch that custom drapes added to a space but possessed rudimentary sewing skills, the thought was daunting. Yet, inspired by Christina from the DIY Mommy, I embarked on a journey to transform my space with homemade drapes featuring a perfect pleat hack. Here's how I achieved incredible-looking curtains, a testament to the fact that with straightforward guidance, anyone can make designer-quality drapes.
Why Make Your Own Curtains?
Making your own curtains offers a palette of creative freedom, cost savings, and the satisfaction of DIY achievement. With the ability to choose from a myriad of fabric designs and customize to your window's exact dimensions, the outcome can significantly uplift the ambiance of any room.
Materials Needed
- Drapery Fabric: I opted for a floral cotton linen blend for its drape and durability. Your choice should complement your room's d* écor.
- Pleater Tape: This ingenious material simplifies making pleats, ensuring a professional finish.
- Curtain Rings with Hooks: Vital for hanging your drapes on the rod.
- Curtain Hooks for Pleater Tapes: These attach to the pleater tape and the curtain rings.
- Measuring Tape & Ruler: Precision is key for measuring and cutting fabric.
- Scissors: For cutting the fabric.
- Iron & Ironing Board: Essential for pressing hems before sewing.
- Stick Pins: To secure hems prior to sewing.
- Sewing Machine & Thread: The core tools for bringing your curtains to life.
Step-by-Step Guide
Learn how to sew DIY curtains for beginners with this easy step-by-step guide. Perfect for those new to sewing wanting to spruce up their home decor.
1. Measuring Your Window
Start by measuring the height and width of your window. For height, I wanted my curtains to almost kiss the floor, so I added seven inches to my measurement for hems and pleater tape allowance. For width, twice the window's width was perfect for a fuller look.
2. Cutting & Preparing Your Fabric
With dimensions in hand, I cut my fabric, allowing extra for seams and hems. A square or hard ruler ensured my lines were straight. Then, I folded and pressed the side and bottom hems (half an inch, then an inch again for the bottom hem), and a four-inch top hem for the pleater tape.
3. Sewing the Hems
The side hems were first, using a straightforward straight stitch, remembering to backstitch at the start and end. Consistency is vital, so I used markings on the sewing machine to maintain a straight line.
4. Attaching Pleater Tape
After sewing the side and top hems, I aligned and pinned the pleater tape to the top hem, folding the ends for a neat finish. Sewing close to the edges of the pleater tape secured it in place.
5. Inserting Curtain Hooks
Placement of hooks into the pleater tape determined the depth of the pleats. I opted for a loop every five spaces, providing ample gathers for a luxurious look.
6. Hanging Your Masterpiece
Finally, attaching the curtains to the rod involved clipping the rings to the hooks and lifting them into position. Adjusting the pleats gently by hand ensured an even and aesthetically pleasing drape.
Personal Touches and Adjustments
Throughout the process, I discovered the importance of fabric choice and precise measurements. Initially, concerns about my sewing skills faded as straightforward seams and pleats came together to form curtains that truly transformed my space.
Customization Tips for DIY Curtains
Making your own curtains is not just about covering a window; it's an opportunity to inject your personality into a room. Here are some simple yet effective ways to customize your DIY curtains:
- Choose Your Fabric Wisely Selecting the right fabric can transform the look and feel of a room. Consider the ambiance you want to make. For a light and airy feel, go for sheer or lightweight cotton. If you're looking for privacy and darkness, heavier fabrics like velvet or blackout linings are ideal.
- Play with Patterns and Colors Don't shy away from patterns and colors. Stripes can make a room seem taller, while bold patterns can turn curtains into a focal point. If you're not ready for a pattern, try a vibrant color that complements your decor.
- Add Trims and Embellishments Trims, such as pom-poms or lace, can add a touch of elegance or fun. Sew or glue them along the edges or bottom of your curtains for a custom look.
- Mix and Match Who says all your curtains have to be the same? Mixing fabrics and patterns can add depth and interest to your space. Just ensure there's a unifying element, like a recurring color.
- Length Matters The length of your curtains can drastically affect the room's style. Floor-length curtains convey a formal look, while curtains that just kiss the floor have a more relaxed feel. For a modern, crisp look, have them float an inch above the floor.
- Hardware Highlights Curtain rods and rings are not just functional; they're also decorative. Choose a rod that complements your curtain's style, and don't be afraid to go bold with metal finishes or intricate designs.
- Tiebacks and Holdbacks Tiebacks and holdbacks are not only practical but also serve as decorative elements. Use a contrasting fabric for tiebacks, or select ornate holdbacks to add sophistication.
By following these tips, you can ensure your DIY curtains are not only unique but also a perfect reflection of your personal style. Remember, the key is to have fun and experiment – your windows are your canvas!
Trends and Inspiration for DIY Curtains
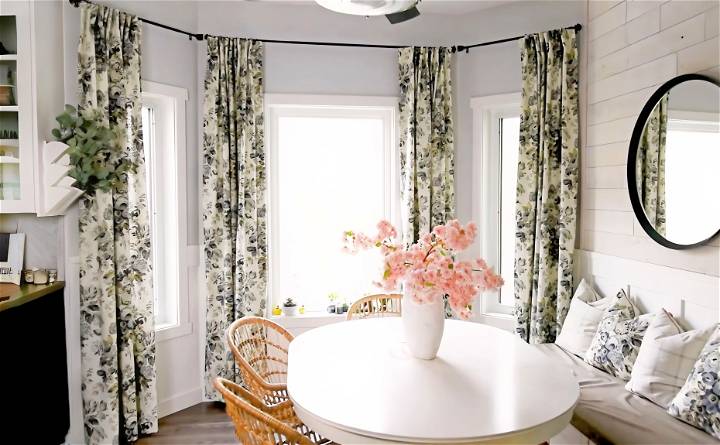
When it comes to DIY curtains, staying updated with the latest trends can inspire you to make designs that are both stylish and personal. Here's a look at what's currently trending in curtain designs:
- Embrace Natural and Textured Fabrics Natural fabrics like linen, cotton, and jute are in vogue. They bring an earthy, organic feel to your space and are perfect for achieving a relaxed, comfortable atmosphere. Textured fabrics add depth and interest to your curtains, making them stand out.
- Bold Colors and Patterns Bold colors are making a statement. Think deep emerald greens, rich terracottas, and vibrant jewel tones. These colors can make a focal point in your room or complement your existing decor. Patterns are also big, with small-scale prints like checks or florals adding a contemporary touch without overwhelming the space.
- Layering for Depth Layering curtains with different colors and textures can add a new dimension to your windows. Consider a lighter shade on top and a darker shade on the bottom, or pair curtains with Roman blinds for a practical yet elegant look.
- Eco-Friendly Choices With a growing focus on sustainability, choosing eco-friendly materials is not just a trend, it's a lifestyle choice. Look for sustainable fabrics and consider upcycling materials to reduce waste.
- Smart and Custom Features Personalization is key. Custom curtains that cater to your specific needs, like light control and privacy, are becoming increasingly popular. Smart curtains, which can be controlled remotely, are also on the rise, offering convenience and a touch of modernity.
- Metallic Accents Metallic accents in curtains bring a touch of elegance and luxury. Whether it's through the fabric itself or the hardware used, metallics can elevate the look of your DIY curtains.
By using these trends in your DIY curtains, you can make stylish window treatments that match your decor and personal style.
FAQs About DIY Curtains
Discover answers to your DIY curtain questions in this comprehensive FAQ guide. Learn how to make beautiful curtains for your home today!
What fabric should I choose for my curtains?
The fabric you choose depends on the function and style you want. For a light, airy feel, opt for sheer or lightweight cotton. If you need privacy and insulation, heavier fabrics like velvet or blackout material are better. Consider the room's decor and the amount of sunlight it receives when selecting your fabric.
How do I measure my windows for curtains?
Measure the width of the window frame and multiply it by 1.5 to 2.5 times for fullness. For length, decide if you want the curtains to fall just below the sill, to the floor, or to pool slightly on the floor, and measure accordingly. Always add a few inches for hemming.
Can I make curtains without sewing?
Yes, there are no-sew options available. You can use iron-on hemming tape to make hems or use clip-on rings to hang fabric panels. These methods are great for quick and easy curtain projects.
How do I ensure my curtains hang properly?
To ensure curtains hang well, use proper fullness and weight the hems if needed. Iron or steam the curtains before hanging to remove wrinkles. Make sure the curtain rod is sturdy and installed correctly for the best drape.
What are some ways to customize my DIY curtains?
Customize your curtains by adding trims, such as pom-poms or lace, for a unique touch. Mix and match patterns and colors, or use tiebacks made from contrasting materials. You can also experiment with different lengths and curtain rod styles.
How do I care for my DIY curtains?
Curtain care depends on the fabric. Most can be vacuumed with an upholstery attachment or dusted. Check the fabric's care instructions for washing—some may be machine washable, while others require dry cleaning. Iron or steam as needed to keep them looking neat.
Conclusion and Reflection
The journey from apprehensive beginner to the proud creator of bespoke curtains was immensely fulfilling. Following Christina's clear and practical steps made an intricate-seeming project accessible and enjoyable. My windows now boast custom, perfectly pleated drapes that elevate the room's atmosphere, all thanks to the empowering guidance of the DIY Mommy. For those pondering whether to take on this project, I wholeheartedly encourage you: with some patience and creativity, stunning results are within reach.


