I've always looked for simple solutions to keep my home dry. A DIY dehumidifier is an easy project that helps reduce moisture. One day, I decided to try making my own natural dehumidifier. It turned out to be a quick and rewarding experience. My homemade dehumidifier worked surprisingly well and saved me money.
Sharing this with you, I hope this DIY moisture absorber can help you too. Keeping your space dry is crucial for comfort and health. Let's make sure we live in a comfortable and mold-free environment. Try making your own natural, homemade dehumidifier today!
How Do Dehumidifiers Work?
At their core, dehumidifiers use a fan to pull in humid air. This air then passes over a refrigerated coil, causing the moisture in the air to condense into water droplets. These droplets collect in a storage tank or drain away. As a result, the air that's released back into the room is drier.
Why Is Dehumidification Important?
Too much humidity can make your home feel stuffy and can contribute to the growth of harmful organisms. By using a dehumidifier, you can maintain an indoor humidity level between 30-50%, which is the recommended range for comfort and health.
Benefits of Using a Dehumidifier:
- Reduces allergens: Lower humidity levels mean fewer dust mites, mold, and mildew.
- Prevents damage: Excess moisture can damage furniture, electronics, and even the structure of your home.
- Improves comfort: A less humid environment feels cooler and more comfortable.
- Energy efficiency: By reducing humidity, your air conditioner can work more efficiently.
While dehumidifiers are helpful, they should be used as part of a broader approach to maintaining a healthy indoor environment.
DIY Eco-Friendly Radiator
Make a DIY eco-friendly radiator with sustainable materials. Find out why these materials are essential for efficient, eco-friendly heating!
Materials Needed:
- Baking sheet
- Muffin tin
- Aluminum foil
- Flowerpot
- Candle (Don't worry, we'll make this!)
Why These Materials?
- Baking Sheet & Muffin Tin: These will hold our heat source safely and distribute the warmth.
- Aluminum Foil: Handy for crafting the candle wick holder and potentially covering any holes in the flower pot.
- Flower Pot: This will trap and then radiate the heat from our candle.
Step by Step Instructions
Learn how to make a DIY dehumidifier with our easy step-by-step instructions. Perfect for reducing humidity and improving air quality at home.
Making the Candle
- Gather Your Supplies: You'll need a glass jar, a shoelace or yarn for the wick, olive oil, matches, and scissors.
- Prepare the Wick: Soak your shoelace or yarn in olive oil, then thread it through a small hole in a doubled-over piece of aluminum foil. This will be your wick holder.
- Fill the Jar: Pour olive oil into the jar, leaving some space at the top. Olive oil is great because it's safe (it goes out if the flame touches the oil directly) and burns for a long time.
- Assemble and Light: Place your wick holder in the jar, letting the wick absorb the olive oil. Light it up, and voila, you've made a candle!
Assembling the Radiator
- Setup: Place your muffin tin on the baking sheet. This will catch any spills and ensure safety.
- Position the Candle: Put your newly made candle in one of the muffin tin compartments.
- Cover: Gently place the flower pot over the candle. If your pot has a hole in it, cover it with aluminum foil. Make sure the pot's edges don't completely block air from reaching the candle.
- Ignite: Light the candle. The flower pot will heat up and radiate warmth around the room.
DIY Dehumidifier
Learn how to make a DIY dehumidifier with simple materials. Understand why each material is needed for effective humidity control in your home.
Materials Needed:
- A small container
- Baking soda
Why These Materials?
- Small Container: Holds the baking soda.
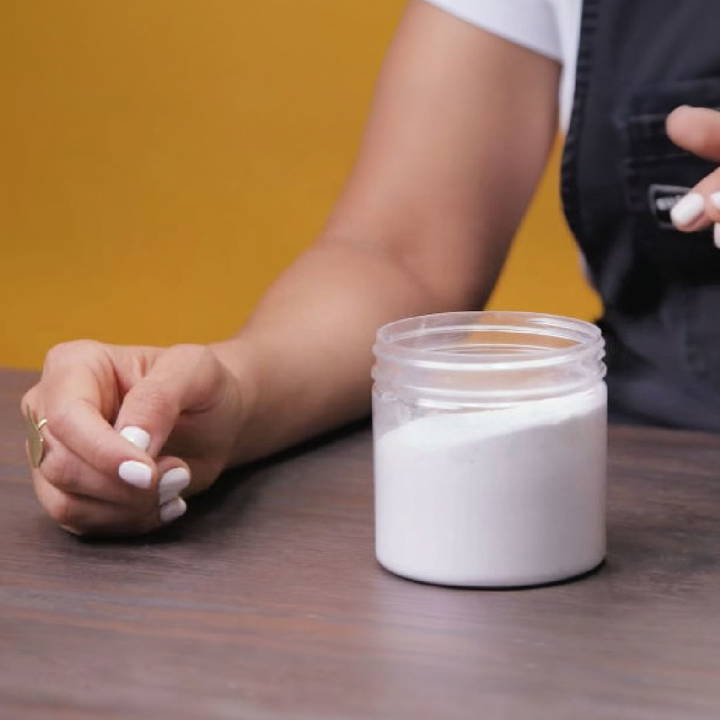
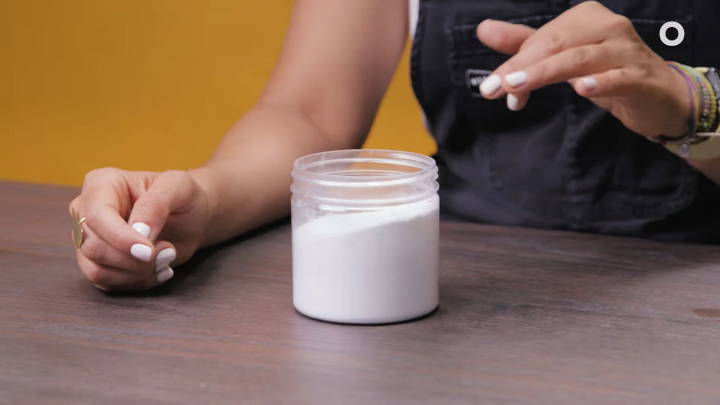
- Baking Soda: An excellent, eco-friendly dehumidifier that also neutralizes odors.
Step by Step Instructions
Discover the foolproof method with easy, step-by-step instructions. Learn how it's really just one step away to achieve your goal effortlessly!
It's Really Just One Step
- Fill the Container: Pour baking soda into your container. That's it. You've made a dehumidifier!
Place these containers in various spots around a room or rooms, especially in areas that feel particularly damp. Over time, you'll notice the baking soda clumping together as it absorbs moisture from the air.
Troubleshooting Common Issues
When you're using a DIY dehumidifier, you might run into a few hiccups along the way. Here's a guide to help you identify and fix common issues, ensuring your dehumidifier works effectively.
The Dehumidifier Isn't Collecting Water
- Check the Airflow: Make sure nothing is blocking the air intake or exhaust.
- Room Temperature: If the room is too cold, the unit may not work properly. Dehumidifiers work best in warmer conditions.
- Humidity Level: If the air isn't very humid, the dehumidifier won't collect much water. Use a hygrometer to check the room's humidity.
The Dehumidifier Is Overheating
- Ventilation: Ensure your DIY dehumidifier has proper ventilation to prevent overheating.
- Dust and Debris: Clean the air intake and exhaust areas regularly to prevent blockages that can cause overheating.
Water Leaks from the Dehumidifier
- Container Check: Ensure the water collection container is correctly positioned and has no cracks.
- Seals and Joints: Check all seals and joints for leaks and apply waterproof sealant if necessary.
Dehumidifier Has a Strange Smell
- Clean or Replace the Filter: If your DIY dehumidifier uses a filter, clean or replace it to eliminate odors.
- Desiccant Refresh: If you're using a desiccant like silica gel, it may need to be replaced or recharged.
Dehumidifier Is Noisy
- Stabilize the Unit: Make sure your dehumidifier is on a stable, flat surface to reduce noise.
- Internal Components: Check for loose parts inside the dehumidifier that may rattle or cause noise.
Handle common issues to keep your DIY dehumidifier efficient. Regular maintenance ensures its longevity.
Safety Precautions
When making and using a DIY dehumidifier, safety is paramount. Here are some key precautions to keep in mind to ensure your safety and the safety of those around you:
- Electrical Safety: If your DIY dehumidifier uses electricity, be cautious. Always use insulated tools and wear rubber-soled shoes when working on the device. Keep all electrical connections dry and secure.
- Chemical Safety: Some dehumidifiers use chemicals like desiccants. Handle these materials with care, wear gloves, and ensure proper ventilation in the area to avoid inhaling any dust or fumes.
- Water Safety: The collected water can be a breeding ground for bacteria. Regularly clean the water container with a mild bleach solution to prevent microbial growth.
- Placement: Place your dehumidifier on a stable, flat surface away from foot traffic. Ensure it's out of reach of children and pets.
- Regular Inspections: Periodically inspect your dehumidifier for wear and tear, especially if it has moving parts. Replace any worn components immediately.
- Fire Safety: Keep your dehumidifier away from flammable materials. If you're using a heat source as part of your dehumidifier, monitor it closely to prevent any fire risk.
Follow these safety tips to use your DIY dehumidifier safely. Always prioritize safety and consult a professional if unsure.
FAQs About DIY Dehumidifier
Discover everything you need to know about DIY dehumidifiers with our comprehensive faqs. Get expert tips and solutions for a moisture-free home.
A DIY dehumidifier is a homemade device that reduces humidity levels in the air without the use of electricity. Common materials like rock salt, baking soda, or charcoal are used because they naturally absorb moisture from the air. For example, rock salt can be placed in a bucket with holes to collect water, while baking soda can be put in a bowl to absorb moisture in small spaces.
Yes, you can make an effective dehumidifier at home using desiccant materials such as silica gel, charcoal, or rock salt. These materials absorb moisture from the air, helping to reduce humidity. However, they are generally more suitable for small areas and may not be as effective as electric dehumidifiers.
Advantages:
Cost-effective and easy to make.
No electricity required, making them eco-friendly.
Portable and can be used in various locations.
Disadvantages:
Not as effective as electric dehumidifiers.
Better suited for small areas.
Require regular maintenance, such as replacing or reactivating the desiccant material.
Yes, besides DIY dehumidifiers, you can reduce humidity by:
Increasing ventilation in your home.
Using exhaust fans in kitchens and bathrooms.
Keeping houseplants that absorb humidity.
Ensuring proper insulation and fixing leaks.
The frequency of replacing the desiccant material in your DIY dehumidifier depends on the humidity level and the material used. For materials like rock salt and silica gel, you may need to replace or regenerate them every few weeks, as they can become saturated with moisture. If you're using baking soda, it may harden as it absorbs moisture, indicating it's time for a replacement. Always check the condition of the desiccant and replace it when it seems to be less effective at absorbing moisture.
Wrapping Up
Making a DIY dehumidifier is easy and useful. This guide will help you get started with your own project and keep your home dry.


