Building your own DIY dirt bike stand offers a cost-effective way to support your bike safely and efficiently. With simple materials and clear instructions, you can build a sturdy stand that meets your needs without spending a fortune. This project is perfect for those who enjoy hands-on tasks and want to enhance their workshop setup.
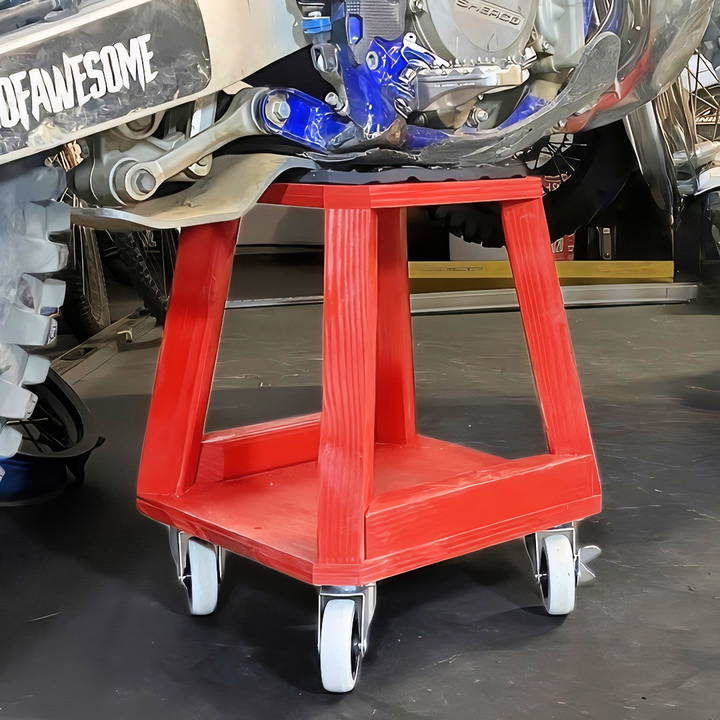
A homemade dirt bike stand not only saves money but also provides a custom solution for dirt bike maintenance. By crafting your stand, you can tailor it to your bike's specifications, ensuring a secure fit. This guide will walk you through each step, making it easy to follow and understand.
Ready to start? Let's dive into the details of building your very own dirt bike stand.
Materials You Need
Before diving into the step-by-step guide, here's a list of the materials you'll need:
- Plywood: 3/4 inch thick, strong enough to support the bike.
- Casters: 4 casters (2 locking, 2 non-locking) for easy movement.
- Drywall screws: For securing the components.
- Wood screws: For mounting the casters.
- Spray paint: Optional, but adds a nice touch.
- Rubber cushion mat: Prevents the bike from slipping off the stand.
- Truss screws: For securing the rubber mat.
- Basic Tools: Measuring tape, table saw, drill, right angle calculator, and sandpaper.
Step by Step Instructions
Learn how to build a DIY dirt bike stand with our step-by-step guide. From measurements to assembly, follow these easy instructions to build your own stand.
Step 1: Take Measurements
The first step is to measure your bike stand dimensions. You need to know:
- The height (16 inches).
- The top width (10 x 10 inches).
- The bottom width (14 x 14 inches).
Casters add an extra 3.5 inches to the height, so I had to factor that into my calculations. The plywood's thickness (3/4 inch but actually 23/32 inches) needs to be considered, which influenced all my measurements.
Step 2: Calculate Angles and Hypotenuse
With the measurements in hand, let's get mathematical:
- The leg of the triangle from top to bottom of the stand is approximately 11.0625 inches.
- The difference between the top and bottom widths is 2 inches.
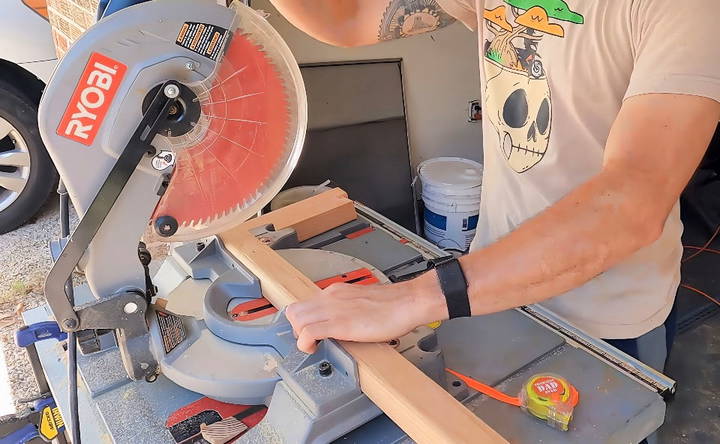
Plugging these numbers into a right-angle calculator, I established my hypotenuse and the necessary angles. I needed a 10-degree cut to achieve the desired angles for the stand legs.
Step 3: Prepare the Wood
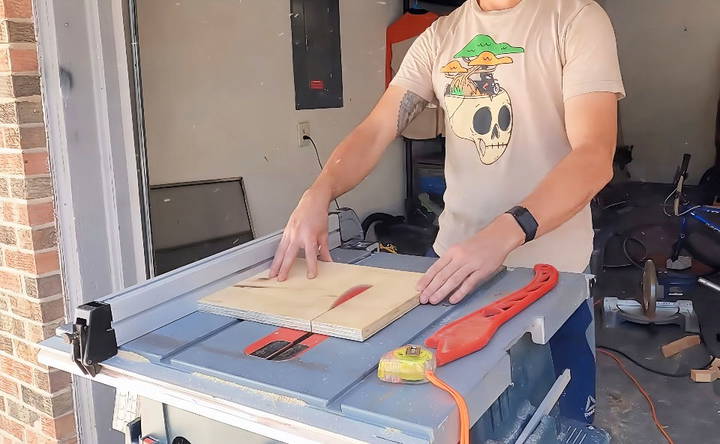
Using a table saw, cut the plywood into four legs:
- Ensure each leg has a 10-degree angle.
- Cut patiently and accurately to avoid mistakes.
Step 4: Pre-drill Holes
Before assembling, I pre-drilled holes where the screws would go:
- This helps prevent wood splitting.
- Countersink holes were also drilled to ensure the drywall screws sat flush against the plywood.
Step 5: Assemble the Stand
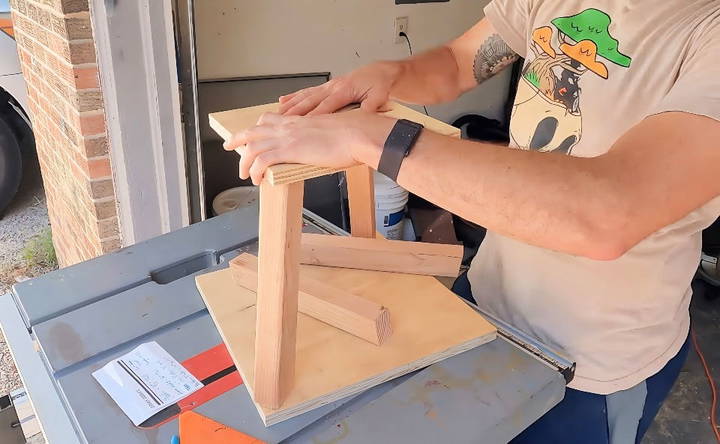
With the legs and the platform pieces prepared:
- Align the legs to the top and bottom pieces.
- Use screws to secure them.
- Confirm everything fits before tightening completely.
I faced issues with alignment due to miscalculations. If your pieces don't fit perfectly, don't get discouraged—measure twice, cut once, and make necessary adjustments.
Step 6: Add Strength with Braces
Adding braces strengthens the structure:
- Measure and cut 45-degree angle braces for each corner.
- Secure them with screws.
A solid frame means your stand will handle the bike's weight without wobbling.
Step 7: Sand and Paint (Optional)
This step is about aesthetic appeal:
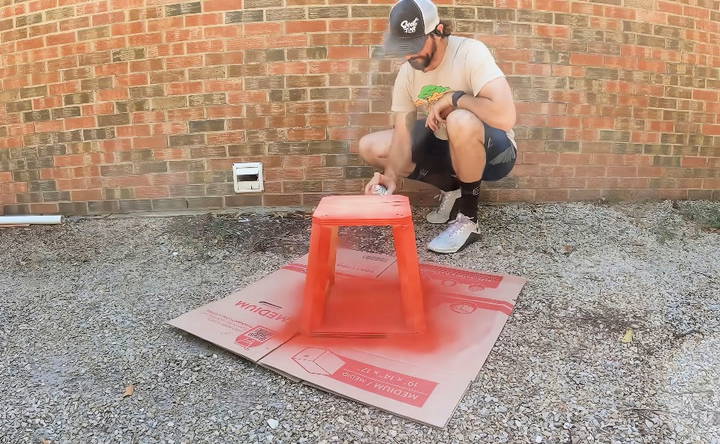
- Sand down rough edges.
- Apply spray paint in a well-ventilated area.
- Let it dry completely before proceeding.
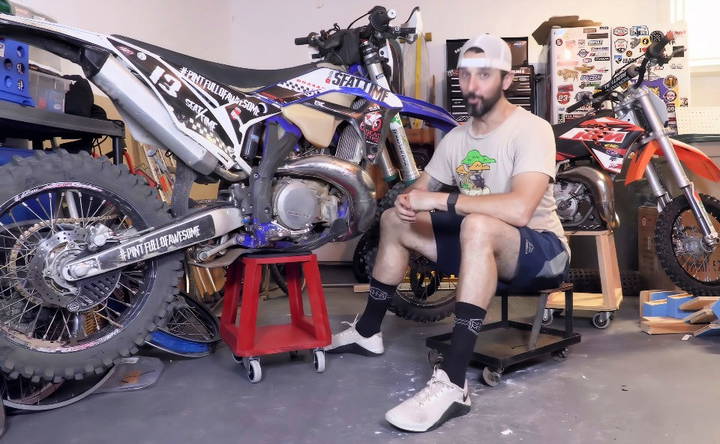
I chose red to match the Seat Time brand, adding a pop of color to my garage.
Step 8: Attach the Rubber Cushion Mat
Cut the mat to fit the stand's top surface:
- Trim excess edges for a cleaner finish.
- Secure it with truss screws.
This mat ensures the bike stays in place while on the stand.
Step 9: Mount the Casters
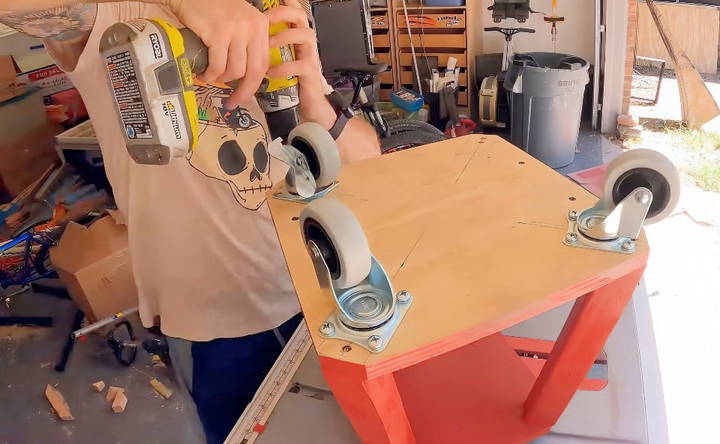
The final step is attaching the casters:
- Mark where each caster will go.
- Drill pilot holes.
- Securely attach the casters with wood screws.
The combination of locking and non-locking casters gives you the flexibility to keep the stand stationary or move it easily.
Testing the Stand
Finally, place your dirt bike on the stand and test its stability. I discovered my casters didn't roll as smoothly as expected due to weight constraints, so you might need to check the weight limit of your casters.
Customization Tips for Your DIY Dirt Bike Stand
When building a DIY dirt bike stand, customization is key to ensuring that it meets your specific needs and preferences. Here are some tips to help you tailor your stand to perfection:
- Choose the Right Size: Measure your bike's dimensions carefully. The stand should be tall enough to lift the bike off the ground but not so tall that it becomes unstable. The width should accommodate your bike's frame snugly.
- Adjustable Width: Consider adding adjustable side arms to accommodate different bike sizes. This can be achieved by using bolts and wing nuts for easy adjustments.
- Padding for Protection: Use rubber padding or foam where the bike contacts the stand to prevent scratches. This is especially important for painted or coated metal stands.
- Tool Storage: Add a small tool tray or magnetic strip to the stand to keep essential tools within reach when performing maintenance.
- Mobility: If you need to move the stand frequently, attach heavy-duty casters to the base. Ensure they have locks to keep the stand stationary when in use.
- Stability Features: For added stability, design the base with a wider footprint or add a cross brace to prevent wobbling.
- Personal Touch: Paint the stand in your favorite color or add decals to personalize it. This not only makes it unique but also helps you identify your stand easily.
- Safety First: Always ensure that any adjustments or additions to the stand do not compromise its stability and safety.
Use these tips to craft a functional, personalized dirt bike stand that is easy to use, protects your bike, and simplifies maintenance.
Advanced Features for Your DIY Dirt Bike Stand
When you're ready to take your DIY dirt bike stand to the next level, incorporating advanced features can make it more versatile and professional. Here's how you can enhance your stand:
- Height Adjustment Mechanism: Add a simple hydraulic or screw jack system to adjust the stand's height. This allows you to work comfortably on bikes of different sizes and can help with tasks that require varying clearance levels.
- Integrated Lift System: For heavy bikes, consider building in a foot-operated lift mechanism. This will save your back and make it easier to elevate the bike without assistance.
- Foldable Design: If space is a concern, build a foldable stand that can be easily stored when not in use. Hinges and locking pins can be used to ensure it remains secure when unfolded.
- Durable Coating: Apply a powder coating to metal parts to increase durability and resistance to the elements. This is particularly useful if you store your stand outdoors.
- Security Locks: For those who need to leave their bike on the stand unattended, adding a locking mechanism can provide peace of mind.
- Built-in Lighting: Attach LED lights to illuminate the underside of the bike, making it easier to work on in low-light conditions.
- Electrical Outlets: Incorporate a power strip into the stand's design so you can plug in tools and chargers without needing an extension cord.
- Tool Organizer: Design a magnetic or pegboard panel to keep your tools organized and within reach while you work.
Enhance your DIY dirt bike stand with advanced features for better functionality and a standout look. Prioritize safety, test thoroughly, and ensure added value.
Troubleshooting Common Issues
Building a DIY dirt bike stand can be a rewarding project, but sometimes you might encounter a few hiccups along the way. Here's a helpful guide to troubleshoot common issues:
Stand is Wobbly
- Solution: Check all connections to ensure they are tight. If the stand is made of wood, verify that all screws are secured into the wood grain, not just the surface. For metal stands, ensure that all welds are solid and there are no cracks.
Stand is Too High or Too Low
- Solution: Measure your bike's clearance when designing the stand. If it's already built, add adjustable feet or cut down the legs to achieve the desired height.
Difficulty in Lifting the Bike onto the Stand
- Solution: Consider adding a lever system or a ramp to help roll the bike onto the stand. Ensure the ramp is stable and has a non-slip surface.
Stand Causes Scratches on the Bike
- Solution: Apply a protective layer where the bike contacts the stand. Use materials like rubber padding or foam for cushioning.
Stand is Not Portable
- Solution: If you need to move the stand often, attach wheels to the base. Make sure the wheels can be locked when the stand is in use.
Tools are Disorganized
- Solution: Build a dedicated space for tools. This could be a small built-in shelf or magnetic strips to hold metal tools in place.
Rust or Corrosion on Metal Stand
- Solution: Treat the metal with rust-resistant paint or a sealant. Regular maintenance checks can prevent long-term damage.
Stand Doesn't Fit All Bikes
- Solution: Design the stand with adjustability in mind. Include features like telescoping arms or movable supports.
Fixing these issues ensures your DIY dirt bike stand is reliable. Patience and adapting your design are key to success.
FAQs About DIY Dirt Bike Stand
Discover everything you need to know about DIY dirt bike stands with our comprehensive FAQs covering materials, construction steps, and safety tips.
For stability:
Use angled legs to distribute the weight evenly
Add cross-bracing between the legs for extra support
Ensure all joints are securely fastened with screws or nails
Apply wood glue at the joints for reinforcement
Consider adding non-slip pads under the legs to prevent sliding.
Yes, you can customize the height of your stand to match your bike size. Measure the height that allows you to comfortably work on your bike and cut the 2x4 lumber accordingly. Remember to account for the thickness of the plywood or MDF board that will form the top platform of the stand.
To protect your stand:
Apply a protective sealant or paint to the wood to guard against moisture and rot
Regularly check for loose screws or damage and repair as needed
Store the stand in a dry, covered area when not in use to prevent weathering.
If you’re looking for a more cost-effective alternative, consider repurposing scrap wood or pallets. You can also look for second-hand stands that can be refurbished. However, building your own stand allows for customization and can be a rewarding DIY project.
To enhance your DIY dirt bike stand, consider adding:
Tool hooks or a small shelf for convenient access to maintenance tools
Wheels or casters for easy mobility around your workspace
Adjustable clamps to secure the bike in place during repairs
Padding on the platform to protect your bike's frame These additions can make your stand more functional and user-friendly.
Conclusion and Lessons Learned
Building this DIY dirt bike stand was an educational journey. From miscalculations to final adjustments, it wasn't perfect, but the experience was enriching. Key takeaways:
- Measure accurately.
- Pre-drill to avoid splitting.
- Use sturdy materials for long-lasting results.
I hope this guide helps you build your own rolling dirt bike stand while avoiding my pitfalls.


