Last summer, I decided to bring disc golf to my backyard. I wanted to build a DIY disc golf basket that would let me practice anytime. With some basic tools and materials, I set out to build a homemade disc golf basket that was both functional and affordable.
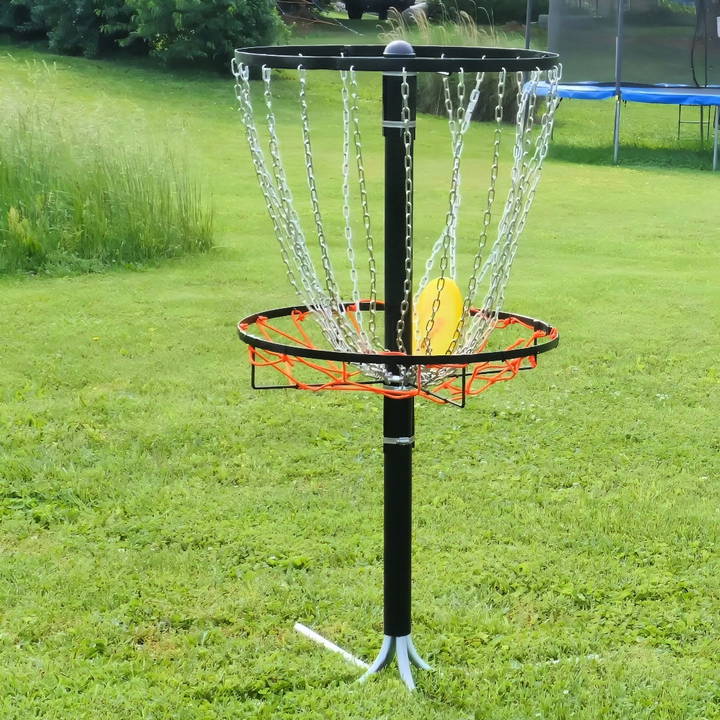
Building my own DIY frisbee golf basket was a fun and rewarding project. I learned a lot about the game and improved my skills along the way. Now, I can enjoy disc golf whenever I want without leaving home.
If you're thinking about making your own basket, my experience might help you get started. It's easier than you think, and the result is a personalized addition to your game.
Why Build a Disc Golf Basket?
I've always believed that the joy of making something with your own hands adds a whole new layer to any hobby. While it's relatively easy to purchase a disc golf basket, making one allows for customization and adds a personal touch to the game. Plus, it's a fun project!
Materials Needed
- Round Steel Bar & Flat Stock: These form the backbone of your basket, providing durability and strength.
- Metal Conduit & Bender: Used for making the legs of the basket, ensuring it stands firm.
- Enameled Black Post: This acts as the central column, giving the structure height and stability.
- Chain-Link Fence Components: These are not just for fences! They're perfect for the basket, offering an aesthetic and functional purpose.
- Paint: For a cohesive look and added protection against the elements.
Step by Step Instructions
Learn how to build your own disc golf basket with our step-by-step DIY guide. From shaping the legs to adding chains, build a pro-quality basket at home!
Building the Frame
I started with cutting the round steel bar and flat stock using a metal cutting bandsaw. You could use a hacksaw or angle grinder if that's what you have on hand. The key here is precision and ensuring all pieces are uniform in length.
Once cut, I aligned them against a straight edge and marked where I would bend them to build hooks. These hooks form the structure for both the basket and the top ring.
Shaping the Legs
For the legs, I used metal conduit. After cutting the conduit into sections, I used a conduit bender to achieve the perfect ninety-degree angle necessary for stability. It's vital that all four legs are bent identically to prevent any wobbling.
Assembling the Frame
With the legs shaped and the frame pieces bent, the next step was assembly. I slid the legs into the enameled black post and applied pressure until they were firmly wedged. It's crucial that the legs are secure to ensure safety while in use.
I then measured and cut the post to the standard height for a disc golf basket (55 inches) before proceeding to attach the round steel bars, forming the side supports of the basket. These supports were essential for attaching the rings that would hold the chains.
Adding the Chains
The chains were the trickiest part. I drilled holes around the top ring to attach quick links, which in turn held the chains. Ensuring even spacing between each chain was crucial for the disc to be caught effectively.
Building the Basket
The basket itself needed to be secure enough to catch and hold the discs. I opted for a cargo net modified to fit the frame, secured at the base. This provided flexibility and ease of replacement if needed.
Lessons Learned
- Patience is Key: Working with metal can be challenging, especially when trying to achieve precise bends and cuts. Take your time for the best outcome.
- Safety First: Always wear appropriate safety gear when cutting, bending, or welding metal.
- Customization is Everything: There's a fantastic sense of satisfaction in customizing the basket to fit personal preferences or to challenge your skills.
Creative Designs for DIY Disc Golf Baskets
Making your own disc golf basket offers endless possibilities. Here's a guide for making unique, functional baskets that challenge players and add artistry to any course or backyard.
The Artistic Basket
Make stunning woven masterpieces with The Artistic Basket. Learn essential materials and follow simple steps to craft beautiful baskets.
Materials Needed:
- Metal barrel or sturdy wire mesh for the body
- Recycled materials for decoration (old CDs, colorful fabric, etc.)
- Paints and brushes
Steps:
- Prepare the Barrel: If using a metal barrel, cut and file it to size. For a wire mesh, shape it into a cylinder.
- Decorate: Use recycled materials to build patterns or mosaics on the outside of the barrel. Be creative!
- Paint: Add a coat of paint to bring your design to life and protect it from the elements.
The Portable Mini Basket
Discover how to make The Portable Mini Basket with our easy steps and materials list. Perfect for DIY enthusiasts!
Materials Needed:
- PVC pipes and joints
- Lightweight chain
- Fabric or light metal for the basket
Steps:
- Assemble the Frame: Connect PVC pipes using joints to build a stand and basket frame.
- Attach the Chain: Secure the chain to the top of the frame to mimic the chains of a standard basket.
- Make the Basket: Attach fabric or a light metal sheet to form the basket.
The Heavy-Duty Basket
Discover how to build The Heavy-Duty Basket with our easy guide. Find out the materials needed and follow the steps to craft this robust basket today!
Materials Needed:
- Thick steel post for the pole
- Heavy chains
- Durable metal for the basket and deflector
Steps:
- Install the Pole: Plant the steel post securely in the ground or a concrete base.
- Attach the Chains: Use heavy chains for a realistic disc-catching experience.
- Add the Basket and Deflector: Weld or bolt a sturdy metal basket and deflector to the pole.
The Eco-Friendly Basket
Make an eco-friendly basket with ease. Discover materials and step-by-step guidance to craft your sustainable masterpiece today!
Materials Needed:
- Bamboo or wooden slats
- Natural fiber rope
- Reclaimed wood for the base
Steps:
- Construct the Frame: Use bamboo or wooden slats to build a circular frame.
- Weave the Rope: Intertwine natural fiber rope through the frame to form the catching area.
- Build the Base: Craft a base from reclaimed wood to support the structure.
Each design provides a unique experience and can be customized for your course or garden. Ensure stability and safety, but most importantly, have fun!
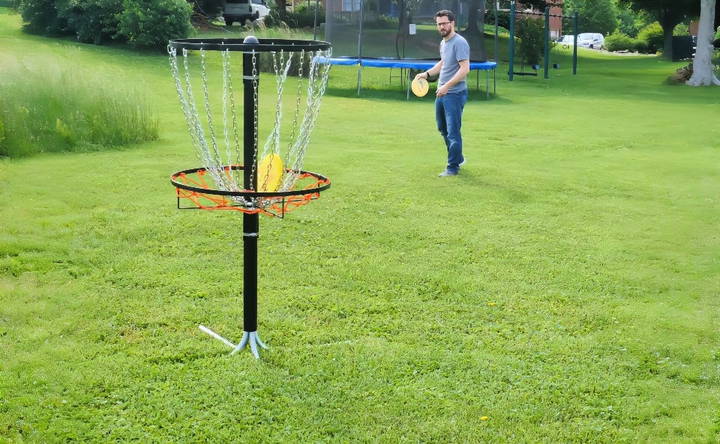
Regulation Size for Disc Golf Baskets
Ensure your disc golf basket meets PDGA size requirements for consistent practice with real courses. Here's a breakdown of the standards.
- Height from Ground to Basket Top: The top of the basket should be 52 inches off the ground.
- Basket Depth: The part of the basket that catches the disc, known as the lower basket, should be 25.7 inches above the ground.
- Basket Diameter: The width of the basket where the disc lands should be 21.3 inches. Since the lower basket is wider, it should measure 25.7 inches in diameter.
These measurements ensure the basket works in play. Too small, discs won't fit; too big, no challenge. Follow these to make a just-right basket for skill practice and game fun.
FAQs About DIY Disc Golf Basket
Get answers to your FAQs about DIY disc golf baskets, from materials needed to assembly tips, and enhance your disc golf experience at home!
To make sure your DIY disc golf basket meets regulation size, refer to the PDGA disc golf basket dimensions. These dimensions will guide you in making a basket that replicates the size and shape of professional baskets used in tournaments.
Yes, you can still build a disc golf basket even if you’re not experienced with tools. The process involves basic construction steps like cutting, drilling, and assembling. If you find it challenging, seek assistance from someone who is more comfortable with DIY projects.
A DIY disc golf basket can be used for practice in your backyard, as a fun activity with family and friends, or even as a feature at fundraisers or tournaments. It's a versatile addition that can enhance your disc golf skills and provide entertainment.
To attach the chains to your disc golf basket, drill holes in the top lid for the bolts in a circular shape. Add T-nuts and screw in the eye bolts. Secure them with nylon locking nuts and washers. Then, attach the inner and outer chains, spacing the outer chains about five inches apart.
To maintain your DIY disc golf basket, you should regularly check and tighten any loose bolts and screws. If your basket is made of metal, protect it from rust by applying a coat of rust-resistant paint or sealant. For baskets with chains, ensure they are not tangled and are securely attached. If your basket is portable, store it in a dry place when not in use to prevent weather-related wear and tear.
Final Thoughts
Making my own DIY disc golf basket was one of the best projects I've undertaken. I encourage you to try it too—you'll not only have fun building it but also enjoy countless hours playing with it.


