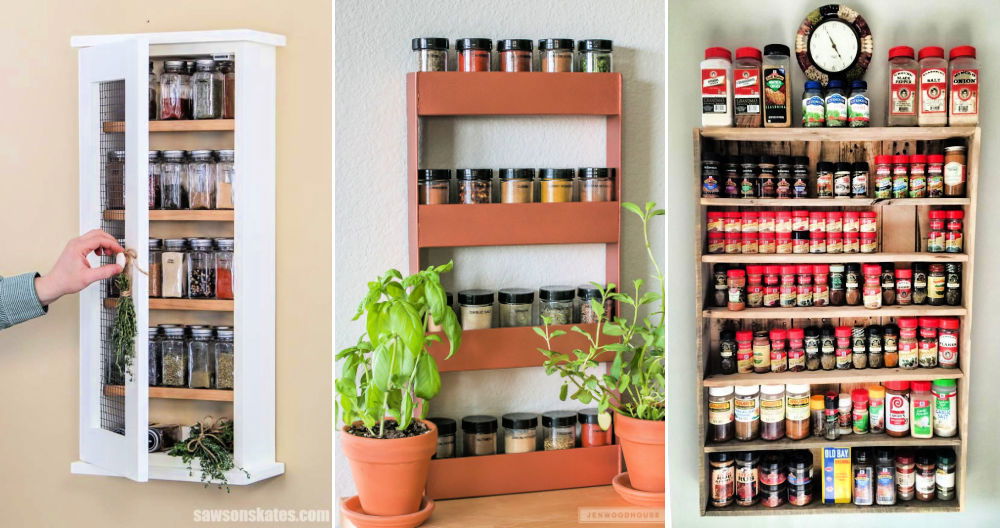
Building my own DIY display shelves was one of the most rewarding projects I've ever taken on. I gathered all the materials and tools needed and sketched a simple design. It wasn't difficult, and seeing the pieces come together was satisfying. I realized the importance of planning and patience. Each step brought me closer to making a space where I could showcase my favorite items.
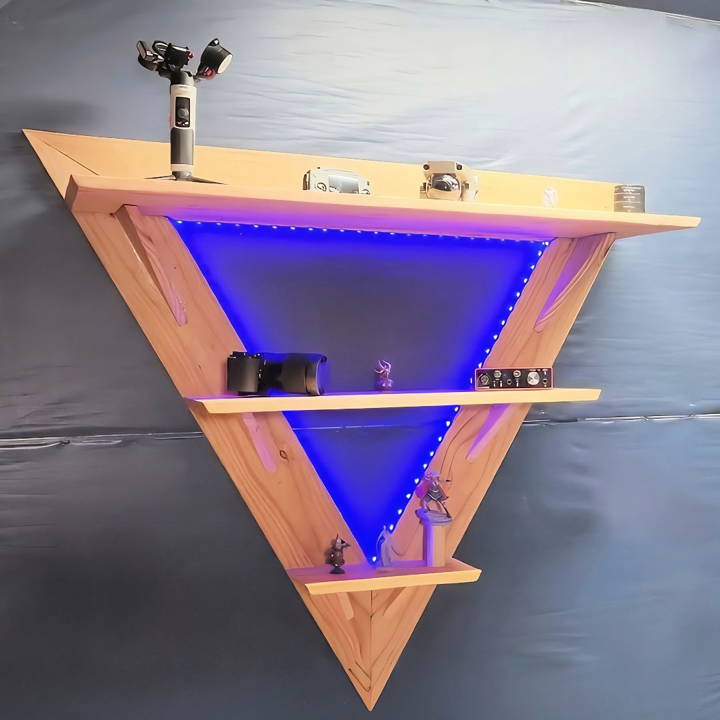
Now, my room looks much more organized, and the new shelves have added a touch of style. It's amazing how such a small project can make a big difference. Watching my treasures neatly arranged brings me joy every day. If you're thinking about a practical and fun project, these DIY display shelves could be just what you need.
I'm helping you with this guide because it can truly transform your space.
Materials Needed
Before we dive into the process, let's go over the materials required:
- 12-foot long piece of 2x6: To form the main triangle frame.
- Four-foot long 2x12, 2x10, and a spare piece of 2x6: For the shelves.
- LED Strip Lights: To add some ambient lighting.
- Wood Glue: For securing the joints.
- Wood Screws: To further secure the shelves and frame.
- Wood Clamps: For holding pieces in place during assembly.
- Wood Stain: To give the shelf a finished look.
- Sandpaper (80 grit and 120 grit): For smoothing the wood surfaces.
These materials are essential for building a structurally sound and visually appealing display shelf. Each item has been chosen for both its functional and aesthetic contributions to the project.
Step by Step Instructions
Build stylish DIY display shelves with our easy, step-by-step instructions. From cutting frames to installing LED lights, transform your space seamlessly.
Step 1: Cutting the Main Triangle Frame
Learn the steps to cut the main triangle frame, including measuring, cutting, and using a custom jig for perfect angles. This is an essential DIY guide!
Measuring and Cutting
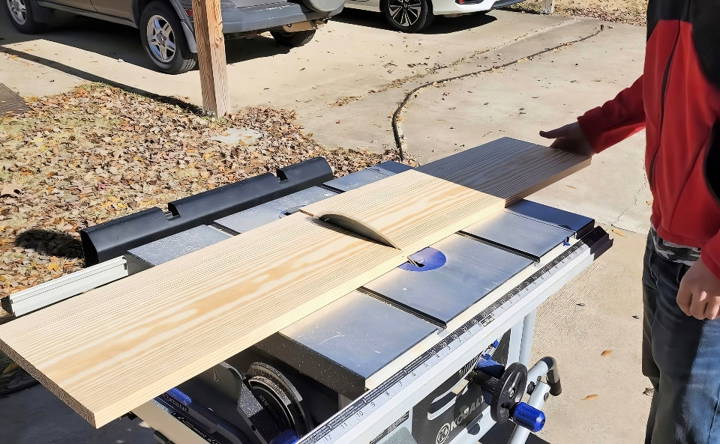
I began with a 12-foot-long piece of 2x6, marking out three four-foot pieces. These pieces would form the main triangle frame. To make the proper corners, I needed to cut each piece at a 60-degree angle. However, my miter saw only cuts up to a 45-degree angle, necessitating a bit of ingenuity.
Custom Jig for Angles
I solved the angle issue by making a simple jig. I cut two small pieces of 2x4 at a 45-degree angle and attached them to the miter saw. By setting the saw to an additional 15 degrees (making it 60 degrees in total), I was able to make the necessary cuts. For wider pieces, I recommend using a table saw with a miter jig to make this process smoother.
Step 2: Preparing the Wood for Lighting
Discover how to prepare wood for lighting, make recesses, and set up conduits for cords effortlessly. Enhance your DIY lighting projects today!
Building Recesses
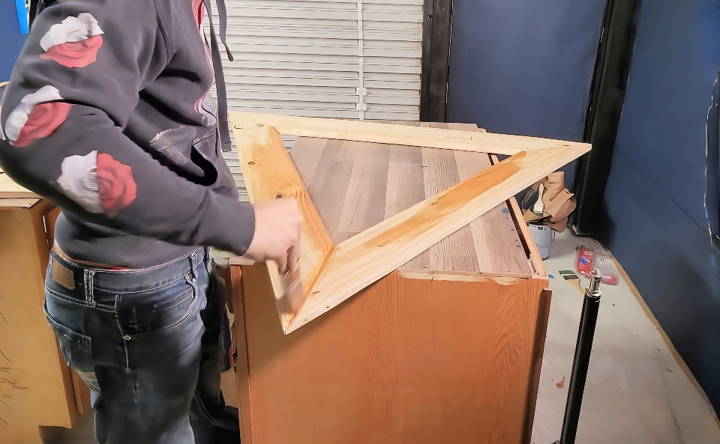
With the main triangular pieces cut, I used a table saw set at a 30-degree angle to make recesses on the inside edges. These recesses would house the LED strip lights later, giving the shelf a unique and modern look.
Conduit for Cords
I also made similar cuts on two of the corner edges to make a channel for the LED power cord. This ensures a clean and neat appearance once the shelf is assembled.
Step 3: Assembling the Frame
Learn how to assemble the frame by joining corners perfectly. Step-by-step guide for flawless frame assembly techniques and tricks.
Joining the Corners
Joining the corners of the triangle was quite challenging due to the angles involved. Clamping everything securely was almost impossible, so I held the pieces together by hand. If you have time, building a jig can make this step a lot easier. The frame eventually came together, though the process required patience and precision.
Step 4: Cutting and Preparing the Shelves
Learn how to determine shelf lengths, cut at angles, add support, and sand pieces for perfect cutting and preparing shelves.
Determining Shelf Lengths
Next, I moved on to the shelves themselves. I used a four-foot-long piece of 2x12 for the bottom shelf, a 2x10 for the middle shelf, and a spare piece of 2x6 for the top shelf. The lengths of the shelves were determined by the triangle's dimensions.
Cutting at Angles
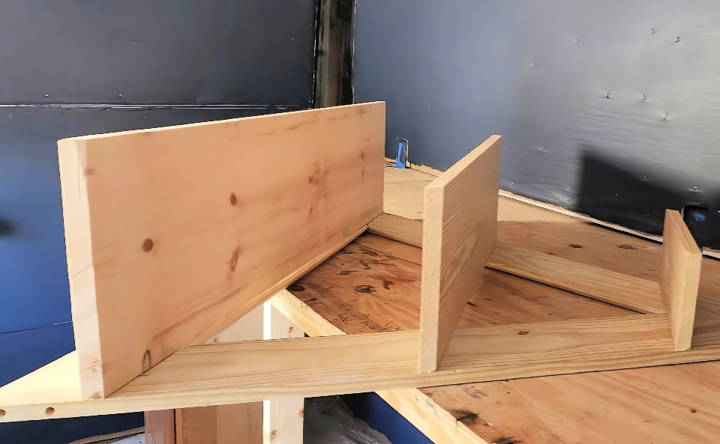
To ensure a cohesive look, I cut the shelves at a 30-degree angle to match the triangle frame's edges. This made sure all surfaces were flush and smooth.
Adding Support
For structural support, I reused the triangular pieces cut earlier from the 2x6s, attaching these to the bottom shelf. I cut additional one-by-four and one-by-two pieces for the middle and top shelves, respectively, ensuring they were also cut at matching angles.
Sanding the Pieces
I sanded all the pieces thoroughly, beginning with 80-grit sandpaper to remove splinters and then moving to 120-grit for a smoother finish. Higher grit sanding could be done for an even finer finish, particularly if you plan to apply a smooth lacquer.
Step 5: Staining the Wood
Learn how to stain wood perfectly. Discover tips for choosing the right stain and applying it efficiently for stunning results.
Choosing the Stain
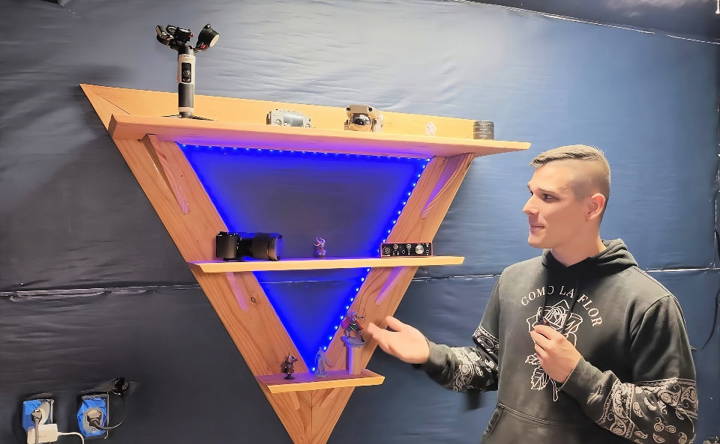
I opted for a golden pecan wood stain to contrast with the dark blue wall. However, it turned out lighter than expected. In retrospect, a darker stain might have been more striking. Remember, stains often dry lighter than they appear initially.
Applying the Stain
I applied the stain evenly across all pieces, ensuring a consistent appearance.
Step 6: Assembling the Shelf
Learn how to assemble and secure shelves for a polished finish. Follow our guide to ensure your shelf assembly is flawless and secure.
Securing the Shelves
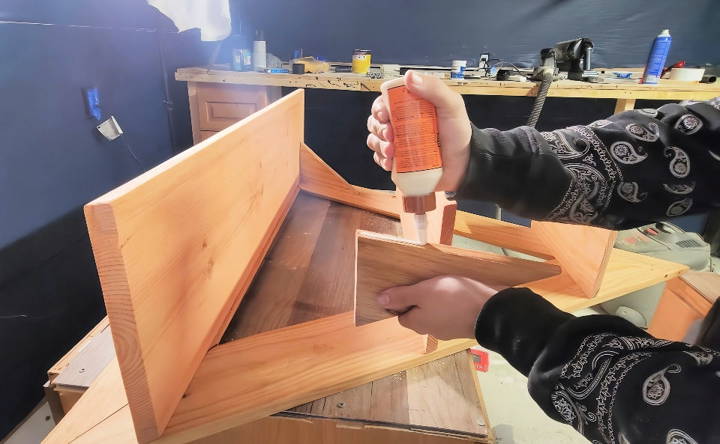
Assembly was a bit tricky due to the angles. I used large wood clamps to hold the shelves in place temporarily while securing them with screws. Once positioned correctly, I applied wood glue for additional hold and stability.
Finalizing the Assembly
After the wood glue dried, I reinforced the joints with more screws, ensuring the entire structure was robust and secure.
Step 7: Installing the LED Lights
Easily follow our guide on installing LED lights. Learn the step-by-step process for attaching leads for a bright and efficient lighting solution.
Attaching the LEDs
The final step was installing the LED strip lights. This part was straightforward: peel off the backing and stick the strips into the recessed grooves. I made sure to run the power cord through the pre-cut channels for a tidy finish.
Customization Ideas for DIY Display Shelves
Building DIY display shelves gives you the freedom to design a space that's uniquely yours. Here are some customization ideas to help you make display shelves that not only fit your space perfectly but also reflect your personal style:
- Choose Your Style: Think about the overall look you want to achieve. Do you prefer a modern, sleek look or a rustic, vintage feel? Your style choice will guide the materials and design of your shelves.
- Play with Colors: Color can completely transform your shelves. Go bold with bright hues, opt for classic white or black, or stain wood for a natural finish. Remember, paint can also be used to make patterns or designs.
- Add Functional Details: Consider adding hooks for keys, a bar for hanging glasses, or slots for wine bottles. These small additions can make your shelves multifunctional.
- Incorporate Lighting: LED strips or small lamps can highlight your displayed items and add ambiance to the room. Choose lighting that complements the style of your shelves.
- Use Decorative Brackets: Shelf brackets come in various designs and can be a decorative element on their own. Pick brackets that match your theme.
- Mix Materials: Combine different materials like wood with metal or glass with rope to add texture and interest to your shelves.
- Personalize with Accessories: Display items that tell your story—photos, souvenirs, or handmade crafts. Arrange them in a way that showcases your personality.
- Experiment with Shapes: Shelves don't have to be straight lines. Consider hexagons, circles, or other geometric shapes for a unique look.
- Adjust for Space: Tailor your shelves to fit any area. Short on space? Vertical shelves draw the eye upward. Have a large wall? Extend shelves horizontally for a statement piece.
- Think Outside the Box: Use unexpected items as shelves. Old drawers, skateboards, or ladders can be repurposed into quirky, one-of-a-kind shelves.
Build functional display shelves that reflect your creativity and style.
Troubleshooting Common Issues with DIY Display Shelves
When you're working on DIY display shelves, you might run into a few snags along the way. Here's a guide to help you troubleshoot some of the most common issues:
- Uneven Shelves: If your shelves aren't level, check to make sure your wall anchors are placed correctly and that you've measured the distances accurately. Use a level tool to adjust the shelves before securing them fully.
- Finding Wall Studs: Locating studs can be tricky. Use a stud finder or tap on the wall to find the solid spots. If you can't find a stud where you need one, consider using heavy-duty wall anchors designed for drywall.
- Weak Shelf Support: Shelves sagging? Make sure you're using the right brackets and supports for the weight of the items you're displaying. Reinforce with additional brackets if necessary.
- Difficulty with Tools: Not everyone is a natural handyman. If you're struggling with power tools, switch to manual tools where possible, or ask a friend for help. Safety first!
- Material Issues: Picked the wrong wood or brackets? It's okay to go back to the store and ask for advice on the best materials for your project. Don't be afraid to start over if something isn't working.
- Finish Flaws: If the paint or stain isn't perfect, sand it down and try again. Multiple thin coats often work better than one thick coat.
- Spacing Problems: If your shelves are too close together or too far apart, take everything down and re-measure. It's worth the effort to get the spacing just right.
- Damaged Walls: Made a mistake and damaged the wall? Patching kits are available at hardware stores, and they're usually simple to use.
- Tool Marks: Accidentally left marks on your wood? Gently sand the area and touch up with paint or stain.
DIY projects teach you. Don't be discouraged by common issues. With patience and problem-solving, you'll make custom display shelves you'll be proud of.
FAQs About DIY Display Shelves
Discover answers to common FAQs about DIY display shelves. Learn tips, techniques, and materials to make stylish and functional shelving solutions.
Consider the items you want to display and the space where the shelves will be installed. For a modern look, floating shelves are a great option. If you're aiming for a rustic vibe, consider using reclaimed wood. Measure your space and decide on the number of shelves and their spacing to make a balanced look.
Yes, there are many simple shelving designs suitable for beginners. Start with a straightforward project like a single shelf with brackets or a picture ledge. Online tutorials and guides provide step-by-step instructions that are easy to follow, even for those new to DIY projects.
Locate the studs in your wall using a stud finder, and make sure to anchor the shelves into these studs for maximum stability. If you can’t use studs, use appropriate wall anchors for your wall type. Always use a level to ensure your shelves are straight before securing them in place.
Personalize your shelves by choosing a paint or stain that complements your room’s decor. Add decorative brackets or trim for a custom look. Consider creative arrangements or unique shapes, like hexagons or interlocking squares, to make your display stand out.
To keep your DIY display shelves in top condition, regular maintenance is key. Dust them regularly with a soft cloth to prevent buildup. If you've painted or stained your shelves, touch up any chips or scratches promptly to protect the wood. For wooden shelves, consider reapplying a sealant or finish every few years to keep them looking fresh. Avoid overloading shelves to prevent sagging or damage.
Final Thoughts
In conclusion, building DIY display shelves is a great, simple project that adds style and organization to any room. You don't need to be an expert to make something beautiful and functional. With easy steps, you'll have a fantastic piece to display your treasures. Get started now; this guide will help you through each step!


