Have you ever seen dogs fly through tunnels, weave around poles, and leap over hurdles in agility competitions? It looks exciting, doesn't it? You might think that only professional trainers can create these courses, but what if I told you that you can build a DIY dog agility course at home, even if you're just looking for some fun activities for your dog?
In this comprehensive guide, we'll explore how you can set up your own dog agility course using simple household items, provide tips for training, and highlight the mental and physical benefits it offers your dog. Whether you want to get started with competitive agility or just want to give your pup some enrichment, this guide has everything you need.
Why Build a DIY Dog Agility Course?
Agility courses provide mental and physical stimulation for dogs, helping to channel their energy and build a strong bond between dog and owner. A home agility course is perfect for any dog, whether they are young and energetic or older and in need of some light exercise.
While some people go all-in on professional courses, training for competitions, or working with specially bred dogs for agility, you can create a mini agility course for pure fun. It's a great way to burn off some energy, provide mental stimulation, and strengthen the bond with your pet.
How to Get Started: Is Your Dog Ready?
Before jumping into building an obstacle course, it's important to ensure that your dog is physically ready and has the temperament suited for agility training. Dogs that excel in agility are confident, energetic, and enjoy learning new things. While professional agility dogs are often bred for their speed and focus, any dog can enjoy the activity at a recreational level.
Consider Your Dog's Age and Physical Condition
Agility can be quite strenuous, so it's important to take your dog's age and health into account. For puppies under two years old, avoid repetitive jumping or activities that put too much stress on their growing joints. Stick with activities that are less intense, like crawling through tunnels or weaving around poles.
Older dogs, or dogs with physical limitations, can still benefit from a homemade agility course. Adjust the challenges to meet their needs. Instead of high jumps, opt for stepping over low objects or walking around obstacles.
Does Your Dog Have Basic Obedience Training?
Before getting into agility, it's essential that your dog has mastered basic obedience skills like “sit,” “stay,” and “come.” These foundational skills ensure that your dog listens to your commands and can safely navigate the obstacles without becoming too distracted.
If you're still working on those basic skills, that's okay! You can use agility training as an additional way to reinforce commands like “stay” or “come.” Be patient and have fun with the process—this is all about enjoying time with your pup.
Step by Step Instructions
One of the best things about making a dog agility course at home is that you can use everyday household items. You don't need fancy equipment or a large backyard; just a little creativity and some space.
Here's how you can get started with a simple DIY dog agility course:
1. Jumps
- What You'll Need: Broom handles, PVC pipes, or dowels
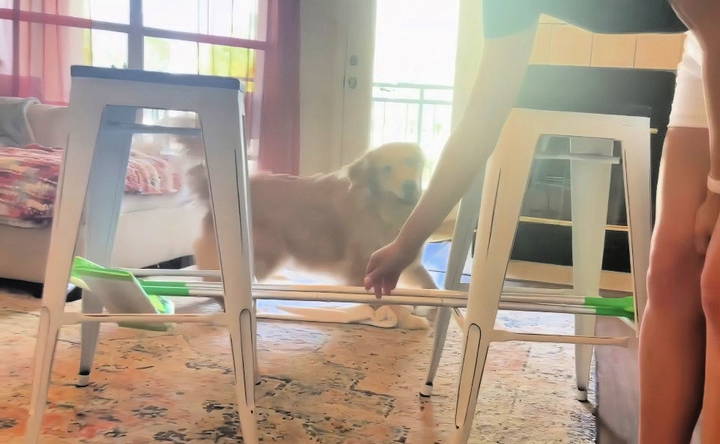
- Setup: Place two chairs about 2 feet apart, and lay a broom handle across them to create a low hurdle. Adjust the height based on your dog's size and agility level. For puppies or small dogs, start with the hurdle barely off the ground, and for larger dogs, gradually raise it.
- Training Tips: Encourage your dog to jump over the bar by using a treat or their favorite toy as motivation. Walk them over the bar a few times before encouraging a jump. Always make sure to celebrate successes with lots of praise.
2. Tunnels
- What You'll Need: A play tunnel (often found in children's toy sections) or a large cardboard box with both ends cut out.
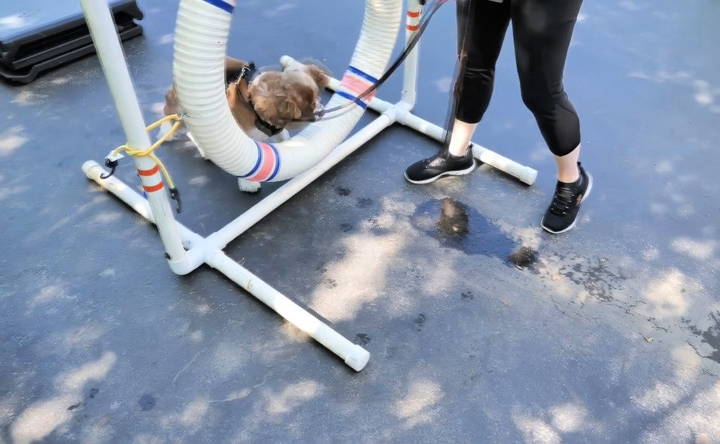
- Setup: Lay the tunnel on the ground, ensuring it's stable and won't collapse while your dog is going through it.
- Training Tips: Lure your dog through the tunnel with treats or a toy. If your dog seems hesitant, shorten the tunnel (if possible) or make it wider at the opening to encourage them. As your dog gets more comfortable, lengthen the tunnel or add curves to make it more challenging.
3. Weave Poles
- What You'll Need: Plastic bottles, cones, or dowels
- Setup: Line up 5-6 poles or bottles in a straight line, spaced about 2 feet apart. You can secure the poles by sticking them into the ground or using heavy bases like sand-filled bottles.
- Training Tips: Walk your dog through the weave poles at a slow pace, guiding them with a treat. Gradually increase the speed as they become more confident. Remember, consistency is key—keep the pattern of weaving the same each time.
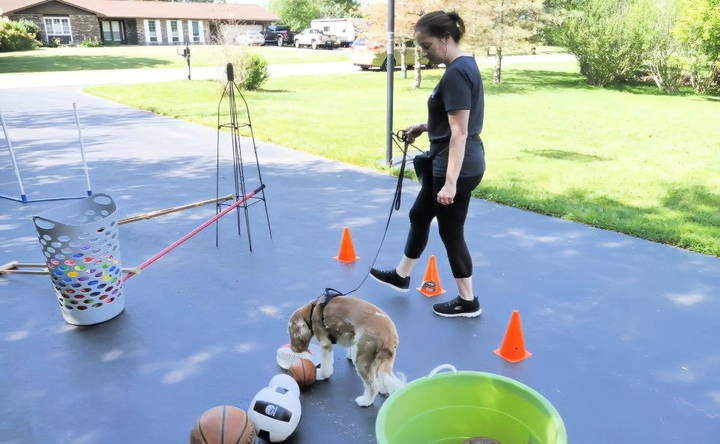
4. Crawl Space
- What You'll Need: A broomstick, a low table, or a piece of cardboard propped up on either side
- Setup: Make a crawl space that your dog can just fit under. Make sure it's sturdy and won't collapse while your dog is underneath it.
- Training Tips: Use treats or a toy to lure your dog under the obstacle. If your dog seems unsure, lower yourself to their level and encourage them with gentle words and positive reinforcement.
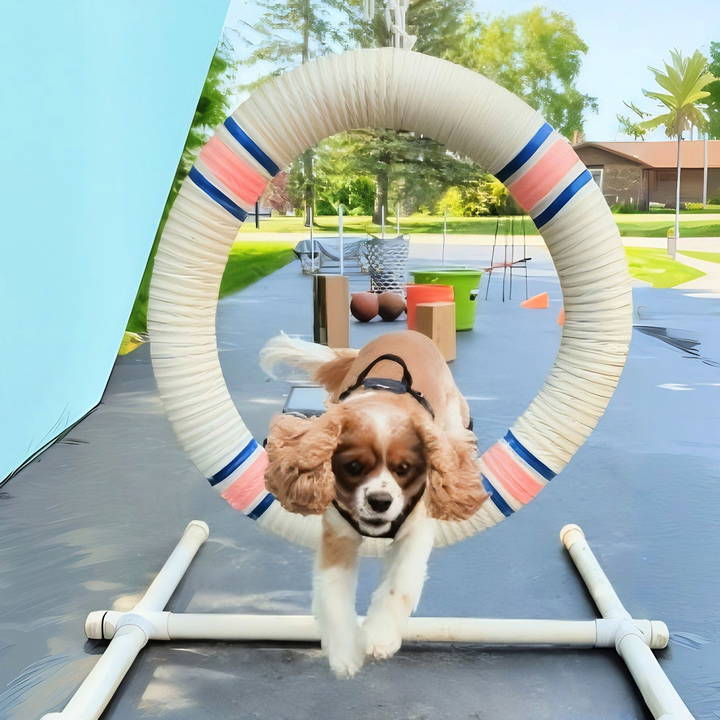
5. Hoop Jump
- What You'll Need: A hula hoop
- Setup: Hold a hula hoop vertically and encourage your dog to jump through it. Start with the hoop touching the ground so your dog can step through, then gradually raise it as they become more comfortable.
- Training Tips: Guide your dog through the hoop using a treat or toy. Start by holding it low to the ground and slowly increase the height as your dog gets more confident jumping through. Always use positive reinforcement to keep them excited and motivated.
6. Stepping Stones
- What You'll Need: Books, cushions, or sturdy boxes
- Setup: Lay out the stepping stones in a random pattern for your dog to step on. Make sure the stones are stable and won't slide around while your dog walks across them.
- Training Tips: Encourage your dog to step from one stone to the next, using treats or a toy as motivation. This exercise helps build balance and body awareness.
Training Tips: Preparing Your Dog for Agility
Training your dog to navigate an obstacle course is all about building a shared language and making sure your dog understands what you want them to do. Here are some important tips to help you along the way:
- Start with Basic Obedience: As mentioned earlier, mastering basic obedience commands is essential. Your dog should respond to commands like “sit,” “stay,” “come,” and “down” before introducing agility. If your dog is still learning these, agility can be a fun way to reinforce them!
- Understand Your Dog's Motivation: Not all dogs are motivated by the same rewards. Some dogs work best for treats, while others respond to toys or praise. Figure out what motivates your dog and use that to keep them engaged in the training. If treats are their reward, try using part of their daily kibble to avoid overfeeding during training.
- Use Positive Reinforcement: Positive reinforcement is key to any successful training session. When your dog successfully completes an obstacle, reward them with treats, praise, or a favorite toy. This helps create a positive association with the course and keeps them motivated.
Advanced Agility Training: Building Confidence and Skill
Once your dog is familiar with the basics of an agility course, you can start introducing more challenging obstacles and increase the difficulty. It's important to build up slowly to ensure your dog stays confident and enjoys the process. Here are some additional ideas for expanding your course and advancing your dog's training.
1. Add More Obstacles
Now that your dog has mastered jumps, tunnels, and weave poles, it's time to introduce new elements to make the course more engaging and dynamic.
Balance Beam
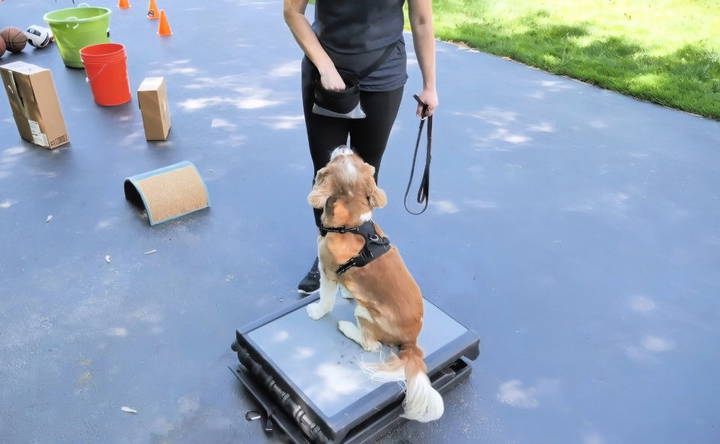
- What You'll Need: A long wooden board or a sturdy plank
- Setup: Place the board on the ground or raise it slightly off the ground by resting it on bricks or other supports. Ensure the surface is stable and wide enough for your dog to comfortably walk across.
- Training Tips: Start with the board flat on the ground to let your dog get used to the feel of walking across it. Use a treat or toy to guide them across. As they become more confident, raise the beam slightly off the ground.
Teeter-Totter
- What You'll Need: A long board and a sturdy pivot point (such as a pipe or block of wood)
- Setup: Place the board across the pivot so that it can tip back and forth as your dog walks on it. Ensure that the board isn't too high off the ground to avoid any injuries.
- Training Tips: Slowly introduce your dog to the teeter-totter by first allowing them to step on it without it tipping. As they become more comfortable, encourage them to walk all the way across, letting the board tip gently as they move.
A-Frame
- What You'll Need: Two sturdy boards and a hinge or rope to connect them at the top
- Setup: Make a triangle-shaped obstacle by connecting the two boards with a hinge or rope at the top. This allows your dog to climb up one side and descend the other.
- Training Tips: Make sure the boards are stable and have enough traction so your dog doesn't slip. Start with the boards at a shallow angle and gradually increase the steepness as your dog gains confidence.
2. Incorporating Handling Cues
As your dog progresses, it's important to develop handling cues that will help guide them through more complex courses. These cues help your dog understand when to turn, jump, weave, or change direction.
Directional Cues
- Teach your dog cues like “left,” “right,” “up,” and “down” to help them navigate the course more efficiently.
- You can use verbal cues combined with hand signals to reinforce the direction you want your dog to go.
- Start by practicing these cues with simple obstacles like a single jump or a tunnel, then gradually combine them with multiple obstacles.
Distance Handling
- Once your dog is comfortable following your cues close by, practice sending them through the course from a distance. This skill will be helpful when you're managing larger courses or more advanced sequences.
- Gradually increase the distance between you and your dog as they navigate the obstacles, using clear cues to direct them through the course.
Customizing the Course to Your Dog's Needs
Not every dog is the same, and agility training can be adapted to fit your dog's unique personality, physical abilities, and learning style. Here are some tips to tailor the course for different types of dogs:
1. For High-Energy Dogs
- Dogs with high energy levels, such as Border Collies or Jack Russell Terriers, may need a more challenging course to burn off energy. Introduce higher jumps, longer tunnels, or more complex sequences to keep them engaged.
- High-energy dogs often need more mental stimulation, so use variations in obstacles and frequent changes in the course layout to keep them on their toes.
2. For Shy or Timid Dogs
- Shy or timid dogs may need more encouragement and positive reinforcement to build their confidence. Start with low-pressure obstacles like weaving through cones or walking over stepping stones.
- Use plenty of praise, treats, and patience to help them feel more comfortable with new challenges. Gradually increase the difficulty as they gain confidence.
3. For Older or Less Active Dogs
- If your dog is older or less active, you can still provide a fun agility experience by lowering the intensity of the obstacles. Stick with walking around cones, stepping over low bars, or crawling under objects.
- Always keep an eye on your dog's energy level and physical condition. Modify or eliminate any obstacles that might be too strenuous or risky for their joints and muscles.
Ensuring Safety During Agility Training
As with any physical activity, safety should be your top priority when building and using an agility course. Here are some key safety tips to keep in mind:
- Warm-Up and Cool-Down: Just like humans, dogs need to warm up before engaging in physical activities. Start with a light walk or some basic commands to get their muscles moving.
- After completing the course, give your dog time to cool down by walking at a relaxed pace and offering water. This helps prevent injury and aids in recovery.
- Avoid Repetitive Motions: Too much repetitive motion, like constant jumping, can put stress on your dog's joints, especially for young puppies or older dogs. Vary the activities to give your dog's body time to recover between jumps or other high-impact movements.
- Check for Hazards: Ensure that all obstacles are stable and won't collapse under your dog's weight. Avoid sharp edges, slippery surfaces, or obstacles that could cause your dog to trip or injure themselves.
- Use Proper Equipment: When building obstacles, make sure they are sturdy and appropriate for your dog's size and weight. For example, don't use items that could break or tip over when your dog interacts with them.
- Monitor Your Dog's Physical Condition: Always keep an eye on your dog's energy level and body language. If they seem tired, frustrated, or unwilling to continue, it's time to take a break. Overtraining can lead to injuries or burnout, so always err on the side of caution.
Fun Variations to Keep Your Dog Engaged
One of the best things about a DIY dog agility course is that it's flexible and adaptable. To keep things fresh and exciting for your dog, try switching up the course layout and adding new challenges. Here are a few fun variations:
- Timed Courses: Once your dog is comfortable with the obstacles, turn the course into a timed challenge. Use a stopwatch to time how quickly your dog can complete the course. This can add an element of excitement and competition (just for fun, of course).
- Relay Races: If you have more than one dog, set up a relay race where each dog takes turns running through the course. You can even invite friends over with their dogs and make it a fun group activity.
- Scavenger Hunt: Hide treats or toys along the course and encourage your dog to find them while completing the obstacles. This adds an extra layer of mental stimulation and can make the course even more engaging.
- Obstacle “Upgrades”: As your dog improves, you can upgrade each obstacle by adding more complexity. For example, add more weave poles, increase the height of the jumps, or create longer tunnels. Gradually challenge your dog with harder versions of the original obstacles.
The Benefits of Dog Agility
Agility training offers numerous benefits beyond just having fun. Here are some key advantages for both you and your dog:
- Improved Physical Health: Agility training provides excellent physical exercise, helping your dog stay fit and healthy. It improves their coordination, balance, and overall strength.
- Mental Stimulation: Agility courses challenge your dog's brain, requiring them to think critically and solve problems. This mental stimulation is just as important as physical exercise, especially for high-energy or working breeds.
- Stronger Bond Between Dog and Owner: Working together on an agility course helps build trust and strengthens the bond between you and your dog. Your dog learns to follow your cues, and you learn to understand their body language and communication.
- Increased Confidence: As your dog successfully completes obstacles and masters new skills, their confidence will grow. This can help with other aspects of training and behavior, especially for shy or nervous dogs.
Step by Step Video Tutorial
Final Thoughts
Building a DIY dog agility course is not only a great way to keep your dog physically active, but it also provides mental stimulation and a fun way to bond. Whether you're working with a high-energy pup or a more relaxed companion, agility training can be adapted to fit your dog's needs and abilities. With simple household items, you can create a versatile and engaging course that challenges your dog's body and mind.
FAQs About DIY Dog Agility Course
Discover answers to common questions about building a DIY dog agility course. Expert tips for making fun and effective training at home.
Start with familiar objects and gradually introduce new obstacles. Allow your dog to sniff and explore each new item before asking them to interact with it. Use treats and praise to create positive associations, and go slow to ensure they feel comfortable.
Yes, but avoid high-impact activities like jumping, as it can damage their growing joints. Stick to low-impact exercises like weaving through cones or crawling under objects until they are older and stronger.
You can use items like chairs, broomsticks, cushions, or hula hoops. Chairs can act as weave poles, broomsticks make great jump bars, and cushions can be used for balance or stepping exercises.
Ensure obstacles are safe and secure, with non-slippery surfaces and low heights. Avoid repetitive jumps, especially for younger or older dogs, and always supervise to prevent accidents. Warm-ups and cool-downs help reduce muscle strain.
Use your dog’s favorite rewards, whether it’s treats, toys, or praise. Some dogs are highly motivated by food, while others might prefer a fun game or verbal encouragement. Keep sessions short and positive to avoid frustration.
Begin training in a quiet, low-distraction area, like inside your home or a calm backyard. Gradually increase distractions as your dog becomes more focused on the tasks. Patience and positive reinforcement are key.
Yes, you can set up an indoor agility course using items like furniture, pillows, and tunnels made from blankets. Just ensure there is enough space for your dog to move safely, and be mindful of slippery floors.
For older dogs, focus on low-impact activities like stepping over low obstacles, walking around cones, or using balance equipment. Avoid high-impact activities like jumping, and always keep the pace gentle.
Increase the difficulty by adding more obstacles, making jumps higher, or spacing weave poles closer together. You can also create more complex sequences or increase the speed at which your dog completes the course.
Keep sessions short, around 10 to 15 minutes, to maintain your dog's interest and energy. End the session on a positive note to ensure your dog remains motivated for future training.


