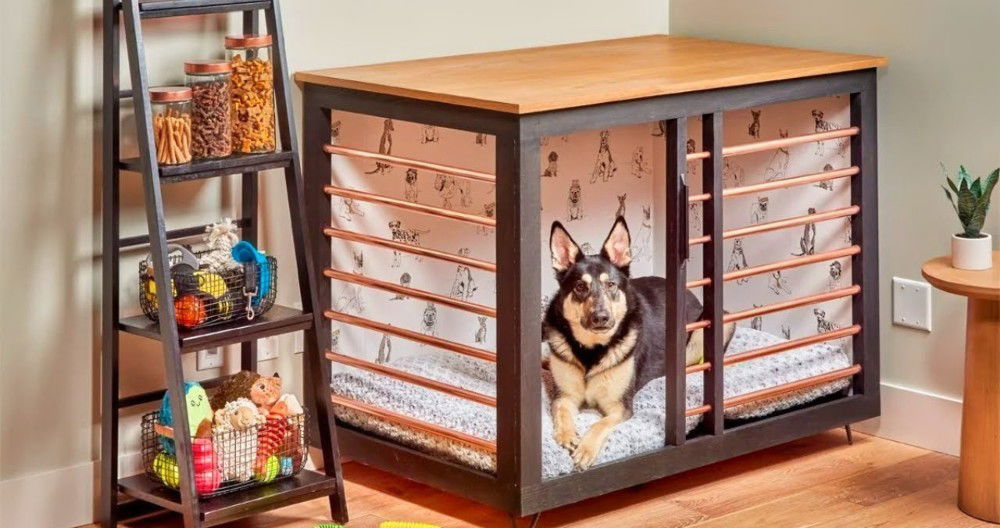
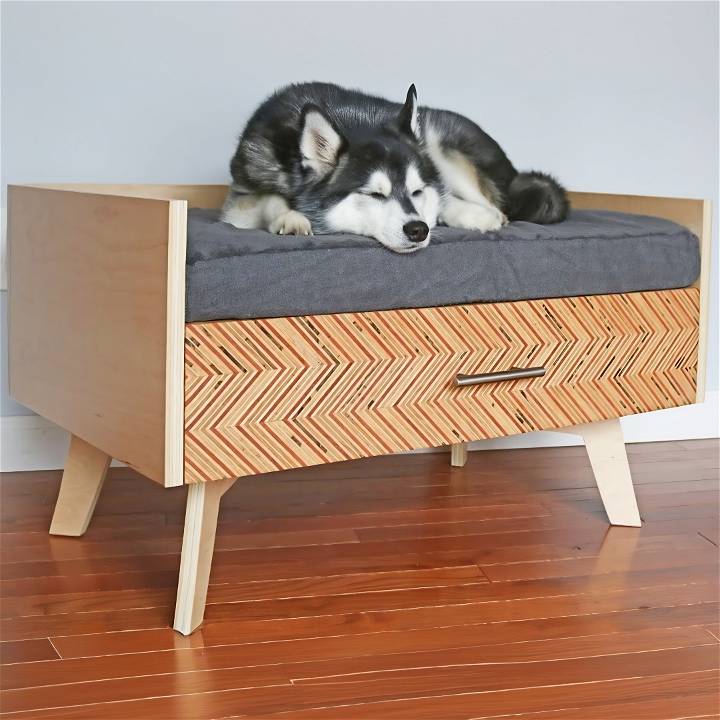
Building a DIY dog bed with storage was not only a fun project but an educational experience that taught me the value of planning, patience, and a bit of creativity. Here's my step-by-step guide on how I accomplished this, influenced by my own trials, errors, and ultimate success. I aimed to integrate storage for grooming supplies into a comfy resting place for my dog, Titan. Follow along for a beginner-friendly journey into crafting a modern and functional piece of pet furniture.
Materials Needed and Why
Discover the essential materials needed for making a DIY dog bed and learn why these items are crucial for your furry friend's comfort and happiness.
- High-Quality Birch Plywood: For durability and a sleek look. Plywood is versatile and easy to work with, essential for both the structure and the patterned drawer front.
- Wood Glue & Screws: These provide the structural integrity of the bed, ensuring it can support your dog's weight and withstand use over time.
- Drawer Slides: Necessary for smooth operation of the storage drawer. Opt for quality slides to avoid jams.
- Sandpaper (Various Grits): To smooth out the wood after cutting and before finishing, ensuring a professional appearance.
- Satin Polyurethane: Protects the wood and gives it a nice sheen, making the bed both beautiful and durable.
- Tools (Saw, Planer, Drill, etc.): Essential for cutting, shaping, and assembling the bed. You can substitute based on what you have, but ensure accuracy and safety.
Step by Step Instructions
Learn how to make a DIY dog bed with our step-by-step instructions. Build a cozy space for your furry friend with this easy guide.
Step 1: Planning & Cutting the Plywood
My adventure began with cutting strips of plywood for the patterned drawer front. I glued these strips together to form a striped panel, which I later planned to shape into a chevron pattern. Precision in cutting ensures that the pattern aligns perfectly, providing not just functionality but also an aesthetic appeal to the final product.
Step 2: Crafting the Chevron Pattern
After the glue dried, I planed the panel to remove excess glue and even out the surface. Cutting the panel at a 45-degree angle on my table saw buildd the strips needed for the chevron pattern. This step was crucial for the visual impact of the drawer, symbolizing the merging of functionality with creative design.
Step 3: Assembling the Side and Back Panels
Once the drawer front aesthetics were underway, I turned my focus to constructing the frame of the bed. I used dowel joinery for a sleek look, but pocket hole joinery could work as well. This step underscored the importance of checking and re-checking for squareness to avoid a skewed bed frame.
Step 4: Attaching the Legs
Inspiration struck when I saw a friend's dog bed design, influencing me to craft similar legs for my project. Adjusting the template to fit Titan's size, I cut and attached the legs at a 45-degree angle for a modern flair. The takeaway here was the adaptability of design to suit personal taste and functionality.
Step 5: Building and Fitting the Drawer
The drawer assembly was where patience really played its part. Despite an initial mishap with sizing, I trimmed the drawer for a perfect fit within the bed frame. This hiccup taught me the significance of double-checking measurements before cutting, especially when integrating moving parts like a drawer.
Step 6: The Finishing Touches
Sanding, applying furniture finish, and attaching the hardware were the final steps in bringing the dog bed to life. Each coat of polyurethane, lightly sanded between applications, brought out the wood's natural beauty and made the effort truly worthwhile.
The Result
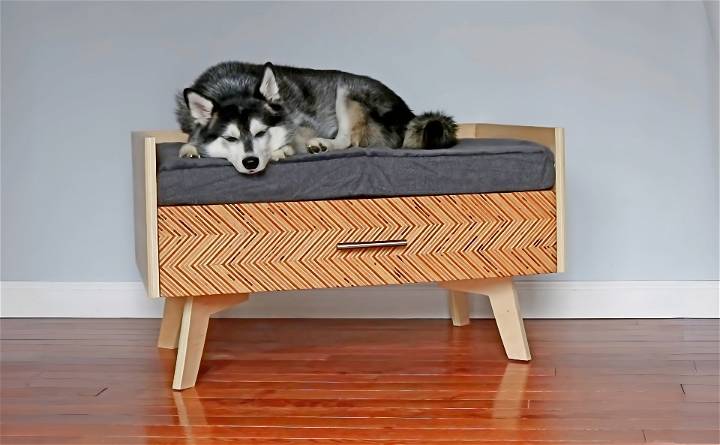
Though there were moments of frustration, especially with fitting the drawer, the final product was immensely satisfying. Titan's approval, as he cozily settled into his new bed, was the ultimate reward for my efforts. The storage drawer, hiding his grooming supplies, was a practical addition that kept everything organized and within reach.
Lessons Learned
This project was not just about building a dog bed but about embracing the learning curve that comes with DIY projects. Each mistake was a lesson in woodworking and project management, teaching me the value of patience and the importance of careful planning and precision. Seeing Titan enjoy his new bed made every minute spent on this project worthwhile.
Sizing Guide for Your Dog Bed
When it comes to choosing the right dog bed, size matters! Ensuring your furry friend has a comfortable and appropriately sized resting spot is essential for their overall well-being. Let's dive into the details of finding the perfect fit for your canine companion.
Measure Your Dog
Before you start shopping or crafting a DIY dog bed, grab a measuring tape and measure your dog. Here's how:
- Length: Measure from the tip of your dog's nose to the base of their tail. This measurement will give you an idea of how long the bed should be.
- Width: Measure the widest part of your dog's body. This will help determine the bed's width.
- Height: Measure from the floor to the top of your dog's shoulder blades. This measurement is crucial if you're considering an elevated bed.
Consider Your Dog's Sleeping Habits
Different dogs have different sleeping styles. Take these factors into account:
- Curlers: If your dog loves to curl up into a ball, choose a round or oval bed with raised sides. This provides a cozy nest-like feel.
- Stretchers: Dogs that like to stretch out need a rectangular bed with ample space. Look for options that allow them to fully extend their legs.
- Burrowers: Some dogs enjoy burrowing under blankets or pillows. Beds with a removable cover or a cozy cave-like design are perfect for them.
Weight and Breed
The weight and breed of your dog play a significant role in bed selection:
- Small Breeds: Chihuahuas, Dachshunds, and Toy Poodles will be comfortable in small beds.
- Medium Breeds: Beagles, Cocker Spaniels, and Bulldogs need medium-sized beds.
- Large Breeds: Labrador Retrievers, German Shepherds, and Great Danes require large or extra-large beds.
Orthopedic Considerations
If your dog is older or has joint issues, opt for an orthopedic bed. These beds provide extra support and cushioning, which can alleviate discomfort and promote better sleep.
Room to Grow
Puppies grow quickly! Choose a bed that accommodates their adult size. Look for beds with removable inserts or expandable options.
Multiple Beds for Multiple Spots
Consider placing dog beds in various areas of your home. Dogs love having options, especially if they like to follow the sun or move around during the day.
Remember, a well-fitting dog bed contributes to your pet's happiness and health. Whether you're buying one or making it yourself, prioritize comfort, durability, and the unique needs of your furry companion.
DIY Waterproof Covers for Your Dog Bed
Keeping your dog's bed clean and dry is essential for their comfort and hygiene. Whether your pup loves to splash in puddles or has occasional accidents, a waterproof cover can save the day. Let's explore how to build a simple and effective waterproof cover for your DIY dog bed.
1. Choose the Right Waterproof Material
Selecting the right fabric is crucial for an effective cover. Look for materials that are:
- Waterproof: Opt for fabrics like polyurethane-coated nylon, polyester, or vinyl. These materials repel water and prevent it from seeping through.
- Durable: Your cover will endure wear and tear, so choose a sturdy fabric that can withstand your dog's playful antics.
- Easy to Clean: Look for materials that are machine washable or wipe-clean. You don't want a cover that's a hassle to maintain.
2. Measure and Cut
Measure your dog bed's dimensions and add a few inches for seam allowances. Cut the waterproof fabric to match the bed size. If your bed has raised sides, cut additional pieces for the sides.
3. Sew the Cover
Follow these steps to sew your waterproof cover:
- Fold and Pin: Fold the fabric in half (right sides together) if you're making a rectangular cover. Pin the edges to secure them.
- Sew the Edges: Use a sewing machine or hand stitch to sew the edges, leaving one side open. Reinforce the corners for extra durability.
- Insert Elastic or Drawstring: To ensure a snug fit, insert elastic or a drawstring along the open side. Sew it in place.
- Turn Inside Out: Turn the cover inside out so the waterproof side faces out.
4. Velcro or Zipper Closure
Choose a closure method that suits your preference:
- Velcro: Attach strips of Velcro along the open side. This allows easy removal for washing.
- Zipper: Sew a zipper along the open edge. Zippers provide a secure closure and make removing the cover a breeze.
5. Test the Waterproofing
Before placing the cover on your dog bed, do a water test. Sprinkle water on the fabric and observe if it beads up and rolls off. If it does, congratulations—you've got an effective waterproof cover!
6. Additional Tips
- Layering: If you want extra protection, layer the waterproof cover over a regular bed cover. This way, you can remove the top layer when needed.
- Replace When Worn: Over time, waterproof materials may lose their effectiveness. Replace the cover if you notice any leaks or damage.
Remember, a waterproof cover not only keeps your dog's bed dry but also prolongs its lifespan. Your furry friend will appreciate a cozy, clean spot to rest!
FAQs About DIY Dog Bed
Discover the answers to all your questions about DIY dog beds, from materials to sizing to design ideas. Get all the info you need in one place!
1. How Can I Make a Comfortable Dog Bed at Home?
Building a cozy dog bed doesn't require advanced skills. Follow these steps:
- Materials: Gather fabric, stuffing (foam, old pillows, or blankets), and basic sewing supplies.
- Design: Decide on the bed shape (rectangle, oval, or round).
- Sewing: Cut and sew the fabric, leaving one side open. Stuff it with the filling.
- Personalize: Add your dog's favorite blanket or toy for extra comfort.
2. What's the Best Filling Material for a Dog Bed?
- Memory Foam: Ideal for older dogs or those with joint issues.
- Polyester Fiberfill: Soft and lightweight.
- Cedar Chips: Natural and repels insects.
- Old Pillows or Blankets: Eco-friendly and budget-friendly.
3. Can I Make a Waterproof Cover for the Dog Bed?
Absolutely! Follow these steps:
- Choose Waterproof Fabric: Look for polyurethane-coated nylon or vinyl.
- Measure and Cut: Measure your bed and cut the fabric accordingly.
- Sew the Cover: Stitch the edges, leaving one side open. Insert elastic or a drawstring.
- Test: Sprinkle water on the cover to check its waterproofing.
4. How Do I Select the Right Size for My Dog's Bed?
- Measure Your Dog: From nose to tail and shoulder height.
- Sleeping Habits: Consider whether your dog curls up, stretches out, or burrows.
- Weight and Breed: Small, medium, or large breed? Choose accordingly.
- Orthopedic Needs: Older dogs or those with joint issues may need specialized beds.
5. Can I Personalize the Dog Bed?
Absolutely! Get creative:
- Embroidery: Add your dog's name or paw prints.
- Pockets: Sew pockets for storing toys or treats.
- Decorative Fabric: Attach patches or colorful fabric strips.
6. How Do I Keep the Dog Bed Clean?
- Removable Covers: Opt for covers that you can easily remove and wash.
- Regular Cleaning: Vacuum or shake out the bed regularly.
- Spot Cleaning: Treat stains promptly with mild soap and water.
- Sun and Air: Let the bed air out in the sun to keep it fresh.
Remember, a well-made dog bed provides comfort and security for your furry companion. Tailor it to their needs, and they'll have a favorite spot to snooze!
Conclusion:
In conclusion, building your own DIY dog bed can be a fun and rewarding project for any pet owner. By following simple instructions and using affordable materials, you can provide a cozy space for your furry friend to relax in style.


