Making a DIY dog crate cover allows you to personalize your pet's space, adding comfort and style. It's simple to make with basic sewing skills and materials you might already have at home. A dog crate cover helps to make a cozy atmosphere, reduces drafts, and can make your dog feel more secure. Plus, it's a great way to match your pet's crate with your home decor.
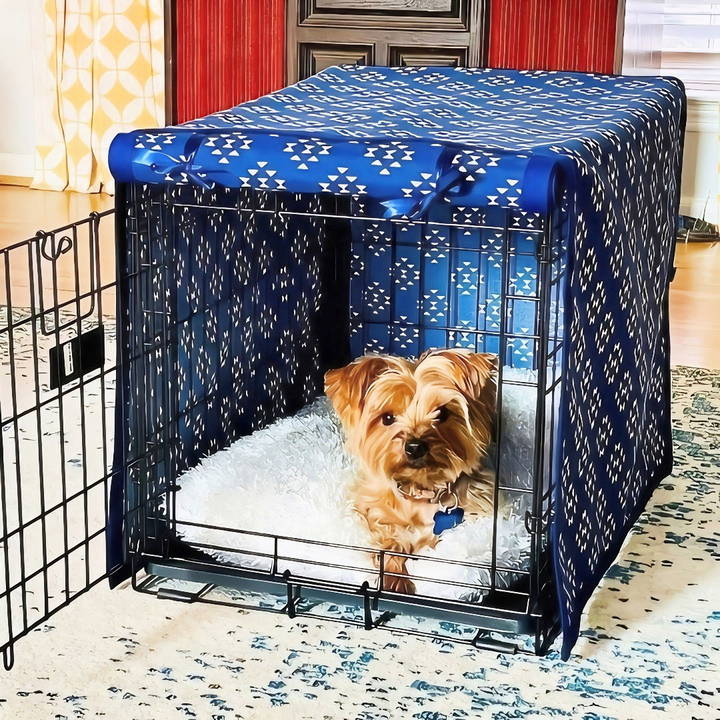
This guide provides step-by-step instructions to sew your own DIY dog crate cover, ensuring you make a cover that fits perfectly. Whether for a small or large dog crate, you can easily adjust the dimensions to suit your needs.
Ready to get started? The next section will walk you through the materials you'll need and the detailed process to make your own DIY crate cover.
Materials Needed
- Fabric: I chose a sturdy and washable fabric for durability and ease of cleaning. The pattern also mattered since I wanted it to fit seamlessly across the crate.
- Sewing Machine: Essential for stitching the fabric together securely.
- Heat n Bond: To keep seams straight and secure before sewing.
- Cricut Mini or Iron: For applying the Heat n Bond.
- Self-Healing Cutting Mat and Rotary Cutter: To ensure clean, straight cuts on the fabric.
- Double Fold Bias Tape: To give the edges a clean, finished look.
- Pins and Clips: To hold the fabric in place as I worked.
- Ribbons: For tying up the crate cover.
- Fabric Filling: To stuff the crate pad and make it fluffy and comfortable.
- Scissors: For cutting the fabric and filling.
Step by Step Instructions
Learn how to make a stylish DIY dog crate cover with our easy step-by-step guide. Perfect for any dog owner looking to add a personal touch!
Step 1: Measuring the Crate
The first step was measuring Rhodey's crate thoroughly—back to front, side to side, and top to bottom. Accurate measurements ensure that the cover fits snugly without any loose or tight spots.
Step 2: Cutting the Fabric
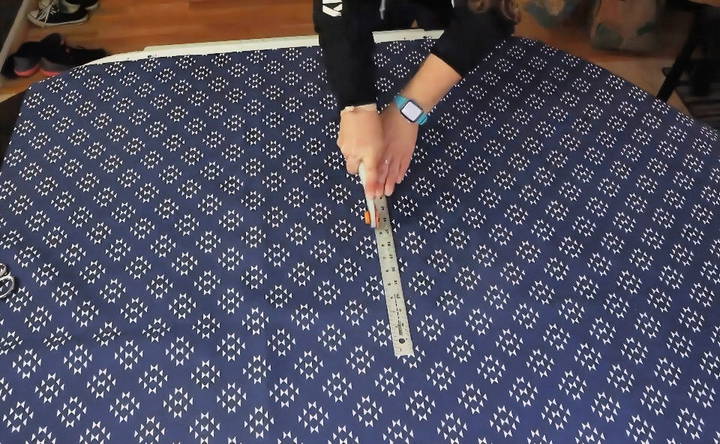
Using the measurements, I cut the fabric. The selvage edge helped me maintain a nice, clean line across the crate. When working with patterned fabric, it's crucial to align patterns precisely to ensure a seamless look.
Step 3: Prepping the Seams
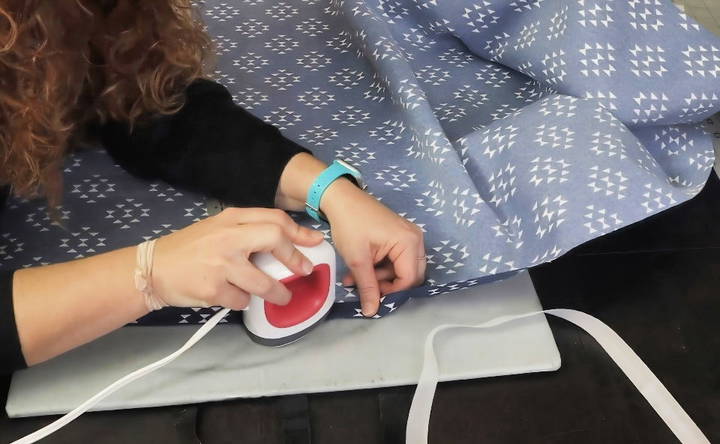
To keep all my seams straight and secure, I used Heat n Bond. This is a fantastic tool for anyone who, like me, is not an expert at sewing. I laid it down along the edges of the fabric and used a Cricut Mini to heat it up, folding the sides in for a clean finish.
Step 4: Assembling the Cover
This guide teaches you how to assemble the cover. It includes detailed steps for the top and side panels, plus a focus on the corners. Perfect for your DIY project!
Top and Side Panels
I began with the top and side panels, using the self-healing cutting mat and rotary cutter for precise cuts. After folding all four sides of each panel with Heat n Bond, I attached double-fold bias tape to give a polished edge.
Corners
For the corners, I opened the bias tape, folded it slightly, and then folded it back, making a neat pocket to tuck the corner fabric into. This prevents any raw edges from showing and ensures a smooth look.
Step 5: Attaching the Cover to the Crate
After all the sides were prepped, I pinned the fabric panels directly to the crate. This allowed me to mark the exact positions where the top, sides, and bottom pieces meet. After ensuring everything was aligned, I sewed the panels together.
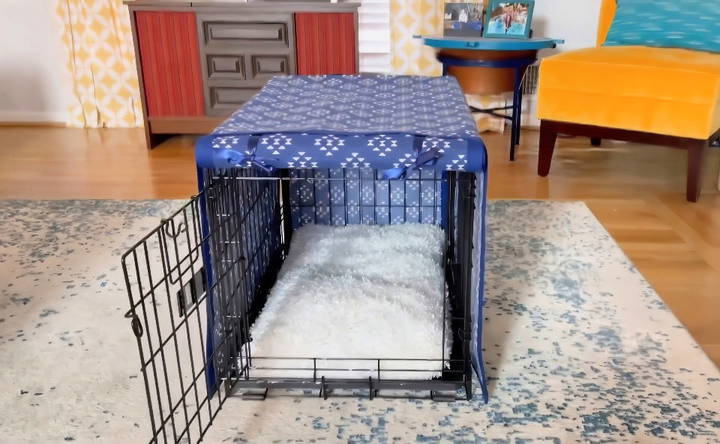
For added convenience, I sewed ribbons to the front panel, allowing it to be tied up and left open when needed. Proper ventilation is essential, and this method provides more airflow while maintaining the cozy den feel.
Step 6: Making the Fuzzy Crate Pad
Learn to craft a cozy fuzzy crate pad: from cutting the fabric and sewing the edges to filling and closing the pad. step-by-step guide for a perfect pet bed!
Cutting the Fabric
I chose a soft, plush fabric that Rhodey already seemed to like. I cut it to roughly the same size as his existing crate pad, ensuring a comfortable fit.
Sewing the Edges
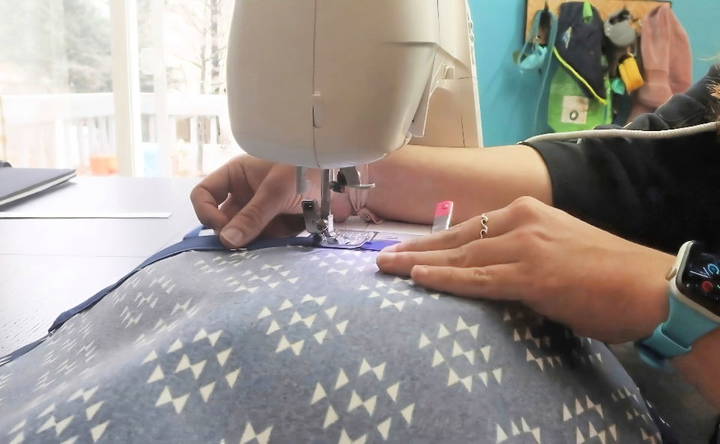
With pins holding the fabric edges together, I ran it through the sewing machine, leaving a small opening to turn the fabric right side out and stuff it. The stitching didn't have to be perfect—just straight enough to keep everything together.
Filling the Pad
Using fabric filling, I stuffed the pad evenly. This task can get messy, so be prepared for a little fuzz around the workspace!
Closing the Pad
Once stuffed, I top-stitched the opening shut, completing the crate pad.
Final Touches and Testing
After finishing the cover and pad, I set them up in Rhodey's crate. It fit perfectly, providing a snug and stylish upgrade from the old beach towel. Rhodey tested it out and seemed quite content, which was the best part of the entire process.
Customization Tips for DIY Dog Crate Covers
Making a DIY dog crate cover is not just about functionality; it's also an opportunity to add a personal touch to your pet's space. Here are some tips to help you customize your dog crate cover:
- Choose the Right Fabric: Select a fabric that reflects your pet's personality or matches your home decor. Consider durable materials like canvas for a sturdy cover or soft fleece for a cozy feel.
- Add Functional Pockets: Sew pockets on the sides to store toys, treats, or grooming tools. This keeps essentials handy and your space organized.
- Incorporate Windows: Cut out sections and sew in mesh panels to provide ventilation. This ensures your pet can see out and helps regulate the temperature inside the crate.
- Personalize with Appliqués: Decorate the cover with appliqués such as your pet's name, paw prints, or fun patterns. Use iron-on patches for an easy update.
- Adjust for Size: Make sure the cover fits snugly around the crate. Add Velcro straps or ties for easy removal and adjustment.
- Consider the Season: Make interchangeable panels or covers for different seasons. Use lighter fabrics for summer and thicker, insulated materials for winter.
- Safety First: Avoid loose decorations or strings that pets could chew on or get tangled in. Always prioritize your pet's safety in your design choices.
By following these tips, you'll make a dog crate cover that is not only practical but also a reflection of your care and creativity. Place to keep it simple, focus on what's best for your pet, and have fun with the process!
Troubleshooting Common Issues with DIY Dog Crate Covers
When crafting a DIY dog crate cover, you might encounter a few hiccups along the way. Here's a helpful guide to troubleshooting common issues, ensuring your project turns out just right:
Fabric Doesn't Fit
- Solution: Measure your crate twice before cutting the fabric. Allow extra inches for seams and adjustments. If the fabric is too small, sew on additional panels to extend it.
Cover Slips Off
- Solution: Secure the cover with ties or Velcro strips attached to the corners. This will keep it in place, even when your dog moves around.
Mesh Windows Fray
- Solution: Use a zigzag stitch or fabric glue to prevent fraying. Reinforce the window edges with extra stitching or bias tape for durability.
Fabric Fades Quickly
- Solution: Choose fade-resistant fabric or treat it with a UV-protective spray. Keep the crate away from direct sunlight when possible.
Difficulty Sewing Thick Fabrics
- Solution: Use a heavy-duty needle and adjust your sewing machine tension. Go slowly to ensure even stitches and prevent needle breakage.
Cover Retains Odors
- Solution: Select odor-resistant materials or add a removable lining that can be washed regularly. Consider using a fabric freshener between washes.
Decorations Come Loose
- Solution: Avoid decorations that can be easily chewed or torn off. Opt for embroidered designs or securely sewn patches instead.
By anticipating these issues and knowing how to fix them, you'll be better prepared to make a functional and stylish dog crate cover.
FAQs About DIY Dog Crate Cover
Discover answers to common questions about DIY dog crate covers, from material choices to customization tips, ensuring comfort and style for your pup.
A DIY dog crate cover is a homemade solution to cover your dog’s crate, providing privacy and helping it blend with your home decor. Making one is cost-effective, allows for customization to fit your crate’s exact size, and lets you choose a fabric that complements your living space.
Yes, there are designs that require minimal skills, such as using tension rods and curtains to create a cover, or simply draping a stylish blanket over the crate. These options are great for those who want a quick and easy solution without the need for tools or sewing.
Absolutely! Some creative DIYers have made crate covers that double as end tables or other pieces of furniture. This requires more materials like wood, screws, and tools, but the result is a functional piece that saves space and looks great in your home.
Ensure the cover has proper ventilation to keep your pet comfortable. Avoid materials that can overheat or restrict air flow. It’s also important to use non-toxic materials and secure the cover so it doesn’t pose a risk of falling or entangling your pet.
Personalizing your dog crate cover is easy and fun. Choose a fabric that matches your interior design, whether it's a classic pattern, a bold color, or a trendy print. You can add trims, such as piping or fringes, for a decorative touch. For a more functional design, consider adding pockets for storage or windows with roll-up shades for adjustable privacy.
Conclusion
Making a custom DIY dog crate cover and pad was a rewarding experience. The steps were straightforward, and the result was a cozy environment for Rhodey that blends seamlessly with our home's decor. If you're looking to give your pet's crate an upgrade, follow this guide, and you'll have a beautifully covered crate and a comfy pad in no time.


