When Harlow first went into heat, panic set in. Not only was I clueless about managing it, but the prices of doggy diapers at pet stores were outright daunting. Imagine my surprise when I discovered that a six-pack cost about $20! Given Harlow's requirements, that was impractical. Hence, I began my quest for a practical, cost-effective solution, which led me to DIY dog diapers.
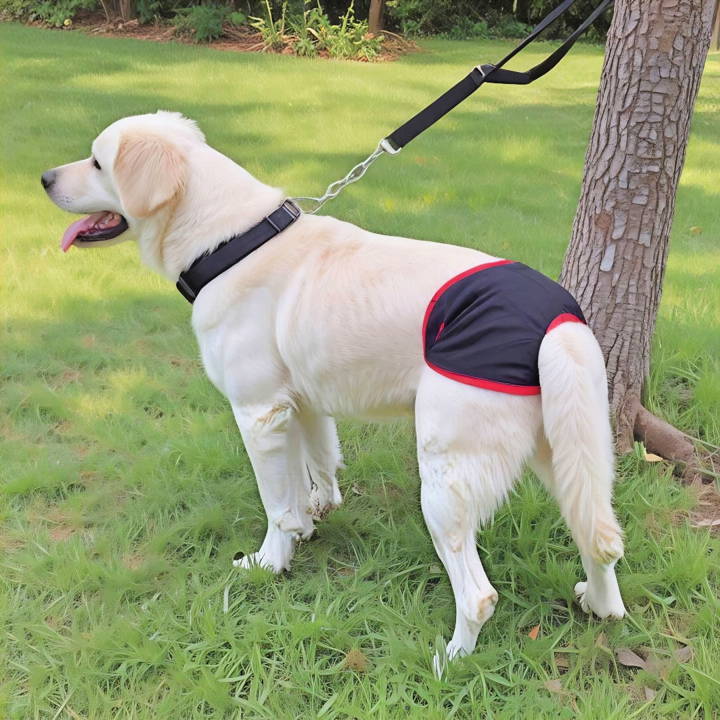
Understanding Your Dog's Needs
When it comes to caring for our furry friends, understanding their needs is paramount. If you're considering a DIY dog diaper, it's likely because your dog has specific requirements that store-bought options may not meet. Here's what you need to know to ensure your homemade solution is both comfortable and effective.
Why Diapers?
Dogs may need diapers for a variety of reasons. Some of the most common include:
- Incontinence: Older dogs or those with health issues may struggle with bladder control.
- Heat Cycles: Female dogs in heat may require diapers to manage bleeding.
- Marking: Some dogs mark their territory inside the home, especially if they feel anxious or there are other pets around.
Finding the Right Fit
A well-fitting diaper is crucial. Here's how to ensure a good fit:
- Measure Your Dog: Use a soft tape measure to find the width of your dog's waist. For females, measure in front of the back legs. For males, ensure coverage of the urethra.
- Consider the Tail: Does your dog have a tail? You'll need to make an opening for it. No tail? Then a snug fit around the back is necessary.
- Adjust for Comfort: The diaper should be snug but not tight. Your dog should be able to move freely without the diaper slipping off.
Materials You'll Need
- Baby Diapers: I found that "Parent's Choice" diapers are the best for this DIY. They're affordable, and you can get a pack of 42 for about $5 to $6. Choose the size carefully based on your dog's size; for Harlow, sizes two or three fit perfectly.
- Scissors: Any pair will do, as long as they're sharp enough to cut through the diaper material.
- Trash Bag: For discarding the cut-out parts.
Why these materials, you ask? Affordability is key, and baby diapers offer a much more cost-effective base for dog diapers. Plus, with sharp scissors, the customization process is a breeze. And of course, hygiene is paramount, hence the trash bag for immediate disposal of waste.
Step by Step Instructions
Learn to make DIY dog diapers with our step-by-step guide. Easily prepare and fit a dog diaper to meet your furry friend's needs!
Preparing the Diaper
- Cutting Off the Ridges: Open up the diaper and look for the ridges on the sides. These ridges can cause diaper rash on your dog if left on. Starting from the back, cut these ridges off at an angle, ensuring the diaper remains as flat as possible. This step is crucial for your dog's comfort.
- Making the Tail Hole: After removing the ridges, focus on the diaper's top. Fold the top flap in half to identify the center. Most diapers have a guideline, which is perfect for this. Measure a half-inch to the left and right of this center line and mark. Then, cut upwards one inch from each mark. Connect these two cuts by snipping out a small section, making a hole for your dog's tail. It's important to ensure this hole is big enough for comfort but not so large that the diaper loses its efficacy.
Fitting the Diaper
- Tail First: With the tail hole ready, gently guide your dog's tail through it. Ensuring the tail is comfortably set in place is crucial.
- Secure the Diaper: Open the diaper's straps and scoop the bottom part under your dog, just like you would with a human baby. Fasten the straps snugly but comfortably around her, ensuring there are no gaps for leaks.
Customization Tips
DIY dog diapers can be both functional and comfy. Customizing one improves its fit. Here are tips to make a perfect diaper for your dog.
Tailoring for Tails
- Tail Opening: If your dog has a tail, cut a small hole in the back of the diaper and reinforce the edges to prevent fraying.
- Tailless Designs: For breeds without tails, ensure the diaper fits securely around the back end to prevent leaks.
Adjusting for Males and Females
- Male Dogs: Diapers for males should extend higher up the belly to cover the urethra.
- Female Dogs: For females, the diaper should sit lower to cover the genital area adequately.
Comfort is Key
- Soft Edges: Use soft fabrics like fleece for the edges to prevent chafing.
- Elastic Bands: Incorporate adjustable elastic bands for a snug fit that stays in place without digging into your dog's skin.
Absorbency Adjustments
- Extra Padding: Add extra layers of absorbent material in the diaper's core for dogs that are heavy wetters.
- Removable Pads: Consider making a pocket for removable pads to make cleaning easier.
Personal Touch
- Fabric Choices: Choose fun patterns or colors to reflect your dog's personality.
- Name Tags: Sew on a name tag or apply iron-on letters to personalize the diaper.
Practical Additions
- Handles: For dogs with mobility issues, sew on handles to help lift them comfortably.
- Reflective Strips: If your dog goes outside at night, add reflective strips for visibility.
Testing and Feedback
- Trial Runs: Have your dog wear the diaper at home to test for comfort and functionality.
- Observation: Watch for any signs of discomfort or irritation and adjust the design accordingly.
Customizing DIY dog diapers ensures a better fit and caters to your dog's needs, making their life comfortable and your home clean.
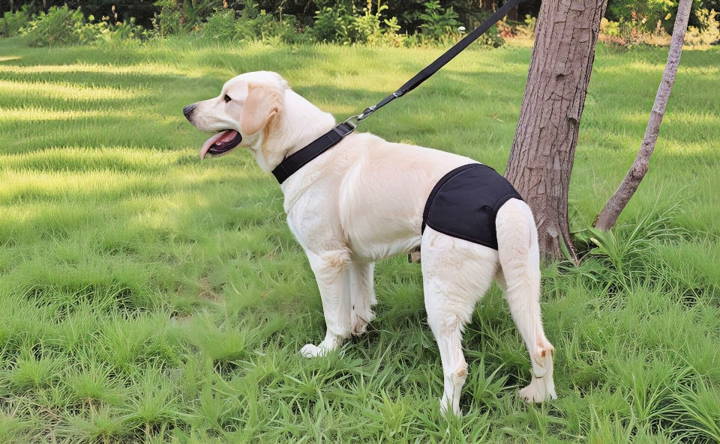
Troubleshooting
When it comes to DIY dog diapers, you might encounter a few hiccups along the way. Here's a troubleshooting guide to help you solve common problems with ease and ensure your dog's comfort and hygiene.
Diaper Slipping Off
- Check the Fit: Make sure the diaper is not too loose. It should fit snugly around your dog's waist.
- Adjust the Fasteners: If you're using Velcro or Snaps, adjust them for a tighter fit.
- Add Suspenders: Consider making or buying suspenders designed for dog diapers to keep them in place.
Leaks and Spills
- Increase Absorbency: Add more layers of absorbent material inside the diaper.
- Waterproof Barrier: Use a waterproof layer, like PUL fabric, on the outside to prevent leaks.
- Proper Placement: Ensure the diaper covers the necessary areas, especially for male dogs.
Chafing and Irritation
- Softer Materials: Use fleece or cotton as the inner layer that touches your dog's skin.
- Loosen Up: If the diaper is too tight, it can cause irritation. Loosen it slightly for comfort.
- Frequent Changes: Change the diaper regularly to prevent moisture buildup, which can lead to rashes.
Diaper Not Staying Dry
- Wicking Fabric: Use a wicking fabric like microfleece for the inner layer to keep moisture away from the skin.
- Change Frequency: Increase the number of times you change the diaper throughout the day.
- Nighttime Solutions: Consider a more absorbent design for overnight use.
Dog Dislikes Wearing the Diaper
- Positive Reinforcement: Use treats and praise to encourage your dog to wear the diaper.
- Gradual Introduction: Start by having your dog wear the diaper for short periods and gradually increase the time.
- Comfort Check: Ensure the diaper is not causing discomfort. Check for any signs of tightness or irritation.
Odor Issues
- Regular Washing: If you're using reusable diapers, wash them frequently to prevent odors.
- Natural Deodorizers: Add baking soda to the wash, or use a pet-safe deodorizer on the diaper.
- Ventilation: Make sure the diaper allows for airflow to reduce odor buildup.
Fixing common issues ensures your DIY dog diaper works well. Patience and observation are crucial. Troubleshooting helps make a comfortable, functional solution for your pet.
Maintenance and Care
Taking care of your DIY dog diaper is essential for your pet's hygiene and comfort. Proper maintenance ensures the diaper remains effective and lasts longer. Here's a straightforward guide to keeping your homemade dog diapers in top condition.
Cleaning Reusable Diapers
- Wash Regularly: Clean diapers after every use to prevent odors and stains.
- Gentle Detergents: Use a mild, fragrance-free detergent to avoid irritating your dog's skin.
- Rinse Thoroughly: Ensure all soap residue is rinsed out to prevent discomfort or allergic reactions.
Drying Diapers
- Air Dry: Hang diapers outside to dry when possible. Sunlight is a natural disinfectant.
- Avoid High Heat: If using a dryer, use a low heat setting to prevent shrinking or damaging the fabric.
Storage
- Keep Dry: Store clean diapers in a dry place to prevent mold and mildew.
- Organize: Have a designated spot for clean and used diapers to avoid confusion.
Disposable Components
- Biodegradable Options: If using disposable inserts, opt for biodegradable ones to reduce environmental impact.
- Proper Disposal: Dispose of used components responsibly to maintain cleanliness.
Regular Inspection
- Check for Wear: Look for signs of wear and tear, such as loose threads or thinning fabric.
- Repair Promptly: Mend any small damages immediately to extend the diaper's life.
Hygiene Practices
- Dog's Skin: Regularly check your dog's skin for any signs of irritation or rash.
- Diaper-Free Time: Allow time without the diaper each day to let your dog's skin breathe.
Odor Control
- Baking Soda: Sprinkle baking soda inside the diaper for natural odor absorption.
- Frequent Changes: Change the diaper often to keep your dog fresh and comfortable.
Follow these tips to keep your DIY dog diapers clean and comfy. Regular care helps your dog and makes diapering easier.
FAQs About DIY Dog Diaper
Discover essential FAQs about DIY dog diapers for hassle-free pet care. Learn how to make and use effective, affordable dog diapers at home.
Dogs may require diapers for several reasons, such as incontinence due to age or illness, marking behavior in males, house training issues, during heat cycles for intact females, or to cover an area due to infection or injury.
Ensure the underwear or briefs fit snugly but not too tight around your dog’s waist. The tail hole should be large enough for comfort and movement without being so big that it allows leaks.
Change your dog’s diaper as soon as it’s soiled to prevent discomfort and skin irritations. For dogs with heavy incontinence or during heat cycles, this may mean several times a day.
For male dogs, you can use a men’s tube sock as a wrap. Cut a hole for the tail and place an absorbent pad inside the sock. Wrap it around the dog’s waist and secure it with Velcro or safety pins. This is often called a belly band and is effective for males that mark indoors.
Yes, you can also use a baby diaper for your dog. Choose the appropriate size, cut a hole for the tail, and fit it snugly around your dog's hindquarters. Ensure it's not too tight and change it regularly to prevent any leaks or discomfort.
Final Thoughts
Wrapping up, mastering the art of making a DIY dog diaper can be a rewarding and practical skill. It's not only cost-effective but also allows you to customize the fit for your dog's comfort. With our simple guide on how to make a dog diaper, you'll be well-equipped to handle any accidents that come your way. So, roll up those sleeves and start crafting! Your furry friend will surely appreciate it.


