Starting a DIY dog door project was one of the best decisions I made for my furry friend's freedom. Seeing my dog happy and able to go in and out as he wished made me feel proud of my work. The process was straightforward, and with a few tools and materials, I managed to build a functional homemade dog door.
The key steps involve measuring your dog, selecting the right spot for the door, and using weatherproof materials. I assure you, this DIY doggie door will make your life easier and keep your dog cheerful.
Give it a try—I'm helping with this guide! These steps will aid you in making a perfect entry for your pet.
Choosing the Perfect Spot
The first step was choosing the right location. I wanted to avoid any electrical wiring or plumbing in the wall. After carefully reviewing my options, I opted for a wall that was free of outlets on the lower part. A handy tip I learned was removing a faceplate from a nearby switch to check where the wiring was coming from. Mine was coming from above, indicating a clear path for the dog door installation.
The Importance of Materials
Materials were vital for this project. I needed:
- A high-quality dog door kit, ensuring it had all the necessary parts for a secure and efficient install.
- A stud finder, to avoid cutting into any structural supports.
- A multi-tool for precise cutting through the drywall.
- Insulation, to keep the house warm after making an opening through the wall.
- Wall anchors and a reliable sealant, for securing the dog door in place and preventing any leaks.
Each material had its role, from ensuring the structural integrity of the wall wasn't compromised, to maintaining the indoor climate and security of my home.
Step by Step Instructions
Learn how to install a DIY dog door with our step-by-step guide, from preparing, cutting, and fitting, to sealing and teaching your pet. Perfect for any pet owner!
Preparing for the Cut
Armed with a stud finder and my trusty tape measure, I located the studs in the wall and marked the desired location for the dog door. I took into account the height that would be most comfortable for Charlie, making sure it was not too high for effortless entry and exit.
Making the Initial Cut
I decided to drill a test hole first. This step was a precaution, to double-check for any hidden wiring or pipes. Once I confirmed the coast was clear, I used a multi-tool to cut out the marked area. The sensation of cutting a hole through my wall was nerve-wracking but thrilling.
Fitting the Dog Door
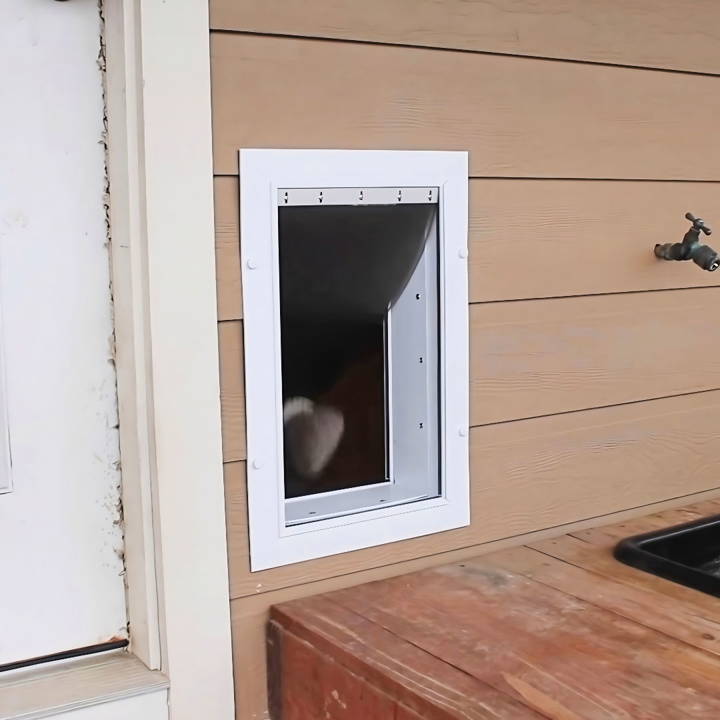
Following the instructions from the dog door kit, I placed part A (the interior frame) into the opening to gauge fit. The kit included a template for cutting through the exterior wall, which made the process straightforward. I drilled through the specified points and then headed outside to repeat the process.
Sealing and Securing
After cutting the corresponding opening on the exterior, I applied a generous amount of sealant around the flange of part A. I chose a high-quality exterior sealant recommended by the dog door manufacturer, ensuring it was weatherproof and durable. The door was then secured with wall anchors, a crucial step to keep it firmly in place.
The Learning Curve
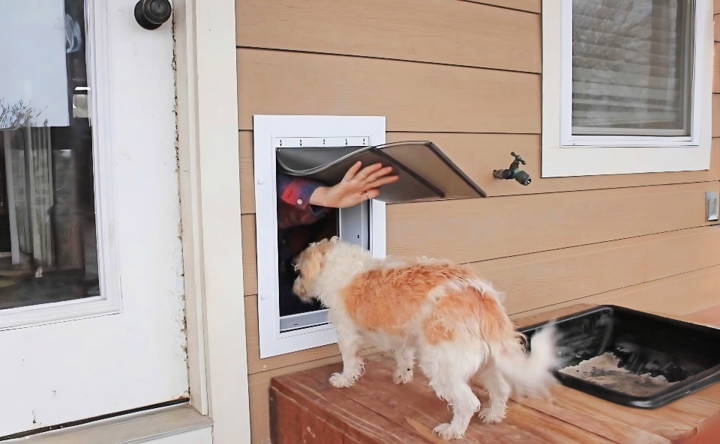
The final step wasn't about construction but about patience. Teaching Charlie to use his new door took a mix of encouragement and lots of treats. Initially, he was skeptical of the flapping mechanism, but with practice, he grew to use it confidently.
Reflecting on the Project
Looking back, the decision to install a dog door was unquestionably the right one. It gave Charlie a new level of independence and saved me countless trips to the door. The project, daunting at first, turned out to be an enriching learning experience. I not only acquired new DIY skills but also enhanced my problem-solving abilities.
Customization Tips for Different Dog Sizes and Breeds
When making a DIY dog door, it's essential to tailor it to the specific needs of your pet. Here are some tips to help you customize the perfect entryway for your furry friend:
- Measure Your Dog: Start by measuring your dog's height and width. The door should be at least 2 inches taller than the highest point of their shoulders and 2 inches wider than the widest part of their body. This ensures they can pass through comfortably.
- Consider the Step-Over: Dogs need to step over the bottom of the door frame to get through. This ‘step-over' should be low enough to be easy for your dog, especially as they age. A good rule of thumb is to make it no higher than one-third of your dog's height.
- Account for Growth: If your dog is still growing, you'll need to consider their adult size. Research your dog's breed to estimate their full size, or consult with your vet for a more accurate prediction.
- Think About All Your Pets: If you have multiple pets, size the door for the largest pet, but ensure the step-over is manageable for the smallest.
- Choose the Right Shape: Some dogs prefer a wider opening, while others are fine with a taller, narrower door. Observe your dog's behavior and preferences when passing through openings to determine the best shape for your DIY door.
- Safety Edges: Ensure all edges are smooth and safe to prevent any injuries. You can use weather stripping or soft rubber to cover sharp edges.
- Sturdy Materials: Use materials that can withstand the wear and tear of daily use. Metal or hard plastic frames are more durable than wood, which can splinter over time.
- Easy to Open: The door should be easy for your dog to push open but not so light that it flaps in the wind. Test different materials for the flap to find the right balance.
- Visibility: Some dogs are hesitant to use a door they can't see through. Consider using a transparent or semi-transparent material for the flap to help your dog feel more comfortable.
By following these tips, you'll build a dog door that is safe, comfortable, and perfectly suited to your pet's needs.
Maintenance and Upkeep
Keeping your DIY dog door in top condition is crucial for its longevity and your pet's safety. Here's a straightforward guide to maintaining your dog door:
- Regular Cleaning: Clean the door flap and frame every week to remove dirt and debris. Use a mild soap and water solution for the frame and a soft cloth for the flap to avoid scratches.
- Check for Damage: Inspect the door regularly for any signs of wear or damage, such as cracks or tears in the flap or loose screws in the frame. Promptly repair any issues to prevent further damage.
- Weatherproofing: Reapply weather stripping or sealant around the door frame annually to prevent drafts and water damage. This will also help maintain your home's energy efficiency.
- Lubricate Moving Parts: If your door has a mechanical opening system, lubricate the moving parts every few months to ensure smooth operation.
- Replace the Flap: Depending on usage, the door flap may need to be replaced every few years. Choose a durable replacement that's easy for your dog to push open.
- Adjust Tension: If the door has a closing mechanism, adjust the tension as needed so the door closes securely but isn't too hard for your pet to open.
- Pest Control: Check the area around the dog door for signs of pests. Seal any gaps and use pet-safe repellents if necessary.
- Train Your Pet: Regularly reinforce training with your pet to ensure they use the door properly, which can reduce the risk of damage.
By following these simple steps, you can ensure your DIY dog door remains a safe and convenient passage for your pet for years to come.
FAQs About DIY Dog Door
Discover answers to all your faqs about DIY dog door, from installation tips to safety features. Get your questions answered for a hassle-free project.
Measure your dog’s height and width at the widest points, and add a couple of inches to each measurement to ensure comfortable passage. The door should be high enough so that your dog doesn’t have to crouch, and wide enough to allow easy passage without touching the sides.
It's best to check with your landlord before making any modifications to the property. If you cannot make permanent changes, consider a temporary solution like a removable dog door that can be installed in a sliding glass door track.
Security concerns can be addressed by adding locks or a cover that can be slid into place when the door is not in use. Some DIY plans include methods for making secure dog doors that help prevent unwanted entry.
The flap material should be durable, weather-resistant, and safe for your pet. Common materials include heavy-duty plastic or rubber. It should also be thick enough to provide insulation but light enough for your pet to push open easily.
Maintaining a DIY dog door involves regular cleaning and inspection. Clean the flap and frame with mild soap and water to remove dirt and debris. Check for wear and tear, especially around the edges of the flap and the hinges. If the door is not swinging freely or sealing properly, you may need to adjust the hinges or replace the flap material. For troubleshooting, listen for unusual noises that might indicate loose parts, and ensure the magnets or closure mechanism are aligned and functioning to keep the door closed when not in use.
Final Thoughts
In conclusion, learning how to build a dog door can be a rewarding project for any pet owner. By following simple steps and using accessible materials, you can build a DIY doggie door that fits your home's needs. This homemade dog door not only gives your furry friend freedom but also adds convenience to your daily routine. Keep these tips in mind, and you'll have a functioning dog door in no time!


