To transform your DIY home grooming process into something more structured and useful, here's how I handle the whole setup based on personal experience. Grooming your dog at home can be both cost-effective and convenient, and I've found that building a simple DIY grooming station can make a world of difference. Instead of chasing your dog around the house or struggling to keep them still, this setup will give you a safe and secure space to groom your dog comfortably.
Why a DIY Dog Grooming Table?
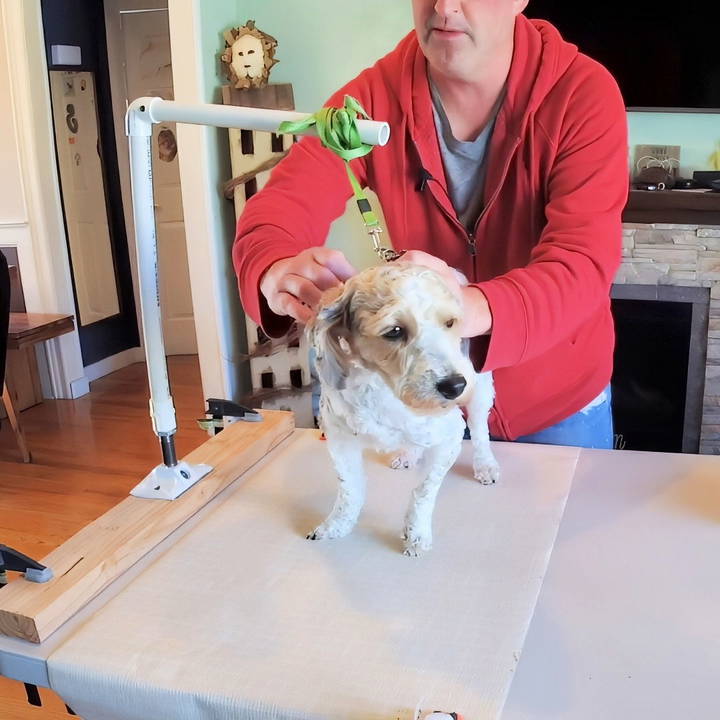
For many of us, the idea of grooming a dog on the floor or a regular table seems easy at first, but it quickly becomes clear that dogs aren't always cooperative. They're likely to squirm, lie down, or even jump off the table, turning the grooming session into a game of chase. I had this exact problem with my dog, who would constantly wiggle and run around. After visiting a professional groomer, I noticed that the key was having a sturdy table and an arm to hold the dog in place.
This inspired me to build my own grooming station at home, using materials I already had. The DIY table solved the problems of keeping my dog still, safe, and comfortable. Plus, it saved me the ongoing cost of professional grooming services.
Materials and Tools
I made my grooming station using inexpensive materials I had lying around, but even if you need to buy them, you can keep costs low. Here's what I used:
- A foldable table: I used a party table we already owned. It's sturdy enough to hold the weight of my dog while being easy to set up and store.
- PVC pipes: These served as the frame for the grooming arm. PVC is lightweight, affordable, and easy to work with. You only need a few pieces to build a structure that holds the dog's collar in place.
- Pipe connections and eyelets: These connect the PVC pipes and give the frame stability. The eyelets are where I attach the lead to secure my dog.
- Clamps: I use these to fasten the grooming arm securely to the table. Without them, the arm would wobble, which wouldn't be helpful during grooming.
- Non-slip mat: Dogs can be uneasy on smooth surfaces, so placing a non-slip mat on the table makes them more comfortable and prevents slipping.
- A detachable collar and lead: These help to keep the dog in place, allowing you to groom them without chasing them around.
Step by Step Instructions
Learn to make your own DIY dog grooming station with step-by-step instructions, personal insights, and essential grooming tips. Perfect for pet owners!
- Setting up the Table
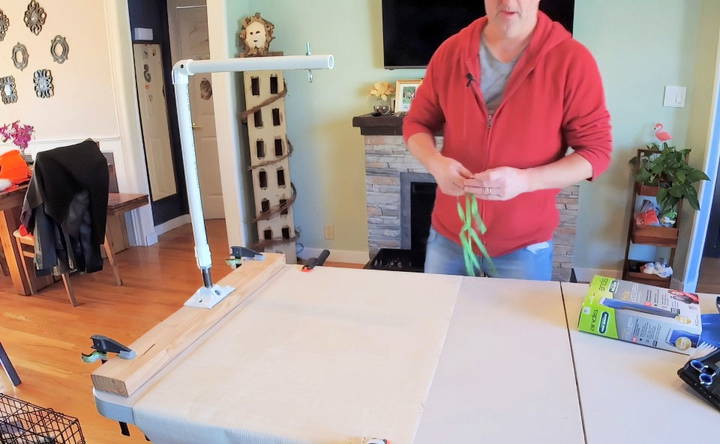
I started by positioning a foldable table in a quiet, well-lit space in my home. The table height was perfect for me to work comfortably without bending down. Any sturdy, waist-height table should work for this setup. Just make sure it's stable enough to hold the weight of your dog. - Building the Grooming Arm
For the arm, I used PVC pipes, which are affordable and easy to assemble. I cut the pipes to a height that matched the size of my dog, ensuring it was high enough to hold a lead without restraining their head too much. I attached the pipes using basic pipe connections and then added an eyelet at the top where I could loop the lead. To make sure the arm stayed in place, I clamped it to the table using a heavy-duty clamp. - Securing the Non-Slip Mat
I placed a non-slip mat on the table's surface. Without it, my dog would be skidding around, and I found that the mat gave him more confidence to stay still while I groomed him. - Attaching the Lead
Next, I hooked up the lead to the grooming arm. I prefer using a detachable collar, as it gives me the flexibility to remove it quickly if needed. The key here is to make sure the lead is snug but not too tight, allowing your dog to sit or stand comfortably.
My Grooming Process
Once everything was set up, I brought my dog to the table. He was curious at first but quickly relaxed once he realized he couldn't jump off. Here's how I worked through each grooming session:
- Securing the Dog
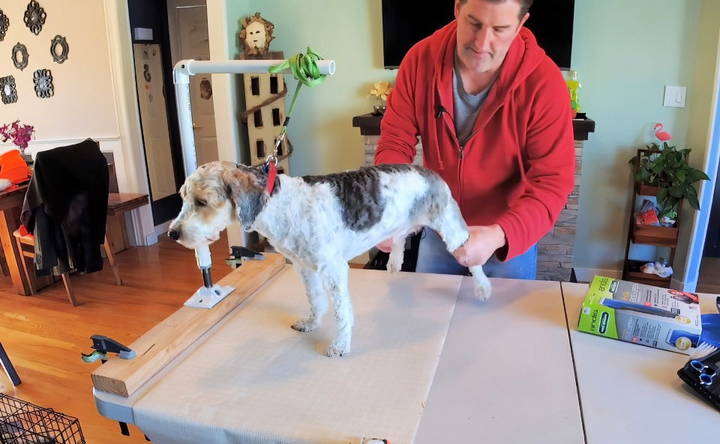
I gently guided my dog onto the table, using treats to make him feel comfortable. After attaching the lead to the grooming arm, I made sure it was secure but loose enough for him to move his head. - Trimming and Clipping
With the dog in place, I grabbed my grooming tools—scissors, clippers, and a brush. I started by brushing through his fur to remove any knots. From there, I used clippers to trim his body, starting at the neck and working my way down. The lead kept him steady, and the grooming arm prevented him from jumping or moving around too much. When I needed to access his belly, I gently lifted him while keeping him tethered. - Handling Sensitive Areas
Grooming sensitive areas like the face, paws, and tail can be tricky. For the face, I unhooked the lead to allow for more freedom of movement, but I kept my hand on him to prevent sudden movements. A calm voice and frequent breaks helped keep him relaxed.
Personal Insights and Lessons Learned
Through trial and error, I learned several important tips that made my grooming process smoother:
- Table stability matters: A wobbly table can make your dog nervous. Be sure to choose something sturdy that won't shift during grooming.
- Start small: If your dog isn't used to grooming, start with short sessions to build up their confidence.
- Build a positive association: Use treats and praise to make grooming a positive experience for your dog.
- Keep the lead loose but secure: You want your dog to stay in place without feeling too restricted. Adjust the lead so they can sit or stand naturally.
Tailored Tips: Choosing the Right Table Design for Your Dog's Breed and Size
When building your own grooming station, it's important to pick a design that suits your dog's needs. Think about their size and breed to make grooming comfortable and safe for everyone.
Small Breeds:
- The compact is key: Smaller dogs need smaller tables. Look for a design that's easy to move around and store.
- Low and steady: A lower table height makes it easier to lift your little pup on and off. Choose a table with a sturdy base to prevent tipping.
Large Breeds:
- Sturdy and strong: Big dogs need a table that can handle their weight. Look for a design with a high weight capacity and a wide, stable base.
- Elevated for comfort: A taller table will save your back from bending over during grooming. Make sure the table height is comfortable for you to work at.
Long-haired Breeds:
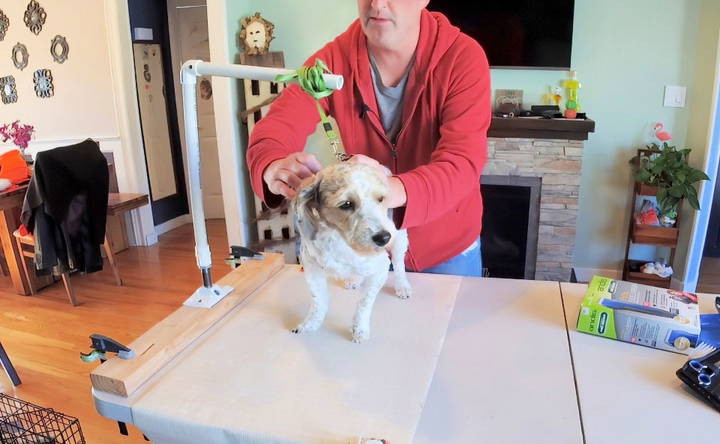
- Grooming arm is a must: A grooming arm helps keep your dog secure and makes it easier to brush out tangles. Choose a table with an adjustable arm to accommodate different sizes.
Senior or Anxious Dogs:
- Easy access: Ramps or lower platforms make it easier for older or nervous dogs to get on the table.
- Comfort is king: Consider a table with a padded surface or a non-slip mat to help your dog feel more secure.
Consider your dog's unique needs when choosing a grooming station design. Plan ahead to build a table that suits both of you perfectly.
Beyond the Basics: Additional Features for a Better Grooming Experience
Once you've got the basics down, consider adding some extra features to your DIY grooming station to make grooming even easier and more enjoyable.
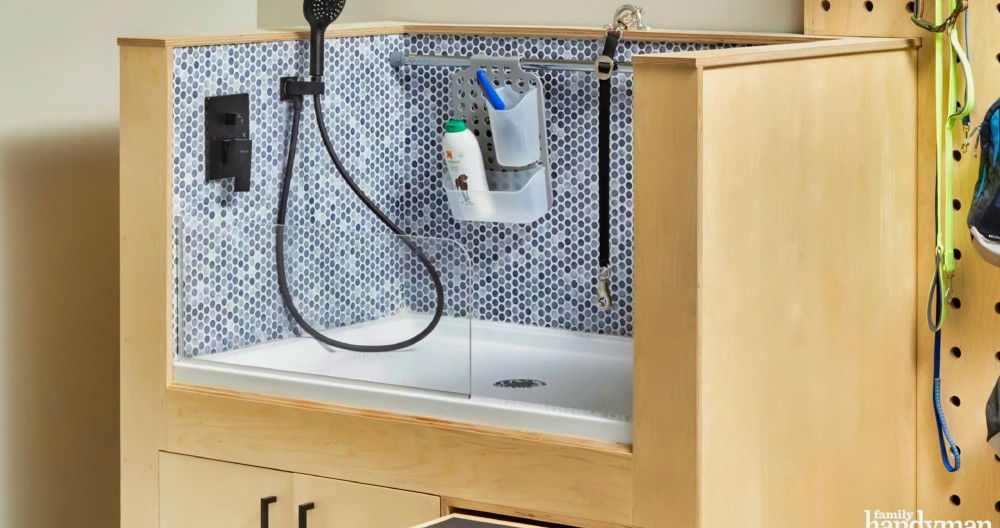
- Storage Solutions: Keep your grooming tools organized and within reach. Built-in drawers, shelves, or hanging organizers are great options for storing brushes, combs, clippers, and shampoos.
- Lighting: Good lighting is essential for seeing what you're doing, especially when trimming nails or working on detailed areas. Consider adding an adjustable task lamp or positioning your table near a window for natural light.
- Custom Touches: Make your grooming station your own! Add a splash of color with paint or stencils, or attach decorative elements that reflect your style.
- Non-Slip Surface: A non-slip mat or textured surface will help keep your dog secure and prevent accidents.
- Drying Station: If you bathe your dog on the table, a built-in drying station with a fan or heater can speed up the drying process and keep your pup comfortable.
- Foldable Design: If space is limited, a foldable table can be easily stored away when not in use.
These are just a few ideas to get you started. The possibilities are endless! Get creative and customize your table to fit your needs and preferences.
Safety First: Essential Precautions for DIY Dog Grooming
Grooming your dog at home can be a fun and rewarding experience, but safety should always be your top priority. Here are some key precautions to keep in mind:
- Secure Footing: A slippery table can lead to falls and injuries. Make sure your table has a non-slip surface, or add a rubber mat for extra traction. You can also use a grooming loop to keep your dog in place while you work.
- Handle Tools with Care: Sharp objects like scissors and nail clippers should be used cautiously and kept out of your dog's reach when not in use.
- Be Mindful of Sensitive Areas: Dogs have sensitive areas like their eyes, ears, and paws. Take extra care when grooming these areas to avoid causing any discomfort or injury.
- Watch for Signs of Stress: Some dogs may feel anxious or stressed during grooming. Watch for signs like panting, shaking, or trying to escape. If your dog seems uncomfortable, take a break or stop the grooming session altogether.
- Choose Safe Products: Some grooming products may contain ingredients that are harmful to dogs if ingested or absorbed through the skin. Look for products that are specifically formulated for dogs and avoid using human shampoos or conditioners.
- Be Prepared for Emergencies: Even with the best precautions, accidents can happen. Keep a first-aid kit on hand for minor cuts or scrapes. If you have any concerns about your dog's health during or after grooming, consult your veterinarian.
Patience and calm are vital for successful grooming. By staying safe and attentive to your dog, you ensure a positive experience.
FAQs About DIY Dog Grooming Tables
Discover essential FAQs about DIY dog grooming stations. Learn tips and tricks to build the perfect grooming station for your pet at home!
While you can technically use a regular table, it's not recommended. Regular tables lack the features that make grooming safe and convenient, such as a non-slip surface, secure tie-down points, and an appropriate height. A DIY grooming table allows you to customize it to your dog's size and needs, ensuring a more comfortable and secure experience for both of you.
Sturdy materials like wood or PVC pipes are popular choices for the frame, while a non-slip rubber mat or textured surface is ideal for the tabletop. Consider using a grooming arm with a leash attachment for added safety and control. You might also repurpose materials like an old desk or table, just ensure they are sturdy and can support your dog's weight.
Use a grooming loop or leash attached to a secure point on the table to prevent your dog from jumping or falling. Positive reinforcement and treats can also encourage your dog to stay calm and still during grooming sessions. If your dog is particularly anxious, consider using a calming spray or pheromone diffuser to help them relax.
Absolutely! You can customize the dimensions and weight capacity of your DIY table to accommodate even the largest breeds. Ensure the materials you choose are strong and durable, and consider adding features like a ramp or lower platform to make it easier for your dog to get on and off the table.
It's best to clean your grooming station after each use to prevent the buildup of hair, dander, and bacteria. Wipe down the surface with a pet-safe disinfectant and wash any removable covers or mats according to their care instructions. Regular cleaning will help keep your grooming space hygienic and ensure a pleasant experience for both you and your dog.
Conclusion: Why You Should Try This DIY Dog Grooming Station
Grooming your dog at home can save you money and time, but only if you have the right setup. After trying several methods, I found that making this DIY dog grooming station made the whole process more manageable and less stressful for both me and my dog. Plus, using simple household materials meant I didn't have to spend a fortune on a professional grooming station.
If you're tired of chasing your dog around during grooming sessions, I highly recommend building your own table like I did. It's affordable, effective, and has completely transformed the way I care for my dog.


