Creating a paw print painting with your dog is a fun and memorable way to capture a special moment with your furry friend. Whether it's to commemorate a significant occasion or simply an afternoon of bonding, a DIY dog paw painting is a perfect keepsake. This detailed guide includes everything necessary to make a paw print painting, from material selection to ensuring your dog feels safe and comfortable.
Why Create a Paw Print Painting?
A paw print painting is more than just a craft—it's a way to capture the unique imprint of your dog's paw and preserve it as a memory. Whether you're creating it as a gift, as part of a family activity, or as a fun way to spend time with your dog, it's a wonderful keepsake that will always remind you of the special bond you share.
In addition to being a fun and creative project, a paw print painting can be personalized with different colors, patterns, and materials, making each one unique. You can hang it up as a piece of art in your home or even give it as a gift to a loved one. The possibilities are endless!
Materials You'll Need
Before starting your paw print painting, gather the necessary supplies. These are some of the essential items you'll need:
- Dog-safe paint: It is critical to use non-toxic paint that's safe for pets. Avoid using any paint that contains harmful chemicals. Water-based, non-toxic paints are ideal because they are easy to wash off and pose no threat to your dog's health if they accidentally ingest it.
- Canvas or heavy-duty cardstock: For the painting's base, you can use a canvas, heavy-duty cardstock, or any sturdy surface. Cardstock works well because it is thick enough to withstand the pressure of the dog's paw without ripping or warping.
- Foam paint sponges: These are helpful for evenly applying the paint to your dog's paw.
- Clipboard (optional): If you're working with cardstock, a clipboard can help keep the paper steady as you apply the paw prints.
- Towels and warm water: You'll need a towel and water handy to clean your dog's paw between prints and when you're finished with the painting.
- Plastic sheet or tarp: This will help keep your workspace clean, especially if you're working indoors. It's best to use a plastic sheet to protect your floors and furniture from any spills or paw prints.
- Dog shampoo: To ensure your dog's paws are clean and free from any paint residue, it's a good idea to have dog-friendly shampoo on hand. Brands like 4-Legger Shampoo are perfect for this, as they are formulated specifically for dogs.
Step by Step Instructions
Learn how to make a DIY dog paw painting with step-by-step instructions for a fun and safe art project. Perfect for pet lovers!
1. Set Up Your Workspace
To start, make sure you have a clean, comfortable, and safe area for your dog to relax. If possible, work outside to minimize mess. If you're indoors, lay down a plastic sheet or tarp to protect your floors.
- Place a foam bed or a comfortable surface for your dog to rest on. Keeping your dog cozy will help them feel at ease during the process.
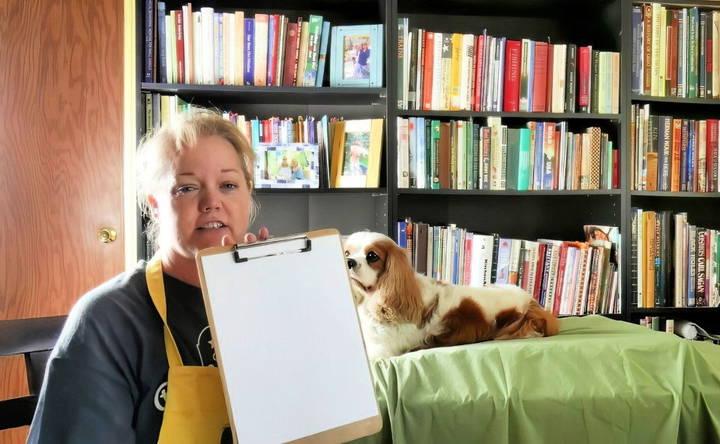
- Lay out your canvas or heavy-duty cardstock. If you're using paper, clip it to a clipboard to prevent it from moving around.
2. Prepare Your Dog's Paw
Before applying paint, ensure your dog's paws are clean. You can give them a quick wash with dog-friendly shampoo to remove any dirt or debris. Clean paws will help the paint adhere more evenly and produce a better print.
3. Apply Paint to the Paw
Using a foam paint sponge, apply a thin layer of non-toxic, dog-safe paint to the pads of your dog's paw. Be sure to cover all the pads evenly but avoid using too much paint, as this could result in a smudged or unclear print.
- Pro tip: Test the paint first by lightly pressing your dog's paw on a piece of scrap paper to make sure you have the right amount of paint and that your dog is comfortable with the sensation.
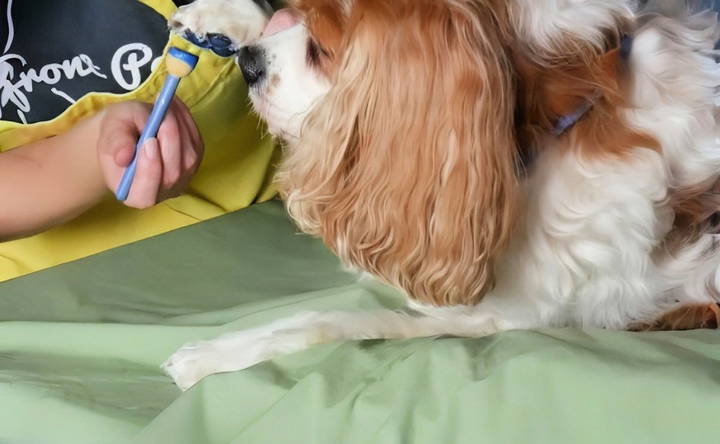
4. Create the Paw Print
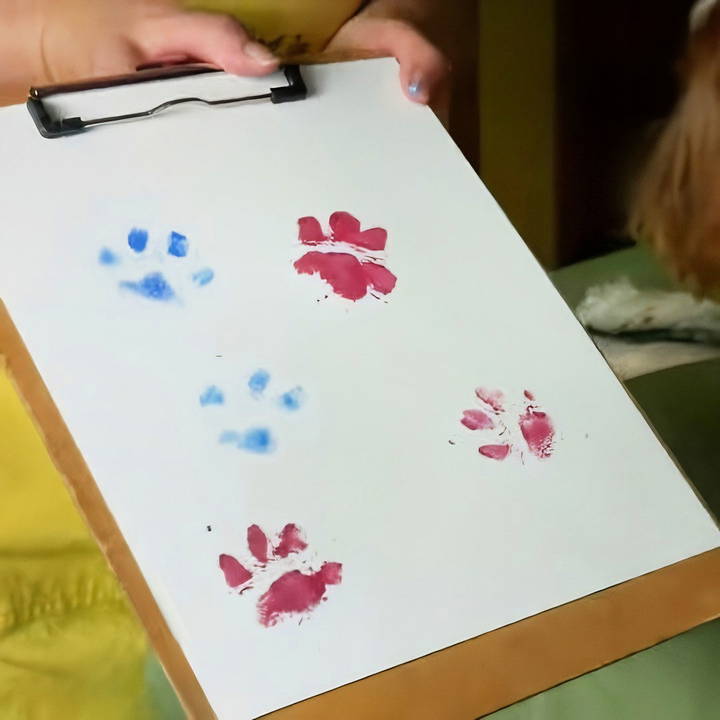
Carefully press your dog's painted paw onto the canvas or cardstock. Hold it in place for a few seconds to ensure the paint transfers well. Gently lift their paw straight up to avoid smearing the print.
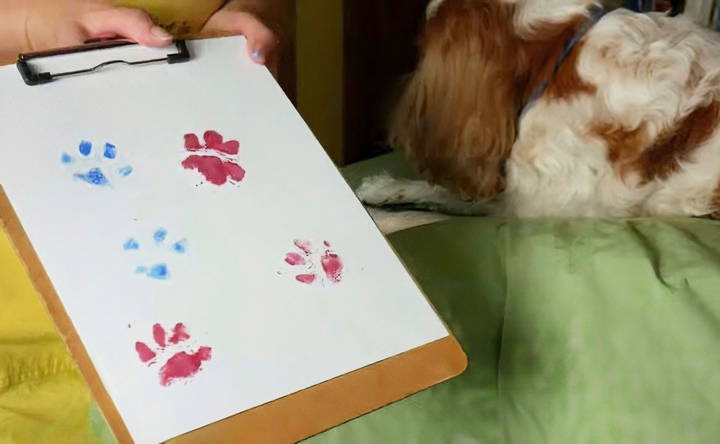
Repeat this process to make multiple prints, if desired. For added variety, you can use different colors for each paw print, or even paint each toe a different color.
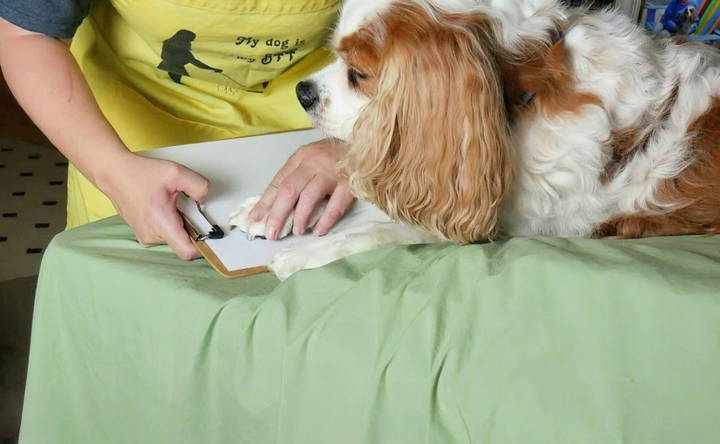
5. Clean Your Dog's Paw
After each print, clean your dog's paw with a towel and warm water. It's essential to wash off the paint immediately to prevent any residue from sticking or drying. If you're planning to use another color, make sure the paw is fully dry before applying the next paint.
For a thorough clean, use a mild dog shampoo like 4-Legger. This ensures your dog's paws are free of any paint residue and prevents any irritation or discomfort.
6. Allow the Painting to Dry
Once you've created your masterpiece, let the painting dry completely. Depending on the type of paint you used, this could take a few hours or overnight.
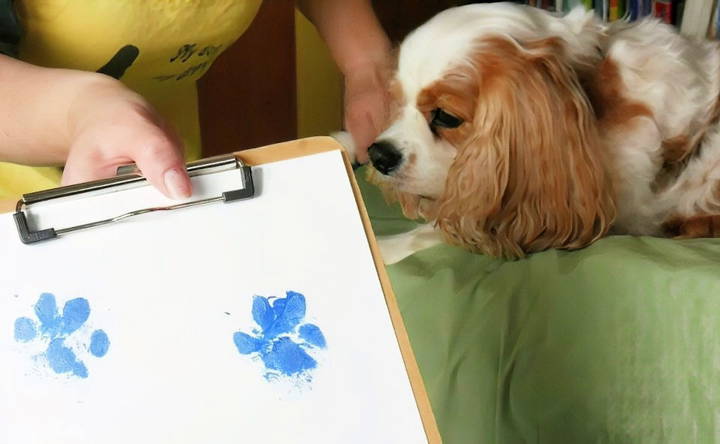
7. Display Your Artwork
After the paint has dried, your paw print painting is ready to be displayed! You can frame the painting, hang it on a wall, or even gift it to someone special. Each print is unique to your dog and serves as a timeless reminder of your bond.
Creative Ideas for Your Paw Print Painting
Here are some ideas to make your paw print painting even more special:
- Paw Print Collage: Instead of creating just one or two prints, consider making a collage of paw prints using different colors. You can layer them to form patterns or create a design that reflects your dog's playful personality.
- Incorporate Your Dog's Name or a Special Date: Make your artwork more personal by including your dog's name or the date the print was made. You can write this directly on the canvas or on a small plaque attached to the frame.
- Add Additional Designs: For a more elaborate piece of art, try adding extra design elements. For instance, you can draw or paint around the paw prints to create a background, such as a garden, stars, or even a beach scene.
- Use Glitter or Textures: After your prints have dried, you can add some sparkle with glitter or textured paints to highlight specific areas of the paw prints.
Tips for a Stress-Free Experience
- Choose a relaxed time: Pick a time when your dog is calm and relaxed, such as after a walk or meal. A tired dog will be more cooperative and less likely to wiggle during the painting process.
- Have a helper: If possible, have someone else present to help hold your dog or keep them calm while you work on the painting. This will make the process smoother and more enjoyable for both you and your dog.
- Practice patience: Not all dogs will immediately be comfortable with the sensation of having their paws painted. Take it slow and make sure to praise your dog and offer treats throughout the process.
Safety Considerations
When working with paint and pets, safety should always be a priority. Here are some important safety tips to keep in mind:
- Use only non-toxic, dog-safe paints: Never use regular craft paint or any products that could be harmful to your dog. Dog-safe, non-toxic paints should always be used to avoid any health risks.
- Avoid sensitive areas: Be careful not to get paint on sensitive areas like between the paw pads or around the claws.
- Clean thoroughly: Always clean your dog's paws thoroughly after painting to remove all traces of paint.
Conclusion
A DIY dog paw painting is a wonderful way to spend quality time with your pet while creating a keepsake that will last a lifetime. This project is simple, fun, and incredibly rewarding, leaving you with a unique piece of artwork that celebrates the special bond you share with your dog.
Whether it's your first time creating a paw print painting or you're adding to your collection, the memories you'll make along the way are priceless. So gather your supplies, grab your dog, and start creating a masterpiece today!
FAQs About DIY Dog Paw Painting
Discover essential FAQs about DIY dog paw painting. Learn tips, techniques, and safety measures for creating perfect paw art at home.
If your dog is uncooperative, it’s best not to force them. Instead, try gradually introducing them to the process with handling lessons and treats to make them more comfortable with their paws being touched. Starting slow can help ease their anxiety over time.
Yes, fabric paint is an option for creating paw prints on fabric like a T-shirt. Just ensure that the paint is non-toxic and safe for pets since their paws will come into direct contact with it.
Use warm water and a pet-safe shampoo, such as 4-Legger, to clean your dog’s paws after painting. Ensure that no paint residue is left to avoid skin irritation or ingestion.
A bit of smudging can happen. To minimize this, apply a thin, even layer of paint to the paw and lift it straight up after pressing it down. A lighter touch can help create a clearer print.
Acrylic paint can be used if it is labeled as non-toxic and washable. Always double-check the ingredients to ensure it's safe for pets, as some regular paints may contain harmful chemicals.
Trimming the fur around the pads can help ensure the paint only gets on the pads, making the prints clearer and less messy. Just be cautious when trimming.
Immediately clean your dog's paws thoroughly after painting to remove all paint. Ensure the paint you use is non-toxic, and supervise your dog closely during the process to prevent licking.


