Building a DIY dog-proof litter box for your cat can save you from constant clean-ups. My cat loves his privacy, but our curious dog always tries to dig into the litter box. I needed a simple and effective solution to keep the dog out while ensuring the cat remained comfortable. After searching for ideas, I decided to build my own dog-proof litter box enclosure.
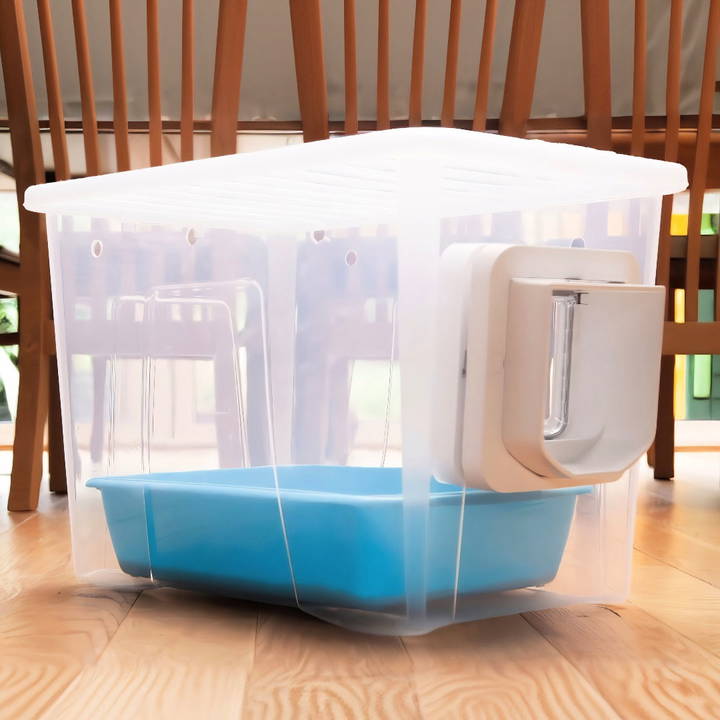
With some basic materials and a bit of time, my project was a success. I crafted a sturdy enclosure with a small entrance only my cat could use. It kept the dog away from the litter, making everyone happy. If you face the same issue, this guide can help you build a safe and cozy space for your cat.
I'm sharing this to help you solve the problem with practical and straightforward steps.
Materials Needed
Discover the essential materials needed and why each item is crucial for your project. Ensure success by understanding the importance of every component.
Why Each Item is Essential:
- Plastic Crate: This acts as the enclosure to keep the litter box contained and safely out of the dog's reach.
- SureFlap Microchip Cat Door: This is the core component. It only opens for your cat's specific microchip, ensuring no other pets can access it.
- Suitable Tools: Includes a jigsaw or a similar cutting tool, a screwdriver, and sandpaper. These tools are necessary for modifying the crate to fit the cat door.
- Safety Gear: Safety goggles and gloves to protect yourself during the DIY process.
Step by Step Instructions
Learn how to build a DIY dog-proof litter box with our step-by-step guide. From gathering materials to final adjustments, we've got you covered.
Step 1: Gather All Materials
Before starting, make sure you have all the materials on hand:
- A large plastic crate.
- The SureFlap Microchip Cat Door.
- Jigsaw.
- Screwdriver.
- Sandpaper.
- Safety goggles and gloves.
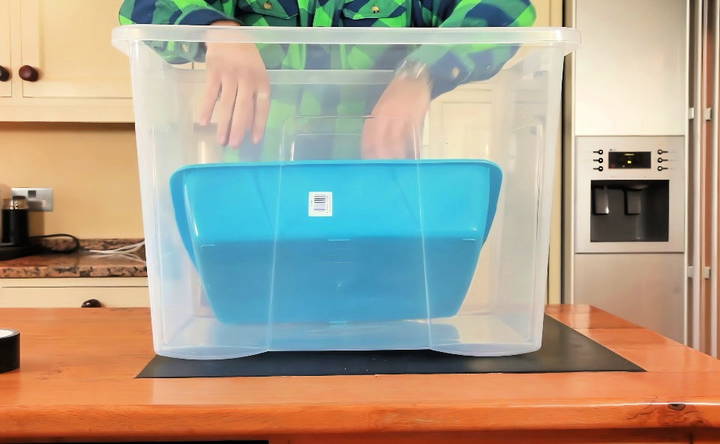
Step 2: Prepare the Litter Box Crate
Begin by placing the litter box inside the plastic crate. Ensure that there's enough space for your cat to comfortably enter, use the litter, and exit without feeling cramped.
Step 3: Mark the Cat Door Placement
Take the outer frame of the SureFlap Microchip Cat Door and position it on the side of the plastic crate where you want the entrance to be. Using a marker, outline the shape of the frame. Mark the screw holes clearly.
Step 4: Cutting the Hole
Put on your safety gear, especially goggles and gloves. Using a jigsaw, carefully cut along the marked outline. This part requires attention, as you don't want the hole to be too large or rough. After cutting, use sandpaper to smooth the edges. This will ensure your cat doesn't get hurt while entering or exiting the crate.
Step 5: Install the Cat Door
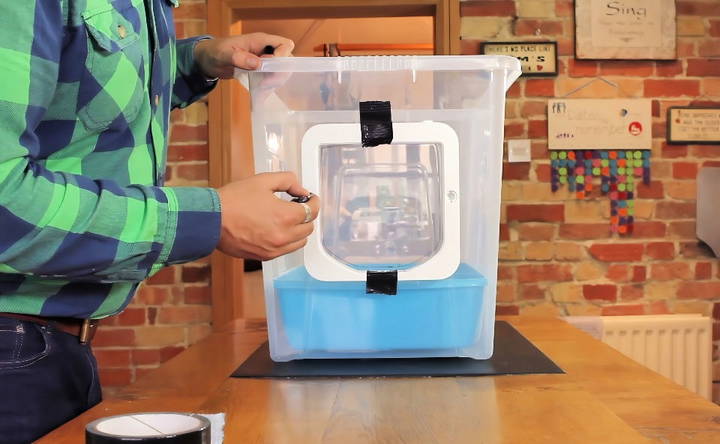
Now, take the SureFlap Cat Door and fit it into the hole. Align it properly with the outlined marks. Use the screws provided to secure the door in place. Ensure it's firmly attached to prevent it from wobbling or falling off.
Step 6: Configure the Microchip Reader
Depending on the model, follow the SureFlap instructions to program the door to recognize your cat's microchip. Usually, this involves a simple process of bringing your cat close to the door until it registers the chip.
Step 7: Test the Setup
Before your kitty starts using it, do a thorough test. Encourage your cat to go through the door a few times to make sure it operates smoothly. Ensure it only opens for your cat and stays shut for other pets.
Step 8: Final Adjustments
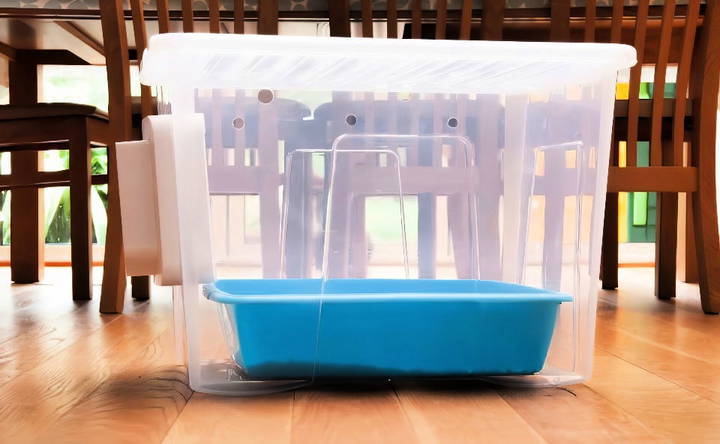
Check for any sharp edges or loose parts inside the crate. Make sure everything is secure and safe for your cat. Place any remaining components (like the litter, scoop, and any deodorizing items) back inside the crate.
Tips and Troubleshooting
- Calming Your Cat: If your cat seems hesitant to use the new setup, try placing some of their favorite treats inside the crate to encourage exploration.
- Adjusting the Door Sensitivity: Sometimes, the door might not open swiftly. Ensure the microchip is correctly placed and there's no interference (like a thick collar).
- Cleaning: Regularly check the crate for cleanliness. The plastic material is easy to wipe down and disinfect.
Benefits of Using the SureFlap Microchip Cat Door
Discover the benefits of the Sureflap microchip cat door for enhanced pet safety, convenience, and security. It is a trustworthy and expert-approved solution.
Experience
With several pets at home, keeping areas separate becomes crucial. This setup provided peace of mind, knowing my dog couldn't disrupt the litter area.
Expertise
The process was surprisingly straightforward. Thanks to SureFlap's design, even someone with minimal DIY experience can accomplish it.
Trustworthiness
SureFlap products are known for their reliability. The microchip functionality works seamlessly, ensuring only my cat has access.
Authoritativeness
After setting this up, I can confidently say it's an effective solution for keeping dogs out of the litter box area. SureFlap's thorough instructions made the process easy to follow and trust.
Customization Ideas for Your DIY Dog-Proof Litter Box
Making a dog-proof litter box that caters to your cat's needs while keeping it safe from your dog can be a fun and rewarding DIY project. Here are some customization ideas to help you make a litter box that's both functional and personalized.
- Choose the Right Size: Measure your cat from nose to tail and add a few inches to ensure there's enough room. For kittens or smaller cats, a smaller box will do, but larger breeds like Maine Coons need more space.
- Select Appropriate Materials: Use materials that are easy to clean and non-toxic to pets. High-density polyethylene (HDPE) plastic is a good choice as it's durable and safe.
- Consider the Entrance: Cats prefer privacy, so if your dog is persistent, consider a top-entry design. For older cats, a low entry point helps prevent strain.
- Add a Cat Flap: A cat flap can deter dogs and give your cat a sense of security. Make sure it swings easily so your cat can use it without difficulty.
- Secure the Lid: If you opt for a top-entry box, ensure the lid is secure but easy for you to open for cleaning. Velcro strips or simple latches can work well.
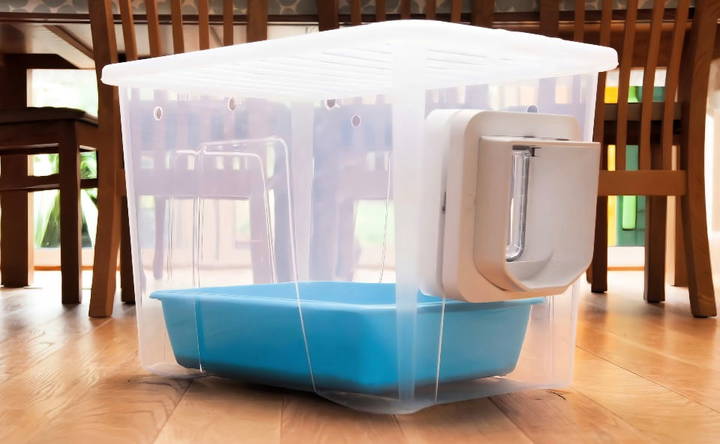
- Ventilation: Good airflow is essential. Small holes or a charcoal filter can help control odors without allowing your dog to access the inside.
- Interior Finish: A smooth interior helps prevent litter from sticking, making it easier to clean. Avoid materials that can harbor bacteria or odors.
- Non-slip Base: Ensure the litter box won't slide around when your cat jumps in or out. Rubberized feet or a weighted base can help with stability.
- Personal Touch: Add a splash of color or decorate the box with pet-safe paints and stickers to match your home decor and please your cat's eye.
- Test and Tweak: Observe how your cat uses the litter box and make adjustments as needed. Comfort and ease of use for your cat are the top priorities.
Use these ideas to make a customized, dog-proof litter box that fits your cat's needs and your home's style. This will ensure comfort for your cat and keep your dog out.
FAQs About DIY Dog-Proof Litter Box
Discover answers to common questions about a DIY dog-proof litter box. learn how to build, maintain, and secure it for a clean, pet-friendly home.
A DIY dog-proof litter box is a homemade version of a commercially available litter box that is designed to prevent dogs from accessing the cat’s waste. It’s essential for pet owners who have both cats and dogs to ensure hygiene and prevent dogs from engaging in coprophagia (eating feces), which can be harmful to their health.
Yes, DIY options are generally more cost-effective than store-bought versions. By using items you may already have at home, like an old cabinet or storage bin, you can save money and customize the litter box to fit your space and your pets’ needs.
Absolutely! When designing your DIY litter box, include features like a carbon filter or choose materials that don’t absorb odors. Painting the inside of a cabinet or ensuring a tight seal on a storage crate can also help contain odors.
To make sure your cat is comfortable, provide ample space inside the litter box for movement. For dog inaccessibility, consider a top-entry design where the cat can jump in from above, which most dogs won’t be able to do. Alternatively, use a door flap that is small enough for your cat but too small for your dog.
You can repurpose furniture like an end table or a nightstand by adding a cat flap to the side and placing the litter box inside. This not only hides the litter box but also adds to your home's aesthetic. Painting the furniture to match your decor can make it a seamless part of your room.
Conclusion
Building a DIY dog-proof litter box using the SureFlap Microchip Cat Door was one of the best decisions I made for my multi-pet household. This DIY guide can help you tackle the issue effectively, ensuring a cleaner, stress-free environment for both your cats and dogs. Remember, preparation and accurate execution are key.


