Building a DIY dog wash station can transform the chore of bathing your pet into a simple, enjoyable task. If you're tired of the mess and hassle that comes with washing your dog at home or paying for professional services, building a dog shower station might be the perfect solution. Not only does it save time and energy, but it also proves to be cost-effective in the long run. Moreover, a customized wash station offers unmatched comfort for your dog and gives you complete control over the cleaning products used.
Moving forward, we'll cover everything from gathering materials and tools to step-by-step instructions for constructing your own dog wash station. Whether it's designing the perfect space, selecting the right fixtures, or ensuring the safety and durability of your setup, we've got you covered. Plus, we'll explore the benefits of bonding time during baths and share tips for maintenance and troubleshooting common issues.
Get ready to upgrade your pet care routine with a functional and stylish DIY dog wash station. Stay tuned for actionable steps that will guide you through the exciting process.
Why DIY Dog Wash Station?
A DIY Dog Wash Station is more than just a convenience—it's a game-changer for any dog owner. Here's why:
Save Time and Energy
One of the main benefits of having a DIY dog wash station at home is the time and energy it saves. No more trips to the groomer or pet store for a wash. Your DIY station is available whenever you need it, saving you travel time and the hassle of scheduling appointments.
Cost-Effective
While there might be an initial investment in setting up your DIY dog wash station, in the long run, it can be cost-effective. Regular visits to professional groomers can add up, but with your own station, you'll only need to invest in dog-friendly products.
Comfort for Your Dog
Many dogs feel more comfortable at home. By washing your dog at home, you can reduce the stress and anxiety associated with unfamiliar environments. Plus, you can control the water temperature and pressure, ensuring a comfortable experience for your furry friend.
Control Over Products
With a DIY dog wash station, you have complete control over the products used. This is particularly beneficial if your dog has sensitive skin or allergies. You can choose hypoallergenic, organic, or medicated shampoos as needed.
Bonding Time
Last but not least, washing your dog at home can be a great bonding experience. It's an opportunity to spend quality time with your pet, strengthening your relationship.
A DIY dog wash station is a practical, cost-effective, and enjoyable solution for maintaining your dog's hygiene. It's a win-win situation for both you and your pet!
Gather Your Materials and Tools
Before you start, ensure you have all the necessary materials and tools. You will need:
- 2x4 lumber for the frame
- Plywood for the steps and base
- Waterproof tiles for the wash area
- A shower wand and fixture
- A standard hose bib
- Shower curtain tension rod
- A hook and a strap for securing your dog
- Building tools such as a saw, drill, screws, tile adhesive, and grout
Step by Step Instructions
Learn how to build a dog wash station at home with our step-by-step guide below:
Step 1: Designing Your Dog Wash Station
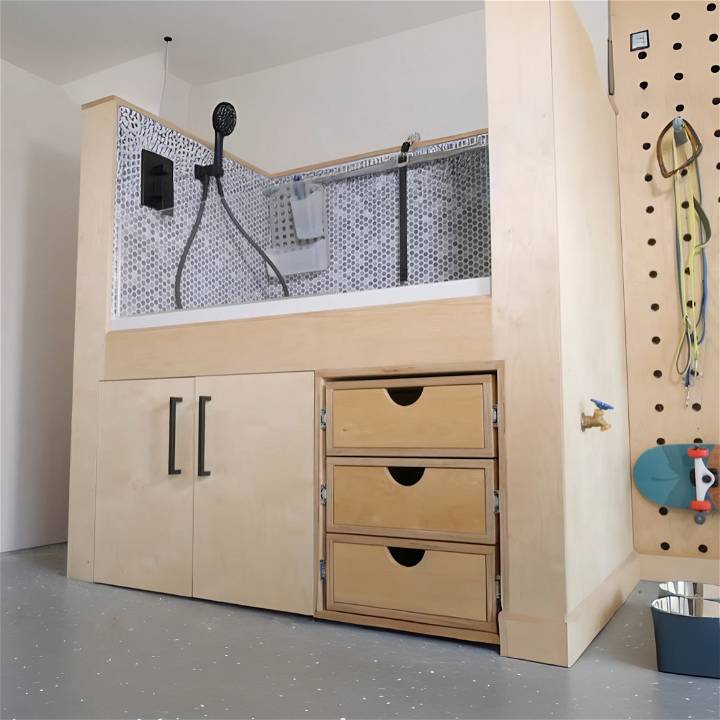
The first step is to measure and plan the size of your dog wash station. Consider the size of your dog and the space in your garage. A good starting point is a tub size of 30 inches wide by 48 inches long and walls around 36 inches high. Sketch your design, including the base, walls, steps, and where the fixtures will go.
Step 2: Constructing the Framework
Using 2x4 lumber, construct a frame for your dog wash station. This will include the base, walls, and any partitions for the steps. Make sure everything is sturdy and level. The walls should be high enough to contain splashes but not so high that you can't easily reach your dog.
Step 3: Adding the Base and Walls
Once the frame is set, add plywood to build the base and walls. Secure the plywood with screws, ensuring no gaps or loose edges. This plywood will support the weight of your dog and the water, so it must be installed properly.
Step 4: Waterproofing and Tiling
To prevent water damage, it's crucial to waterproof the station before tiling. Use a waterproofing membrane over the plywood surfaces. Once dry, start tiling the base and walls as desired. Grout the tiles after laying them to ensure a watertight seal.
Step 5: Installing the Fixtures
With the tiling done, you can install the shower wand, fixture, and hose bib. Place the shower wand at a height that is convenient for washing your dog, and ensure the hose bib is accessible for filling water dishes or buckets.
Step 6: Building the Step Storage
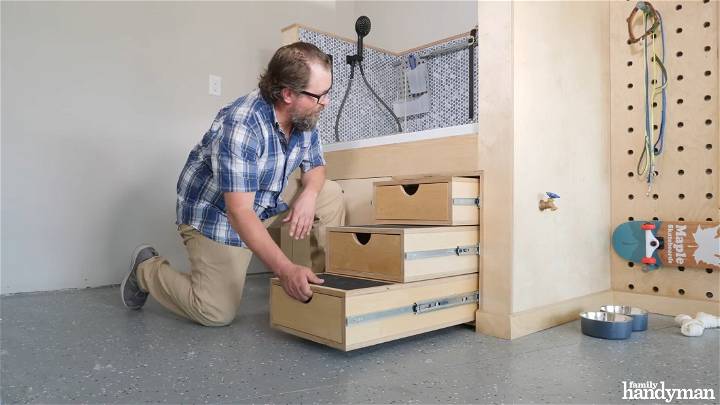
For the retractable steps, construct small drawer steps that can slide in and out. Each step should fit into the one below it. This innovative design allows easy access for dogs of all sizes and keeps the steps out of the way when not in use.
Step 7: Adding Safety Features
Install a shower curtain tension rod at one end of the wash station. This can be used to hang a shower caddy for shampoo and other cleaning supplies. Additionally, set up a hook and a strap on the side to secure your dog during the wash, ensuring they stay safe and don't wander off.
Final Touches
Double-check all fixtures and fittings to ensure they are secure. Test the water flow and make adjustments as needed. Now your dog wash station is ready for use.
Video Tutorial
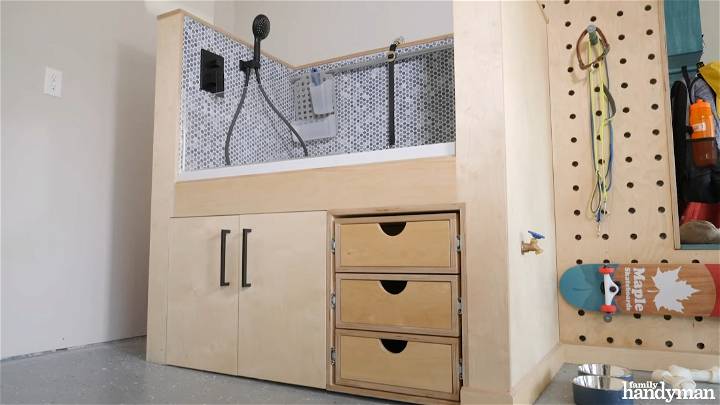
For a step-by-step video tutorial, watch this helpful guide by Family Handyman on YouTube.
It pairs well with this written guide, offering visual reinforcement of the steps outlined above in an approachable format.
By following these steps and watching the video, you can make a practical dog wash station in your garage. This adds value to your home and makes washing your dog easier.
Cost and Time Estimates for Your DIY Dog Wash Station
Building a DIY dog wash station can be a rewarding project, but it's important to have an idea of the cost and time involved. Here's a general overview:
Cost Estimates
The cost of building a DIY dog wash station can vary greatly depending on the materials used, the size of the station, and whether you're starting from scratch or modifying an existing setup. On average, you can expect to spend between $100 and $500. Here's a rough breakdown:
- Building Materials: This includes items like wood, screws, sealant, and paint. Depending on the quality and quantity of materials, this could range from $50 to $300.
- Plumbing Materials: You'll need a hose, nozzle, and possibly a water heater. Expect to spend around $20 to $100.
- Accessories: This includes items like a non-slip mat, dog shampoo, and a brush. These can add another $30 to $100 to your total cost.
Remember, these are just estimates. The actual cost could be lower or higher depending on various factors.
Time Estimates
The time it takes to build your DIY dog wash station can also vary. If you're handy and have all the materials ready, you could potentially complete the project in a single weekend. However, if you're new to DIY projects or if you're designing a more complex station, it could take several weekends to complete.
While building a DIY dog wash station requires an investment of both time and money, the convenience and benefits it provides can make it a worthwhile project. Remember to plan ahead, budget accordingly, and most importantly, have fun with it!
Safety Tips for Your DIY Dog Wash Station
Ensuring safety is paramount when it comes to setting up and using your DIY dog wash station. Here are some key points to consider:
Stability of the Station
Ensure that your DIY dog wash station is stable. A shaky or wobbly station can be dangerous for both you and your pet. Make sure it's built on a flat surface and is sturdy enough to handle your dog's weight.
Water Temperature and Pressure
Be mindful of the water temperature and pressure. The water should be lukewarm—neither too hot nor too cold. Also, the water pressure should be gentle to avoid frightening your dog or causing discomfort.
Use of Pet-Friendly Products
Always use pet-friendly products. Some human shampoos and soaps can be harmful to dogs. Look for products specifically designed for dogs, preferably those that are hypoallergenic and free from harsh chemicals.
Preventing Slips and Falls
Consider using a non-slip mat in the washing area. This can prevent your dog from slipping during the bath. Also, ensure the surrounding area is dry to prevent slips and falls.
Supervision
Never leave your dog unsupervised in the wash station. Always be present to ensure they are safe and comfortable.
By following these safety tips, you can ensure that your DIY dog wash station is a safe and enjoyable place for your pet.
Troubleshooting Your DIY Dog Wash Station
Even with the best planning and construction, you may encounter some issues with your DIY dog wash station. Here are some common problems and their solutions:
Low Water Pressure
If you're experiencing low water pressure, check your hoses and nozzles for any blockages. Also, ensure that your water source is providing sufficient pressure.
Drainage Issues
Drainage issues can occur if the water isn't flowing out of the station as it should. Check for any clogs in your drainage system. Regular cleaning can prevent this issue.
Dog Resistance
If your dog is resistant to the new station, try to make the experience as positive as possible. Use treats and positive reinforcement to help your dog associate the station with good things.
Leaks
Leaks can occur over time. Regularly check your station for any signs of leakage. If you find a leak, it's important to repair it promptly to prevent water damage.
Wear and Tear
Over time, your station may show signs of wear and tear. Regular maintenance and replacing worn-out parts can keep your station in good condition.
Troubleshooting is a normal part of any DIY project. With patience and persistence, you can ensure your dog wash station remains functional and safe for your pet.
Maintenance and Cleaning of Your DIY Dog Wash Station
Keeping your DIY dog wash station clean and well-maintained is crucial for its longevity and your pet's health. Here are some tips:
Regular Cleaning
Regular cleaning is essential. After each wash, rinse the station to remove any leftover shampoo or dirt. This prevents buildup and keeps the station fresh for the next use.
Deep Cleaning
Perform a deep cleaning every few weeks. This involves scrubbing the station with a pet-safe cleaning solution to remove any stubborn dirt or grime. Rinse thoroughly afterward to ensure no cleaning product is left behind.
Checking for Wear and Tear
Regularly check for wear and tear. Look for any signs of damage, such as cracks or leaks. Promptly repair any damage to prevent it from worsening.
Replacing Old Parts
Replace old parts as needed. Over time, certain parts, like hoses or nozzles, may wear out. Replacing them when necessary ensures your station remains functional and safe.
Storing Products Properly
Store your pet grooming products properly. Keep them in a cool, dry place and out of direct sunlight. This helps maintain their effectiveness and prevents them from spoiling.
By following these maintenance and cleaning tips, you can ensure your DIY dog wash station remains in top condition, providing a safe and comfortable space for your pet's grooming needs.
FAQs About DIY Dog Wash Station
Discover everything you need to know about DIY dog wash stations with these frequently asked questions. Learn how to build the perfect grooming area for your furry friend.
Why should I build a DIY dog wash station?
A DIY dog wash station can save you time and money, provide comfort for your dog, give you control over the products used, and offer a great bonding experience.
What materials do I need for a DIY dog wash station?
You'll need building materials like wood and screws, plumbing materials like a hose and nozzle, and accessories like a non-slip mat and dog shampoo.
Can you provide step-by-step instructions to build a DIY dog wash station?
While the exact steps can vary depending on your specific design, the general process involves gathering materials, constructing the station, setting up the plumbing, and adding any desired accessories.
What safety measures should I consider when building and using a DIY dog wash station?
Safety measures include ensuring the station is stable, using lukewarm water with gentle pressure, using pet-friendly products, preventing slips and falls with a non-slip mat, and never leaving your dog unsupervised in the station.
How do I maintain and clean my DIY dog wash station?
Regular cleaning after each use, deep cleaning every few weeks, checking for wear and tear, replacing old parts, and properly storing your pet grooming products can help maintain your station.
What are some common problems I might encounter with my DIY dog wash station, and how can I solve them?
Common problems include low water pressure, drainage issues, dog resistance, leaks, and wear and tear. These can be addressed by checking for blockages, cleaning regularly, using positive reinforcement, repairing leaks promptly, and replacing worn-out parts.
How much does it cost to build a DIY dog wash station?
The cost can vary greatly, but on average, you can expect to spend between $100 and $500. This includes the cost of building materials, plumbing materials, and accessories.
How long does it take to build a DIY dog wash station?
The time it takes can vary depending on your skill level and the complexity of the station. However, if you're handy and have all the materials ready, you could potentially complete the project in a single weekend.
What is the ideal size for a DIY dog wash station?
The ideal size for a DIY dog wash station depends on the size of your dog. It should be large enough for your dog to comfortably fit but not so large that they can jump out.
Can I build a DIY dog wash station in a small space?
Yes, a DIY dog wash station can be built in a small space. You just need to ensure it's large enough for your dog to fit comfortably. Consider a collapsible or portable design if space is a concern.
Conclusion:
In conclusion, building a DIY dog wash station offers numerous benefits, such as saving time and energy, cost-effectiveness, enhanced comfort for your pet, control over the cleaning products used, and invaluable bonding time with your furry friend. By following the step-by-step guide provided, from gathering your materials and tools to adding the final touches, you can build a functional and pet-friendly space.
Remember, regular maintenance and prompt troubleshooting are key to ensuring your dog shower station remains in top condition for years to come. This project not only caters to the practical needs of pet owners but also enriches the overall well-being of their dogs, making it a worthwhile addition to any home.


