My journey into crafting began quite unexpectedly. I was browsing through online videos, looking for inspiration to kick off a new hobby, when I stumbled upon a particularly charming miniature dollhouse. Its intricate details and quaint charm immediately captivated me. I've always been fascinated by miniatures but never ventured into making them. This video, however, lit a spark within me. I decided to take on the challenge of building and decorating my very own DIY miniature dollhouse, from scratch.
Step by Step Instructions
Learn how to build, paint, and decorate step by step with our detailed instructions. From gathering materials to reflecting on the experience, we cover it all.
Step 1: Gathering Materials
First and foremost, I needed to gather all my materials. My craft room, usually brimming with a variety of art supplies, became my go-to place. I needed balsa wood for the structure, vibrant acrylic paints, fabric scraps for curtains and bedding, and tiny embellishments to bring the dollhouse to life. Each material was chosen with care, ensuring they would contribute to my envisioned theme: a cozy, Victorian-inspired dollhouse.
Why Each Material Was Needed
- Balsa Wood: Its lightweight and easy-to-cut nature make it perfect for the dollhouse structure.
- Acrylic Paints: These would bring color and vibrance to the walls and furnishings.
- Fabric Scraps: Necessary for adding those cozy touches with curtains, carpets, and bedding.
- Tiny Embellishments: To infuse the dollhouse with character and charm through details like miniature books, vases, and picture frames.
Step 2: Building the Structure
Building the structure was both exciting and daunting. I measured and cut the balsa wood, crafting the walls, floors, and ceiling of the dollhouse. This process required patience and precision. Errors were made, but each mistake was a lesson learned. As the structure slowly took shape, I could envision the dollhouse coming to life, room by room.
Step 3: Painting and Wallpapering
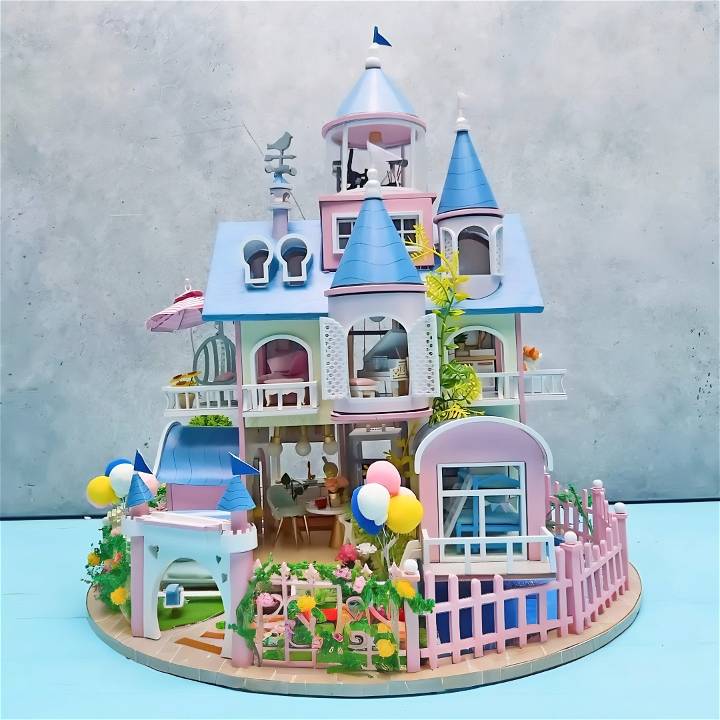
Once the structure was solid, it was time to add color. Painting and wallpapering were incredibly satisfying processes. I opted for soft, pastel colors that would reflect the Victorian theme. For certain rooms, I chose wallpaper with delicate floral patterns, cutting and fitting each piece meticulously. The transformation was stunning, with each room beginning to exhibit its own unique charm.
Step 4: Furnishing and Decorating
Furnishing and decorating were where creativity truly came into play. I crafted miniature furniture from scraps of wood, painted them, and then adorned them with tiny cushions and throws made from fabric scraps. The living room received a cozy fireplace, the bedroom a quaint four-poster bed, and the kitchen was fitted with balsa wood cabinets painted in soft hues. The joy I found in positioning each tiny embellishment was unparalleled. Each addition, from the little books to the miniature dinnerware, made the dollhouse more real.
Step 5: Reflecting on the Experience
Making this miniature dollhouse from scratch was a project full of ups and downs. There were moments of frustration where nothing seemed to fit or look right. But there were also moments of pure joy, especially when I saw the completed dollhouse – my vision brought to life. It wasn't just about building a dollhouse; it was about making a tiny world, a cozy haven that reflected a dream.
Painting and Decorating Techniques
When it comes to bringing your DIY dollhouse to life, painting and decorating are where you can really let your creativity shine. Here's a guide to help you achieve a beautiful finish that will make your miniature home look both charming and realistic.
Choosing Your Paints
Start with selecting the right type of paint. Acrylic paints are a great choice for dollhouses because they are water-based, which means they're easy to work with and clean up. They also come in a wide range of colors, allowing for plenty of creative freedom.
Tip: Use a primer before painting, especially if you're working with bare wood. This will help the paint adhere better and result in a smoother finish.
Painting Techniques
For the exterior, consider the look you're going for. Do you want a modern, sleek appearance or a cozy, vintage feel? Use a flat brush for large areas and a fine-tip brush for details like window frames and trim.
Technique Highlight: To make a weathered wood look, apply a base coat in your chosen color, then lightly brush over it with a dry brush dipped in a lighter color. This technique adds depth and character to your dollhouse.
Interior Decorating
Inside, you'll want to choose colors that complement each other and fit the theme of each room. Lighter colors can make small spaces appear larger, while darker hues make a cozy atmosphere.
Tip: For wallpaper, you can use scrapbook paper or print your own designs. Apply with a thin layer of glue and smooth out any air bubbles for a professional look.
Finishing Touches
Once your paint has dried, it's time for the finishing touches. Add varnish to protect your paint job and give it a glossy or matte finish, depending on your preference.
Technique Highlight: For a realistic touch, use a thin brush to paint tiny details like doorknobs, light switches, and outlet covers. These small additions make a big difference in the overall look.
By following these tips and techniques, you'll make a DIY dollhouse that's not only beautiful to look at but also reflects the care and attention to detail you've put into it.
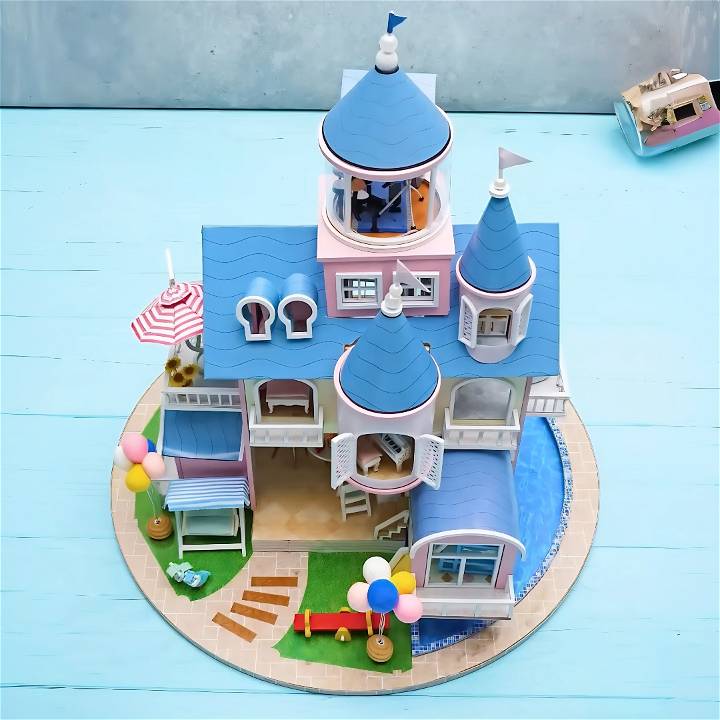
Furniture and Miniatures
Making the perfect miniature furniture and accessories for your DIY dollhouse can be both fun and rewarding. This section will guide you through selecting and arranging the right pieces to bring your miniature home to life.
Selecting the Right Scale
The scale of your furniture is crucial. Most dollhouses use a 1:12 scale, meaning one inch equals one foot. Ensure all your pieces match this scale to maintain a realistic look throughout your dollhouse.
Tip: Measure spaces in your dollhouse and compare them to the dimensions of potential furniture pieces before purchasing.
Style Consistency
Choose a consistent style for your dollhouse's interior. Whether it's modern, Victorian, or country cottage, sticking to one style will make your dollhouse more cohesive and visually appealing.
Tip: Make a mood board with images of furniture that inspires you and fits your chosen style.
Arranging Furniture
Think about the layout of each room. Place larger pieces first, like beds and sofas, then add smaller items like tables and chairs. Leave enough space for miniature inhabitants to "move" around.
Tip: Use tacky putty to keep furniture in place without permanent damage.
DIY Miniature Furniture
If you're crafty, consider making your own furniture. Use materials like balsa wood, polymer clay, and fabric scraps. There are plenty of tutorials online to help you get started.
Tip: Start with simple pieces like a basic table or chair before moving on to more complex projects.
Accessorizing
Accessories add personality to your dollhouse. Rugs, books, and plants are small details that make a big impact. You can find these items at craft stores or specialize in miniature shops.
Tip: Less is more. Don't overcrowd rooms with accessories; choose a few key pieces instead.
Maintenance
Keep your dollhouse furniture dust-free and in good repair. A soft paintbrush is perfect for dusting without causing damage.
Tip: If a piece breaks, a small amount of wood glue can usually fix it.
By carefully selecting, crafting, and arranging furniture and miniatures, you'll make a dollhouse that's not only a joy to look at but also tells a story of its own. Remember, the key is in the details, so take your time and enjoy the process of miniaturization!
FAQs About DIY Dollhouse
Discover everything you need to know about DIY dollhouses with our comprehensive FAQs. Find answers to your burning questions and start crafting today!
How do I choose the right scale for my dollhouse?
The scale is the ratio of the dollhouse to full-size items. The most common scale for dollhouses is 1:12, which means one inch in the dollhouse equals one foot in real life. When purchasing or making furniture and accessories, ensure they are the same scale to maintain consistency.
Can I build a dollhouse if I have no woodworking experience?
Yes, you can! There are many resources available, including free plans and tutorials that cater to beginners. You can start with simple designs using pre-cut kits or cardboard, which require minimal tools and provide a good introduction to dollhouse building.
What tools do I need to build a wooden dollhouse?
Basic tools needed include a saw for cutting wood, a drill for making holes, sandpaper for smoothing edges, and glue or nails for assembly. If you're working with balsa wood for furniture, a craft knife, and a cutting mat are also useful.
How can I decorate my dollhouse to make it look realistic?
Use paint and wallpaper to add color and texture to the walls. Fabric scraps can serve as carpets or curtains, and beads or buttons can become light fixtures or doorknobs. For a lived-in look, add miniature books, dishes, and other accessories that reflect a real home.
Where can I find miniature furniture and accessories?
Miniature furniture and accessories can be found at craft stores, online retailers, and specialty shops that sell dollhouse supplies. You can also make your own using everyday items or craft materials, which allows for further personalization of your dollhouse.
Final Thoughts
This experience was more than a crafting project; it was a journey of discovery. I discovered patience I didn't know I had, creativity that knew no bounds, and a passion for miniatures that was waiting to be unleashed. The completed dollhouse sits proudly on my shelf, a testament to what can be achieved with a bit of inspiration, a lot of determination, and a deep love for making tiny worlds. For anyone thinking of embarking on their own miniature project, my advice is simple: go for it. The journey is every bit as rewarding as the destination.


