Making a DIY doormat is a fun and practical way to add a personal touch to your entryway. Using basic materials and a bit of creativity, you can design a doormat that perfectly matches your style and home decor. Whether you prefer bold patterns or subtle designs, making your own doormat allows endless customization options. This guide will walk you through the simple steps needed to craft your unique doormat.
Designing and crafting a doormat is not only easy but also budget-friendly. With a few household tools and some patience, you can quickly transform your entrance into a welcoming space. Our step-by-step instructions ensure that you can follow along without any hassle.
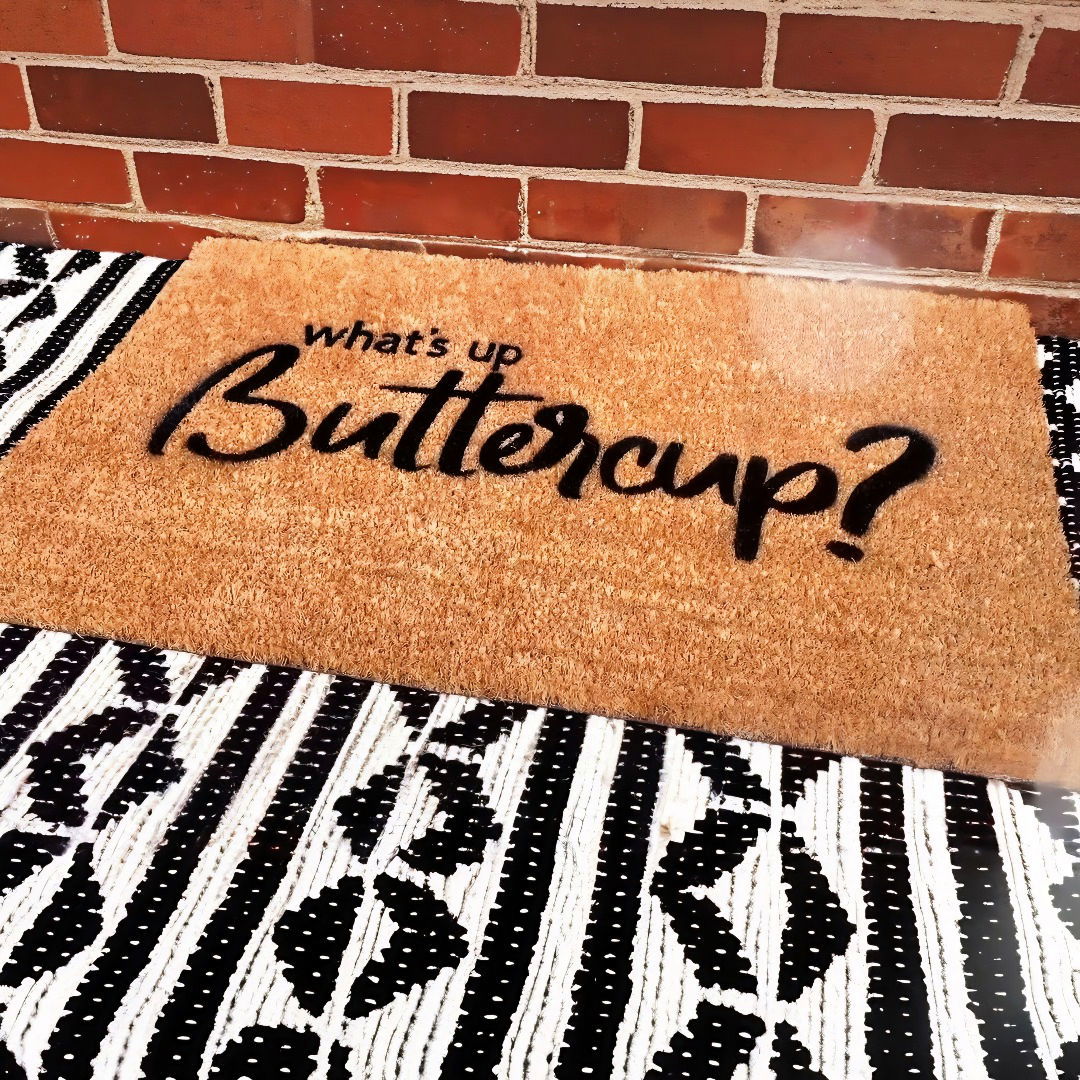
Make a unique entryway with our DIY Doormat guide. Easy steps and tips for a custom welcome mat to enhance your home's curb appeal.
Materials You'll Need
- Cricut Cutting Machine: Essential for cutting your design.
- 12"x12" Cricut Cutting Mat: For holding the vinyl as it is cut.
- Oracal 651 Permanent Vinyl: This will be used to make the stencil.
- Masking Tape Transfer Tape: Needed for transferring the vinyl stencil to the doormat.
- Flex Seal Liquid Rubber Spray Paint: For painting your doormat.
- Front Door Mat: You can find affordable options at stores like Target or IKEA.
- Scraper Tool: To burnish the vinyl onto the transfer tape and doormat.
- Scissors or Paper Cutter: For trimming the vinyl.
- Computer with Cricut Design Space: To design your stencil.
- Poster Board or Foam Core Board: To support your doormat while moving it.
Each of these materials plays an important role in ensuring that your project turns out beautifully. The Cricut machine cuts precise designs, the vinyl makes a sturdy stencil, and the Flex Seal paint provides a durable and professional finish.
Step-By-Step Instructions
Make a personalized DIY doormat with our step-by-step instructions. Learn designing, cutting, weeding, and applying your stencil using a flex seal.
Step 1: Designing Your Stencil in Cricut Design Space
- Open Cricut Design Space: Start by opening a new canvas.
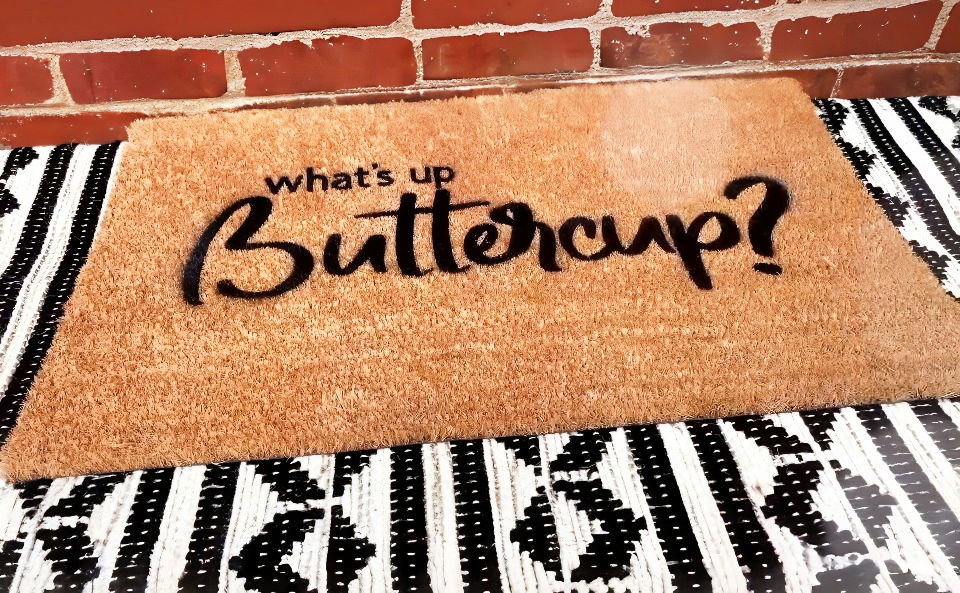
- Make Your Text: Click on the text tool and type in your desired welcome message. For this project, I typed "What's up, buttercup".
- Adjust Font and Size: Customize the font and size of your text to fit your doormat. If you want the letters closer together, you can ungroup them and manually adjust their positions.
- Split the Design if Needed: If you're using a 12"x12" mat, you may need to split the design. Use the "Slice" tool to divide it into manageable sections.
- Weld Your Design: Once satisfied with the layout, select all elements and click on “Weld” to make it one single image.
Step 2: Cutting the Vinyl
- Load Vinyl onto Cutting Mat: Place your Oracal 651 vinyl on the 12"x12" Cricut mat.
- Select Material in Cricut Design Space: Choose 'Premium Vinyl' from the materials list.
- Cut the Design: Let your Cricut machine cut the vinyl according to your design. This will produce your stencils.
Step 3: Weeding the Vinyl
- Remove Excess Vinyl: Weed out all the vinyl around your design, leaving behind just the stencil areas.
- Remove Inner Parts of the Letters: Ensure that any inner parts of letters (like the center of "o" or "e") are removed.
Step 4: Applying Transfer Tape
- Cut Transfer Tape to Size: Measure and cut a piece of transfer tape slightly larger than your design.
- Apply Transfer Tape: Place the transfer tape sticky-side up on your work surface. Carefully place the vinyl stencil onto the transfer tape.
- Burnish the Vinyl: Use a scraper tool to rub over the back of the vinyl, ensuring it adheres well to the transfer tape.
- Remove Backing Paper: Carefully peel away the vinyl's backing paper, leaving the vinyl stencil on the transfer tape.
Step 5: Positioning the Stencil on the Doormat
- Clean the Doormat: Use a lint roller or tape to lift any loose fibers or particles from the doormat's surface.
- Center the Stencil: Line up your stencil on the doormat. Carefully place it down in one go to avoid repositioning, which can reduce adhesive effectiveness.
- Burnish the Stencil: Smooth your scraper tool over the surface of the stencil to ensure it sticks well to the doormat.
- Remove Transfer Tape: Slowly peel back the transfer tape, ensuring the vinyl stencil remains on the doormat.
Step 6: Protecting the Doormat and Applying Flex Seal
- Tape Off Edges: Use extra transfer tape or masking tape to cover areas of the doormat not being stenciled.
- Move the Doormat Outdoors: Carefully move the doormat outdoors, supporting it on a sturdy surface like poster board.
- Apply Flex Seal: Spray the Flex Seal directly over the stencil from a straight angle. Avoid spraying at an angle to prevent paint from bleeding under the stencil.
Step 7: Finishing Touches
- Let the Paint Dry: Allow the Flex Seal to dry for at least 15 minutes.
- Remove the Stencil: Carefully peel away the vinyl stencil.
- Optional: Apply a Sealant: For added protection, apply a clear UV-resistant sealant over the entire surface once the Flex Seal is completely dry.
Design Inspiration
When it comes to making your own doormat, the design possibilities are endless. Here's a guide to spark your creativity and help you design a doormat that's both functional and stylish.
- Seasonal Themes: Celebrate the changing seasons with a doormat that welcomes guests with seasonal flair. Think about using colors and patterns that reflect the time of year, like warm tones and leaves for autumn or bright flowers for spring.
- Festive Designs: Get into the holiday spirit with festive designs. Whether it's spooky Halloween imagery, cheerful Christmas motifs, or vibrant Easter patterns, a themed doormat can add to the festive atmosphere.
- Personal Touch: Personalize your doormat by adding your family name, house number, or a welcome message. This not only makes your doormat unique but also gives your entrance a personal touch.
- Patterns and Textures: Experiment with different patterns like stripes, chevrons, or geometric shapes. Textures can also add interest, so consider materials like coir, rubber, or even braided fabric for a tactile feel.
- Quotes and Sayings: If you're a fan of words, why not choose a favorite quote or a fun saying? It's a great way to express your personality right at your doorstep.
- Nature-Inspired: Incorporate elements like flowers, leaves, or ocean waves into your design to draw inspiration from nature. Natural themes can make a serene and welcoming entrance.
- Abstract Art: For a modern look, choose abstract designs with bold shapes and colors. These can be conversation starters and statement pieces for your home.
- Cultural Patterns: Celebrate your heritage or an affinity for a particular culture with traditional patterns and symbols. This can range from intricate mandalas to bold tribal prints.
- Kids' Creations: If you have children, involve them in the design process. Kids' drawings and handprints can make for a charming and heartfelt doormat design.
- Eco-Friendly Message: If you're passionate about the environment, use your doormat to spread awareness. Designs featuring earth-friendly messages or symbols can be both beautiful and meaningful.
The key to a great DIY doormat design is to make it reflect your style and the message you want to convey to anyone who steps up to your door. Have fun with it, and don't be afraid to try something new!
Upcycling Ideas
Upcycling is a fantastic way to give old items a new life, especially when it comes to making a unique doormat. Here are some creative ideas to transform everyday items into welcoming pieces for your home.
- Old T-Shirts: Cut clean T-shirts into strips and braid them together to form a colorful, soft doormat. This is a great way to reuse old clothing and add a splash of color to your entryway.
- Worn-Out Jeans: Denim is durable and can withstand foot traffic. Use the seams and pockets of old jeans to make a doormat with a rustic feel. The different shades of blue will give it a cool, casual look.
- Burlap Sacks: If you have burlap sacks lying around, they can be turned into a doormat with a natural texture. Paint or stencil a design on them for an extra touch of personality.
- Wine Corks: Collect wine corks and slice them in half. Arrange them flat-side down on a sturdy base to make a doormat that's not only unique but also has a bit of bounce.
- Rubber Tires: Old tires can be cut and woven into durable, weather-resistant doormats. They're perfect for outdoor use and add an industrial vibe to your doorstep.
- Rope: Coil a sturdy rope into a circular or rectangular shape and secure it with strong glue to make a nautical-themed doormat. It's simple yet effective and adds a seaside charm.
- Old Towels: Towels can be cut into strips and knotted or woven into a plush doormat. It's a great way to repurpose towels that are no longer suitable for the bathroom but still have life left in them.
- Discarded Plastic Bags: Crochet plastic bags into a waterproof doormat. This not only recycles the bags but also makes a conversation piece about sustainability.
- Unused Wallpaper: If you have leftover wallpaper, cover a plain doormat with it and seal it with a waterproof clear coat. This can instantly elevate the look of your doormat with intricate patterns.
- Old Belts: Leather belts can be arranged in a crisscross pattern and glued onto a mat base. This makes a chic, upmarket doormat that's sure to impress.
By using these upcycling ideas, you'll not only make a unique entrance to your home but also contribute to a more sustainable world. Each piece tells a story and adds character to your space.
Common Mistakes to Avoid
Making a DIY doormat can be a fun and rewarding project. However, there are some common mistakes that you should be aware of to ensure the best results. Here's a list of pitfalls to avoid:
- Choosing the Wrong Materials: Not all materials are suitable for outdoor use. Make sure to select materials that are durable and can withstand the weather. For example, using non-weatherproof paint can lead to quick fading and deterioration.
- Ignoring Dimensions: Before starting your project, measure the area where the doormat will be placed. A doormat that's too small or too large can be impractical and visually unappealing.
- Skipping the Base: A sturdy base is essential for a doormat. Without it, your doormat might be too flimsy and could move around or even become a tripping hazard.
- Overlooking Safety: When choosing materials and designs, consider the safety aspect. Avoid materials that are too slippery or rough, which could cause falls or scrape against feet.
- Neglecting Edges: Frayed or unfinished edges not only look untidy but can also lead to the doormat unraveling. Secure the edges properly for a polished look and a longer lifespan.
- Forgetting About Maintenance: Consider how easy it will be to clean your doormat. Intricate designs and delicate materials might look nice but could be a nightmare to keep clean.
- Overcomplicating the Design: Sometimes, less is more. An overly complicated design can be difficult to execute and may not always translate well in a functional item like a doormat.
- Not Testing Your Design: Before finalizing your doormat, test out your design. Place it where it will go and see how it looks and functions. You might find that adjustments are needed.
By keeping these points in mind, you'll be on your way to making a doormat that's not only beautiful but also practical and safe for everyday use. The best DIY projects are those that combine creativity with functionality.
FAQs About DIY Doormat
Find answers to common questions about DIY doormat projects. Discover tips, materials, and techniques to make your perfect doormat.
Start by placing your doormat on a flat surface and securing your stencil or design with painter’s tape. If you’re using a Cricut machine, cut out your design on vinyl and weed the excess material. Apply the stencil to the mat, making sure it’s flat and adheres well to prevent paint bleeding.
Use a stencil brush or foam dauber to apply paint in a dabbing motion. This helps prevent paint from seeping under the stencil. Apply several thin coats of paint rather than one thick coat for the best results. Allow the paint to dry completely between coats.
To extend the life of your doormat, apply a spray sealer after the paint has dried to protect it from the elements. Place the doormat in a covered area to reduce exposure to rain and direct sunlight. Regularly shake out or vacuum the doormat to remove dirt and debris.
Yes, you can achieve a stylish layered look by placing a larger patterned rug underneath your DIY coir mat. For a budget-friendly option, consider making a fabric cover for the bottom rug that can be changed out seasonally or as desired. This allows for versatility and keeps your entryway looking fresh.
When selecting paint for your DIY doormat, opt for outdoor acrylic paint as it is formulated to withstand the elements. It's important to choose a paint that is fade-resistant and waterproof to ensure your design remains vibrant and intact through different weather conditions. For added durability, you can also consider using a spray sealer after painting to seal the design.
Final Thoughts
Wrapping up, making a DIY doormat to spruce up your entryway offers a fun and rewarding way to personalize your home. By making your own doormat, you can add a unique touch that reflects your style and creativity. It's an easy project that brings immediate charm to your space. Plus, designing a DIY doormat is a cost-effective way to refresh your home's entrance. Try crafting your own doormat today and enjoy the welcoming feel it brings to your entryway.


