Making DIY dragon wings was an amazing boost to my costume. I wanted to stand out, so I decided to make these wings on my own. It turned out to be a fun and rewarding project. The sense of achievement was worth every effort. Plus, I got to show off my creativity.
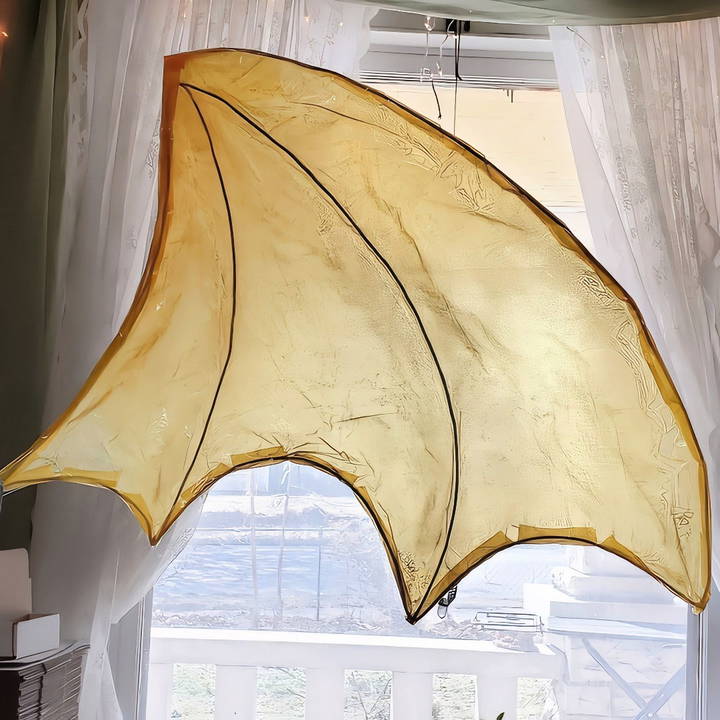
I'm sharing this DIY dragon wings guide to help you make your own. You don't need any special skills or complex materials. Just follow the steps, and you'll have a set of impressive dragon wings.
These tips will give you the confidence to get started on your DIY dragon wings. Let's make something amazing together!
Materials Needed
Before we get started, let's gather all the materials you'll need:
- 12-Gauge Dead Soft Aluminum Wire: This is the backbone of your wings. It's malleable yet sturdy enough to hold shapes.
- Hammer and Steel Block: Useful for flattening and hardening the wire.
- Round Nose Pliers: For making smooth curves.
- Wire Snips: To cut the wire.
- Packaging Tape: To splice wires together.
- Five-Millimeter Foam: Acts as a support structure for the wings.
- Hot Glue: To assemble parts.
- Cellophane: The “skin” of the wings. Three layers are preferred for sturdiness.
- UV Reactive Pigments: Adds a magical glow to your wings.
- Spray Adhesive: For attaching cellophane to the frame.
- Heat Gun or Hairdryer: Helps the cellophane adhere and wrinkle artistically.
- Optional Tools: Heavy books or binder clips for clamping, a balance ball for shaping curves, and a rotary cutter for precise cutting.
Each material plays a significant role in ensuring your dragon wings are sturdy and visually appealing. Now, let's dive into the actual crafting process!
Step by Step Instructions
Learn how to make fantastic DIY dragon wings with our step-by-step guide. From blueprint to final touches, craft perfect wings for your cosplay!
Step 1: Blueprint Your Design
Discover how to blueprint your design for stable creations. Learn to make a detailed blueprint and shape the wire for continuous stability.
Make a Detailed Blueprint
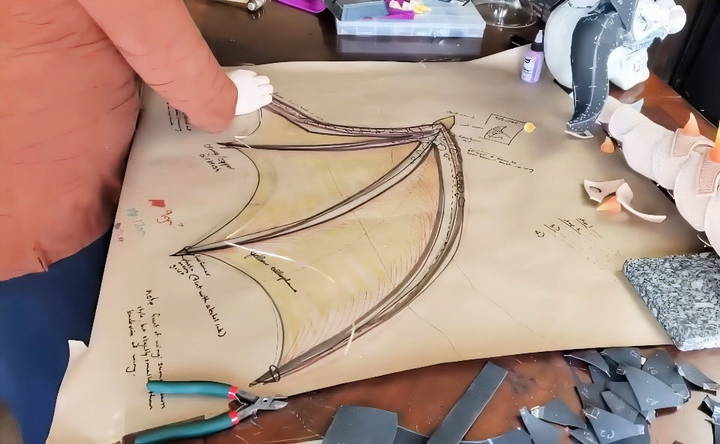
Having a solid plan is essential. I started by sketching out a detailed blueprint of my dragon wings. This sketch indicated where each wire would go, ensuring everything was aligned and balanced.
Shape the Wire
Using the 12-gauge dead soft aluminum wire, I formed the main "finger bones" or spines of the wings. Since this wire is soft, I used a hammer and steel block to flatten and harden it slightly, making it more durable.
Continuous Wire for Stability
I ensured a continuous wire across the back paddle to avoid any sharp ends poking out. This step included a lot of manipulating and bending to match my blueprint perfectly.
Step 2: Assemble the Frame
Learn how to assemble the frame, splice the wires, perform a stability check, and secure connections for a reliable setup. Step-by-step guide for optimal stability.
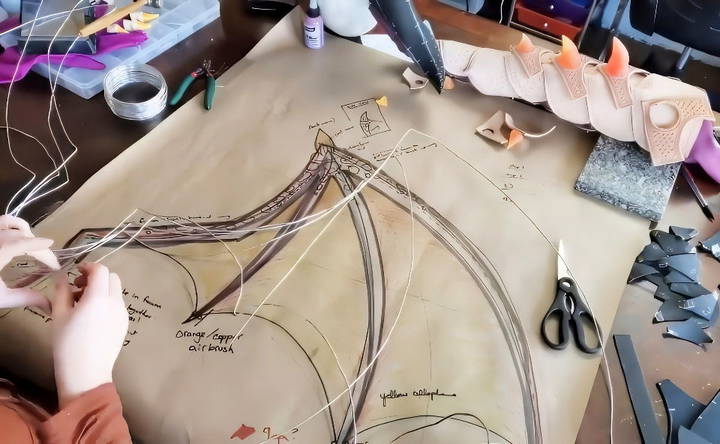
Splicing the Wires
Using packaging tape, I began splicing the wires together. This process was done incrementally, starting with the top edge and moving downward, ensuring a solid structure.
Stability Check
I double-checked each wire's alignment by measuring. This step helps maintain symmetry and keeps the wings balanced.
Secure Connections
I used round nose pliers to make small hooks at the end of each wire for secure attachment, ensuring there was minimal use of tape or extra wire, keeping the wings light.
Step 3: Make the Support Paddle
Make the support paddle easily! Learn how to cut the foam and assemble the paddle with our step-by-step guide. Perfect for DIY projects.
Cut the Foam
I cut two pieces of five-millimeter foam for the support paddle. By slightly staggering them, I provided additional stability.
Assemble the Paddle
Using hot glue, I sandwiched the support wire between the foam pieces and clamped them together with binder clips until they were securely bonded.
Step 4: Apply the Cellophane
Learn how to apply cellophane with our guide. Prepare your workspace, add a magical touch, layer, trim, and seal for a perfect finish!
Preparing the Workspace
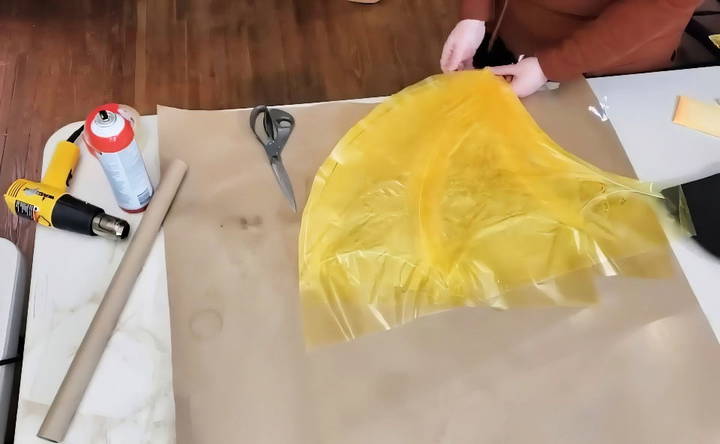
Lay down butcher paper to protect your work surface. Spray adhesive onto your work area where the cellophane will be applied.
Add a Magical Touch
Brush UV reactive pigments onto the cellophane before laying it onto the adhesive surface. This makes your wings glow beautifully under UV light.
Layering the Cellophane
Apply three layers of cellophane, ensuring you smooth out any wrinkles as you go. Reapply adhesive between each layer.
Trimming and Sealing
Once the adhesive dried, I trimmed the excess cellophane, leaving about a half-inch seam allowance. For added security, I folded the cellophane over the wire edges and sealed it with packaging tape.
Step 5: Final Shaping and Detailing
Master final shaping and detailing with our guide. Learn to shape curves and provide additional support for perfect results.
Shape Curves
Using a balance ball, I gently shaped the curves of the wings to make them look more organic and realistic.
Additional Support
I revisited any weak spots and reinforced them with extra adhesive and heat from the heat gun.
Step 6: Attaching and Displaying
Learn expert tips on attaching and displaying your projects. Attach to garments seamlessly and apply the final touches for a polished look.
Attach to Garments
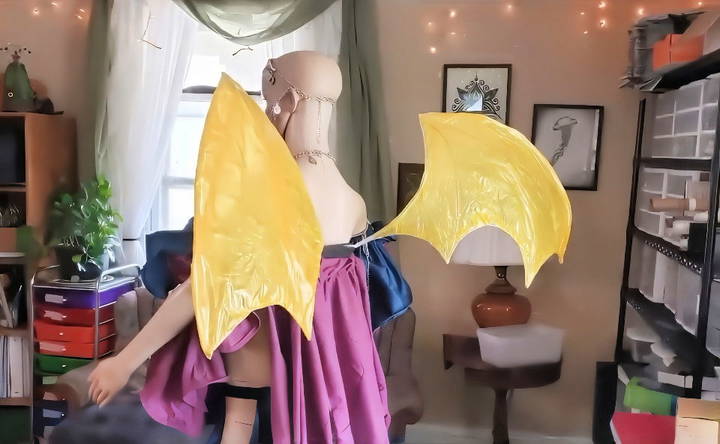
Whether it's a corset, shapewear, or a custom harness, ensure the wings are firmly secure. I recommend testing the fit and durability before any public display or costume event.
Final Touches
For additional flair, consider adding polymorph thermoplastic granules to make spikes or decorative elements. Paint can also be applied to further enhance the magical appeal of your wings.
Troubleshooting Common Issues
When crafting your DIY dragon wings, you might encounter a few hiccups along the way. Here's a helpful guide to troubleshooting common issues, ensuring your wings are both majestic and durable.
Wings Lack Stability or Rigidity
- Solution: Reinforce the frame with stronger materials like wire or lightweight metal rods. Ensure that the base of the wings is securely attached to your harness or backplate.
Materials Are Not Holding Together
- Solution: Use appropriate adhesives for your materials. Hot glue works well for quick fixes, but consider sewing or using epoxy for a more permanent bond.
Wings Are Too Heavy
- Solution: Reevaluate your materials. Opt for lighter alternatives such as foam or fabric instead of heavy cardboard or plastics. Balance the weight evenly across the wings.
Difficulty in Achieving Symmetry
- Solution: Make templates for each wing component before cutting your materials. This ensures that both wings are uniform in shape and size.
Paint or Dye Isn't Setting Properly
- Solution: Prepare your materials with a primer suitable for the base material. Use paints or dyes designed for the specific materials you're working with.
Wings Aren't Comfortable to Wear
- Solution: Adjust the harness to fit your body comfortably. Add padding where the wings rest against your back to prevent chafing.
Difficulty in Storage or Transport
- Solution: Design your wings to be detachable or foldable. Use connectors or hinges that allow for easy disassembly and reassembly.
Don't hesitate to go back to the drawing board if something isn't working. With a bit of troubleshooting, you'll have a pair of dragon wings that are not only impressive but also practical and comfortable to wear.
FAQs About DIY Dragon Wings
Discover the top faqs about DIY dragon wings, including crafting tips, materials, and step-by-step guides for making stunning costume accessories.
Start by drawing a blueprint of your wings to scale. Shape the wire to form the main frame of the wings. Attach foam along the spine of the wings to give them volume and structure. Then, apply the cellophane or chosen material over the frame to create the wing membrane, using a heat gun to carefully shape and fix it in place.
Yes, you can make dragon wings without sewing. Use materials like felt or fleece that don't fray and can be cut to shape. You can attach parts of the wings using adhesives or by making slots in the material to interlock pieces.
For a secure fit, measure the wearer's shoulders and wrists. Use elastic bands to make loops that will go around the shoulders and wrists, ensuring the wings stay in place. The shoulder loops should be made from wider elastic for comfort, while the wrist loops can be thinner.
Always be cautious when working with tools like wire cutters and heat guns. Ensure that the materials used are safe and non-toxic, especially if the wings are for children. Make sure that the wings are securely attached to avoid any accidents during wear.
To enhance the durability of your dragon wings, consider the following tips:
Use thicker gauge wire for the frame to withstand more wear and tear.
Apply multiple layers of cellophane or use a heavier-duty material like PVC or vinyl for the wing membrane.
Reinforce the attachment points with extra adhesive or stitching to prevent them from coming loose.
Consider using fabric or leather for a more robust look and feel, especially around the areas that will experience the most movement.
Apply a clear sealant over painted areas to protect the colors from chipping or fading.
Conclusion
There you have it! Your very own pair of DIY dragon wings. Don't be afraid to experiment and tweak the process to suit your style. Crafting these wings has been a transformative experience for me, and I hope it will be for you, too.


