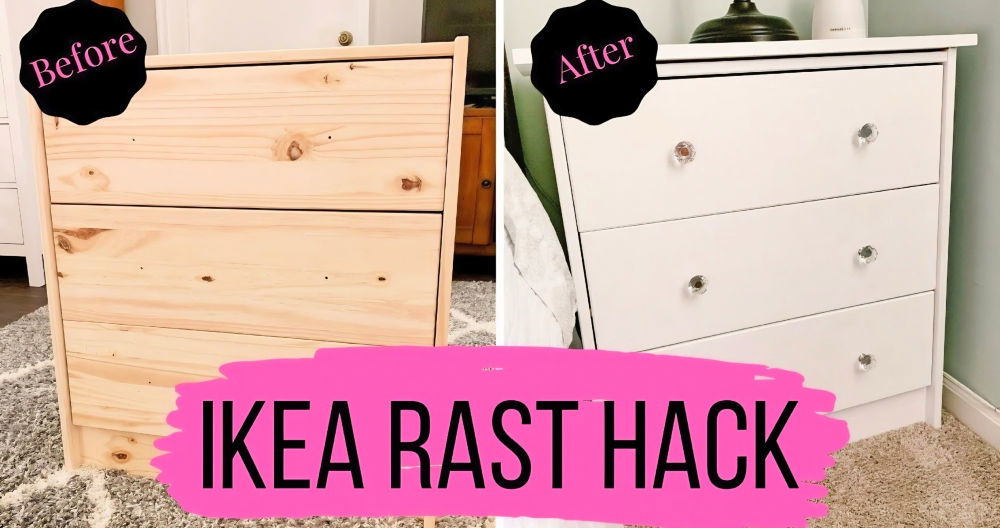
Tackling the DIY dresser makeover was a project I had been thinking about for a while. I found an old dresser at a yard sale and knew it had potential. First, I gathered my supplies: sandpaper, paint, brushes, and new knobs. I started by sanding the surface to remove the old finish and scratches. This step was crucial to ensure a smooth paint job.
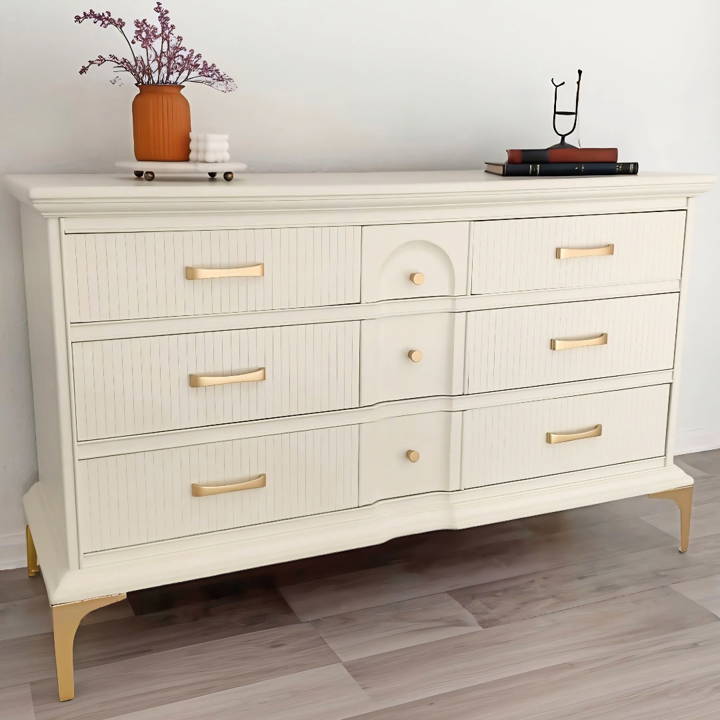
Next, I applied a primer to help the paint adhere better. Once the primer dried, I painted the dresser with my chosen color. It already looked much better! After it dried, I added the new knobs, giving the dresser a fresh, modern look. Making these changes felt incredibly satisfying. Now, I'm sharing this to help you transform your old furniture too.
Getting started with a DIY dresser makeover is fulfilling. Once you see the finished product, you'll appreciate the effort.
The Materials I Used and Why
- Krud Kutter: A powerful cleaner to remove years of dust and grime.
- Toothbrush: Perfect for getting into those nooks and crannies.
- Bondo: A heavy-duty filler for cracks and missing details.
- DAP Plastic Wood: For minor repairs, it's easy to sand and paint well.
- DAP Paintable Caulk: To achieve a seamless finish on trim gaps.
- Sanding Equipment: Crucial for smoothing out surfaces and prepping for paint.
- Bamboo Mats: My secret ingredient for a unique drawer front texture.
- Gorilla Glue: This is used to adhere the bamboo securely to the drawers.
- Zinsser's 123 Spray Primer: A time-saver that ensures paint adheres well.
- Behr's Water-Based Polyurethane: This is for a durable topcoat that doesn't yellow over time.
- Rustoleum's Metallic Gold Spray: To modernize the hardware and legs.
- Howard's Feed-N-Wax: To rejuvenate the inside and sides of the drawers for smooth operation.
Step by Step Instructions
Discover easy DIY dresser makeover tips with our step-by-step instructions—from cleaning to painting. Perfect your project with our expert guidance!
Step 1: Cleaning and Disassembly
The first step in any makeover is to start with a clean slate. I removed the outdated hardware and thoroughly cleaned the dresser with Krud Kutter, paying extra attention to the detailed areas with a toothbrush. This step is crucial because paint and filler won't adhere properly to a dirty surface.
Step 2: Repair and Prep
After the dresser was clean, I assessed the damage. The top and drawers had significant cracks and discoloration, so I opted to use Bondo for its durability. I also sanded the entire piece down to ensure a smooth foundation for the new finish. This prep work is like setting a strong foundation for a house - it's what makes the makeover last.
Step 3: The Secret Ingredient
Now for the fun part! Inspired by a friend's project, I decided to cover the drawer fronts with bamboo mats. This was my secret ingredient for adding texture and visual interest to the dresser. Cutting and adhering the mats was challenging but so worth the effort. The key was to spread the Gorilla Glue evenly to avoid bubbles, something I learned the hard way.
Step 4: Priming and Painting
Before painting, I primed the dresser with Zinsser's 123 spray primer. Primer not only helps the paint stick but also reveals any imperfections that need filling. I chose a creamy white paint from the oops section at Home Depot - a budget-friendly tip for those unexpected finds. After applying several thin coats and sanding between each, the dresser was transforming before my eyes.
Step 5: The Finishing Touches
No makeover is complete without attention to detail. I sprayed the new legs and hardware with Rustoleum's Metallic Gold for a touch of elegance. Once assembled, I used Howard's Feed-N-Wax on the drawer glides and insides, ensuring smooth operation and giving the wood a new lease on life.
The Final Reveal
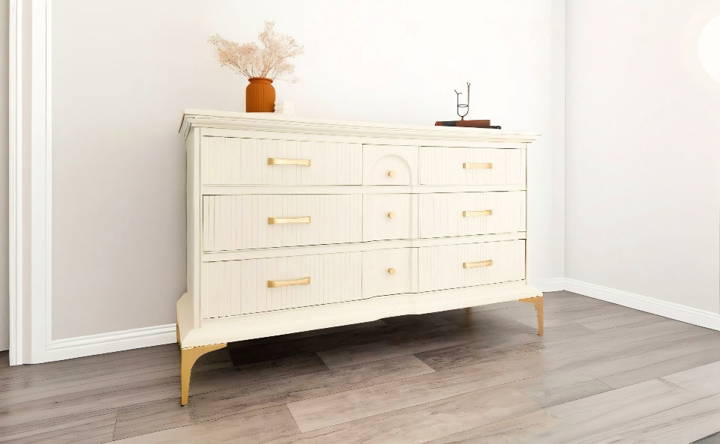
The transformation was stunning. The bamboo drawer fronts, now seamlessly integrated with the dresser, maked a unique and modern look. The creamy white paint, accented by the gold legs and hardware, brought the piece into the 21st century without losing its vintage charm.
Personalization Ideas for Your Dresser Makeover
When it comes to giving your dresser a new lease on life, personalization is key. It's not just about refreshing the look; it's about making a piece that resonates with your personality and fits seamlessly into your space. Here are some ideas to help you personalize your dresser:
- Choose a Theme: Start by deciding on a theme that reflects your interests or the decor of the room. Whether it's vintage chic, modern minimalism, or bohemian flair, let your theme guide your choices.
- Select a Color Palette: Colors can dramatically alter the mood of a room. Pick a palette that complements the room and your theme. Don't be afraid to mix and match colors for a bold statement.
- Add Patterns and Textures: Use stencils or wallpaper to add patterns to the dresser's surface. Textured paints or decorative knobs can add depth and interest.
- Incorporate Artwork: Decoupage your favorite prints, photos, or fabric onto the drawers for a unique touch. This is a great way to make your dresser truly one-of-a-kind.
- Stencil Your Design: Stenciling is a simple way to add intricate designs. You can make your own stencils or purchase them to add floral patterns, geometric shapes, or even quotes.
- Change the Hardware: Swapping out old knobs and pulling for new ones is an easy update. Choose hardware that matches your theme and adds a touch of elegance or whimsy.
- Use Creative Techniques: Try different painting techniques like distressing, layering, or ombre to give your dresser character. These techniques can highlight the dresser's design and shape.
- Add Functional Elements: Consider adding hooks, rods, or built-in organizers. These can turn your dresser into a multi-functional piece, perfect for small spaces.
- Light It Up: Incorporate lighting by adding LED strips inside drawers or under the dresser. This not only adds functionality but also makes ambiance.
- Reflect with Mirrors: Attaching mirrors to the top or sides of your dresser can brighten the room and make it appear larger.
The goal is to make a dresser that you love, and that serves your needs. Don't hesitate to experiment and have fun with the process.
Troubleshooting Tips for Dresser Makeover Challenges
Embarking on a dresser makeover can be an exciting project, but sometimes, you might encounter a few bumps along the way. Here are some troubleshooting tips to help you overcome common challenges:
- Stripping Old Paint or Finish: If you're struggling to remove old paint or finish, try using a chemical stripper that's safe for indoor use. Apply it according to the manufacturer's instructions, and use a scraper to remove the layers gently. For tough spots, fine-grit sandpaper can help.
- Sticky Drawers: Drawers that don't slide smoothly can be frustrating. To fix this, remove the drawer and check for any damage. You can rub a bar of soap or paraffin wax along the tracks to help them glide better. If the drawers are damaged, consider replacing the slides with new ones.
- Choosing the Right Sealant: After painting, it's important to protect your dresser with the right sealant. For high-traffic pieces, a polyurethane sealant offers durability. If you prefer a more natural look, beeswax or a tung oil finish can be a good alternative.
- Avoiding Brush Strokes: To achieve a smooth finish without brush strokes, use a high-quality brush and apply thin coats of paint. Sanding lightly between coats can also help eliminate any marks.
- Fixing Loose Knobs and Handles: Tighten any loose hardware by removing the knob or handle and tightening the screw. If the screw no longer grips, use a toothpick or a small piece of wood dipped in glue to fill the hole and then re-screw the hardware.
- Dealing with Wood Swelling: Wood can swell due to humidity, causing drawers to stick. To fix this, you can lightly sand the edges of the drawer. Make sure to seal the wood properly to prevent future swelling.
- Matching Colors: If you're having trouble finding the exact paint color, take a small piece of the dresser, like a drawer, to your local paint store. They can often make a custom color match for you.
- Removing Odors: Old dressers can sometimes have a musty smell. To remove odors, clean the dresser with a vinegar solution and let it dry completely. You can also place bowls of baking soda or coffee grounds inside the drawers to absorb any lingering smells.
Keep these tips in mind, and you can handle any dresser makeover issues. Patience and persistence are key. Troubleshoot a bit, and you'll have a refreshed dresser to be proud of.
FAQs About DIY Dresser Makeover
Discover essential FAQs about DIY dresser makeovers, tips, and tricks for effortlessly transforming your old furniture. Start your project today!
Absolutely! Wallpaper can add a unique touch to your dresser. Ensure the drawers have a flat front for the best results. Apply a base coat of paint, measure and cut your wallpaper, and attach it with spray adhesive. Finish off with some cool vintage knobs to complement your design.
For a professional finish on your painted dresser, follow these tips:
Use fine-grit sandpaper between coats to remove any bumps or imperfections.
Apply thin, even coats of paint to avoid drips or brush marks.
Consider using a paint sprayer for a smoother finish if you’re comfortable with the tool.
Allow ample drying time between coats to ensure the best adhesion.
Safety is paramount when undertaking any DIY project. Here are some precautions:
Wear protective gear such as gloves, masks, and safety glasses.
Ensure adequate ventilation when painting or staining.
Keep your workspace clean and organized to prevent accidents.
Follow all product safety instructions, especially when using chemicals or power tools.
It’s generally not recommended to mix different types of paint or brands, as they may not be compatible and could result in an uneven finish or poor adhesion. Stick to one type and brand for the best results. If you need to switch, make sure the first paint is completely cured, and then apply a primer before the new paint.
If a drawer sticks after repainting, it's likely due to paint buildup. Here's how to fix it:
Remove the drawer and sand down the areas where it's sticking, usually the sides or bottom.
Apply a thin layer of wax or a specialty product designed to ease drawer movement.
Reattach the drawer and test the movement, repeating the process if necessary.
Conclusion:
Wrapping up, your DIY dresser makeover from start to finish project can transform an ordinary piece of furniture into a stunning centerpiece for your home. With the right tools and a bit of creativity, you can achieve a dramatic before and after dresser makeover. Enjoy the process and let your personal style shine through. Happy crafting!


