Building a DIY drift trike can be an exciting project. I remember my first time building one with my friends. We gathered materials like wood and metal pipes. It was a simple plan. We had a clear vision of how we wanted our trike to look and feel. With everyone pitching in, we began the assembly. The laughter and teamwork made the process enjoyable and memorable.
As we put the pieces together, I learned about the importance of safety. We wore helmets and checked everything twice. Once the drift trike frame was ready, we painted it bright colors. It felt amazing to see our hard work come to life. Now, I encourage anyone interested in building their own drift trike. It's a fun experience that you can share with friends and family.
I'm helping you get started with this exciting project. Grab your materials and enjoy the ride ahead!
Gathering Your Materials
Discover essential tips for gathering your materials and understand why each material is essential for your next project.
Why Each Material is Essential:
- Donor Bike: The backbone of our drift trike project. It provides the front wheel, fork, and head tube essential for steering. I sourced mine from the local junkyard, which saved a pretty penny.
- Axle Kit: Acting as our rear driving force, the axle kit I chose was a 32-inch model, perfect for the balance between stability and agility. It includes a brake rotor, caliper, pillow blocks, and bearings necessary for the build.
- Plastic Seat: Comfort and control during the drift are paramount. A sturdy, ergonomic go-kart seat was my choice, ensuring I remained in place during those tight corners.
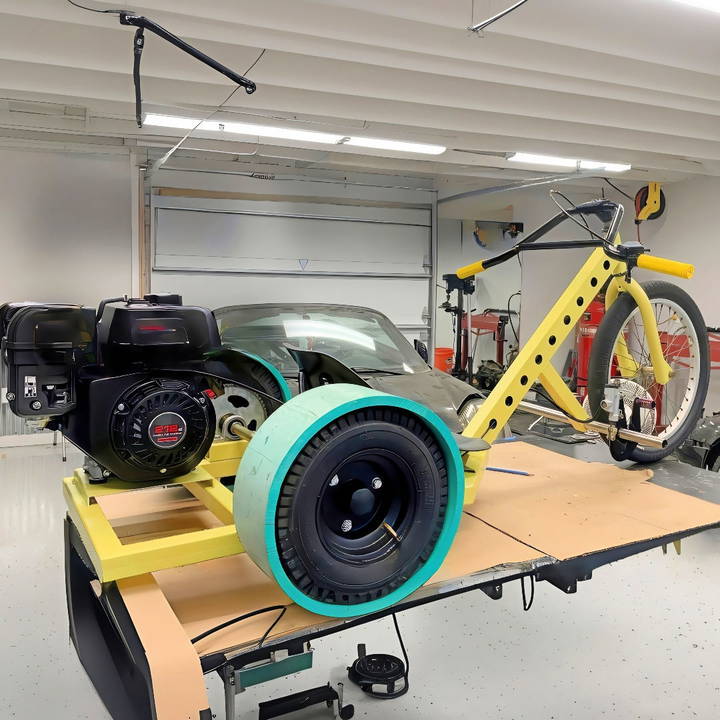
- Predator 212 Motor: The heart of the trike, providing the necessary horsepower to keep adrenaline levels high. I opted for the reliable and powerful Predator 212 model.
Step by Step Instructions
Learn how to build a DIY drift trike with step-by-step instructions. From building the frame to final assembly and painting, get tips for a smooth ride!
Building The Frame
The first major step was making a steady frame to support the weight of the rider and the mechanical components. This required:
- Measuring and Cutting: Based on the axle's dimensions, I measured and cut inch-and-a-half square tubing for the frame. Precision here is key to ensure everything aligns properly.
- Welding: After notching out my cuts for the perfect fit, welding was up next. I carefully joined each piece of the frame, paying close attention to the strength and durability of each weld.
Tips:
Wear appropriate safety gear when welding, and always work in a well-ventilated area to avoid inhaling fumes.
Installing the Axle and Wheels
After ensuring the frame was square and solid, mounting the axle was the next big task. This involved drilling holes through the frame to fit the axle securely. I also encountered a hiccup with the first axle being bent, which taught me the valuable lesson of quality inspection before proceeding.
Once resolved with a replacement axle, the real fun began - attaching the wheels. The drift trike's essence lies in its ability to slide, necessitating specific types of rear wheels. I employed PVC sleeves over the wheels to achieve the desired drift effect.
Mounting the Engine
Placing the Predator 212 motor onto the frame was exhilarating; it meant that my project was finally taking shape. I mounted the engine using a pre-fabricated plate that allowed for easy adjustment and alignment with the rear axle, ensuring the chain had perfect tension.
Front Fork and Wheel Installation
Transforming the donor bike's front fork and wheel into the drift trike's steering mechanism was a rewarding challenge. It required:
- Cutting: I salvaged the head tube, fork, and front wheel from the donor bike, ensuring to cut as cleanly as possible.
- Alignment: Using a laser level for precision, I aligned the head tube with the frame, ensuring everything was straight before welding.
Seat and Brakes
Comfort and control being paramount, I mounted the seat as low as possible for better centre of gravity and integrated the braking system carefully to ensure it was robust and reliable. The brake system was DIY, crafting a custom mount for the caliper and devising a pedal mechanism.
Final Assembly and Painting
With all the components ready, the final assembly was somewhat of a ceremonial process. Each part found its place as I meticulously bolted, tightened, and secured every piece. Choosing the paint was perhaps one of the most personal decisions in this project. After much deliberation, I settled on a color that resonated with my vision of the perfect drift trike.
Lessons Learned
Building a drift trike from scratch was a profound journey. Beyond the technical skills gained, the process taught me patience, resilience, and the importance of attention to detail.
A Few Takeaways:
- Preparation is Key: Lay out all your materials and tools beforehand to streamline the building process.
- Quality Checks: Inspect each component, especially if you're using second-hand items, to avoid any setbacks.
- Personalization: Don't shy away from customizing your drift trike to make it truly yours.
Safety Gear and Riding Techniques
Safety is crucial when riding a drift trike. Regardless of skill level, following safety practices ensures a fun and accident-free ride. Here are key safety tips and techniques to remember:
1. Wear Protective Gear:
- Helmet: Always wear a certified helmet designed for cycling or motorcycling. It protects your head in case of falls or collisions.
- Gloves: Sturdy gloves provide a better grip on the handlebars and protect your hands during slides.
- Knee and Elbow Pads: These protect your joints from abrasions and impact during drifts.
- Closed-Toe Shoes: Wear shoes with good traction to maintain control over the pedals and ground.
2. Choose the Right Terrain:
- Smooth Surfaces: Opt for smooth, paved surfaces with minimal debris. Avoid gravel, sand, or wet areas.
- Open Spaces: Practice in open areas away from traffic, pedestrians, and obstacles.
- Avoid Hills: Steep hills can be dangerous for drift trikes. Stick to flat or gently sloping terrain.
3. Master the Basics:
- Countersteering: Learn how to initiate slides by pushing the handlebars in the opposite direction of the turn. Practice this technique to control drifts.
- Balance: Maintain a balanced posture while sliding. Keep your weight centered over the trike.
- Braking: Use both feet to brake evenly. Avoid sudden stops to prevent skidding.
4. Initiating Slides:
- Speed Control: Start at a moderate speed. Too fast can lead to loss of control.
- Lean and Turn: Shift your weight to the outside of the turn. Lean into the slide.
- Throttle Control (Motorized Trikes): Gradually apply throttle to maintain controlled slides.
5. Safety During Slides:
- Look Ahead: Focus on where you want to go, not where you are. Keep your eyes ahead.
- Avoid Oversteer: Too much steering input can cause spins. Be gentle with the handlebars.
- Emergency Stops: If you lose control, release the throttle and gently apply brakes.
6. Group Riding Etiquette:
- Spacing: Maintain a safe distance from other riders to avoid collisions.
- Signals: Use hand signals to communicate turns or stops.
- Awareness: Be aware of other riders' movements and adjust accordingly.
Practice makes perfect. Start slow, build confidence, and gradually push your limits. Always prioritize safety, and enjoy the adrenaline rush of drift triking responsibly!
FAQs About DIY Drift Trikes
Discover answers to common questions about DIY Drift Trikes, from building tips to safety guidelines, and get started on your own ride!
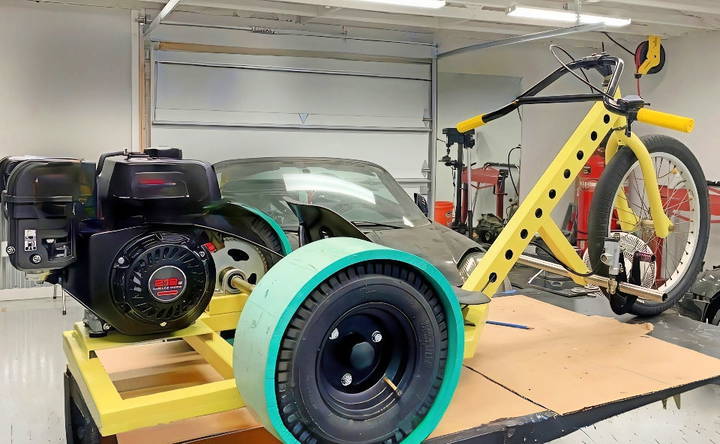
A drift trike is a three-wheeled vehicle designed for sliding and drifting around corners. It combines elements of go-karts, bicycles, and drifting techniques. Here’s how it works:
Frame: Drift trikes typically have a sturdy steel frame with a low center of gravity.
Wheels: The rear wheels are larger and often have a plastic or PVC sleeve around them. This sleeve reduces traction, allowing the trike to slide easily.
Drifting: Riders gain speed by pedaling or pushing off with their feet. As they approach a turn, they shift their weight and steer, causing the rear wheels to break traction. The trike slides sideways, making a thrilling drifting experience.
Absolutely! Building a DIY drift trike can be a fun and rewarding project. Here’s what you’ll need:
Frame: Start with a sturdy bicycle frame or build one from scratch.
Wheels: Obtain large rear wheels (usually around 10 inches in diameter) with removable sleeves.
Axle and Bearings: You’ll need an axle and bearings to attach the wheels.
Brakes: Install a brake system to control your speed.
Seat and Handlebars: Adapt or build comfortable seating and handlebars.
Drift Sleeves: Attach plastic or PVC sleeves to the rear wheels.
Tools: Basic tools like wrenches, a drill, and welding equipment.
To improve your drift trike's sliding performance:
Tire Pressure: Lower the tire pressure slightly to increase surface area and reduce grip.
Drift Sleeves: Ensure the sleeves on your rear wheels are smooth and well-fitted.
Weight Distribution: Shift your weight toward the rear during turns to break traction.
Practice: Mastering the art of drifting takes practice. Experiment with different techniques and find what works best for you.
While drift trikes are exhilarating, safety is crucial:
Protective Gear: Always wear a helmet, knee pads, and elbow pads.
Choose the Right Location: Find an open area with smooth pavement and minimal traffic.
Start Slow: Begin at a moderate speed to get a feel for the trike's handling.
Avoid Busy Roads: Drifting on public roads is dangerous and illegal.
Yes! Drift trike events and races are held worldwide. Look for local clubs or online communities to connect with other enthusiasts. Participate in organized races or friendly competitions.
Conclusion
In closing, making a DIY drift trike has taught me so much. The joy of building with friends and making something unique is unforgettable. I believe anyone can do it if they put their mind to it. So, gather your materials, and let's get started on your drift trike adventure!


