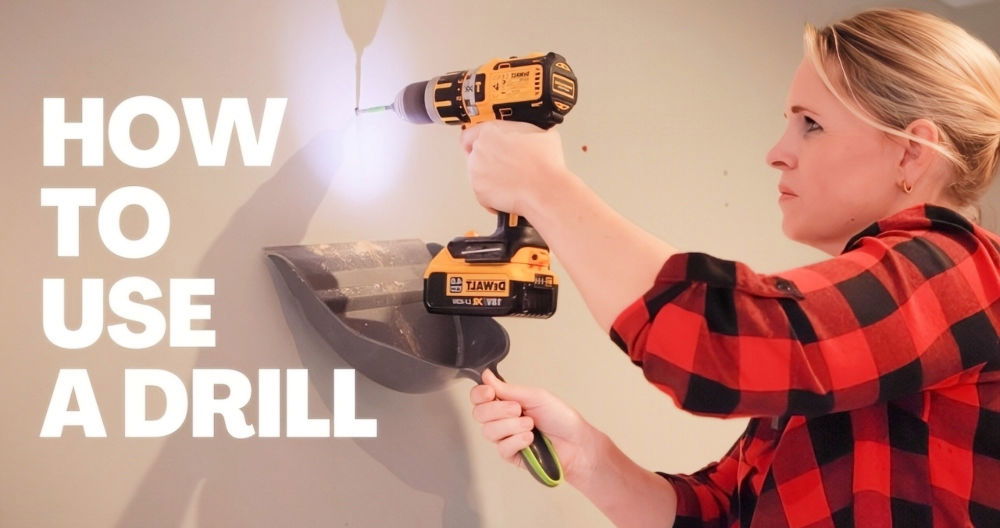
Making practical DIY projects at home can save money and offer a sense of accomplishment. Last month, I decided to tackle a DIY drill holder. My growing collection of power tools was getting messy, and I needed a better way to organize them. The project was straightforward and only required basic materials and tools.
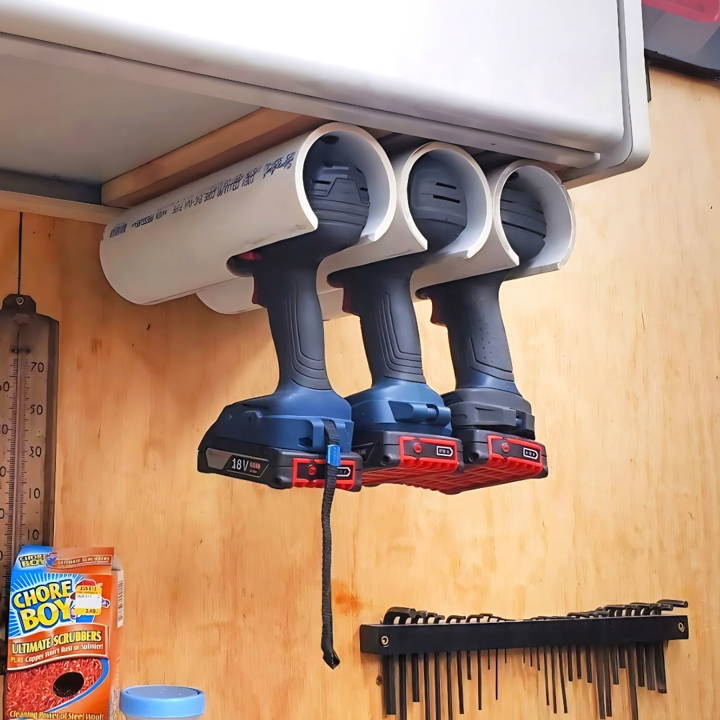
Following five easy steps, I built a sturdy cordless drill holder. The process was quick and fulfilling, giving me a designated spot for each tool. Now, my workspace looks neat, and I can find my power tools quickly. By sharing my experience, I hope to encourage you to build your own DIY drill holder to organize your tools efficiently.
Starting your own DIY drill holder project is rewarding. It helps in organizing your workspace and makes finding tools easier. Follow the steps given below, and you'll find it both helpful and satisfying. Trust me, you'll appreciate the tidiness and efficiency it brings.
Materials Needed and Their Purpose
- PVC Pipe: The main body of the holder, chosen for its affordability and ease of manipulation.
- Scrap Wood: To build a sturdy mounting base for the PVC pipes.
- Screws: To secure everything in place, ensuring stability.
- Saw and Sandpaper: This is used to cut the PVC pipe and smooth the rough edges.
- Measuring Tape and Marker: To make precise cuts and marks for accurate assembly.
Each material was chosen with budget and efficiency in mind, ensuring the project would not only be accessible to fellow DIY enthusiasts but also sustainable by repurposing materials I already had on hand.
Step by Step Instructions
Learn how to build a DIY drill holder with our step-by-step guide. Perfect for organizing your tools in five easy steps. Start your project today!
Step 1: Planning and Measuring
First, I needed a clear plan. I measured my drills and the space under a shelf where the holder would be mounted. This step is crucial for ensuring that the final product would fit the intended space and accommodate all my drills.
Step 2: Cutting and Preparing the PVC Pipe
Using the measurements, I cut the PVC pipe into sections that would act as the individual holders for each drill. A segment was carefully removed from each section to build a slot for the drills to sit in. This required a steady hand and patience to ensure the slots were smooth and free from jagged edges, which could potentially scratch my tools.
Step 3: Preparing the Mounting Base
The scrap wood served as the mounting base for the PVC pipes. I measured and cut it to fit the designated space under my shelf, making sure to slightly trim the corners for an easy fit. This base not only needed to be sturdy but also capable of holding the weight of the drills.
Step 4: Assembly
Once all the pieces were prepared, assembly began. I attached the PVC sections to the wooden base using screws, ensuring each was tightly secured. This step required attention to detail to make sure the holders were spaced appropriately, allowing easy access to each drill without clutter or interference.
Step 5: Mounting
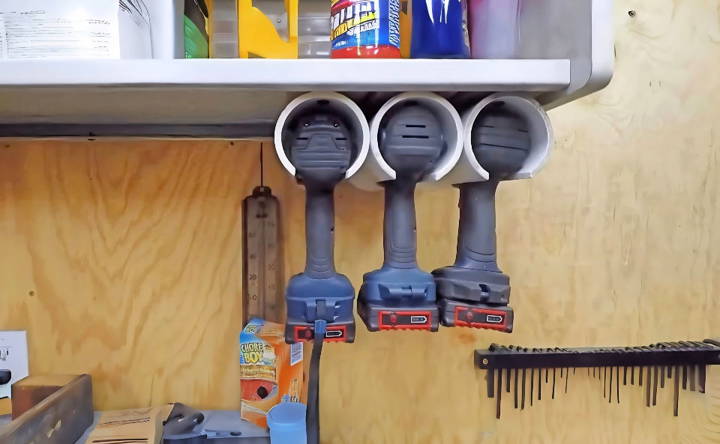
The final step was to mount the assembled holder under the shelf. This was somewhat tricky, as I needed to ensure the holder was both level and securely attached. Careful measuring and adjustment resulted in a perfectly fitted and functional drill holder.
The drill holder exceeded my expectations, offering neat, accessible storage, and a sense of achievement. For under $15, it brought invaluable efficiency and organization to my workshop.
Customization Options
Making a DIY drill holder lets you customize it to fit your workspace perfectly. Here are some options to make it functional and suited to your needs.
- Adjustable Slots: Design your drill holder with adjustable slots to accommodate drills of various sizes. This can be achieved by using slotted angles or movable dividers within the holder.
- Color Coding: Assign different colors to different sections of your drill holder. This adds a personal touch and helps quickly identify the right drill for the job.
- Mounting Choices: Depending on your space, you might prefer a wall-mounted drill holder or one that sits on a workbench. Consider adding mounting brackets or a sturdy base to suit your preference.
- Material Selection: While wood is a common choice for DIY projects, you might opt for metal or plastic if that suits your environment better. Each material has its benefits, such as durability or ease of cleaning.
- Tool Integration: Think about integrating spaces for related tools and accessories, like drill bits and chargers, so everything you need is in one place.
- Labeling System: Make a simple labeling system using stickers or engravings to mark where each drill should be placed. This will make it easier to keep your workspace organized.
- Security Features: If safety is a concern, you can secure your tools by adding locks or latches to your drill holder.
- Expansion Capabilities: Design your holder with the future in mind. Leave room for additional drills or tools you may acquire down the line.
The key to DIY success is making it work for you. These options are just starters—get creative and add features for a unique, functional drill holder.
Advanced Features
Incorporating advanced features into your DIY drill holder can significantly enhance its functionality and user experience. Here's how you can add sophisticated elements to your project:
- Integrated Charging Station: Equip your drill holder with a built-in charging station. This ensures your drills are always charged and ready to use. You can do this by allocating a space for a power strip and routing the cables neatly.
- Magnetic Tool Strip: A magnetic strip can be added to the side of the drill holder. It's perfect for keeping metal bits and screws within easy reach while you work.
- LED Lighting: Install LED lights to illuminate the holder. This is not only practical for dark spaces but also adds a modern touch to your workshop.
- Dust Collection System: If you're concerned about cleanliness, consider adding a small dust collection system near the drill storage area to keep your workspace tidy.
- Inventory Tags: Use RFID tags or barcodes on each drill slot. This can be linked to an inventory management app to keep track of your tools and order supplies when needed.
- Retractable Shelves: For compact storage, add retractable shelves or drawers that can be pulled out when you need access to your drills and pushed back in to save space.
- Foam Inserts: Cut out foam inserts that fit the shape of your drills. This provides extra protection and keeps them snugly in place.
- Smart Connectivity: Integrate smart technology to monitor the condition of your drills. Sensors can alert you when a drill needs maintenance or when the battery is low.
These features will make your DIY drill holder smart and efficient, integral to your craft area. Prioritize safety and ease of use in your project.
Troubleshooting Common Issues
When working on a DIY drill holder, you might encounter a few hiccups along the way. Here's a guide to troubleshooting some common issues you may face:
- Drill Doesn't Fit: If your drill doesn't fit into the holder, check the measurements and adjust the slot size accordingly. Ensure you have accounted for any additional space needed for the drill's handle or power cord.
- Holder is Unstable: A wobbly drill holder can be a nuisance. Make sure the base is flat and the holder is properly secured to the wall or bench. If necessary, reinforce with additional brackets or a heavier base.
- Difficulty in Mounting: If you're having trouble mounting the holder, verify that you're using the right tools and hardware for your wall type. For drywall, use anchors; for studs, use longer screws.
- Wood Splitting: If you find wood splitting when working with it, pre-drill holes to prevent this issue. Choose the correct drill bit size and drill at a steady pace.
- Tools Falling Out: If tools keep falling out of the holder, consider adding a lip or edge to each slot. You can also line the slots with a soft material like rubber to provide extra grip.
- Difficulty in Accessing Drills: If it's hard to reach your drills, reorganize the layout. Place the most frequently used drills at an accessible height and angle.
- Material Wear and Tear: To prevent wear and tear, apply a sealant or paint to protect the material from moisture and scratches. Regular maintenance checks can also help extend the life of your holder.
- Difficulty in Following Instructions: If the instructions are unclear, break them down into smaller steps. Use visual aids like diagrams to help clarify complex parts.
You'll build a functional, durable DIY drill holder by anticipating issues and knowing how to address them. Patience and planning are key to overcoming challenges in DIY projects.
FAQs About DIY Drill Holder
Discover essential FAQs about DIY drill holders. Learn tips, materials, and step-by-step guidance for making your own efficient drill storage solution.
Measure the top of the handle, just under the head of your largest drill. If it’s larger than 1 1/2", adjust the width of the holder accordingly. Most plans provide a cut list and diagram to help you customize the holder size to fit your specific drills.
Yes, you can design your drill holder to include a space for a battery charging station. Ensure it’s near a power outlet, and consider adding a shelf or compartment where you can place the charger and batteries. Some designs allow for the drill holder to be mounted on the wall, making it easy to access and charge your drills simultaneously.
Organize your drills by frequency of use, with the most commonly used drills easily accessible. If you have both corded and cordless drills, you might want to separate them or arrange them by size. Including labeled compartments or slots can also help keep things tidy.
Find the studs in your wall to ensure a secure mount, especially if the holder will carry the weight of multiple drills. Pre-drill holes in the holder for the screws, and use a level to make sure it's straight. If you're not attaching it to studs, use appropriate wall anchors to support the weight.
To maintain your DIY drill holder, follow these tips:
Regularly check for any loose screws or wear and tear, and tighten or replace parts as necessary.
Clean the holder with a damp cloth to remove dust and debris, which can accumulate over time and cause scratches or rust.
Apply a wood finish or paint to protect the wood from moisture and enhance its appearance. Reapply as needed, especially if the holder is in a humid environment.
Organize your drills and accessories periodically to ensure that everything is in its place and easy to find.
Inspect the mounting on the wall to ensure it remains secure. If you notice any movement, reinforce the holder with additional screws or mounting hardware.
Conclusion
Starting your own DIY drill holder project is rewarding. It helps in organizing your workspace and makes finding tools easier. Follow the steps given below, and you'll find it both helpful and satisfying. Trust me, you'll appreciate the tidiness and efficiency it brings.


