A dedicated drill press stand is essential for those looking to build a stable, organized space for their drill press in a workshop. In this guide, you'll learn how to build a strong, functional DIY drill press stand using simple materials and tools, even if you're new to DIY woodworking projects.
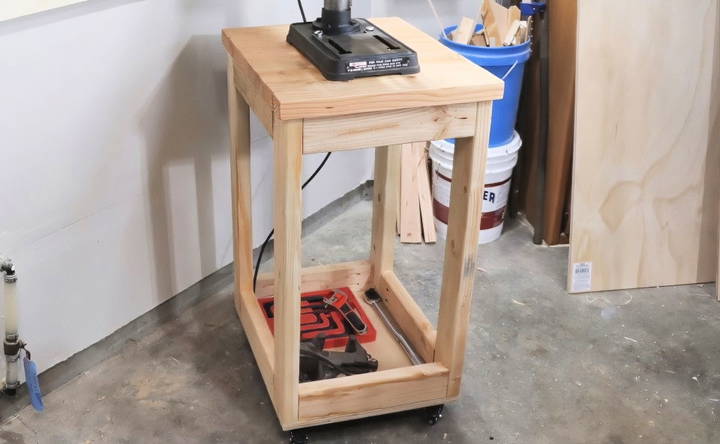
The stand described here features a robust glue-up top, sturdy 2x4 framing, a plywood base, and locking castors for easy movement around your workspace. Future drawer additions can make it even more versatile, but the basic design is already highly practical.
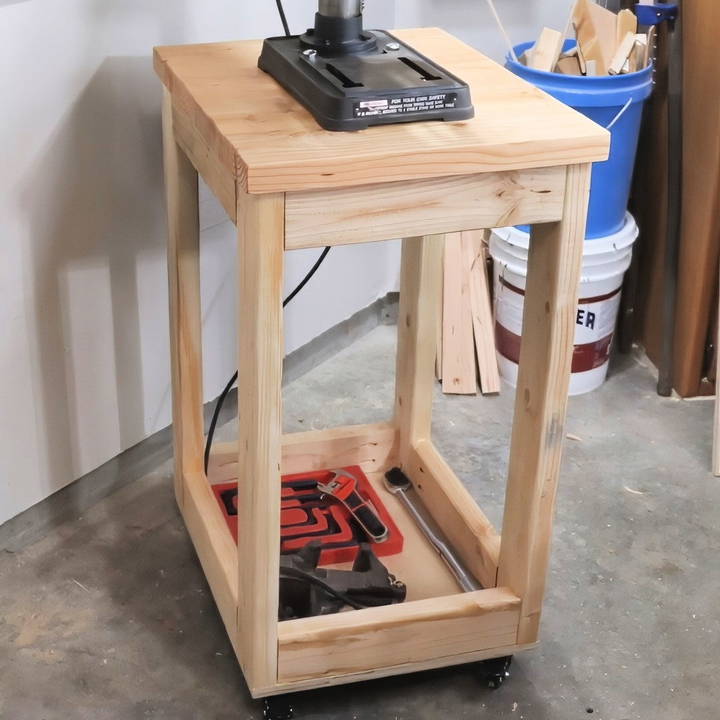
Tools and Materials You'll Need
Discover essential tools and materials for building a DIY drill press stand, ensuring stability and precision in your projects.
Lumber and Supplies
This project primarily uses standard lumber and supplies, which should be easy to find at your local hardware store or lumberyard.
- Lumber: (3) 8-foot 2x4 boards
- (1) 6-foot 2x8 board (for a thicker top)
- (1) 18"x22" piece of ¾-inch plywood (for the bottom shelf)
- Cut List: Legs: (4) 31 ¼-inch 2x4s
- Frame Pieces: (8) 15-inch 2x4s (four for the top, four for the bottom)
- Bottom Plywood Panel: 18"x22" ¾-inch plywood
- Top Panel: (4) 18-inch 2x8 boards
- Additional Supplies: (4) Locking castors
- 2 ½-inch pocket screws (approximately 32 for the frame)
- 2-inch pocket screws (for attaching the top)
- 1 ¾-inch wood screws (for attaching the bottom shelf)
- Wood glue
- (2) 3-inch bolts, nuts, and washers (for securing the drill press to the top)
Essential Tools
Here's the list of tools needed for this project:
- Table Saw: For cutting the lumber pieces to size.
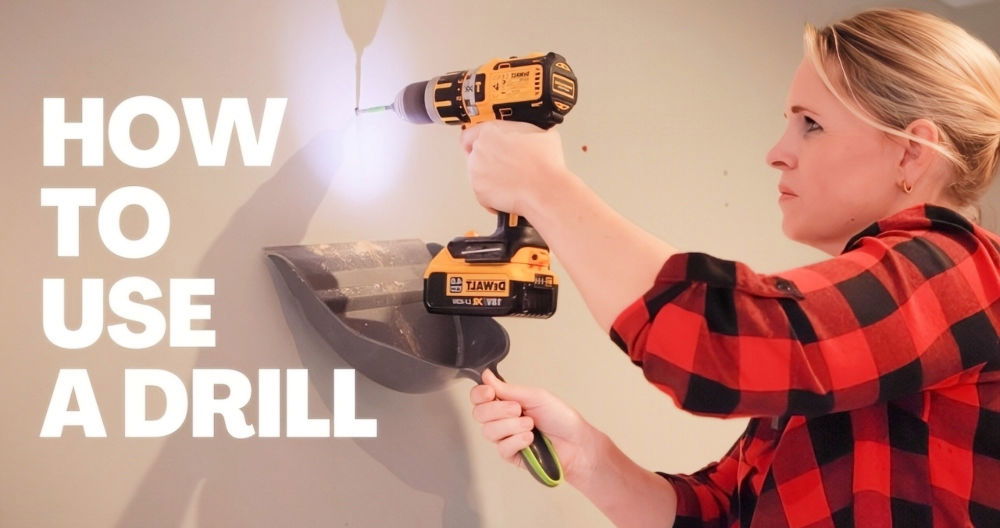
- Power Drill: Essential for building pocket holes and assembling the frame.
- Pocket Hole Jig: To build strong joints in the 2x4 framing.
- 90-degree Drill Adaptor: Helpful for tight spaces.
- Clamps: A minimum 24-inch clamp or a pocket hole clamp is necessary. (Nine clamps were used for the glue-up top, but adjust as needed.)
- Optional (for glue-up top): Orbital sander, cauls (1x3 boards wrapped in packing tape), and spray lacquer.
Step by Step Instructions
Learn how to build a DIY drill press stand with step-by-step instructions. From lumber cuts to securing your drill press, master your project today!
Step 1: Make the Lumber Cuts
Refer to the cut list above to prepare each piece. Start by cutting the 2x4s and 2x8s to the specified lengths.
For a sturdy, thick top, you can build a glue-up by joining four 2x8 boards. Alternatively, use two layers of ¾-inch plywood if you prefer a quicker solution. Using 2x8s is beneficial for supporting heavier drill presses, offering added durability.
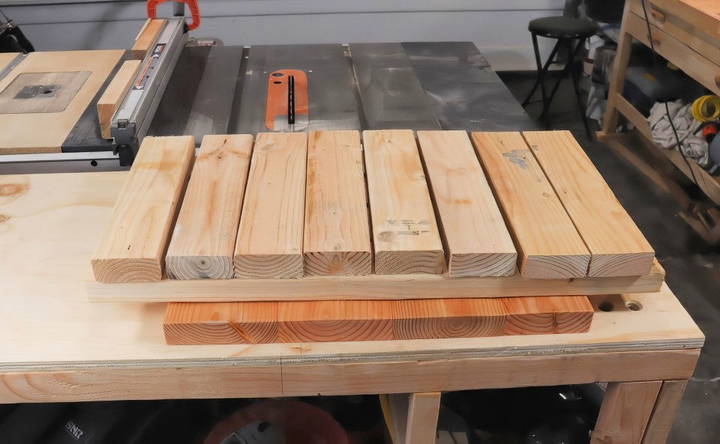
- Tip: When making cuts, especially for the glue-up top, cut slightly larger than the final size to allow room for trimming after gluing.
Step 2: Drill Pocket Holes
Pocket holes build strong, hidden joints essential for a stand that needs to support the weight of a drill press. Adjust the pocket hole jig based on the lumber thickness as follows:
- Frame Pieces: Set the jig to 1½ inches for the eight 15-inch 2x4 frame pieces. Drill two pocket holes on each end.
- Top Frame Pieces: Change the jig setting to 1¼ inches and drill two pocket holes along one edge of the four top 15-inch frame pieces. These holes will be used to attach the top to the frame.
Step 3: Assemble the Frame Sides
With your cuts and pocket holes ready, start building the frame sides:
- Position a 15-inch 2x4 at both the top and bottom of two 31¼-inch leg pieces, forming one side.
- Apply wood glue at each joint and secure with 2 ½-inch pocket screws.
- Make sure the 1¼-inch pocket holes on the top frame pieces face upward for attaching the top later.
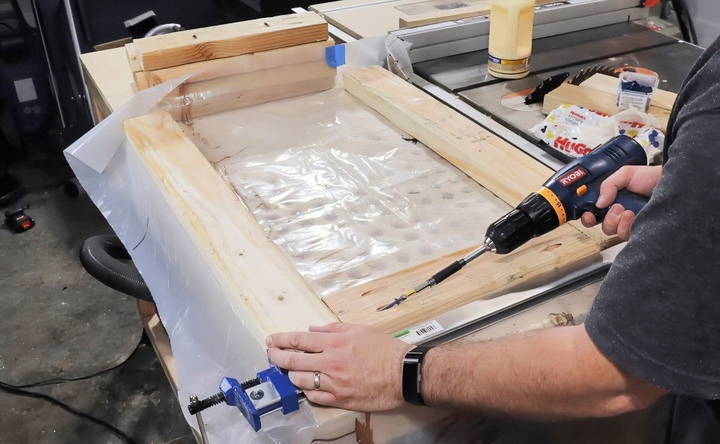
Repeat the process for the other side, forming two identical side frames.
Step 4: Complete the Frame Assembly
To join the side frames:
- Attach the remaining four 15-inch 2x4 pieces between the sides, forming the front and back of the stand.
- Using a square jig or an extra set of hands can help keep everything upright as you work.
- Secure with 2 ½-inch pocket screws.
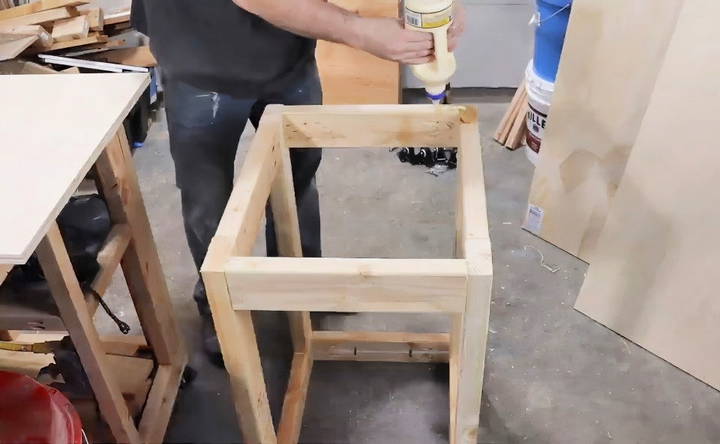
Step 5: Attach the Bottom Shelf and Locking Castors
For added functionality and storage, the stand includes a plywood bottom shelf and four locking castors:
- Place the 18"x22" plywood at the bottom of the frame.
- Glue and clamp the plywood to the frame, then secure it with 1¾-inch wood screws.
- Attach the locking castors. If the castor holes line up with the frame, use the wood screws with washers; for holes that only reach the plywood, use the screws that came with the castors.
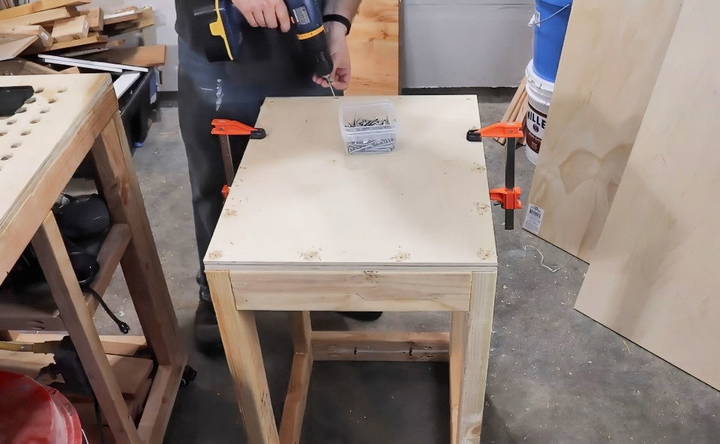
The locking castors allow you to move the stand easily and secure it firmly in place.
Step 6: Secure the Top
To install the top panel:
- Line up the top panel with the frame and mark where to drill two holes for the bolts that will attach the drill press.
- Apply wood glue to the top edges of the frame, then place the top panel.
- Fasten the top panel to the frame with 2-inch pocket screws or cabinet screws.
Step 7: Bolt the Drill Press in Place
To keep the drill press stable, bolt it securely to the top of the stand:
- Align the drill press with the pre-drilled holes.
- Use 3-inch bolts, nuts, and washers to anchor the drill press firmly.
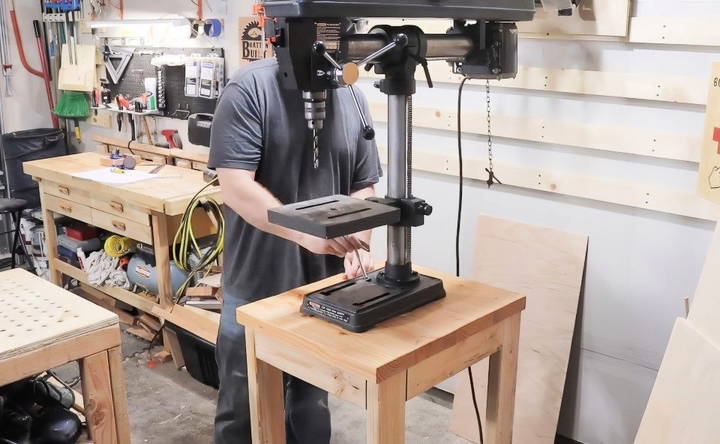
Optional: Building the Glue-Up Top
If you're aiming for a strong and durable top, the glue-up method using 2x8 boards offers an excellent solution.
- Prepare the Boards: Cut the 2x8s slightly larger than the required size.
- Square Up the Edges: Rip both edges of the boards to ensure they are square and will join seamlessly.
- Set Up Clamps and Cauls: Lay down clamps with cauls to keep the boards aligned.
- Apply Glue and Clamp: Apply a generous amount of wood glue to one edge of each board, clamp them together, and adjust for even pressure across the surface.
- Let Dry and Sand Smooth: After drying overnight, scrape any glue residue, sand the surface starting from a 60-grit up to a 120-grit for smoothness.
- Finish with Lacquer: If desired, apply three coats of spray lacquer for a polished, protected surface.
Tip: Clamping evenly ensures a flat surface, preventing any unevenness after glue-up.
Additional Tips for Success
- Safety First: Always use proper protective gear, including eye protection, gloves, and a dust mask.
- Planning for Expansion: You might want to add drawers to the stand in the future, as a back panel can help with stability and provide space for attaching drawer slides.
- Easy Adjustments: If you lack some tools, like a jointer or planer, work around these by carefully squaring lumber with a table saw.
Benefits of a DIY Drill Press Stand
Building a DIY drill press stand gives you a personalized solution that meets your unique workspace needs. Here are some specific advantages:
- Customization: You can adjust dimensions, add drawers, and modify the design based on your tool requirements.
- Mobility: The locking castors offer the flexibility to move the stand around your workshop and lock it securely.
- Cost-Effective: Building it yourself is often more affordable than purchasing a pre-made stand, especially if you have access to scrap materials.
- Skill Development: This project allows you to refine essential woodworking skills, from pocket hole drilling to glue-ups and accurate measuring.
Conclusion: Enjoy Your New Drill Press Stand
With the right materials, tools, and this step-by-step guide, building a sturdy drill press stand is a straightforward project. Not only will this stand improve the organization and functionality of your workspace, but it also offers the satisfaction of having buildd it yourself. Enjoy your new DIY drill press stand, and consider adding drawers in the future for extra storage!
This drill press stand is a practical and rewarding addition to any workshop. Follow these steps closely, make adjustments where necessary, and have fun building a reliable piece of equipment that will serve you well for years to come.
FAQs for Building a DIY Drill Press Stand
Discover essential tips and answers for building a DIY drill press stand. Enhance your workshop with our comprehensive FAQ guide.
Adding weight to the bottom shelf, such as sandbags, can lower the center of gravity and improve stability, especially for heavier drill presses. Alternatively, you can modify the design to allow the drill press base to sit lower than the top surface, helping reduce the risk of tipping.
The pocket hole jig in the original project is a Kreg K4, which is popular for building strong, hidden joints. If unavailable, similar pocket hole jigs are widely available, and many serve the same purpose. A simple dowel joinery technique can be used as an alternative, though it may require more skill.
While glue works well for a solid attachment, consider using Z-clips to allow for wood expansion, which can prevent the frame from warping over time. Z-clips hold the top securely while providing flexibility for natural wood movement.
If concerned about top-heaviness, consider designing a lowered section where the drill press base sits below the surface of the stand. This modification requires precise cutting but significantly improves stability, especially when paired with additional weight on the base.
After sanding the glued boards to a smooth finish, apply a few coats of spray lacquer for a durable and polished appearance. This protects the wood and gives it a sleek look without extensive finishing steps.
Yes, the design can be modified to include drawers. Add a back panel to increase frame stability, which also allows for drawer slides. This addition is straightforward and provides extra storage for drill bits and other tools.
If you lack a jointer, use a table saw to rip both edges of the boards slightly wider than needed. Then, trim them to exact measurements for a clean fit. This workaround provides even edges and a square surface for the glue-up top.
Depending on experience and tool availability, the stand can take half a day to a full day to complete. Beginners may take a bit longer but can still achieve great results with patience and careful planning.


