Building your DIY driveway can be a satisfying and cost-effective project. With some planning and the right materials, you can have a functional and attractive driveway without breaking the bank. Start by deciding on the type and design of your driveway. Measure the area and mark it clearly before going any further. This initial step ensures you know exactly what's needed and prepares you for the work ahead.
To achieve a budget driveway, consider using gravel, crushed stone, or recycled materials. These options are among the cheapest ways to make a driveway, providing both durability and aesthetic appeal. Gather all your tools and materials before beginning the construction to avoid delays. Proper grading is essential for good drainage and longevity. With attention to detail, you can build a driveway that enhances your home's value and appearance.
Ready to begin your DIY driveway project? Explore the next section for a detailed step-by-step guide!
Understanding the Need for Materials
Before diving into the process, let's talk about why certain materials are needed for pouring a concrete driveway addition:
- Concrete: The backbone of our project. Its durability and longevity make concrete the ideal choice for driveways.
- Rebar or Wire Mesh: These provide internal support to the concrete, helping to prevent cracking over time.
- Wooden Boards for Framing: These will outline the area where your concrete will be poured, keeping it contained and shaping your driveway.
- Compactor: Essential for preparing the ground, ensuring it's solid and ready to support the concrete.
Step by Step Instructions
Learn how to build a durable DIY driveway with our step-by-step guide. From planning to sealing, follow these simple steps for a professional finish.
Step 1: Planning and Preparation
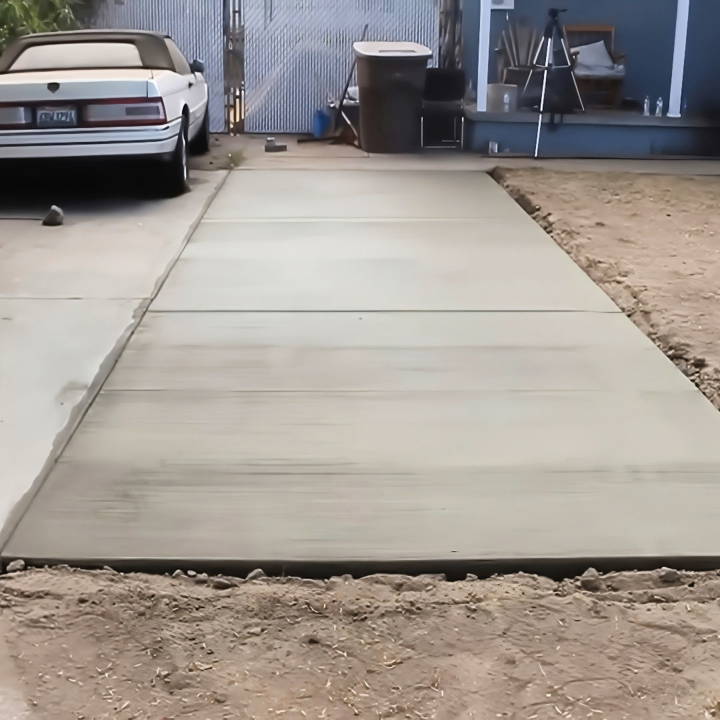
Measure the area where you intend to add to your driveway. For my project, I decided to add eight feet in width to the existing driveway. Knowing the size of your addition will dictate the amount of materials you need.
Map out your area using stakes and string. This will give you a visual boundary to work within. Clear the designated area of any grass, stones, or debris. This is where the compactor comes in handy, making a firm foundation for the concrete.
Step 2: Setting Up the Frame
Using the wooden boards, build a frame around the area you're going to fill with concrete. These boards should be secured with stakes to ensure they stay in place. Make sure the frame is level; if your driveway has a specific slope for water drainage, replicate that slope in your addition.
Step 3: Reinforcing the Foundation
Lay down your choice of rebar or wire mesh. This step is crucial for structural integrity. I used wire mesh based on my research and discussions with experts.
Step 4: Mixing and Pouring the Concrete
Mixing concrete can be physically demanding, so make sure to follow the manufacturer's instructions on the mix ratio. Pour the concrete into the framed area, starting at one end and working your way across. Use a rake or a shovel to spread the concrete evenly.
Step 5: Smoothing the Surface
After the concrete is poured, it's time to smooth the surface. Begin with a bull float to level out the concrete, followed by a magnesium float for a finer finish. This is also the time to build any desired patterns or textures on your driveway.
Step 6: Curing and Sealing
Allow the concrete to cure properly, which can take several days. Keep the surface moist during this period to prevent cracking. Once cured, apply a concrete sealer to protect your driveway from moisture, chemicals, and UV rays.
Additional Tips
- Always check the weather forecast. You don't want rain washing away your hard work.
- Wear protective gear. Concrete can be harsh on your skin and dangerous to your eyes.
- Patience is key. Don't rush the curing process. Giving it time will result in a stronger driveway.
Design Ideas for Your Driveway
When it comes to designing your driveway, the trends of 2024 blend aesthetics, functionality, and environmental consciousness. Here's how you can incorporate these trends into your driveway design:
Embrace Eco-Friendly Materials
Sustainable concrete is the way forward. It's not only strong and durable but also energy-efficient and cost-effective over time. Consider using concrete that incorporates recycled materials like old glass or used concrete to reduce your environmental footprint.
Go Decorative with Stamped Concrete
Stamped concrete allows for creative patterns and textures that can mimic more expensive materials like natural stone, brick, or wood. This adds a touch of elegance and personal style to your driveway.
Choose the Right Finish
The finish of your driveway can greatly impact its look and feel. Whether you opt for a brushed, polished, or textured finish, make sure it complements the overall design of your home and landscape.
Integrate Smart Technology
With the rise of smart homes, consider integrating technology into your driveway. This could include automated lighting, heating elements to melt snow, or embedded sensors to monitor wear and tear.
Prioritize Safety and Accessibility
Modern concrete technologies ensure smoother surfaces and better traction, which is crucial for safety and accessibility. Make sure your driveway design is safe and accessible for everyone.
Use these ideas to make a driveway that's attractive, practical, durable, and eco-friendly. Ensure it matches your personal style and home's character.
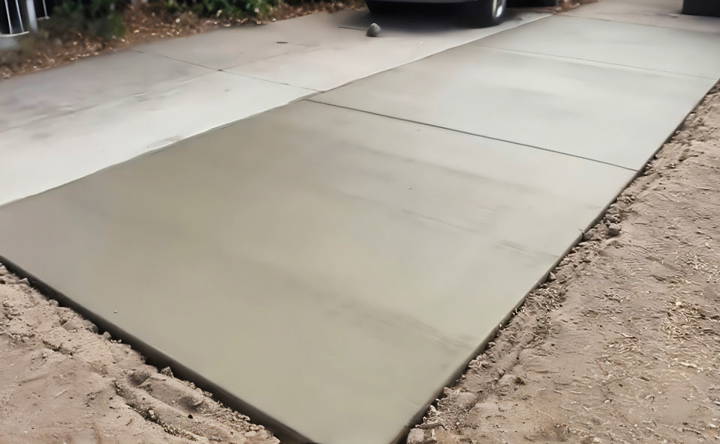
Troubleshooting Common Driveway Issues
Maintaining a driveway is crucial for ensuring its longevity and functionality. Here's a guide to troubleshooting some common driveway problems you might encounter:
Potholes
Potholes are often caused by water seepage and freeze-thaw cycles. To fix them:
- Clear debris from the hole.
- Fill it with a cold patch asphalt repair compound, tamping it down firmly.
- For larger potholes, apply the material in layers, compacting each one.
Cracks
Cracks can lead to more severe damage if not addressed. To repair cracks:
- Use a filler designed for your driveway type (asphalt or concrete).
- Apply the filler into the crack, smoothing it out.
- For larger cracks, use a patching compound before sealing.
Oil Stains
Oil stains are unsightly and can be stubborn. To remove them:
- Cover the stain with an absorbent material like kitty litter.
- Let it sit to absorb the oil, then sweep it away.
- Treat the area with a commercial remover or a mixture of dish soap and hot water.
Fading and Discoloration
Driveways can fade over time due to sunlight and weather. To restore their appearance:
- Clean the driveway thoroughly.
- Apply a sealer to enhance the color and protect against further damage.
Uneven Surfaces
Uneven surfaces can be a tripping hazard. To level them:
- Use a patching compound to fill in low spots.
- Smooth it out until it's level with the surrounding surface.
By regularly inspecting and addressing these common issues, you can keep your driveway in top condition and prevent minor problems from becoming major ones.
Safety Guidelines for Driveway Construction and Maintenance
Ensuring safety during driveway construction and maintenance is paramount. Here are some guidelines to help you keep safety at the forefront:
Personal Protective Equipment (PPE)
- Always wear appropriate PPE, including gloves, eye protection, and sturdy footwear when working on your driveway.
Proper Tool Use
- Use tools and machinery according to the manufacturer's instructions.
- Ensure all equipment is in good working order before use.
Material Handling
- When handling heavy materials, use proper lifting techniques or machinery to avoid injury.
- Store materials safely to prevent tripping hazards.
Work Area Safety
- Keep your work area clean and organized to minimize the risk of accidents.
- Clearly mark any hazards in the area, such as holes or wet concrete.
Chemical Safety
- Follow instructions carefully when using sealants or other chemicals.
- Store chemicals in a secure location away from children and pets.
Emergency Preparedness
- Have a first aid kit readily available.
- Know the location of the nearest hospital and have a plan in case of an emergency.
Traffic Control
- If your driveway is near a roadway, use cones or barriers to alert passing drivers.
- Never obstruct visibility for oncoming traffic.
By adhering to these safety guidelines, you can ensure that your driveway project is completed without incident, keeping yourself and others safe.
FAQs About DIY Driveway
Find all answers to your most pressing FAQs about DIY driveway projects! Learn tips, materials, costs, and how-to information for your next project.
Start by marking out the area and removing any grass or topsoil. You’ll need to dig to the appropriate depth—usually around 8-12 inches for a gravel base—and ensure the ground is level. Compact the soil with a tamper before adding your base materials.
It’s possible to lay a driveway yourself if you’re comfortable with physical labor and following detailed instructions. However, for tasks like pouring concrete or if you’re unsure about the process, hiring a professional might be a better option to ensure a durable and well-finished driveway.
After preparing your base, lay down a layer of sand to build a flat surface. Place the pavers starting from one corner and work your way across, ensuring they're level and evenly spaced. Once all pavers are laid, fill the gaps with sand and compact the surface.
Regular maintenance includes checking for weeds between pavers and filling any gaps with sand as needed. For concrete driveways, sealing every few years can prevent cracks and erosion. Always remove debris and clean stains promptly to keep your driveway looking its best.
The choice of driveway depends on your budget, the climate of your area, and the aesthetic you desire. Gravel driveways are cost-effective and easy to install but require more maintenance. Concrete driveways are durable and low-maintenance but can be more expensive. Pavers offer a range of styles and patterns but can be time-consuming to install. Consider factors like drainage, local weather conditions, and usage when deciding.
Final Thoughts
In conclusion, building your own DIY driveway is a cost-effective and rewarding project. Taking advantage of the cheapest way to make a driveway can save you money and improve your home's curb appeal. With some planning and effort, you can build a durable and attractive budget driveway that suits your needs. Start your project today and enjoy the benefits of a beautiful, personalized driveway.


