My fascination with drones began a couple of years ago when I viewed spectacular aerial footage on a travel blog. The thought of capturing my adventures from a bird's-eye view intrigued me. However, the high cost of ready-to-fly drones was a significant deterrent. That's when I stumbled upon a DIY drone video on Bing, and the idea of building my own drone seemed like a thrilling challenge. This article is a culmination of my experience, aiming to guide fellow enthusiasts through the process of creating their own drone.
Essential Materials and Why Each is Needed
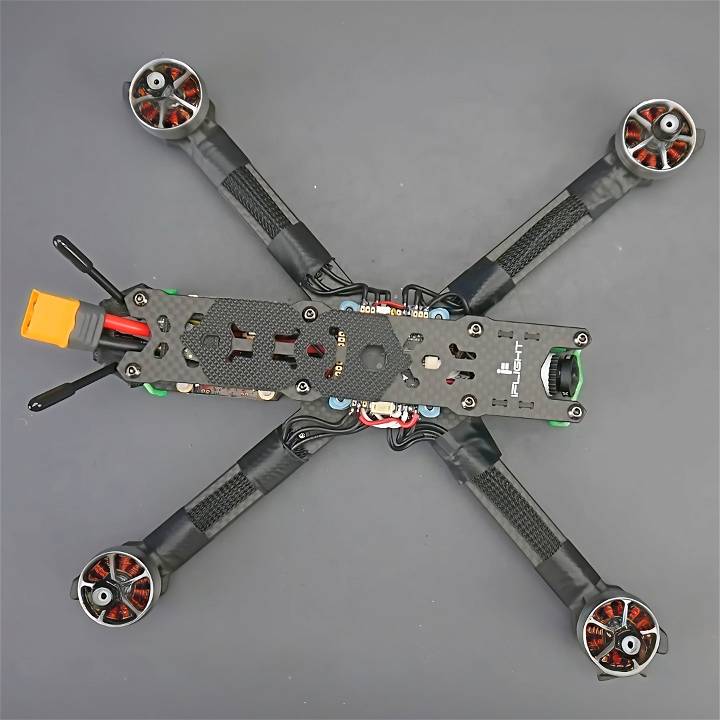
- Frame: This acts as the skeleton to which all other components are attached. I chose a lightweight and durable material because it influences the drone's flight efficiency and durability.
- Motors (x4): These are crucial for the drone's propulsion and control. Make sure they are powerful enough for the drone's size.
- Electronic Speed Controllers (ESC) (x4): ESCs control the speed of the motors based on input from the flight controller. They are a bridge between the motors and the battery.
- Flight Controller: This is the brain of the drone. It processes input from the receiver and sensors to make adjustments to the motor's speed, keeping the drone stable and maneuverable.
- Propellers (x4): They create the thrust that lifts the drone. The size and pitch of the propellers significantly impact the drone's lift and speed.
- Battery: Opt for a lithium-polymer (LiPo) battery for a balance between weight and power.
- Remote Control & Receiver: These are essential for piloting the drone. Compatibility between the controller and the receiver is crucial.
- FPV Camera and Transmitter (optional): For those interested in first-person view flying, an FPV system is a fascinating addition.
Step-by-Step Guide to Building Your DIY Drone
Learn how to build your DIY drone with this step-by-step guide, from assembling the frame to setting up the flight controller and attaching the propellers.
Step 1: Assembling the Frame
Start by attaching the arms to the main body of the frame. Ensure everything is tight and secure, as the frame needs to withstand vibrations during flight.
Step 2: Mounting the Motors
Attach each motor to the end of the frame's arms. The motors should be mounted securely as they will be under a lot of strain during takeoff and flight.
Step 3: Installing Electronic Speed Controllers (ESCs)
Each motor needs to be connected to an ESC. Mount the ESCs on the frame, close to the motors, and connect the wires accordingly. This setup will vary slightly depending on your specific components.
Step 4: Setting Up the Flight Controller
The flight controller should be mounted in the center of the frame. It's crucial to ensure the orientation is correct according to the controller's manual. This will be the most critical part of your build, as the flight controller will dictate the drone's stability.
Step 5: Connecting the Battery
Secure the battery to the frame but do not connect it until you are ready for your first test. The positioning can affect the drone's center of gravity, so center it as much as possible.
Step 6: Attaching the Propellers
Attach the propellers to the motors. Be sure to check that you're attaching them in the correct direction for optimal thrust.
Step 7: Receiver and Remote Control Setup
Mount the receiver on the drone and link it to your remote control according to the manufacturer's instructions. This process includes ensuring that each channel on the remote corresponds correctly to the drone's movements.
Finalizing Your Build and Initial Testing
Before the maiden flight, double-check all connections and ensure the firmware on your flight controller is updated. Start with a basic hover test in an open area, keeping the drone low to the ground.
Troubleshooting Common Issues
- Unstable Flight: Check the calibration of your flight controller and ensure the propellers are correctly oriented.
- Motor Not Spinning: Verify connections between the motor, ESC, and flight controller. Also, ensure that the ESC is properly calibrated.
Selecting Quality Components for Your DIY Drone
When building your own drone, the components you choose significantly impact its performance, reliability, and safety. Here’s a practical guide to selecting high-quality parts for your DIY project:
1. Frame and Chassis
- Material Matters: Opt for frames made from durable materials like carbon fiber or aluminum alloy. These materials offer a balance of strength and lightweight design.
- Design Considerations: Look for frames with modular designs that allow easy customization and maintenance. A well-designed frame ensures stability during flight.
2. Motors and Propellers
- Motor Types: Brushless motors are preferred for their efficiency and longevity. Choose motors with the right KV rating (RPM per volt) based on your desired flight characteristics.
- Propeller Matching: Select propellers that match your motor specifications. Consider factors like pitch, diameter, and material (carbon fiber or plastic).
3. Flight Controller
- Heart of Your Drone: The flight controller manages stability, navigation, and communication. Opt for reliable brands like Betaflight, ArduPilot, or KISS.
- Sensor Integration: Look for controllers with built-in gyroscopes, accelerometers, and barometers for precise flight control.
4. Electronic Speed Controllers (ESCs)
- Smooth Power Delivery: ESCs regulate motor speed. Choose ones with high refresh rates and active braking for smoother transitions.
- Amps and Voltage: Match ESCs to your motor’s current draw and battery voltage.
5. Batteries
- Capacity and Discharge Rate: Select LiPo batteries with sufficient mAh (milliampere-hours) and C-rating. Higher C-ratings provide better power delivery.
- Balance Charging: Invest in a quality balance charger to prolong battery life.
6. Radio Transmitter and Receiver
- Reliable Communication: Choose a transmitter with a good range and interference resistance. Brands like FrSky and Spektrum are popular.
- Binding Compatibility: Ensure your receiver is compatible with your chosen transmitter.
7. Propulsion System Accessories
- Anti-Vibration Mounts: Reduce vibrations between the frame and components using rubber or silicone mounts.
- Motor Mounts and Screws: Invest in sturdy motor mounts and quality screws to prevent loosening during flight.
8. Safety Features
- Low Voltage Protection: Use voltage alarms or telemetry systems to monitor battery levels during flight.
- Fail-Safe Settings: Configure your flight controller to activate fail-safe modes (e.g., return to home) in case of signal loss.
Remember, quality components enhance not only your drone’s performance but also your overall flying experience. Prioritize safety, research thoroughly, and enjoy building your custom drone!
Advanced Flight Modes and Maneuvers for Your DIY Drone
Taking your drone piloting skills to the next level involves mastering advanced flight modes and executing impressive maneuvers. Let’s explore these exciting features:
1. Waypoint Navigation
- What It Is: Waypoint navigation allows you to predefine a series of GPS coordinates (waypoints) that your drone will follow autonomously.
- How to Set Up:
- Use a ground control station (GCS) software like Mission Planner or QGroundControl.
- Plot waypoints on a map, specifying altitude, speed, and actions at each point.
- Upload the mission to your drone.
- Applications:
- Aerial Mapping: Capture consistent images for 3D mapping or surveying.
- Search and Rescue: Program search patterns over large areas.
2. Follow-Me Mode
- What It Does: In this mode, your drone tracks a moving subject (usually you) while maintaining a constant distance and altitude.
- Setting It Up:
- Enable GPS tracking on your controller or mobile app.
- Select “Follow Me” mode.
- The drone will lock onto your position and follow you.
- Use Cases:
- Action Sports: Capture dynamic footage while skiing, biking, or running.
- Vlogging and Travel: Film yourself without needing a dedicated camera operator.
3. Orbit Mode (Circles)
- How It Works: In orbit mode, your drone circles around a central point of interest.
- Configuration:
- Set the center point (e.g., a building, landscape feature, or person).
- Adjust the radius and speed of the orbit.
- Creative Applications:
- Cinematic Shots: Create captivating aerial videos with smooth circular movements.
- Real Estate: Showcase properties by circling around them.
4. Aerobatic Maneuvers
- Rolls and Loops:
- Rolls: Execute barrel rolls by tilting the drone sideways.
- Loops: Perform vertical loops by flying in a circular path.
- Safety Note: Practice these maneuvers at a safe altitude.
- Flips and Inverted Flight:
- Flips: Flip the drone forward or backward.
- Inverted Flight: Fly upside down (requires acro mode).
- Expert Pilots Only: These maneuvers demand precise control.
5. Return-to-Home (RTH)
- Why It Matters: RTH ensures your drone returns to its takeoff point automatically when:
- Battery is critically low.
- Signal is lost.
- You initiate RTH manually.
- Setting Up RTH:
- Calibrate your compass and GPS.
- Set the home point during pre-flight checks.
- Test RTH in a safe environment.
- Safety Tip: Always monitor RTH behavior during flight.
Remember, practice makes perfect! Start with simple maneuvers and gradually explore more complex flight modes. Safety and responsible flying are paramount.
FAQs About DIY Drone
Get answers to all your DIY drone questions in our comprehensive FAQ guide. Learn about building, flying, and maintaining your own drone.
1. What is a DIY Drone?
A DIY drone (Do-It-Yourself drone) is a custom-built unmanned aerial vehicle (UAV) assembled by enthusiasts or hobbyists. Unlike off-the-shelf drones, which come pre-assembled, a DIY drone allows you to choose and assemble individual components, tailoring them to your specific needs.
2. Why Build Your Own Drone?
- Customization: Building your own drone lets you select components like motors, flight controllers, and cameras, allowing for personalized features.
- Learning Experience: It’s an educational journey that deepens your understanding of electronics, aerodynamics, and programming.
- Cost-Effective: DIY drones can be more budget-friendly than commercial alternatives.
3. Can I Fly My DIY Drone Anywhere?
- Legal Considerations: Check local regulations regarding drone flights.
- Safe Locations: Fly in open areas away from people, buildings, and airports.
- Weather Conditions: Avoid strong winds, rain, or extreme temperatures.
- Respect Privacy: Don’t invade others’ privacy with your drone.
4. What Skills Do I Need?
- Basic Electronics: Familiarity with soldering and wiring.
- Mechanical Aptitude: Assembling components and securing them.
- Software Proficiency: Understanding flight controller software.
- Patience and Persistence: Building a drone takes time and troubleshooting skills.
Building a DIY drone is both challenging and rewarding. Take your time, learn, and enjoy the process!
Final Thoughts
Building a DIY drone was more than just a project; it was a highly educational and rewarding experience. I now not only possess a drone tailored to my specific desires but also a deeper understanding of the mechanics behind drone flight. For fellow enthusiasts looking to embark on this journey, remember patience and attention to detail are your best tools.


