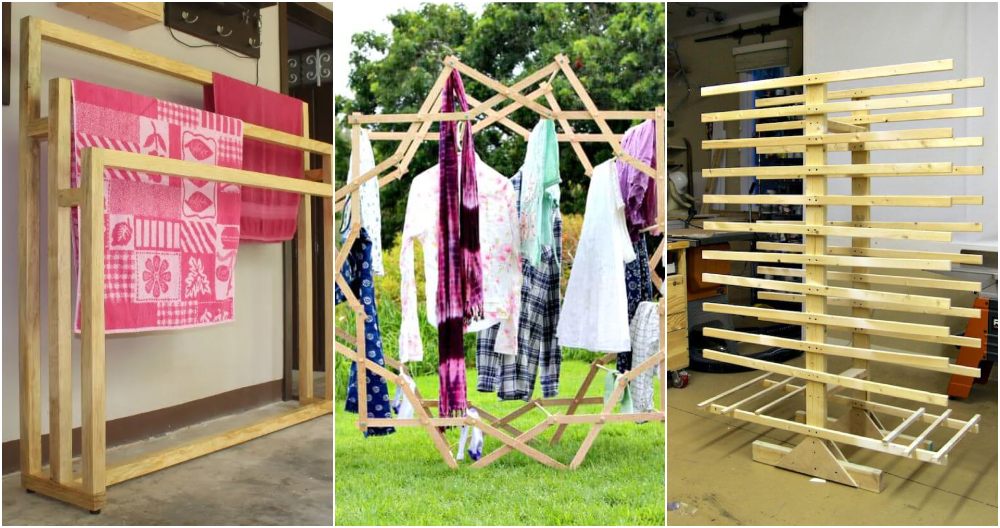
Starting with a DIY drying rack was one of the best ideas I ever had. It helps save space and protects my clothes. I spent an evening gathering materials and followed easy instructions step-by-step. Building a DIY clothes drying rack felt satisfying and made my laundry routine simpler.
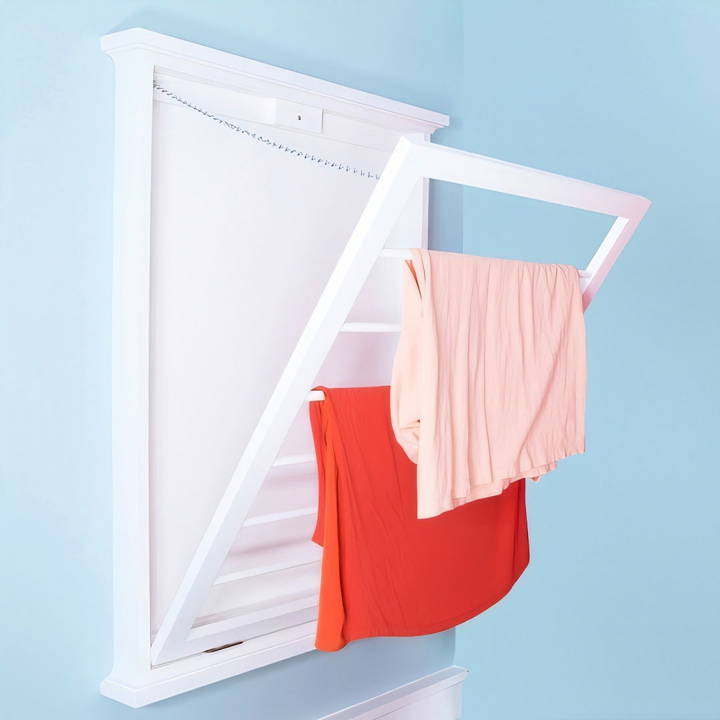
Having my own DIY laundry drying rack changed my laundry game. Drying clothes became easier and quicker. Plus, it looks neat in my laundry room. If you want to try something new and practical, making your own drying rack is a great project.
You can follow these instructions to build your very own DIY drying rack. It's simpler than you think and will help you keep your clothes in good condition.
Purpose and Benefits of a Drying Rack
A drying rack is a simple yet valuable tool for air-drying clothes. Its main purpose is to provide a designated space to hang laundry indoors or outdoors, allowing clothes to dry naturally.
Benefits:
- Saves Energy: Dries clothes without electricity, reducing your energy bill and carbon footprint.
- Gentler on Clothes: Air drying is less harsh than machine drying, extending the lifespan of delicate fabrics.
- Fresh Scent: Clothes dried outdoors have a naturally clean smell.
- Disinfects: Sunlight naturally disinfects clothes while drying them.
- Convenient: Portable and can be used in various locations, including small apartments or outdoor spaces.
Overall, using a drying rack is a cost-effective and environmentally friendly way to dry laundry while maintaining the quality of your clothes.
Gathering the Materials
First, let's talk about what I needed and why:
- Dimensional Lumber: The skeleton of the drying rack, providing sturdiness and structure. I opted for 1 by 2's and 1 by 3's, which can easily be purchased or cut down from larger pieces if you have the tools.
- Dowels: These serve as the bars for hanging clothes. They're essential for making enough hanging space without the rack taking up too much room when unfolded.
- Plywood (Quarter-inch): For the back panel of the wall frame, adding to the overall stability.
- Pocket Hole Screws: Ideal for joining pieces without visible screws, making the finished product look sleek.
- Cove Molding: This is all about aesthetics, giving the drying rack a polished, custom-made appearance.
- Paint: To protect the wood and match the rack with the laundry room's decor. I chose white for a clean, minimal look.
- Magnet and Metal Plate: For a nifty way to keep the drying rack closed when not in use.
- Chain: A practical solution for supporting the drying rack when opened.
Step by Step Instructions
Learn how to build a DIY drying rack with step-by-step instructions. Build the frame, craft the wall frame, and add finishing touches for a perfect project.
Building the Drying Rack Frame
I started by cutting the top, bottom, and sides for the foldable part of the drying rack, using 1 by 2 lumber. After clamping the side pieces together, I marked and drilled holes for the dowels ensuring they'd align perfectly. I used a drill press, but a handheld drill with a guide block works fine too.
Next, the dowels were cut and assembled into the side pieces with some wood glue, a bit chaotic but manageable. Pocket holes were drilled at the ends of the top and bottom parts for joining everything together. Once assembled, I plugged the pocket holes with dowels for a clean finish.
Crafting the Wall Frame
The frame, constructed from 1 by 3 lumber and a 1 by 2 mounting plate, was straightforward. I notched out rabbets on the framework to fit the plywood backing then used pocket screws for assembly. The frame added structure and a mounting mechanism to secure the rack to the wall.
I installed a magnet on the top mounting cleat, ensuring the drying rack would stay put when not in use. The last bit for the frame was adding some trim with 1 by 4 lumber and cove molding for that custom look.
Finishing Touches
With everything assembled, I moved on to painting. Two coats of white paint gave the drying rack and wall frame a clean, consistent finish. Hardware installation followed, including the metal plate for the magnet and chain for support when extended.
Lastly, I cut and installed the plywood back on the frame, securing it with brad nails for that extra bit of rigidity.
Installation and Reflection
Mounting the drying rack in our laundry room was straightforward. Ensuring it was level, I secured it into wall studs and reattached the drying rack via the hinges. Adjusting the length of the chains to suit our space ensured the rack wouldn't extend too far out.
Looking back, the project was a refreshing exercise in problem-solving and DIY spirit. Not only does the new drying rack serve its purpose well, but it also adds a bit of charm to our laundry room. It stands as a testament to what you can achieve with a clear vision and a bit of elbow grease.
Creative Customization Ideas
Enhance your drying rack with these creative customization ideas to make it functional, stylish, and tailored to your needs:
Colorful Paint or Stain:
- Personalize: Choose a color that complements your home decor. Pastel shades, vibrant hues, or natural wood stains can add character to your drying rack.
- Waterproof Finish: Apply a waterproof sealant to protect the wood from moisture and humidity.
Add Hooks and Pegs:
- Accessory Hangouts: Attach hooks or pegs to the sides of your drying rack. Use them for small items like scarves, hats, or reusable grocery bags.
- Organized Storage: Hang keys, kitchen towels, or even lightweight utensils. It's a convenient way to keep essentials within reach.
Shelf or Top Surface:
- Extra Space: Install a small shelf or add a flat top surface to your drying rack. Use it for folding clothes, placing laundry baskets, or storing laundry supplies.
- Mini Wardrobe: Arrange freshly ironed shirts or folded sweaters on the shelf for easy access.
Built-In Clothespins or Clips:
- Streamlined Design: Integrate retractable clothespins or clips directly into the drying rack. No need to search for separate pins!
- Secure Delicates: Hang delicate fabrics without worrying about them slipping off.
Wheels or Casters:
- Mobility: Attach wheels or casters to the base of your drying rack. Move it effortlessly from room to room or between indoor and outdoor spaces.
- Space Optimization: Roll it away when not in use to free up floor space.
Foldable Side Wings:
- Expandable Drying Area: Add foldable side wings to your rack. When needed, unfold them to build extra hanging space.
- Compact Storage: Fold the wings back when not in use to save space.
Decorative Fabric Cover:
- Hide It Stylishly: Sew or drape a fabric cover over your drying rack. Choose patterns or colors that match your room.
- Disguise Clutter: When guests visit, cover the rack to transform it into a decorative piece.
LED Lighting:
- Illuminated Drying: Attach battery-powered LED lights to the top bars. It's useful for drying clothes in dimly lit areas.
- Nighttime Convenience: No more fumbling for clothespins in the dark!
Your drying rack can be both functional and aesthetically pleasing. Feel free to mix and match these ideas or come up with your own unique twists.
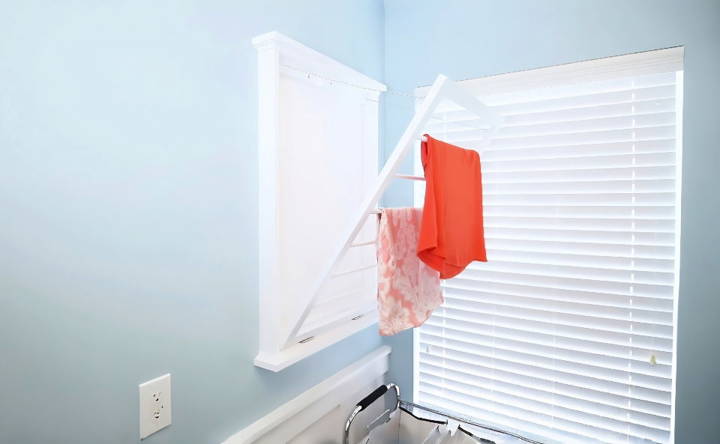
Design Considerations for Your Drying Rack
When making your own drying rack, thoughtful design considerations ensure functionality, stability, and user satisfaction. Let's explore key aspects to keep in mind:
Space Availability:
- Indoor or Outdoor: Decide where you'll place the drying rack. If indoors, consider room dimensions, ceiling height, and available floor space. For outdoor use, think about weather exposure.
- Foldability: Opt for a foldable design if space is limited. Folded racks can be stored discreetly when not in use.
Materials Selection:
- Wood: Commonly used for drying racks due to its durability and natural aesthetics. Choose hardwoods like oak or pine. Sand the surfaces to prevent splinters.
- Metal: Lightweight and resistant to moisture. Stainless steel or aluminum are good options. Look for rust-resistant coatings.
- Plastic: Lightweight and affordable. Ensure it's sturdy and UV-resistant for outdoor use.
Dimensions and Shape:
- Height: Consider the height of your drying rack. Taller racks accommodate longer garments without touching the floor.
- Width and Depth: Determine the width based on available space. A deeper rack provides more hanging area.
Stability and Weight Capacity:
- Base Support: Wide legs or a stable base prevent tipping. Add rubber feet to avoid scratching floors.
- Weight Distribution: Ensure the weight is evenly distributed. Reinforce critical joints with additional screws or dowels.
- Load-Bearing Capacity: Calculate the maximum weight your rack can hold. Factor in wet clothes and any additional accessories.
Hanging Mechanism:
- Bars or Rungs: Horizontal bars or rungs provide ample hanging space. Space them evenly to avoid crowding.
- Hooks or Pegs: Attach hooks or pegs to the sides for smaller items like socks, underwear, or scarves.
- Retractable Lines: Some racks have retractable clotheslines that extend when needed.
Foldability and Portability:
- Hinges: Use sturdy hinges for foldable racks. Test their durability before final assembly.
- Wheels or Casters: Add wheels for easy movement. Lock them in place when the rack is stationary.
Aesthetics and Customization:
- Paint or Stain: Customize the appearance with paint or wood stain. Match it to your home decor.
- Decorative Elements: Add decorative knobs, hooks, or fabric covers for a personalized touch.
Child Safety:
- Smooth Edges: Sand any sharp edges to prevent accidental cuts.
- Stability: Ensure the rack won't tip over easily, especially if children are around.
A well-designed drying rack enhances your laundry routine and contributes to a sustainable lifestyle. Tailor your rack to fit your space, needs, and personal style!
Maintenance and Care of Your Drying Rack
Taking care of your drying rack ensures its longevity and efficient performance. Follow these simple maintenance steps to keep your rack in top condition:
Regular Cleaning:
- Dust Removal: Dust and lint can accumulate on the bars and joints. Regularly wipe down the rack with a damp cloth or use a handheld vacuum cleaner.
- Wood Care: If your rack is wooden, periodically apply wood polish or beeswax to maintain its natural luster.
Inspect for Wear and Tear:
- Check Joints: Examine screws, hinges, and dowels. Tighten any loose parts to prevent wobbling.
- Metal Racks: Inspect for rust or corrosion. Sand off any rust spots and apply a rust-resistant coating.
Stability Check:
- Balance: Ensure the rack stands evenly on all legs. Adjust the feet or add shims if needed.
- Weight Distribution: Avoid overloading one side. Distribute wet clothes evenly to prevent strain on specific areas.
Weather Protection (Outdoor Racks):
- Waterproofing: If your drying rack stays outdoors, protect it from rain and sun exposure.
- Cover Option: Invest in a weatherproof cover or move the rack indoors during inclement weather.
Avoid Overloading:
- Weight Limits: Know the weight capacity of your rack. Heavy wet clothes can strain the structure.
- Delicates Separation: Hang delicate fabrics separately to prevent stretching or distortion.
Child Safety Measures:
- Secure Base: Ensure the rack won't tip over easily. If you have children, consider stability and rounded edges.
- Height Placement: Position the rack away from curious little hands.
Storage Tips:
- Fold and Store: If your rack is foldable, collapse it when not in use. Store it in a dry area.
- Avoid Humidity: Keep wooden racks away from damp spaces to prevent warping.
Inspect Moving Parts:
- Hinges and Wheels: Lubricate hinges and check wheels for smooth movement. Replace worn-out parts promptly.
A well-maintained drying rack not only dries your clothes efficiently but also contributes to sustainable living.
FAQs About DIY Drying Rack
Discover answers to common questions about DIY drying racks. Learn tips, materials, and step-by-step guidance for making your own drying solution.
Yes, there are simple designs that don't require advanced skills. For example, you can build a rack by attaching hooks to a board and hanging it on the wall. Alternatively, use an old ladder as a frame to hang clothes.
A drying rack made from sturdy softwood and thick dowels will be more durable and less likely to crease clothes. Ensure all joints are securely fastened and consider a wood finish for added protection.
Absolutely! You can repurpose materials like an old crib spring or ladder for the frame. Using sustainable wood and non-toxic finishes can also make your drying rack more eco-friendly.
Proper maintenance ensures your drying rack lasts longer. Here's how:
Regularly inspect the rack for loose screws, damaged dowels, or chipped wood.
Wipe down the surface with a damp cloth to remove dust and dirt.
If your rack is outdoors, protect it from rain and direct sunlight to prevent warping.
Apply a fresh coat of wood sealer or paint periodically to maintain its appearance and durability.
Absolutely! Get creative with your DIY drying rack:
Add hooks or extra dowels for more hanging space.
Paint or stain the wood in your favorite color.
Attach a small shelf for storing laundry essentials.
Incorporate decorative elements like stencils or decals to personalize it.
Conclusion:
In conclusion, making a custom DIY drying rack with easy instructions is an excellent project for any home. It's practical and adds a personal touch to your laundry routine. By crafting your own DIY clothes drying rack, you save money and space while ensuring your clothes dry naturally.


