Building a DIY dumbbell rack for your home gym is a practical and rewarding project. Building a custom dumbbell rack allows you to tailor it to your space and needs. It helps in keeping your dumbbells organized and accessible, enhancing the efficiency of your workouts. This project can be completed with basic tools and supplies, making it an achievable task for any fitness enthusiast.
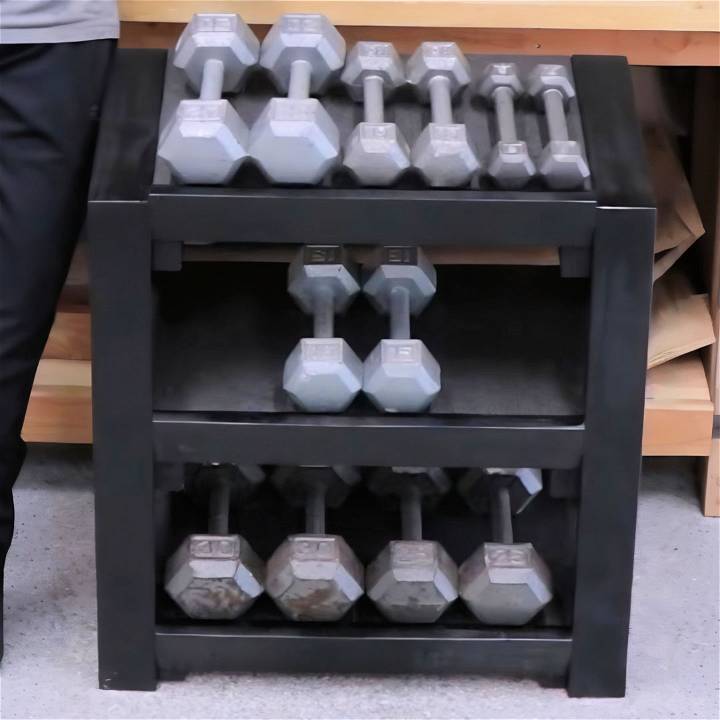
Designing your own DIY weight rack not only saves money but also provides a sense of achievement. A well-organized weight rack enhances safety by reducing clutter and preventing accidents. Plus, with your own dumbbell rack, you can keep your workout area tidy and inviting.
Make your own DIY dumbbell rack with our easy guide! Perfect for organizing your home gym and keeping your weights secure.
Materials Needed
- Two by Fours: Chosen for their affordability and sturdiness. They make the primary structure of the rack.
- White Wood: Used for the front face frame to add a bit of aesthetic touch.
- MDF: A half-inch medium-density fiberboard for the shelves, chosen for its flat and smooth surface.
- Screws and Wood Glue: For strong joints to bear the weight of the dumbbells.
- Paint: To give the rack a cleaner look that blends well with the surroundings.
- Gym Mats: To protect the dumbbells and the wood from damage.
Step by Step Instructions
Learn to build a DIY dumbbell rack with step-by-step instructions, from cutting wood and building the frame to adding shelves and finishing touches.
Step 1: Cutting the Wood
First, I measured and cut the two by fours to the sizes I needed. I opted for a 20-degree angle for the shelf slots to securely hold the dumbbells in place. Accuracy in cutting is key to ensuring the pieces fit together smoothly.
Step 2: Building the Frame
Using wood glue and screws, I assembled the side frames of the rack, ensuring that the slots were evenly spaced. This process required some trial and error, but patience paid off. Remember, it’s crucial that the foundation is strong and level.
Step 3: Adding the Shelves
Initially, I planned to place the shelves on top of the side support but decided to add an extra piece on top for a cleaner finish. This hid the shelf mounts from side view, giving a neater appearance.
Step 4: Front Face Frame
To enhance the rack's look, I cut the white wood to fit as a face frame across the front of each shelf. This step wasn't just for aesthetics; it also buildd a lip to prevent dumbbells from rolling off.
Step 5: Adding the MDF Shelves
Cutting the MDF to fit each shelf, I notched out sections to accommodate the front face frame. Glue and nails secured these in place. The MDF provided a smooth, flat surface for the dumbbells, and the gym mats, cut to size, were placed on top for added protection.
Step 6: Painting and Finishing Touches
After assembly, I filled any nail holes with wood filler, sanded the rack, and applied spray paint. The paint job didn't need to be perfect, as I planned to place the rack in a closet, but a smooth finish would make it visually appealing.
Customization Ideas for Your DIY Dumbbell Rack
Building a dumbbell rack that suits your personal needs can be both fun and rewarding. Here are some customization ideas to help you make a rack that’s as unique as your workout routine:
Choose Your Materials Wisely
- Wood or Metal? Wood is easier to work with if you’re a beginner and adds a warm touch to your home gym. Metal, on the other hand, offers more durability and a sleek look. Consider what matches your space and skill level.
Design for Your Space
- Measure Twice, Cut Once: Before you start, measure your available space. Think about how many dumbbells you need to store and plan the rack size accordingly. A foldable design can save space, while wheels can add mobility.
Personalize with Colors and Finishes
- Make it Yours: Paint or stain your rack to match your home decor or to stand out with bright, motivational colors. If you’re using metal, powder coating can be a great way to add a durable and professional finish.
Adjustable Features
- Flexibility is Key: Consider adding adjustable shelves or hooks to accommodate different dumbbell sizes or other exercise equipment. This way, your rack can evolve with your fitness journey.
Safety First
- Sturdy and Stable: Ensure your design is stable and can bear the weight of your dumbbells. Use quality fasteners and, if necessary, secure the rack to a wall to prevent tipping.
Add-Ons for Convenience
- Extras That Count: Think about including a small shelf for a water bottle, towel, or your phone. Hooks on the side for resistance bands or jump ropes can also be handy.
Incorporate these ideas to design a functional and stylish dumbbell rack. Plan well for a DIY project success and build a rack you'll proudly use daily.
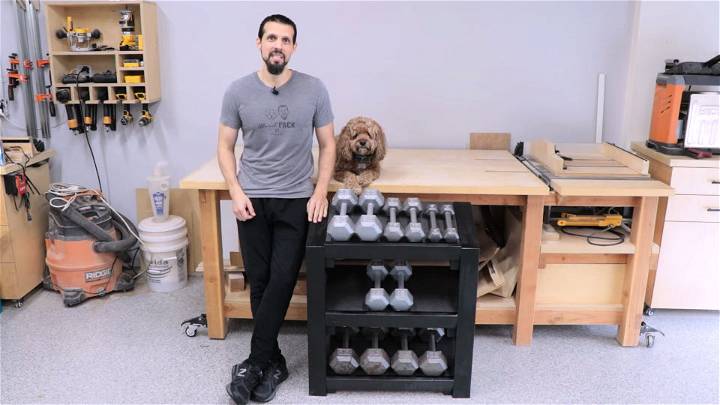
Maintenance and Care for Your DIY Dumbbell Rack
Keeping your DIY dumbbell rack in top condition is crucial for safety and longevity. Here’s a straightforward guide to maintaining your rack:
Regular Inspection
- Check for Wear and Tear: Every month, inspect your rack for any loose screws, bolts, or signs of wear. Tighten any loose parts and replace components if necessary.
Cleaning Routine
- Keep it Clean: Dust and sweat can accumulate on your rack. Wipe it down with a damp cloth regularly. If you’ve used metal, check for rust, especially if your gym area is prone to moisture.
Wood Care
- Protect Your Wood: If your rack is wooden, treat it with a wood conditioner or sealant once a year to protect it from humidity and prevent warping.
Metal Maintenance
- Prevent Rust: For metal racks, consider using a rust protector. If you notice any rust forming, sand it down and apply a fresh coat of paint or sealant.
Stability Checks
- Stay Stable: Make sure your rack remains stable. If it wobbles, it may need to be rebalanced or repositioned on a more even surface.
Update Your Setup
- Evolve with Your Needs: As your workout routine changes, your rack might need to adapt. Add extra storage or adjust the height of the shelves as needed.
By following these simple maintenance steps, you can ensure that your DIY dumbbell rack remains a safe and reliable part of your home gym for years to come.
Safety Tips and Best Practices
When building and using your DIY dumbbell rack, safety is paramount. Here’s a guide to ensure you stay safe and your equipment remains secure:
Building Safely
- Work in a Safe Area: Choose a well-lit, spacious area to work on your project. Keep your workspace tidy to avoid tripping over tools or materials.
Proper Tool Use
- Handle Tools with Care: Always use tools according to their instructions. Wear safety gear like gloves and goggles when necessary, especially when cutting or drilling.
Weight Distribution
- Balance the Load: Place heavier dumbbells on the lower shelves to lower the center of gravity and prevent the rack from tipping over.
Secure the Rack
- Fix it Firmly: If possible, secure your rack to a wall or floor to ensure it doesn’t move or fall over when removing or returning weights.
Regular Checks
- Inspect Regularly: Periodically check the rack for any loose parts or signs of damage. Tighten any loose screws and replace parts if they show signs of wear.
Safe Usage
- Lift Correctly: When removing dumbbells, lift with your legs, not your back, to avoid injury. Return them gently to avoid damaging the rack or causing accidents.
Following these safety tips ensures a secure and efficient workout with your DIY dumbbell rack, protecting both you and your equipment.
FAQs About DIY Dumbbell Rack
Discover everything you need to know about DIY dumbbell racks with our comprehensive FAQs and build the perfect solution for organizing your weights.
To ensure stability, double-check all measurements and use a level during assembly to keep the rack straight. Make sure all drill holes are evenly spaced to distribute the weight evenly. You can also use clamps or weights to hold the rack together while any glue dries, if used.
Yes, there are designs for vertical dumbbell racks made from solid oak that can hold six pairs of dumbbells, which are great for small spaces. You can also consider a dumbbell tree design if you have just a few pairs of weights.
The most cost-effective way is to use repurposed materials like 2x4s and 2x3s for a wooden rack or scrap plywood for a dumbbell tree. Designs that use minimal equipment and simple construction methods will also help keep costs down.
Inspect your rack periodically for loose screws, bolts, or other hardware. If you’ve used wood, you may need to sand down any rough spots that develop over time and tighten any connections that may have loosened with use.
To customize your DIY dumbbell rack, consider painting or staining the wood to match your home gym’s color scheme. You can also add decorative trim or engrave the wood for a personal touch. If you’re using metal parts, choose a powder coating in a color that complements your space. For a unique design, you can arrange the racks in creative patterns or use unconventional materials like copper pipes or reclaimed wood.
Final Thoughts
Wrapping up, building your own DIY dumbbell rack for your home gym is a practical and cost-effective solution. It helps you organize your weights neatly and ensures your workout space remains clutter-free. With some basic tools and materials, you can build a sturdy and efficient DIY weight rack tailored to your needs. Start today and enjoy a well-organized gym space right at home.


