Building a DIY dump trailer can be a really fun project. One summer, I decided to build my own homemade dump trailer to help with garden waste and small construction jobs. I got some basic materials from the hardware store and researched how to build one. It took some effort, but I was excited to see my progress.
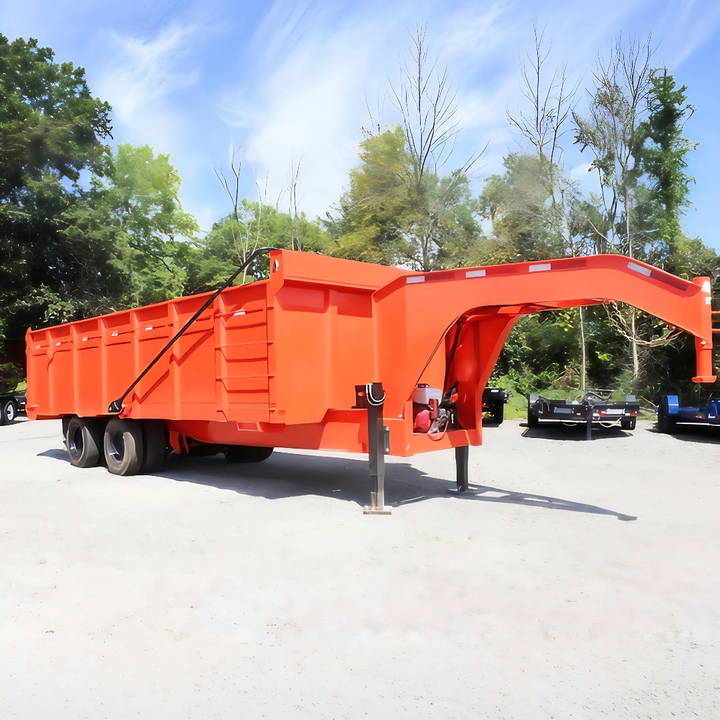
By the time I finished, my new DIY dump trailer was extremely helpful. It was so rewarding to know I built it myself. If you're interested in starting your own project, these simple steps can guide you through the process.
I'm helping with this because having a reliable DIY dump trailer at home will save time and effort.
Gathering the Materials
The first step in any project of this magnitude is to meticulously plan and gather the necessary materials. Here's why each material was crucial:
- Steel Sheets and Panels: These formed the sides and the bed of the dump trailer. Their durability and strength are essential for withstanding the loads the trailer would carry.
- Frame Members and Brackets: These structural elements are the skeleton of the trailer, providing necessary support and stability.
- Suspension System: Essential for safe and smooth transportation, a reliable suspension system is critical.
- Welding Equipment: Since the trailer would primarily be assembled through welding, having a high-quality welder and the required safety gear was non-negotiable.
Step by Step Instructions
Learn how to build your own dump trailer with our step-by-step DIY instructions. From framing to painting, get a complete guide on making a functional trailer.
Building the Frame
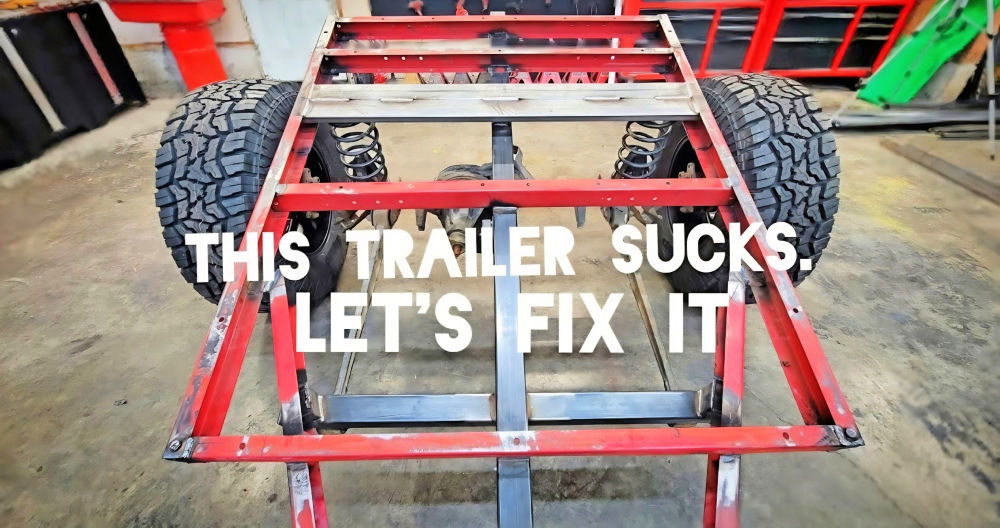
With all materials in hand, the construction began with the frame, the backbone of the dump trailer. I started by welding the brackets that would hold the suspension in place onto the frame members. Accuracy here was critical; a misaligned bracket could lead to a plethora of issues down the line. Flipping the frame members and boxing them out came next, followed by attaching the suspension system. Throughout this process, patience and precision were my best friends. Despite years of welding experience, I never underestimated the importance of double-checking alignments and measurements.
Assembling the Dump Body
The next major phase was assembling the dump body. Starting with the steel panels, I meticulously welded them to form the sides and bottom of the dump bed. Each step, from placing the cross members to welding the uprights for the gate, required a steady hand and focused attention. This wasn't a job that tolerated shortcuts or hastiness; every weld and every cut mattered.
Attaching the Hoist and Hydraulics
Perhaps one of the most technically challenging aspects of this project was installing the telescopic hoist and hydraulic system. This system is what enables the dump trailer to lift and tilt, unloading the material it carries. The installation had to be precise to ensure smooth, reliable operation. I spent a considerable amount of time researching and consulting with experts to get this right.
Painting and Finishing Touches
After the construction was complete and the welding spots had cooled, the trailer underwent sandblasting, priming, and painting. Selecting a durable, rust-resistant paint was crucial, given the trailer's future exposure to various elements. The painting process not only served an aesthetic purpose but also added an extra layer of protection to the metal.
The finishing touches included installing the lights, wiring, and safety chains. Ensuring that the electrical system was expertly installed was critical for safety. By this point, the end was in sight, and seeing the trailer almost ready was incredibly satisfying.
Reflecting on the Project
Looking back, building the dump trailer was a monumental task that tested my skills, patience, and resourcefulness. There were moments of frustration, particularly when things didn't go as planned, but also moments of triumph that made it all worthwhile.
Customization Ideas for Your DIY Dump Trailer
When it comes to building a DIY dump trailer, customization is key. Tailoring your trailer to fit your specific needs not only makes it more functional but also adds a personal touch that can be quite satisfying. Here are some ideas to inspire your customization journey:
Choose the Right Size and Capacity
- Start by determining the optimal size for your trailer. Consider the types of loads you'll be carrying and where you'll be using the trailer.
- Calculate the weight capacity you'll need. It's important to ensure that your trailer can handle the loads you plan to transport without compromising safety.
Add a Tarp System
- A tarp system can protect your cargo from the elements and keep it secure during transport.
- You can install a manual roll-up tarp or an automated system for ease of use.
Incorporate Toolboxes
- Toolboxes are great for storing tools and equipment you might need on the go.
- Consider custom-built toolboxes that fit snugly into your trailer's design, maximizing space and accessibility.
Install Removable Sides
- Removable sides can transform your dump trailer into a flatbed, increasing its versatility.
- Use durable materials and secure locking mechanisms for easy conversion and safety.
Consider a Hydraulic Lift
- A hydraulic lift can make unloading heavy materials much easier.
- If you're skilled enough, you can install a hydraulic system yourself, or you might opt for a pre-made kit.
Enhance the Flooring
- The flooring of your trailer is crucial for durability. Reinforce it with high-quality materials like treated wood or metal.
- For added protection, consider a bed liner to prevent scratches and dents.
Upgrade the Wheels and Suspension
- Good quality tires and a robust suspension system are essential, especially if you'll be navigating rough terrain.
- Research the best options for your specific needs and invest in quality components.
Add Lighting and Reflectors
- Proper lighting and reflectors are not only a safety requirement but also a practical addition for nighttime use.
- LED lights are a durable and energy-efficient option that can improve visibility.
Personalize with Paint and Decals
- Once your trailer is built, give it a personal touch with a custom paint job or decals.
- Choose a color scheme that matches your other vehicles or equipment, and add decals that reflect your personal or business brand.
Implement Smart Technology
- Consider adding smart technology like GPS tracking for security or load sensors to monitor weight distribution.
- Smart tech can also help you maintain records of your loads and trips, which can be useful for business purposes.
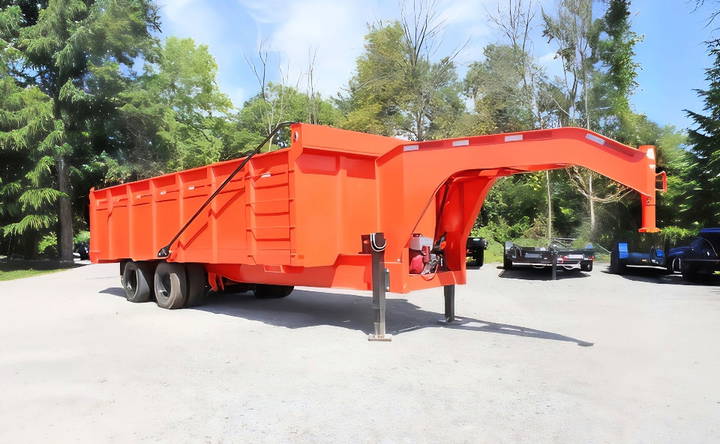
Advanced Features and Technology Integration
In the world of DIY dump trailers, integrating advanced features and technology can significantly enhance functionality and efficiency. Here's a detailed look at how you can incorporate the latest tech into your project:
Automated Hydraulic Systems
- Modern dump trailers often include automated hydraulic systems. These systems make unloading materials as simple as pushing a button.
- Consider adding a hydraulic kit to your trailer for this convenience.
Lightweight Materials
- Advances in material science mean you can now use lighter materials without sacrificing strength.
- Using aluminum or composite materials can increase your trailer's payload capacity while making it easier to tow.
Precision Dumping Controls
- Computerized controls can help you dump loads with greater precision.
- Look into adding a control system that allows you to adjust the angle and speed of the dump.
Electric-Powered Models
- Electric-powered dump trailers are becoming more popular due to their sustainability.
- If you're environmentally conscious, consider converting your trailer's power system to electric.
GPS Technology
- GPS technology can optimize your routes and save you time and fuel.
- Install a GPS system to track your trailer's location and manage your trips more efficiently.
Maintenance Tracking Applications
- Use maintenance tracking apps to keep your trailer in top condition.
- These apps can remind you when it's time for regular service or repairs.
Customer Relationship Management (CRM) Systems
- A CRM system can improve communication with clients and streamline your business operations.
- Implementing a CRM can help you manage orders and maintain customer satisfaction.
Solar Harvesting
- Solar panels can power your trailer's electronics and even charge the battery for electric models.
- Consider installing solar panels on your trailer's roof for a renewable energy source.
Smart Trailer Technology
- Smart trailers come with a host of benefits, including asset tracking and fleet management.
- Explore options for adding smart sensors to monitor load distribution and trailer health.
Embrace these technologies to upgrade your DIY dump trailer, enhancing efficiency and innovation. Research thoroughly for compatibility. With proper planning, enjoy a high-tech dump trailer tailored to your needs.
Safety Precautions and Best Practices
When working with a DIY dump trailer, safety is paramount. Here's a guide to help you operate your trailer safely, ensuring you and those around you are protected:
Wear Proper Safety Gear
- Always wear a hard hat and safety glasses to shield yourself from potential hazards.
- Sturdy gloves and steel-toed boots can protect your hands and feet from injury.
Know Your Trailer's Capacity
- Understand the weight limit of your trailer and never exceed it.
- Overloading can cause instability and increase the risk of accidents.
Evenly Distribute the Load
- Place your material evenly across the bed of the trailer.
- If the load doesn't flow out easily during unloading, position more towards the rear.
Check Your Equipment Before Use
- Inspect the trailer for any signs of wear or damage before each use.
- Ensure that all connections and fittings are secure and the tires are properly inflated.
Practice Safe Towing
- Keep your tow vehicle and trailer as straight as possible when driving and maneuvering.
- Avoid sudden stops and starts, which can cause the trailer to sway or tip.
Be Cautious When Unloading
- Never stand behind or near the trailer while unloading.
- Use the safety bar beneath the trailer bed if you need to work underneath it, to prevent injury in case of hydraulic failure.
Secure the Trailer Properly
- Always latch the gates securely to the sides of the trailer when lifting it to dump.
- Failure to do so can result in damage to the trailer's gates and potential injury.
Stay Aware of Your Surroundings
- Be mindful of your environment, especially when backing up or in tight spaces.
- Keep an eye out for bystanders, vehicles, and obstacles that could be in the path of the trailer.
Educate Yourself and Others
- Read the manufacturer's manual thoroughly and understand all operational aspects of your trailer.
- If others are using the trailer, ensure they are trained and aware of all safety precautions.
Follow these safety precautions to reduce the risk of accidents. Operating your DIY dump trailer safely is essential for everyone's well-being.
FAQs About DIY Dump Trailer
Discover the top FAQs about DIY dump trailers for tips on construction, materials, and costs. Get all the answers for your DIY dump trailer project here!
A DIY dump trailer is a homemade trailer with a bed that tilts or lifts to dump its load. It’s commonly used for transporting materials like soil, gravel, or debris from home landscaping projects, small-scale construction, or farm work.
You can build a non-hydraulic dump trailer by using a 12V winch system. This method involves attaching a winch to the front of the trailer bed and using it to pull the bed up to dump the load. It’s a simpler and often more cost-effective solution compared to hydraulic systems.
Yes, you can build a dump trailer capable of handling heavy loads. The key is to use high-quality, durable materials and ensure that the frame, axle, and bed are all designed to support the weight you intend to carry. Following detailed plans and reinforcing stress points can result in a trailer with a high weight capacity.
Regular maintenance for a DIY dump trailer includes checking and greasing the wheel bearings, inspecting the winch and cable for wear, ensuring the bed and frame are free from rust and damage, and checking the electrical connections if you have lights or a winch. It's also important to keep the hydraulic or winch system in good working order if applicable.
To ensure the electrical system in your DIY dump trailer is safe and functional, you should regularly inspect all wiring and connections for signs of wear or damage. Use weatherproof connectors and keep the wiring harness secured and protected from the elements. Additionally, if your trailer has a battery to operate the winch or lights, make sure it's charged and properly maintained. It's also wise to have a circuit breaker or fuse in place to prevent electrical overloads.
Key Takeaways
To conclude, starting with a simple blueprint can make your DIY dump trailer project manageable and fun. A homemade dump trailer not only saves money but also gives you a sense of achievement. With these steps, you're equipped to get started. Happy building!


